Skip to content
68

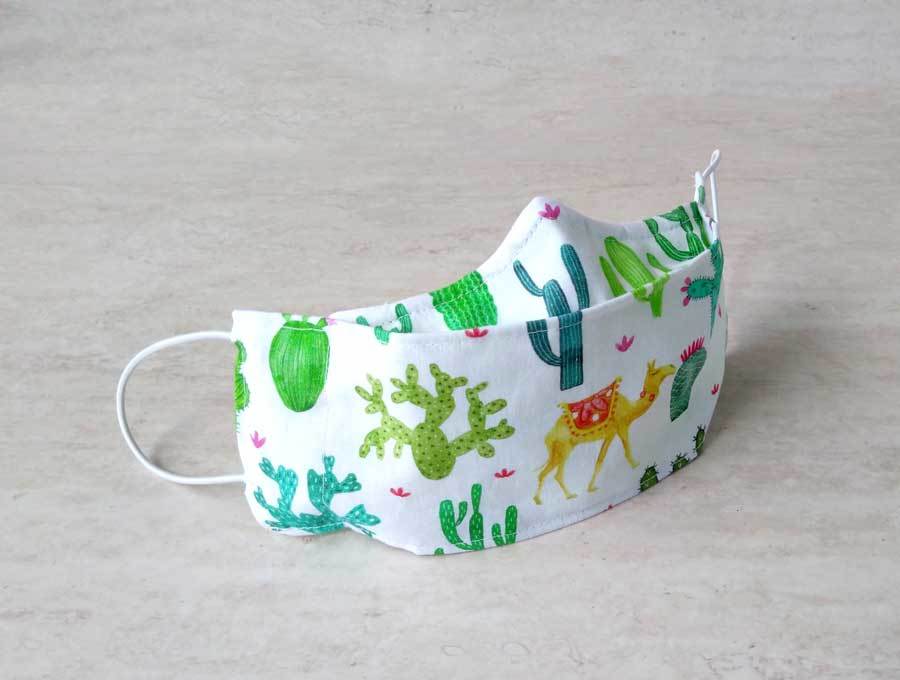
3D Face Mask DIY – How to Make a Simple 3D Mask at Home

With this difficult situation being far from over, and we all must try our best to act responsibly and protect ourselves and everyone around us. That means that wearing a mask should be something we do whenever we go out. But wearing it all day can get pretty uncomfortable. There’s a solution to that problem. DIY 3D face mask which is much more comfortable .

If you like the sound of that, stick around and find out how to make 3D face mask at home. All you have to do is make a 3D face mask pattern and start sewing, simple as that. Let’s get to it!

3d face mask standing by itself on a table

Below you will find my step by step 3d mask written tutorial with VIDEO instructions for all the visual learners.

We occasionally link to goods offered by vendors to help the reader find relevant products. Some of the links may be affiliate meaning we earn a small commission if an item is purchased.

How to make 3d face mask

Before we get to the instructions on how to sew a simple face mask, first you will need to prepare the required materials.

For this 3D mask with filter pocket, you will need the following supplies.

3d face mask supplies

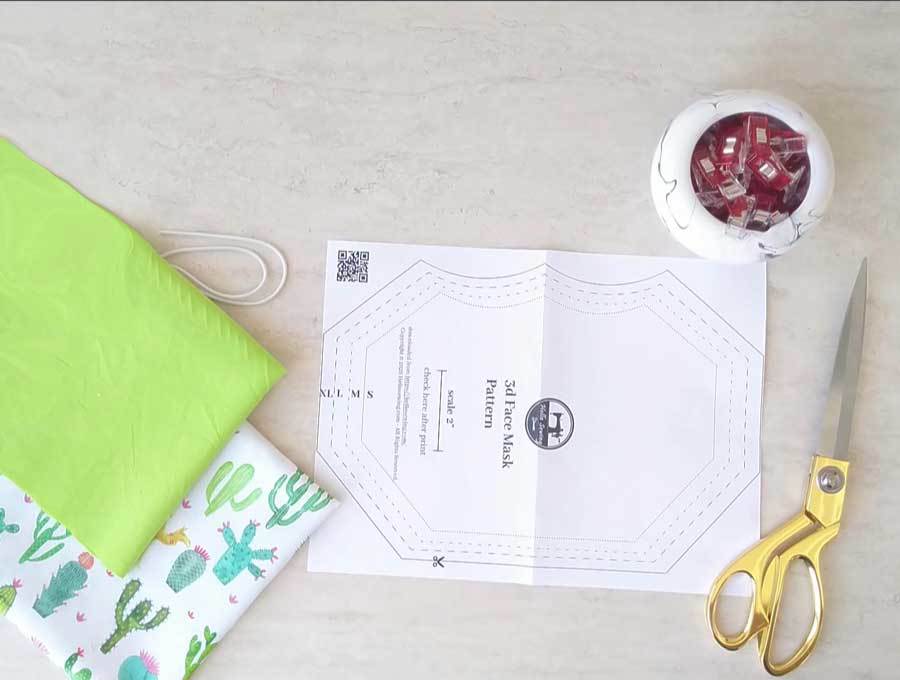
3D Mask Supplies and tools

DOWNLOAD: 3d face mask pattern (Free PDF file)
Follow us for free patterns & tutorials!

How To Sew 3d mask

Watch the 3d mask video first and then follow the written step by step instructions below.
Please enjoy and don’t forget to Like and SUBSCRIBE over on YouTube to be kept up to date with new videos as they come out.

DIY 3d Face Mask VIDEO TUTORIAL

3D FACE MASK INSTRUCTIONS:

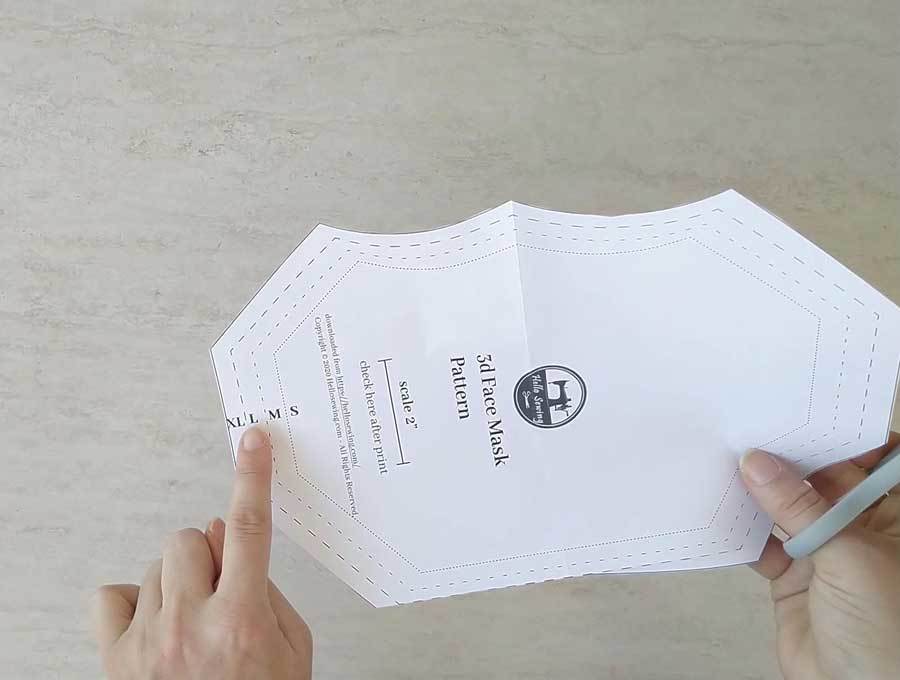
STEP 1: Prepare the 3d face mask pattern

Download and print the 3d mask template without any scaling (print at actual size / 100%). The pattern prints on just one piece of paper and includes 4 different sizes – S, M, L, and XL. Cut out the size you need.

All seam allowances are 1/4 inches (6mm) unless noted otherwise.

Which 3d mask size to make?

We all have different facial sizes and features and the fits is a bit different, but as a rough sizing guide:

  • size S 2-5 years
  • size M 5-12 years
  • size L teens and most adults
  • size XL large faces/men

printable 3d face mask template

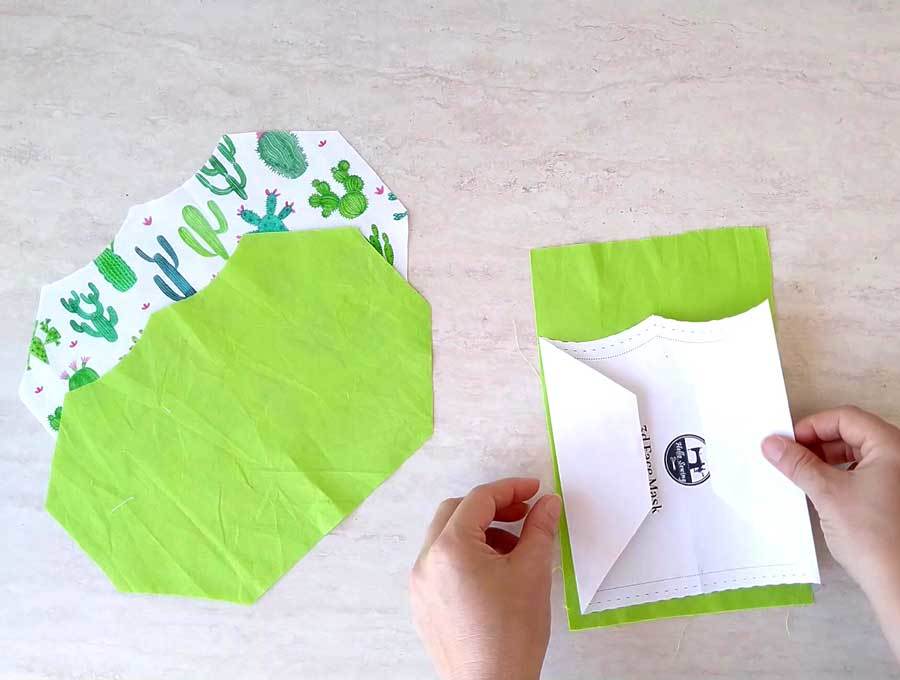
STEP 2: Cut the fabric for the mask

Unfold the pattern you made earlier and set it on top of the fabric. Mark the fabric with sewist chalk or a washable pen, using the pattern as a guideline. Cut the fabric along those lines. You will need to cut two of these – one for the main piece and one for lining.

Tip: Before you cut your fabric, wash it thoroughly and iron it. 

STEP 3: (OPTIONAL): Make the filter pocket

This step is only for those of you who want to make a 3d face mask with a filter pocket. If you don’t want a filter pocket – skip the step

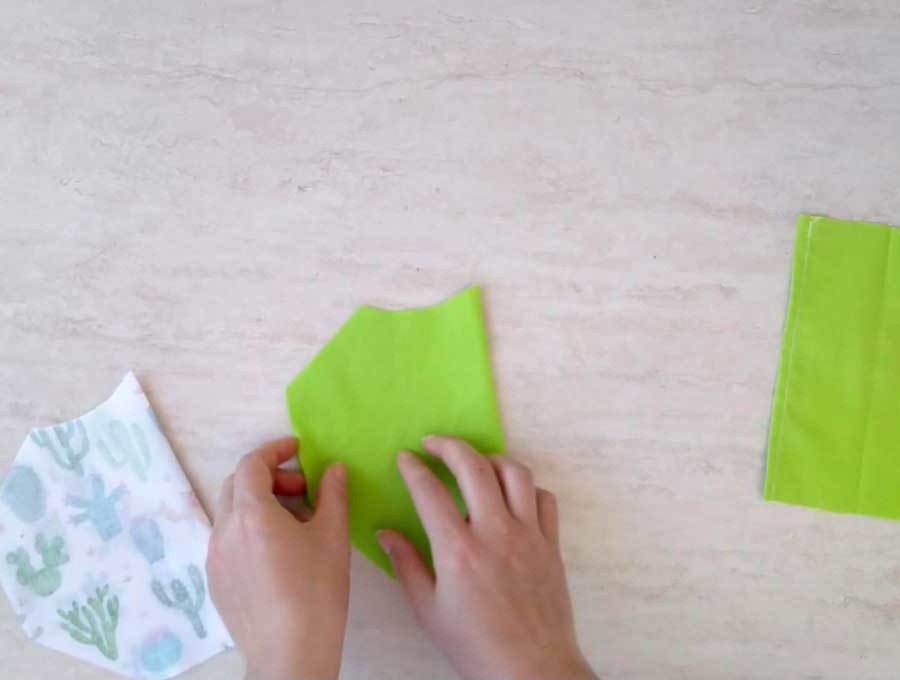
Cut fabric for the filter pocket. Fold both sides of the pattern towards the middle as shown and cut out a rectangle of fabric according to its highest and widest parts.

Fold the side edges inward 1/4″ twice and press with an iron. Pin and sew the sides.

cutting fabrics to make the 3d face mask with filter pocket

STEP 4: Layer the mask

Find the middles of each fabric piece: Fold each of the three parts of your mask in half and fingerpress to mark the middle. Place the lining fabric on a flat surface with the right side up, then place the filter pocket on top of it, and finally place the main fabric on top with the wrong side up.

Align the middle of all pieces and pin in place.

folding fabrics before layering them to create the 3d mask

STEP 5: Sew top and bottom

Sew all around the edges with a quarter-inch seam allowance. Leave both sides unstitched so that you can turn the whole thing inside out through it.

pressing the 3d mask

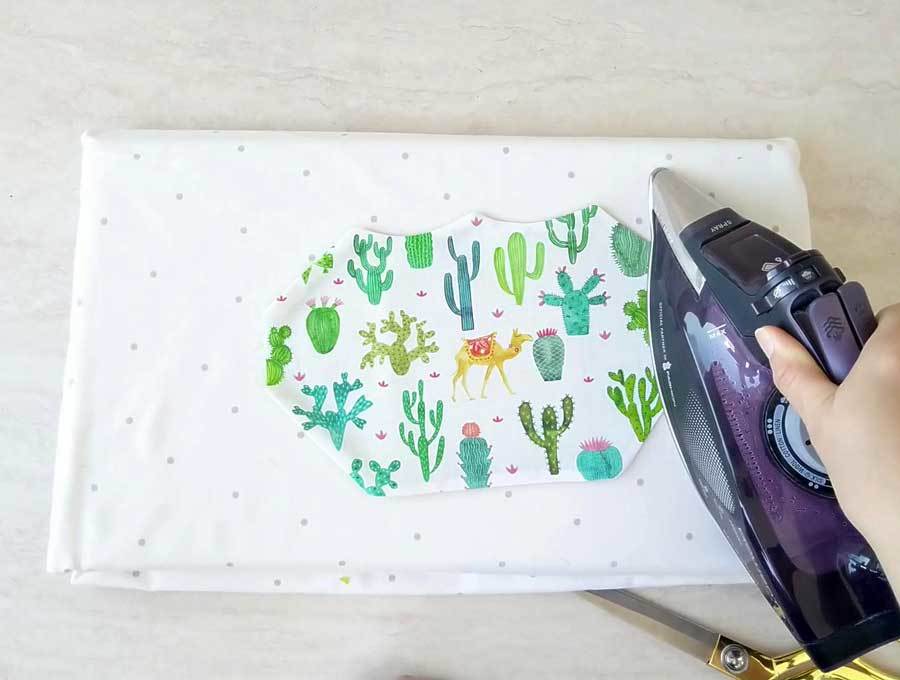
Clip the curves and snip the pointed edges at the top. This will allow the mask to lay flat.

Turn the whole thing inside out through one of the side openings and press.

STEP 6: Nose wire channel

  1. Mask with filter pocket The stitching creates a nose wire channel into the filter pocket. You can insert a twist tie or craft wire into this channel.
  2. Mask without filter pocket: Turn the fabric inside out through the opening you left earlier. Then insert the nose wire into the fabric piece and set it all the way to the center on the top edge, where the curves are. Secure the wire with pins.
    Stitch the wire in place.

STEP 7: Fold, press and topstitch

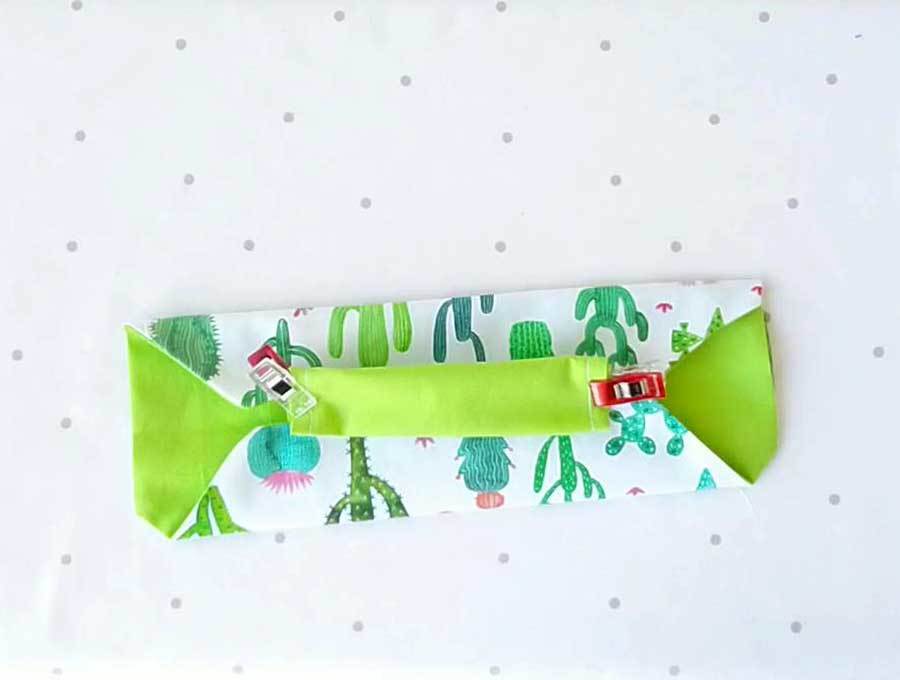
Fold the mask in half lengthwise. Unfold and fold top and bottom towards the middle crease. Press with an iron and pin in place.

Stitch along the top and bottom folds.

3d face mask prepared for stitching

STEP 8: Make the three-dimensional form

Grab the bottom left corner of the folded section. Pull it up and slightly to the left, almost as if you were folding that section in half lengthwise. However, you will be forming a 90-degree angle between the upper edge and the edge you just made by dragging the lower corner up and to the left. Pin in place.

making the 90 degrees angle to allow the 3d mask to pop out

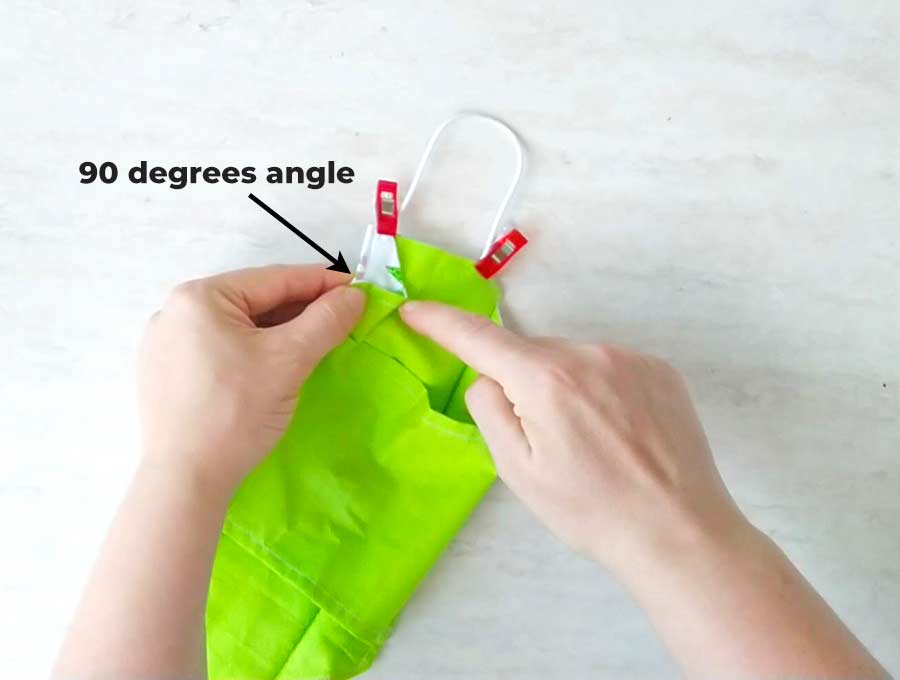
Repeat on the lower side as well. Two new corners will be touching now, one from the top with the one on the bottom. Stitch across from top to the bottom, going through both those corners.
Repeat all these steps on the right side.

creating the three-dimensional form of the mask

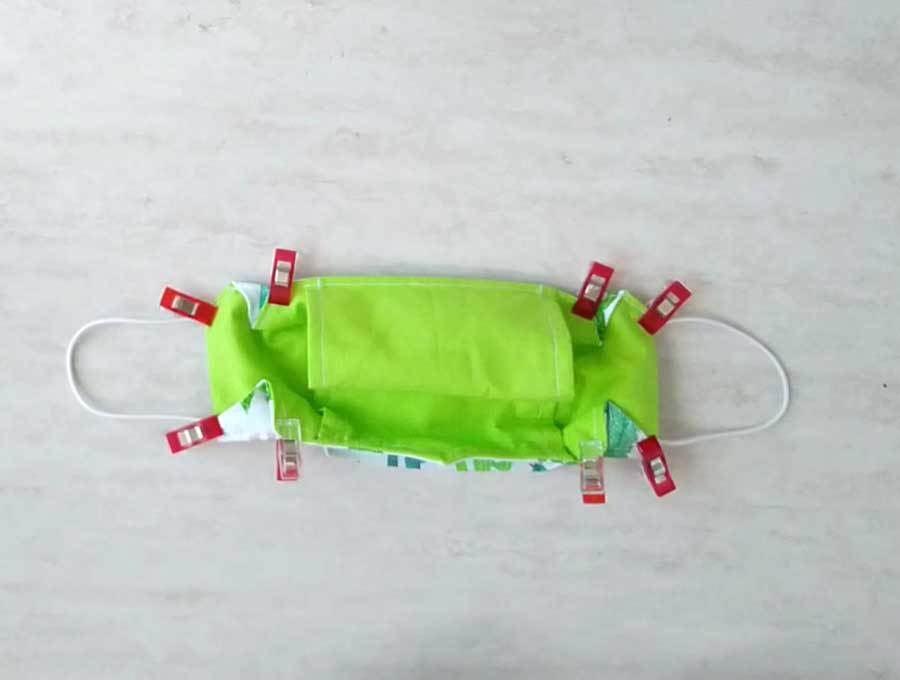
STEP 9: Insert elastic

Tuck both side edges in and insert elastic in the opening. Pin or clip in place.

Stitch from top to bottom, back-stitching at the beginning and the end. Repeat on the other side.

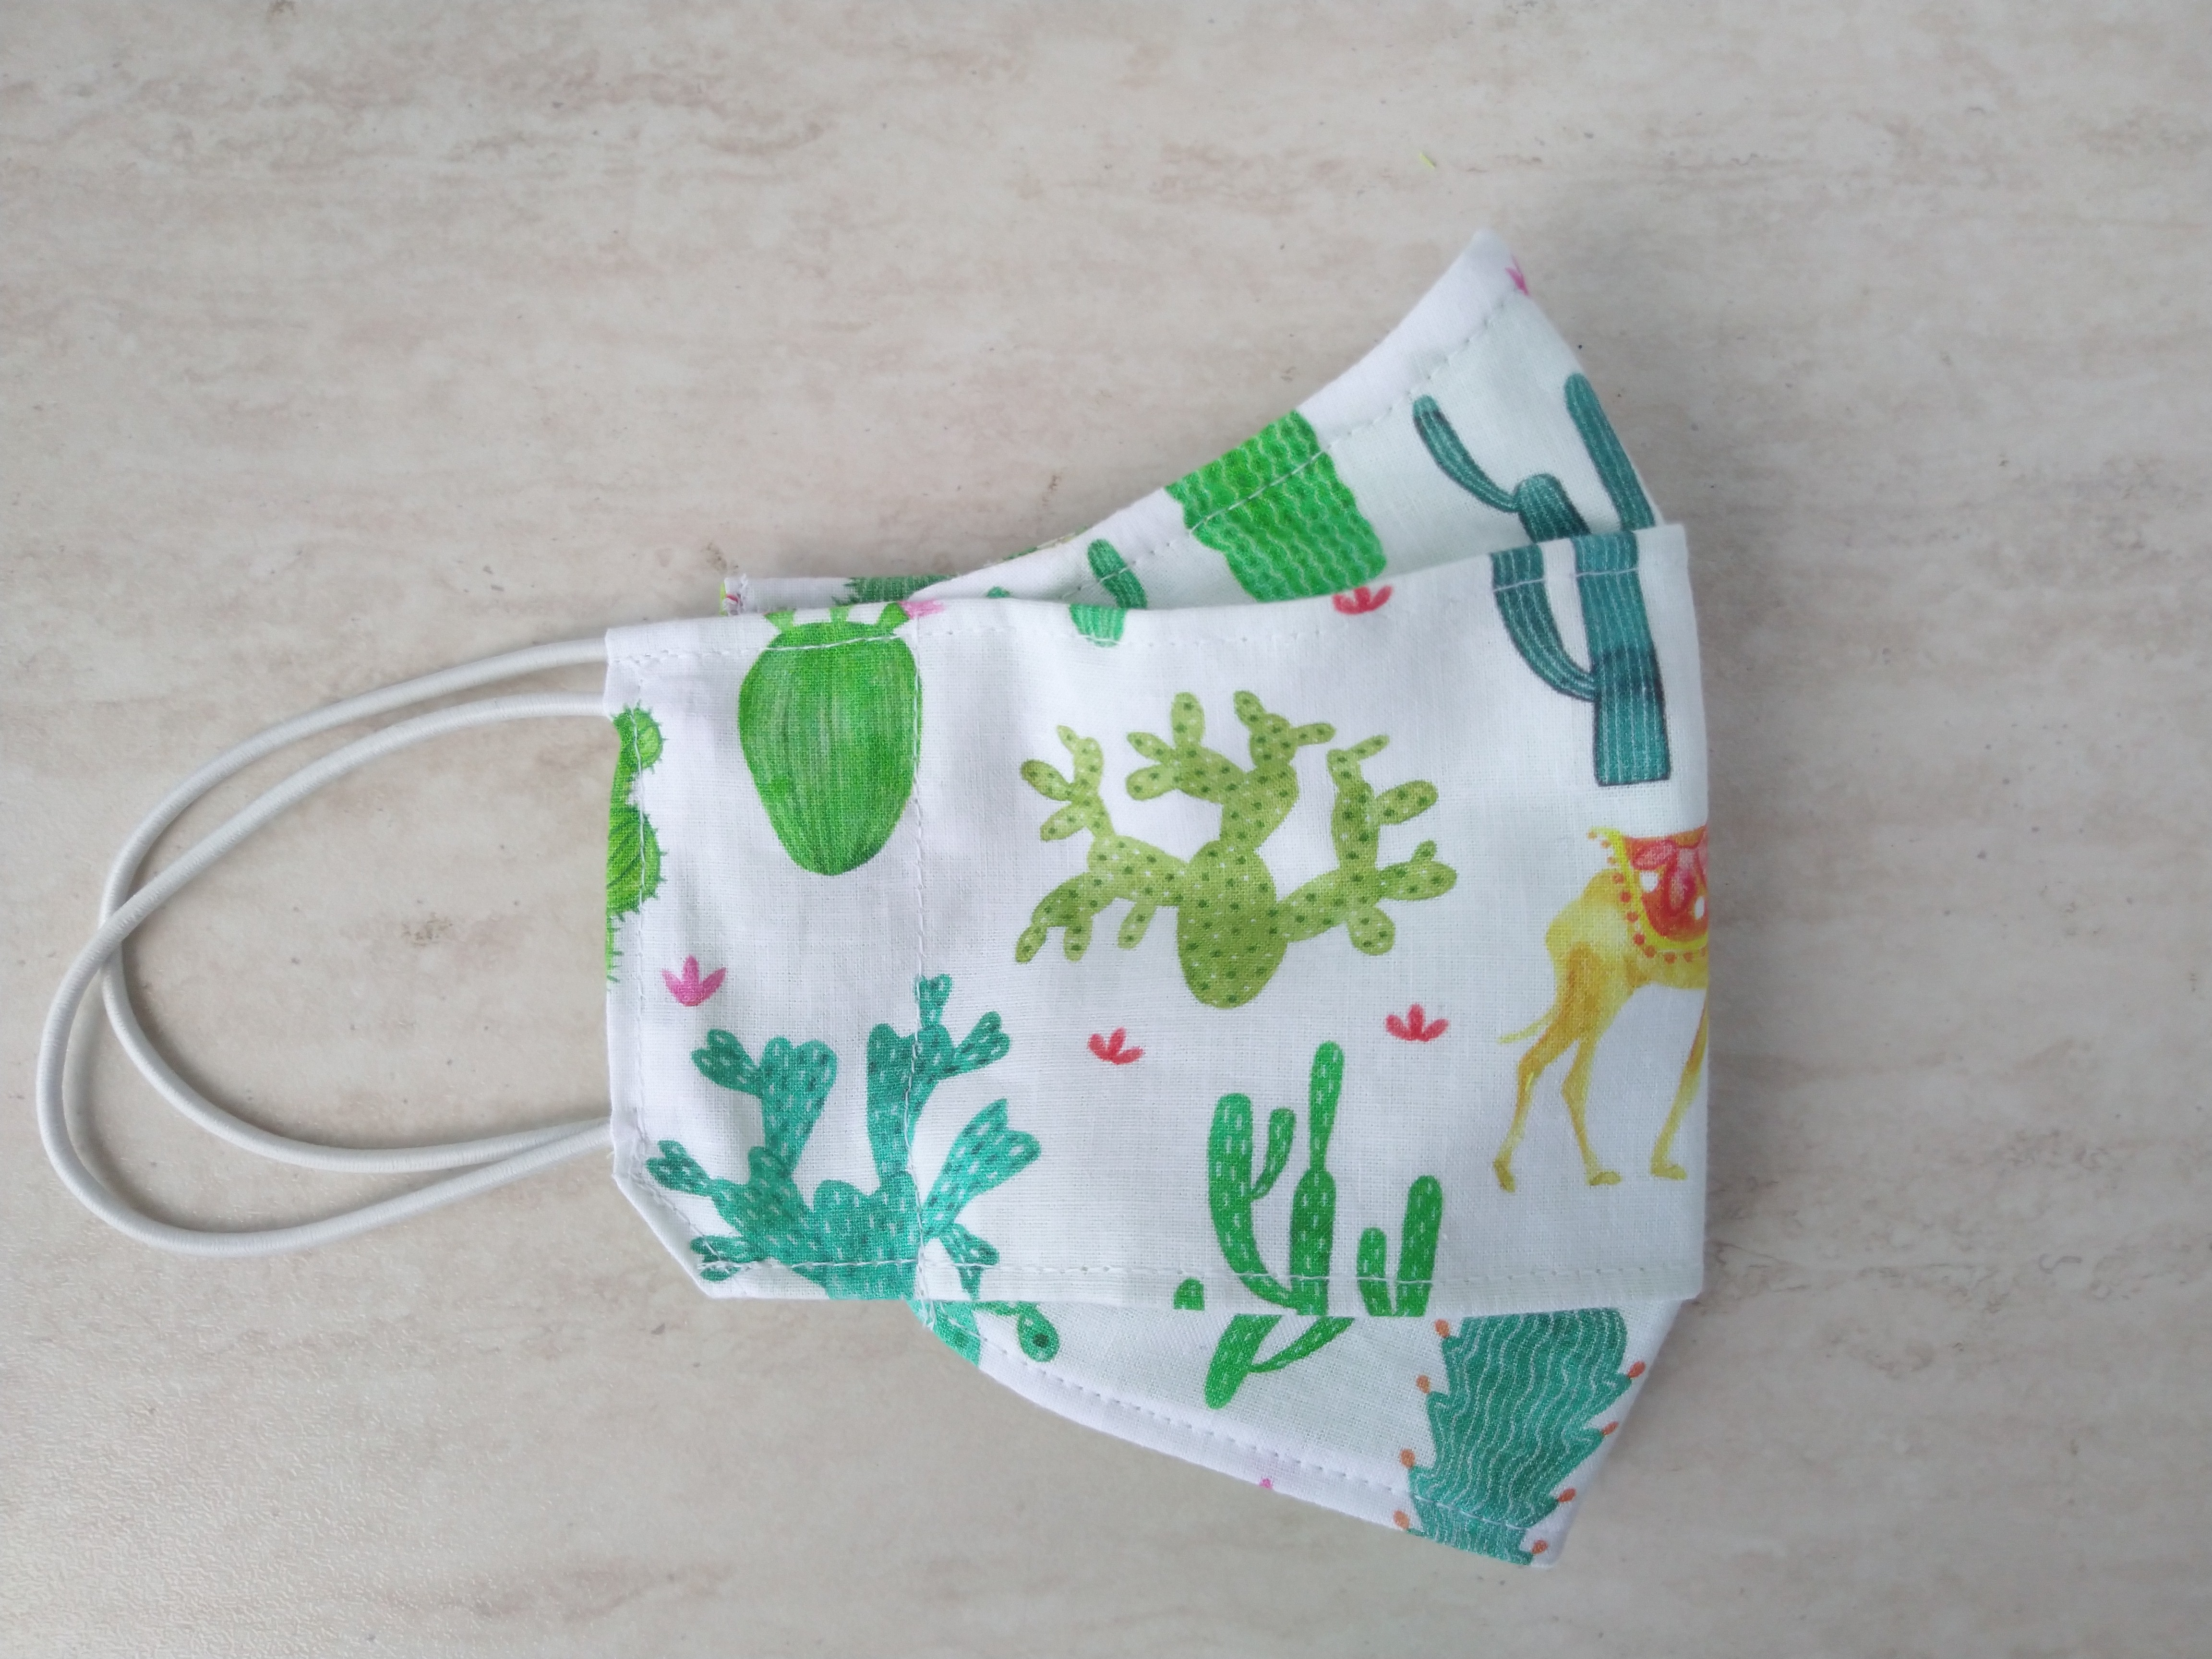
Well done, your DIY 3D face mask is complete!

DIY 3d face mask folded in half

Did you like the 3d mask template and tutorial? Which one do you prefer the VIDEO or the Written instructions?

Do you have any ideas for improvement? Any tips or tricks how to sew a 3D mask even easier and quicker?

Share your thoughts with everyone in the section below. Remember to stay responsible and protect yourself, and everyone around you!

Do you like this 3D mask pattern? Pin for later:

Free printable 3d face mask pattern pdf with written tutorial and VIDEO

Wanna be friends? Click HERE and follow me on Pinterest

RELATED:

Click Here to Leave a Comment Below 68 comments
Antionette Blake - July 5, 2020

I just ordered a few masks!

Thank you for sharing your post at this week’s #TrafficJamWeekend Linky Party.

Have a wonderful weekend!

Reply
    Helen - July 8, 2020

    One can never have enough masks 🙂

    Reply
April J Harris - July 5, 2020

Thank you for sharing this really helpful pattern and tutorial with the Hearth and Soul Link party! It’s very timely and your directions are so straight-forward and helpful. Love that you can personalise the masks with your own chosen fabric too. Thank you for sharing, and for being a part of the Hearth and Soul Link Party. I’m featuring your post at the party this week. Hope to ‘see’ you there. Take care and have a lovely week!

Reply
    Helen - July 8, 2020

    Thank you for the feature, April. ‘See’ you there!

    Reply
Petra - July 5, 2020

Thank you or sharing your pattern for 3d face masks! This is something we all need and thank you for showing us it isn’t difficult.
A brilliant share at Fiesta Friday 🙂

Reply
    Helen - July 8, 2020

    Thank you so much, Petra. I’m glad you find it helpful

    Reply
Michelle - July 6, 2020

Wow Helen, I do believe you have a solution to every mask problem!

Thank you for sharing with Creative Compulsions!
Michelle
https://mybijoulifeonline.com

Reply
    Helen - July 7, 2020

    I try to make this site the ONE-STOP solution to every mask problem there is. There are so many people in need of masks that keep asking me for new, different mask designs

    Reply
Sam - July 7, 2020

This is useful, thanks for sharing X #anythinggoes

Reply
    Helen - July 7, 2020

    Thanks for dropping by and commenting, Sam!

    Reply
Shelbee on the Edge - July 8, 2020

I love this idea of a 3D masks to keep it off of your face. I do not like the feeling of the fabric pressed right against my mouth. This is fabulous. Thanks for sharing and linking up.

Shelbee
http://www.shelbeeontheedge.com

Reply
T'onna | Sew Crafty Crochet - July 10, 2020

Cute mask! I love that cactus fabric! Thanks for sharing at Snickerdoodle Create Bake Make!!!

Reply
    Helen - July 11, 2020

    Thanks, T’onna. I loved how it turned out, it’s hubby’s favorite mask out of all I made

    Reply
Emily - July 14, 2020

Do you have a general suggestion for what size mask might fit a woman?
Does your small fit a child? If so, about what age? I’m looking to make
masks for my grandchldren ages 15 and 10 and for myself. I have limited fabric
so I don’t want to have to experiment too much with guessing sizes.

I sure would appreciate your advice. Thanks so much for the tutorial. I’ve looked through so many videos and this one looks a lot easier than most of the 3D ones I’ve seen.

Reply
    Helen - July 14, 2020

    Hi Emily, I’m glad you liked the tutorial. It really is easy. Generally, size L fits most women and men, size XL is for larger faces
    I’m wearing size L and it fits my husband’s face as well.
    As for children, it’s a bit tricky as some grow up faster than others. I would make an L sized mask for your 15 years old and an M for the 10 years old.
    That being said, the pattern is forgiving, so you might just leave the elastic a bit longer, so it can be adjusted to fit a slightly smaller or larger face.

    Reply
Karan - July 15, 2020

I just can’t find the written instructions to download. I’ve gone to your website, and tutorial there, but I guess I’m missing the place to download written instructions. Hope you can help. I have several masks to make in all sizes, and this pattern seems like the perfect one to make. Thank you.

Reply
    Helen - July 15, 2020

    Thank you, Karen.
    There is no such download. As much as I would love to add downloadable instructions to every tutorial, I simply don’t have enough time. You can print the written instruction right from the page if you’d like.

    Reply
Pam - July 23, 2020

Looks good but at step 8 I had trouble getting the fold right. I rarely have problems with instructions. After repeated tries
I gave up.

Reply
    Helen - July 23, 2020

    Oh, no! I’m sorry to hear that. Have you watched the video? It might be helpful
    Step 8 starts at 5:00. Here’s the link https://youtu.be/qjqweGdyDuA?t=301

    you need to pull over the corner to create a 90 degree angle

    Reply
      Stacia - August 5, 2020

      I had some difficulty with the 90 degree angle also and with the filter piece in the video it was still a bit difficult to figure out. I basically pulled the corners down near the corners so to speak on the bottom or top and made a dart, easier way for me to figure it out, then Press the darts so they look like a v or cone shape. Hope that helps someone else. Rule of thumb I found helpful is a 3D mask should be able to stand up when you set it on the table.

      For sizing I found the small fits my 6 year old grandchild, the medium fits my almost 9 year old grandkid, the large fits my turning 11 grandkid and my turning 14 kid, i think it’s the best fit for me as well. My husband is likely to fit t the Extra Large.

      Thanks for the pattern, this has been a fun one after making 200+ of the basic rectangle with pleats, close to 50 of the fitted up over the nose with the seam up the middle. I love this pattern because it allows a full piece without cutting into a pattern and then total mismatch or drive my OCD self crazy trying to match it to look seamless!

      Reply
        Just another Helen - October 2, 2020

        Thank you!! This helps me to picture this in my head better!! Been sitting here about 10 minutes fussing, wondering why it’s not looking right (playing with it, not sewing).

        Reply
          Helen - October 2, 2020

          I’m glad to hear you have figured this out

          Reply
    Alicia - July 25, 2020

    Hey, I was having the same problem. I had to consult the sewing guru in my life(my mother). The way she helped me understand is basically you are making a, “N” shape. The mask edge that the straps attach to is the first leg of the N, then the diagonal of the nose piece is folded to make the second 2 legs. And the piece you folded up is going to be parallel with the strap edge. Then do pretty much the same on the bottom. That won’t really have the N shape, but just fold it so it’s parallel to the strap edge. You’ll end up with 2 right triangles of your front-side fabric showing on the back of the mask. And the points of those triangles are pointed at each other so the line you stitch from one point to the other is also parallel to the strap edge.
    I hope that helps. I’m not great at explaining directions, but hopefully there’s some bit of help here.

    Reply
heather kuhl - July 26, 2020

Great mask! Thank you so much for the free pattern. I would love to make this style for my kids (5,7,11 and all on the petite side). I was wondering if anyone had any input in how much I can reduce the pattern when I print it to make that happen. I am wearing the size medium (I’m fairly petite as well).

Thanks!

Reply
    Helen - July 26, 2020

    Hi Heather, can you try your mask on your kids to see how it fits? I think it might fit your 11 year old as well if you make the ear loops smaller. As for the younger kids I would try the S size but instead of using 1/2 inch seam allowance I’ll use 1/4 inch, otherwise size S is rather small (2-4 y.o.)
    You can also try these kids face masks https://hellosewing.com/kids-face-mask-template/ – the design is pretty forgiving, so you can just adjust the elastic size

    Reply
Katy - August 3, 2020

Thank you for sharing this wonderful pattern. I have some nurse friends who are loving this design. I just have a question about the filter pocket. Should I be sewing the filter pocket along with the horizontal seams or leave it pulled away when I sew the seams? I have left it pulled away and sewed the seams but it seems a little loose. Am I misunderstanding the directions?

Reply
    Helen - August 4, 2020

    Hi Katy, I’m not sewing the pocket along with the horizontal seams. If you wanted a tighter filter pocket, you can cut it a bit shorter and just pull it down to meet the bottom edge

    Reply
Maureen - September 15, 2020

This is a cute pattern for a mask. I love cactuses and just adore them whether on a mask or a shirt. So so cute!

Maureen | http://www.littlemisscasual.com

Reply
    Helen - September 16, 2020

    I love them too. They are so cute

    Reply
Shelbee on the Edge - September 20, 2020

Helen, this is another fantastic idea! I feel like I am suffocating with the mask pressed right against my face. What a brilliant solution!

Shelbee
http://www.shelbeeontheedge.com

Reply
Naush Samama - September 21, 2020

These are perfect !! I love the color and the pattern.
I wear a hijab (head veil), my ears are covered under my scarf. Can you design or suggest a way so that I could wear a mask and the elastic could somehow be tied behind my head ?
Thank you so much for linking at Meraki Link Party.
Naush

Reply
    Helen - September 23, 2020

    Hey Naush, thanks for asking. You can definitely make the elastic one whole piece and tie it behind your head OR make a simple ear saver such as this – https://hellosewing.com/diy-ear-saver-for-face-masks/
    You might need to make the elastic a bit longer to accommodate the hijab

    Reply
Ann - October 13, 2020

Thanks for sharing this mask pattern. Made one for my husband, he says the width across the mouth is very comfortable, he’s very pleased with the mask.

Reply
    Helen - October 13, 2020

    I’m glad to hear he loved it! Thanks for sharing your experience.
    Please share the article with your friends on social media

    Reply
K Laedlein - October 14, 2020

This is the best fitting mask I have made. Thank you for the demonstration and the pattern. I also needed the directions in print form that fit on one double sided sheet of paper. I’d like to submit it to you but don’t see an attachment link.

Reply
Kim | Shiplap and Shells - October 25, 2020

This is such a great mask! Thank you for sharing at Charming Homes and Gardens.

Reply
Jenny Pare - November 24, 2020

You did not list the wire in the supplies list, is it necessary to use one with this mask?
thank you!

Reply
    Helen - November 24, 2020

    Nose wire is optional for this mask. I’ve used it with or without nose wire and both work fine.
    That being said, if you wear glasses or want tighter fit, I recommend you use a small piece of craft wire or twist ties

    Reply
diane - November 29, 2020

Hi I saw your tutorial on how to make this 3d mask in october and loved it. Now I went to refresh to make some more for my children it is not the same I liked the first video I saw better. can you tell mer where to find it please .

thank you

Reply
    Helen - November 30, 2020

    I haven’t changed the video, Diane

    Reply
Emma - December 7, 2020

Hello, good morning to you. Thank you for taking the time to explain the process of the 3-D mask. I appreciate it, we all appreciate it. (no need to reply, just wanted to express gratitude for all of the work it takes to put up this information). Emma

Reply
Sue - January 21, 2021

I must be missing where in the directions you mention tucking in the seam allowance on the sides–I keep going over the steps and don’t see any mention of it. Luckily I can piece together steps using other tutorials. I like your pattern!

Reply
    Helen - January 22, 2021

    It’s in step 9, Sue 🙂 Glad you figured i out

    Reply
sue - January 21, 2021

Ok–I figured it out–tuck in the sides, insert elastic, stitch opening closed.

Reply
    Helen - January 22, 2021

    yes, exactly. It’s step 9 in the tutorial 🙂

    Reply
Carole - January 22, 2021

Hi Helen. I will probably make one, but asking – Is this mask useful for singing with, meaning does the projection give enough room for moving the jaw, with mouth open without fabric collapsing back? I’ve looked Heaven’s half acre for a roomy “singing mask” to buy, or pattern to make, with no luck. Thanks

Reply
    Helen - January 25, 2021

    This is the roomiest mask I’ve made so far (and I have 13 different face mask designs). I haven’t tried singing with the mask on 🙂 but you can talk comfortably without fabric collapsing back.

    Reply
Shireen - February 24, 2021

I’d love to try this out! How would this work with a polypropylene layer? Would it work if you have to iron the pleats, or is it only for the filter type of mask?

Reply
Nicole - March 1, 2021

It won’t let me download the pattern? I put in my info but there is no download button.

Reply
    Helen - March 2, 2021

    We have some technical issues here, I’ve emailed you the pattern so you can start working on it

    Reply
Paula - March 1, 2021

I wasn’t able to submit my information for the pattern. Can you please email it to me? Thank you so much!

Reply
    Helen - March 2, 2021

    Hi Paula, Looks like there is some technical glitch with the download, and we are working to fix it.
    I’ve sent you an email with the pattern so you can start working on it.
    Happy sewing

    Reply
      Paula Clark - March 2, 2021

      Got it! Thank you so much Helen!

      Reply
Barbara - March 12, 2021

I downloaded the pattern but when printed it was not to scale. How can I get it to print correctly. Thank you

Reply
    Helen - March 12, 2021

    First – don’t print directly from the browser. Download it on your computer and use Adobe reader (or similar) to open and print the 3d mask pattern.
    Also – make sure you check 100% (no scale) from your printer settings

    Reply
cc - April 9, 2021

I love the pattern and the look. I cannot get the sizing right. I made size small which is for age 9 to 11 but it was slightly smaller for him, so i used the patter 1 size up which was a little big especially the nose part. I sewed xxl for my husband but still too small. can i increase horizontal or nose sizing somehow? If I do that would the pattern change for the nose section? Believe me I really love the pattern and just want to get it right. Thanks Would love to hear your thought.

Reply
    Helen - April 10, 2021

    You can just cut between the sizes for your son or just a tiny bit smaller than size M and it will fit right.
    As for your husband – you really need to experiment – I would try adding 1/4 inch to the top part only.

    Reply
MS - April 16, 2021

Helen, Thank you for this wonderful pattern and directions! However, alas, I am unable to download the file. When I click the link, I only get a blank page. Am I doing something wrong? Thank you again!

Reply
    Helen - April 18, 2021

    Hi MS, thank you for your kind words. Something is blocking the pop up form. Try a different browser / device

    Reply
H - July 30, 2021

It would have been nice to show how the nose bridge goes in.
Since I am not making one with a filter pocket . And the end mask appears to have a nose bridge in it .

Reply
Angel - August 18, 2021

Looking forward to trying this pattern, I have
several mask patterns that I currently use.

I have issues with this pattern – – –
1. Scale is short of the printed 2 inches.
2. Pattern is too far down from the top of page.
3. My printer cuts off the bottom edge.
. . . But I will measure & draw remaining part of pattern.

Reply
    Helen - August 19, 2021

    Angel, you’ll need to check your printer settings. Make sure that you choose ‘No scale’, orientation is Portrait, there are no custom margins and paper size is ‘Letter’
    Also – make sure to download the pattern, open it with adobe reader or a similar program and print from there. If you are printing directly from the browser that may skew the pattern. Make sure that the test line measures exactly 2″ or the mask won’t fit properly

    Reply
faye effler - October 9, 2021

I’m having trouble getting the instructions for the 3D mask, can you help Thanks Faye

Reply
    Helen - October 10, 2021

    Just follow the blog post, there are no printable instructions

    Reply
GramsInSaskatoon - December 4, 2021

Gathering together the supplies and will make some tonight.
DO you have a link to those little clips that you are using instead of pins.
Thank you for all your work.
Debbie

Reply
    Helen - December 5, 2021

    Hi Debbie, I’ve updated the supplies and tools section to include the sewing clips.
    Hope that helps. Happy sewing

    Reply
Sandra - February 1, 2022

Just what I’m looking for. Here in New Zealand we have been advised to wear the 3D. Masks. I wanted to make my own. We have been told to use third layer of polypropylene. Will have to try and get some. Thank you.

Reply
    Helen - February 1, 2022

    Hi Sandra, I’m so happy to hear you find this helpful.

    Reply

Leave a Reply:

Send this to a friend