
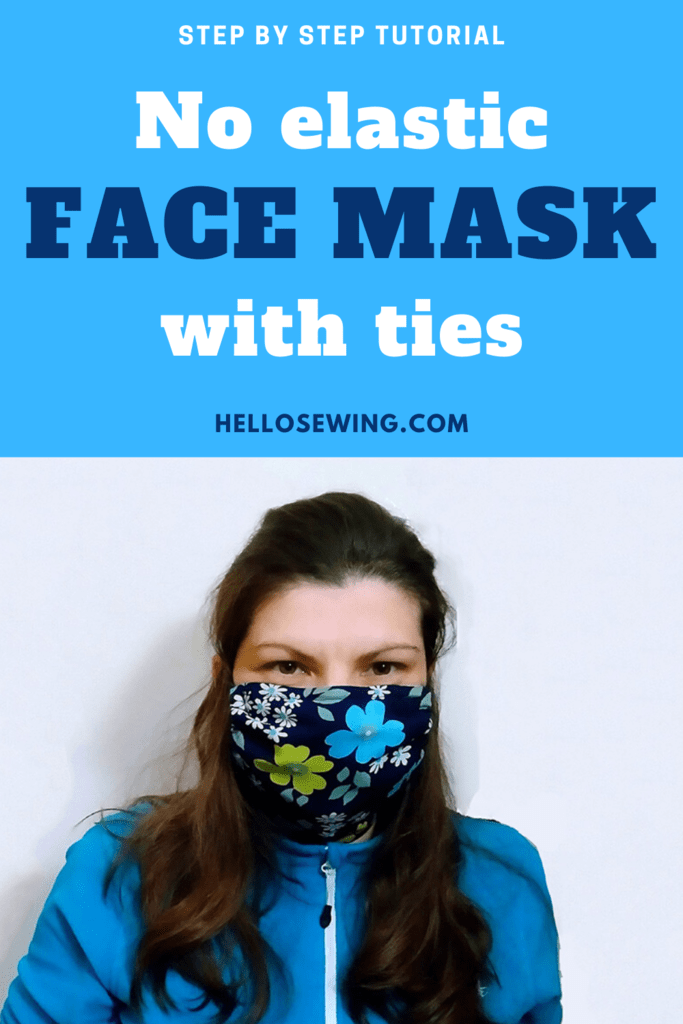
Fast and Easy No Elastic Face Mask [with Filter pocket and Nose Stay]
Do you want a face mask with a good coverage that you can sew up in 5 minutes flat? A lot of readers asked me to come up with a beginner friendly pattern that sews up quickly, uses no elastic and fits well on a wide variety of faces. Many of you worried that the mask they will be sewing up may not fit the intended recipient and asked if it will be possible to create ‘one size fits most’ faces mask. So, here it goes. There’s an option to add a nose wire stay at the top — so that it can be molded over the nose to improve the fit of the mask. This mask uses non stretch cord instead of elastic which comes handy as all the large stores are currently out of elastic.
If you are just getting started with sewing, make sure to read to the end as I will share couple of tips to make sewing this mask easier and faster. I’ll also show you how to sew a mask by hand for those of you without a sewing machine.
We occasionally link to goods offered by vendors to help the reader find relevant products. Some of the links may be affiliate meaning we earn a small commission if an item is purchased.
Table of Contents
How to sew the Fast and Easy Facemask
Supplies and tools:
You actually need very little in terms of materials and tools:
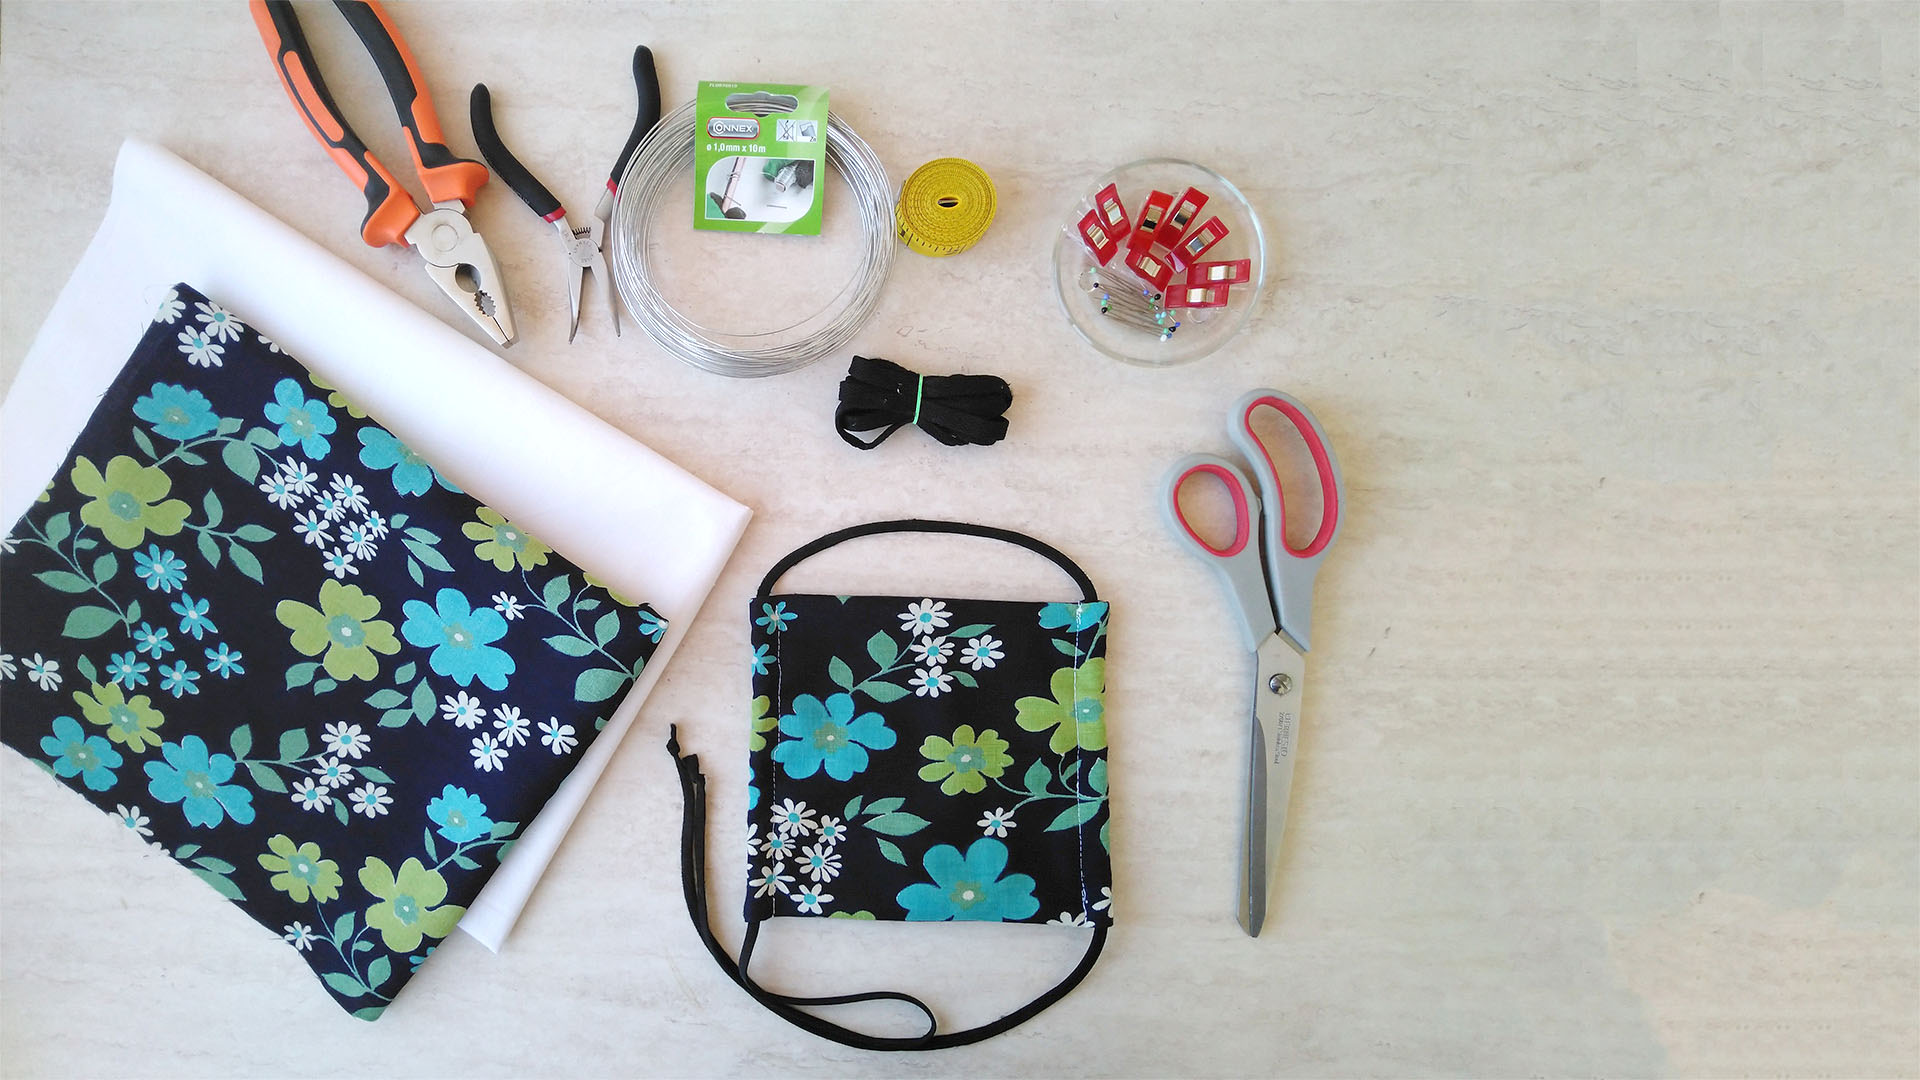
- main fabric – 10″x 8″ cotton (tightly woven, prewashed) – e.g. all white or medical themed
- lining fabric – 2 pieces 10″x 8″ cotton (tightly woven, prewashed)
- non-stretch cord at least 45″ long (e.g.shoelace or synthetic clothesline)
- filter (optional)
- crafting or floral wire for the nose stay (you can use other nose wire materials instead)
- scissors (or rotary cutter and a cutting mat)
- iron and ironing board
- sewing clips or pins
- (optional) to make tying easier
- beginner sewing machine or sew it by hand
Downloads: Printable instructions for the fast and easy face mask, nose stay and filter pocket (PDF)
Follow us for free patterns & tutorials! [easy-profiles]
As for fabrics make sure you use high thread count cotton such as quilting cotton or the material use for high quality bed sheets.
How to make the Fast and Easy Facemask:
Please enjoy and don’t forget to Like and SUBSCRIBE over on YouTube to be kept up to date with our latest videos.
FAST & EASY FACE MASK VIDEO TUTORIAL
INSTRUCTIONS:
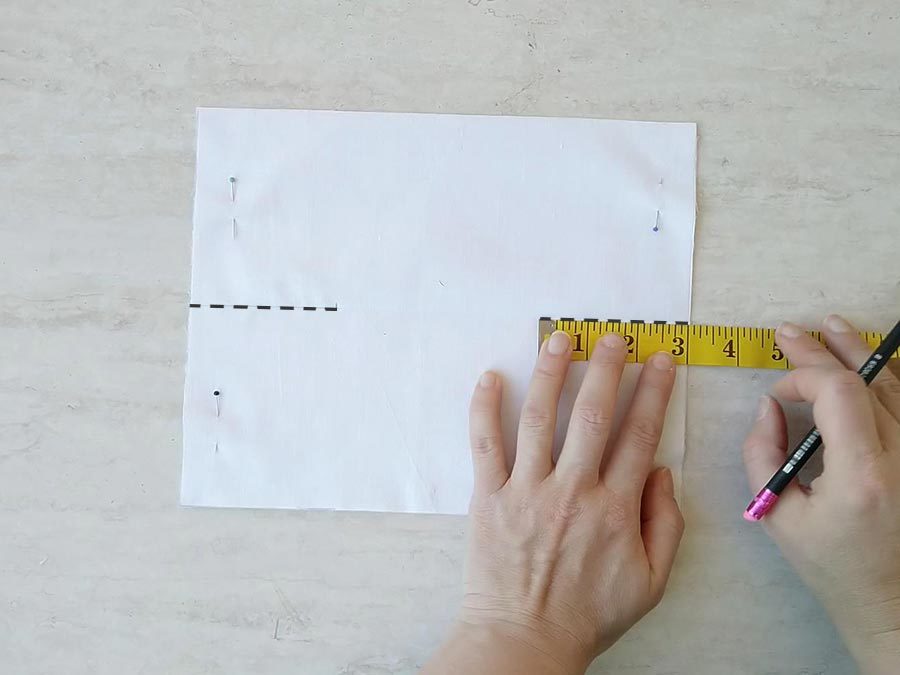
STEP 1: Cut the fabrics into 3 rectangles (1 from the main fabric and 2 from the lining fabric, or cut 3 rectangles if you are using the same fabric for both inner and outer layer). Lay both fabric pieces on a flat surface with the pretty sides facing out. Then, pin them together.

STEP 2: Fold in half lenghtwise and fingerpress to create a crease. Mark 2 inches in from left and right short sides.
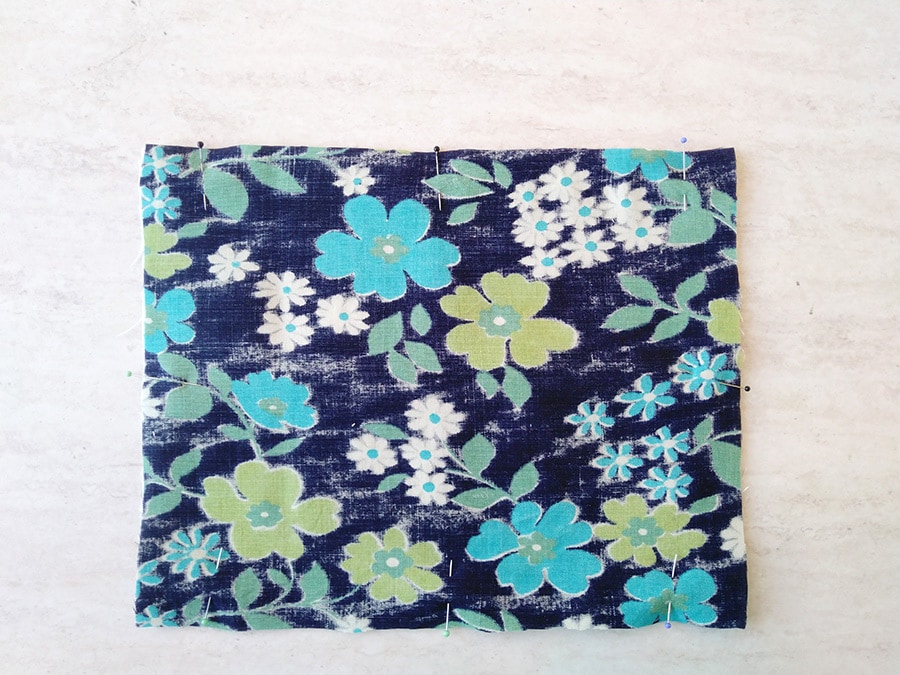
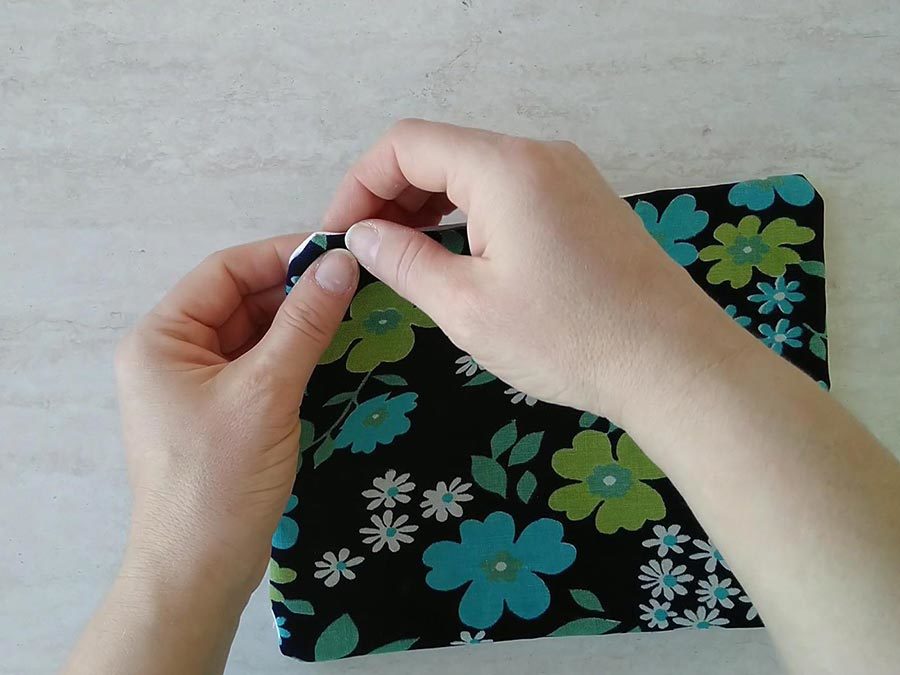
STEP 3: Sew along the marks and leave the middle part unsewn. Pinch both top corners of the top layer and bring them to the bottom. Flip the whole thing around so that the bottom edge is now on top. Ping the top corners one more time and bring them to the bottom. This creates the filter pocket opening.
STEP 3: Place the main fabric on top of the filter pocket and pin them together with the right (pretty) side of the fabrics facing each other.
STEP 4: Sew around the mask using 1/4″ seam allowance. Clip the corners close to the seams, but not through the seams. Turn the corners out. Don’t use a pointy tool to make them sharp. Instead leave them a bit blunt.
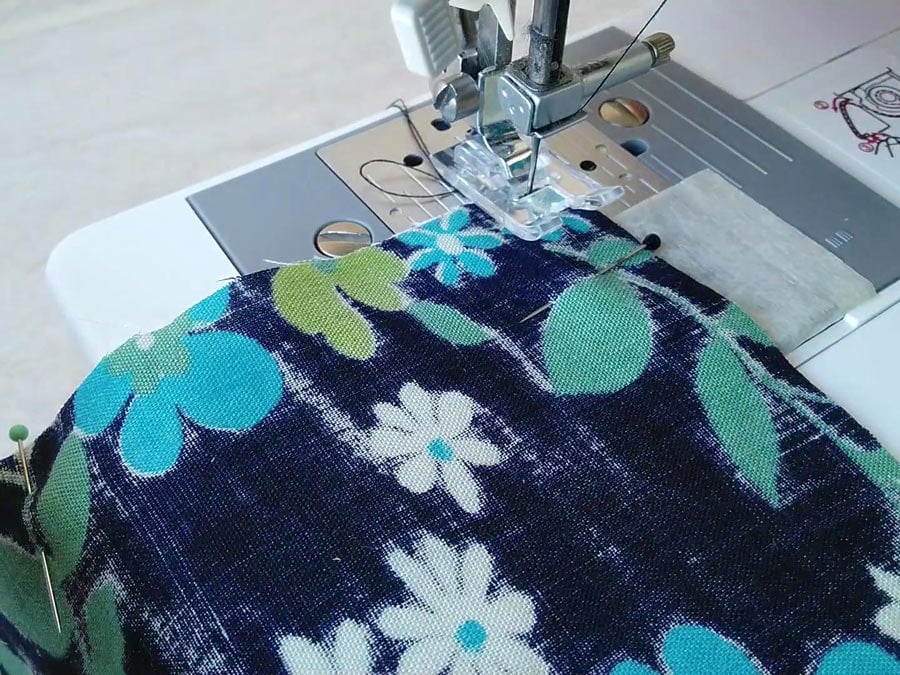
Wait, what? Why blunt corners? We’ll be sewing over them later and we don’t want them to show on the outside. One way to achieve this is to turn the corners sharp using a pointy tool and then fold them. However, this creates a lot of unnecessary bulk which might be difficult to sew over with an entry level sewing machine. By leaving the corners blunt we achieve both goals – the corners won’t show on the outside and there won’t be too much bulk.
STEP 5: Press the mask to give it a nice finish. Fold the left and right sides about 3/4″ inwards. Press again with a lot of steam.
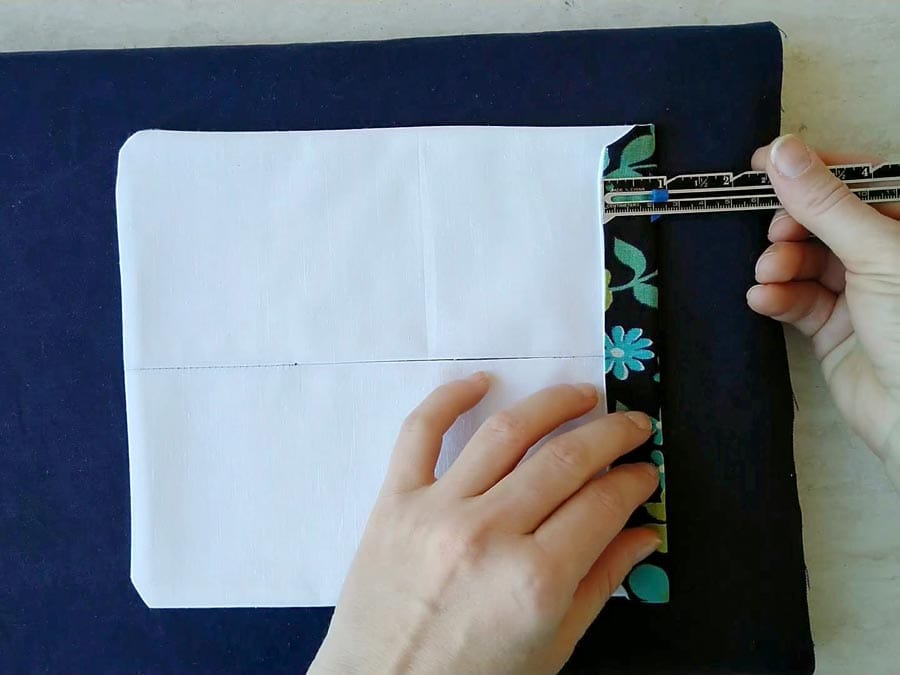
TIPS: You don’t need to be exact and actually measure those 3/4 inches. The pattern is really forgiving, so you can just eyeball the folds.
I’d like to keep my mini iron board right next to my sewing machine. It comes really handy if you need to give your project a quick press as you sew.
STEP 6: To insert the cord, place the cord at both left and right folds you made. Push the cord inside the fold, so that you won’t accidentally sew over it. Pin the folds in place.
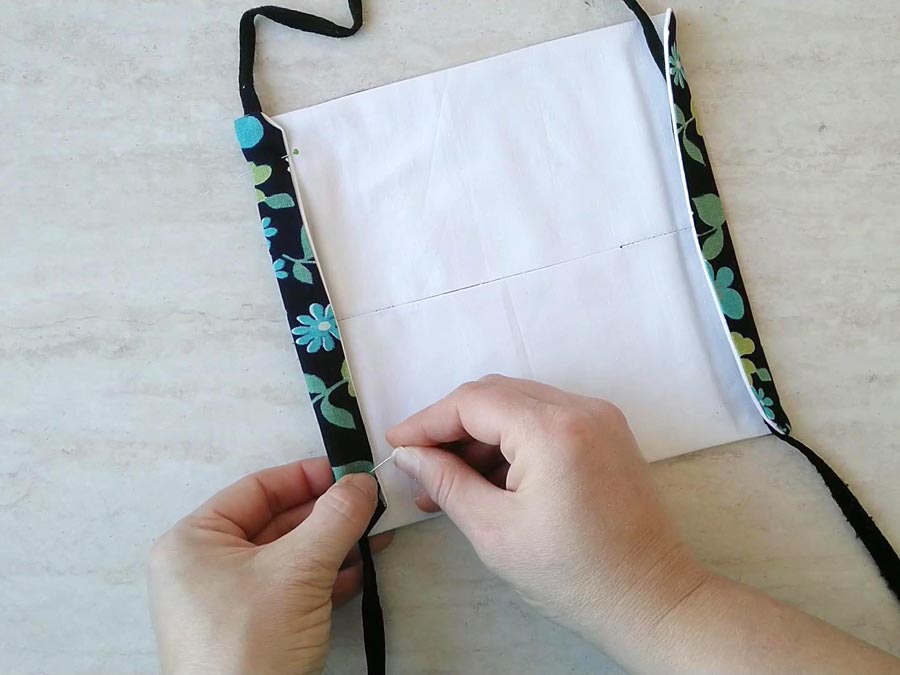
TIP: If you have sewing clips use them instead of pins. For me these were the next best thing since sliced bread. They just slide in and out. It’s soo much easier than using pins.
STEP 7: (OPTIONAL) Cut and insert the nose piece stay.
Cut the craft wire to 7” and curl both ends inwards about 1/2″. Insert it though the filter pocket. Push it to the top, center it and pin in place. Sew through both fabrics right next to the craft wire to prevent it from moving.
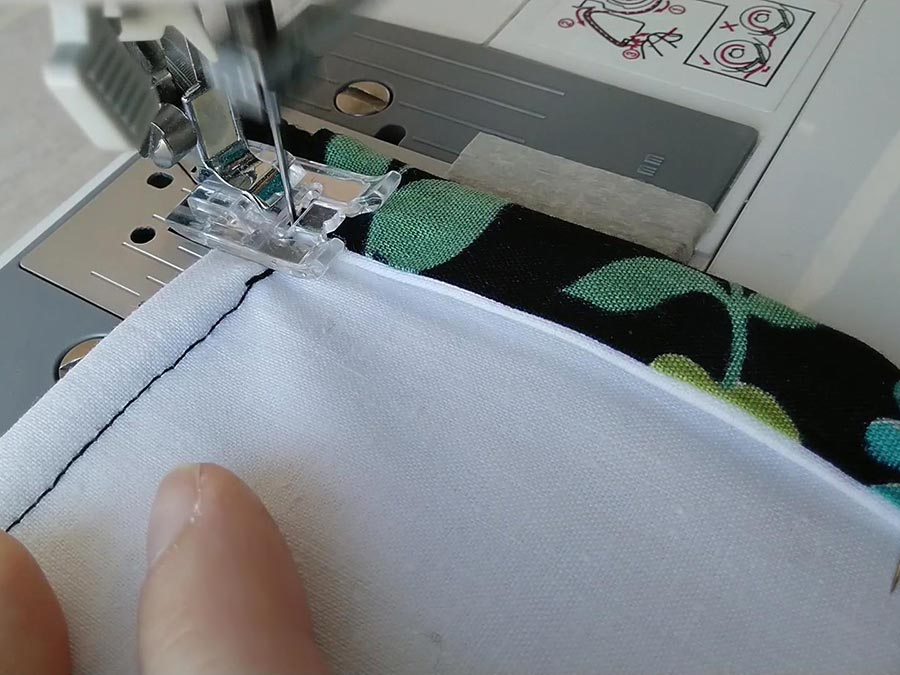
STEP 8: Sew over the edge of the folds. Go slow and be careful not to sew over the cord. Backstitch several times at the beginning and the end of these seams to reinforce them. The cord will be pulling against them, so we want to make these seams as strong as possible.
There are few tools/notions that can help make a bunch of masks faster and easier.
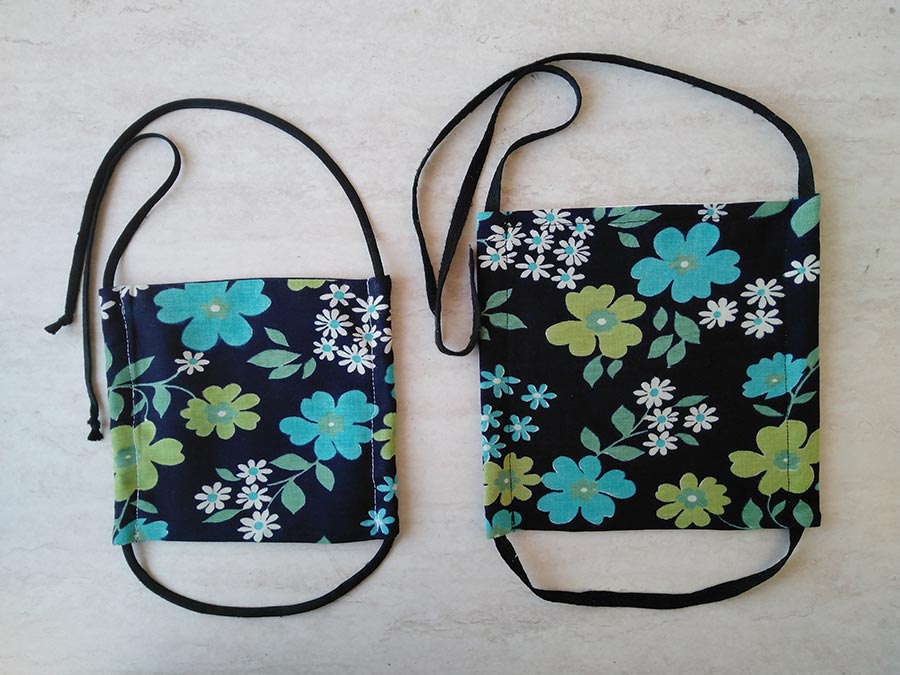
Now, just 7 straight stitches later, the face mask is now ready! I told you it would be easy. Here’s how it looks (child size on left, adults size on right):

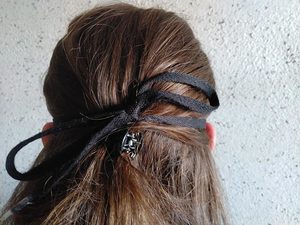
How to wear the mask?
To put it on put the bottom loop over your head and under your hair, then tie the top ties behind your head. Here’s a little visual to show you how the backside looks when you wear it:
and the front..

Now on to the tips..
TIPS:
- If you are making more than couple of masks, make a template out of paper or carton so that you don’t have to measure each and every time. This alone will speed up your sewing quite a bit.
- Back stitch at the beginning and end of each seam to prevent the stitching from coming undone.
- If the thread keeps breaking when you sew over multiple layers of fabric, go as slow as possible and/or use a walking foot attachment.
- Use sewing clips instead of pins – they help your projects come together faster and you won’t accidentally prick your fingers
Our FREE face mask patterns:

Do you like this? Pin for later:
So, did you make this face mask? How long did it take you? Was it easy to sew?
Did you find sewing over many layers difficult? Tell us, we’d love to hear from you!
RELATED: