 VIDEO tutorial + FREE pattern")
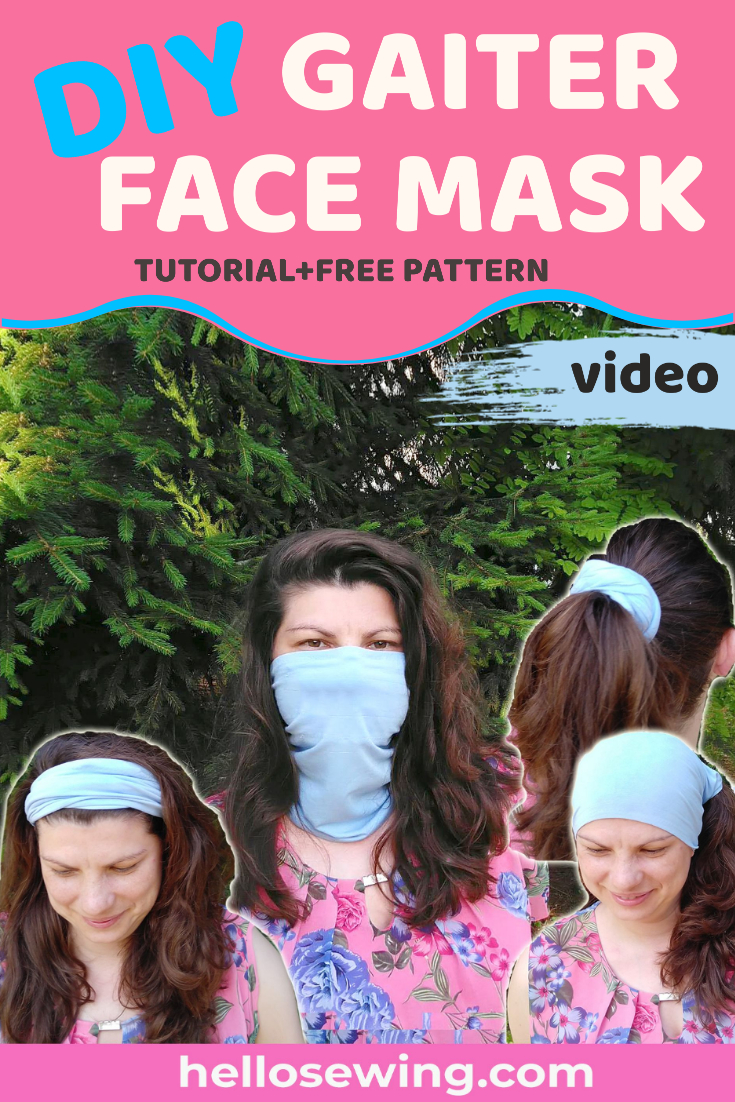
DIY Neck Gaiter // Gaiter Face Mask (2 ways) VIDEO tutorial + FREE pattern
Let’s make a Multipurpose neck gaiter – this tubular multi-purpose accessory is designed for a wide variety of uses: balaclava, neck gaiter, scarf, headband, scrunchie, beanie, bandana, facemask, wristband, hair band and more. It can be worn in twelve different ways! That makes this neck gaiter a fashion accessory that is compatible with all kinds of outfits or styles.
The best thing about it is the fact that you can make it on your own, quickly and relatively easily. It’s even simple enough for a beginner sewing enthusiast to sew. Just follow one of the two methods below and you’ll have a DIY neck gaiter face mask before you know it!
Below you will find my step by step written tutorial with VIDEO instructions for all the visual learners.
We occasionally link to goods offered by vendors to help the reader find relevant products. Some of the links may be affiliate meaning we earn a small commission if an item is purchased.
Table of Contents
How to make a neck gaiter
Supplies and tools
- 4-way stretch fabric – 1/2 yard
- matching thread thread
- scissors (or rotary cutter and a cutting mat)
- ruler or measuring tape
- nose wire (optional). You can cut some tin and fold it lengthwise a few times and use that if you don’t have a wire.
- Pins and needles
- Iron and ironing board
- Sewing machine for clothes or a beginner serger with the usual sewing supplies like needles, threads, and everything else.
DOWNLOAD: Neck gaiter face mask pattern (Free PDF file)
Follow us for free patterns & tutorials! [easy-profiles]
How To Sew Gaiter Face Mask (Lined or unlined)
OPTION 1: UNLINED DIY neck gaiter face mask
This gaiter face mask can be made in two ways, with the lining or without it. First up is the unlined option.
Watch the neck gaiter video first and then follow the written step by step instructions below.
Please enjoy and don’t forget to Like and SUBSCRIBE over on YouTube to be kept up to date with new videos as they come out.
Unlined Gaiter VIDEO TUTORIAL
INSTRUCTIONS:
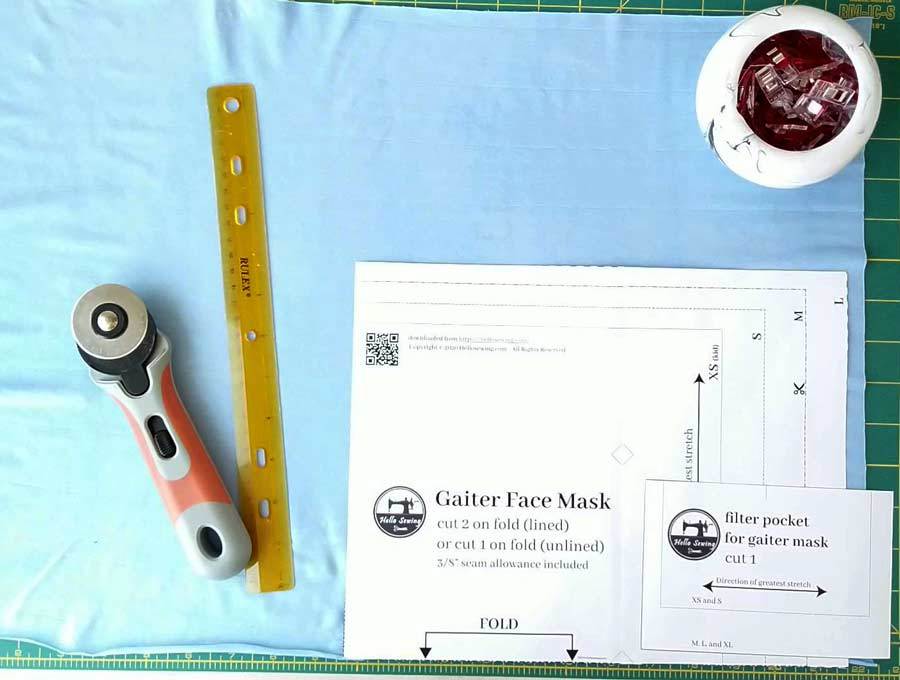
STEP 1: Prepare the pattern
Prepare the pattern
The first thing you will be doing is downloading the gaiter face mask pattern. Then print it out (100%, no scaling), tape it together, and cut it out accordingly. Use a pair of scissors that aren’t for sewing, because cutting paper can blunt them.
You will get two rectangles, one small and one big. The larger one is for the main section, the smaller one is for a filter pocket, which is optional but we’ll get to that later on.
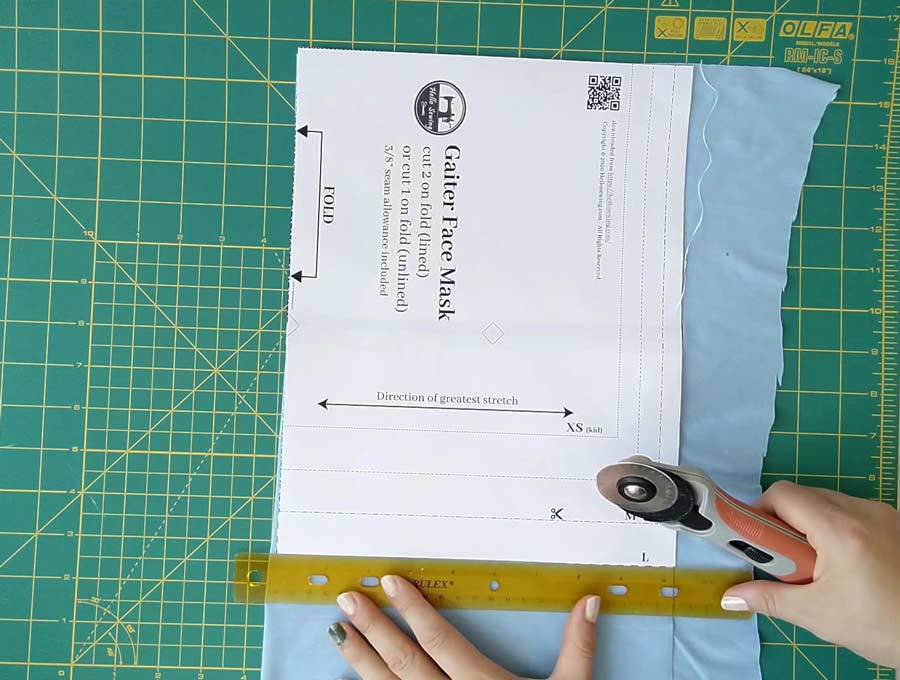
STEP 2: Cut the fabric
Use 4-way stretch fabric. I recommend using 95% cotton with 5% Lycra/Spandex or 95% Rayon, 5% Lycra/Spandex. Fabric with lycra or spandex has good elasticity and has a good bounce back to its original shape.
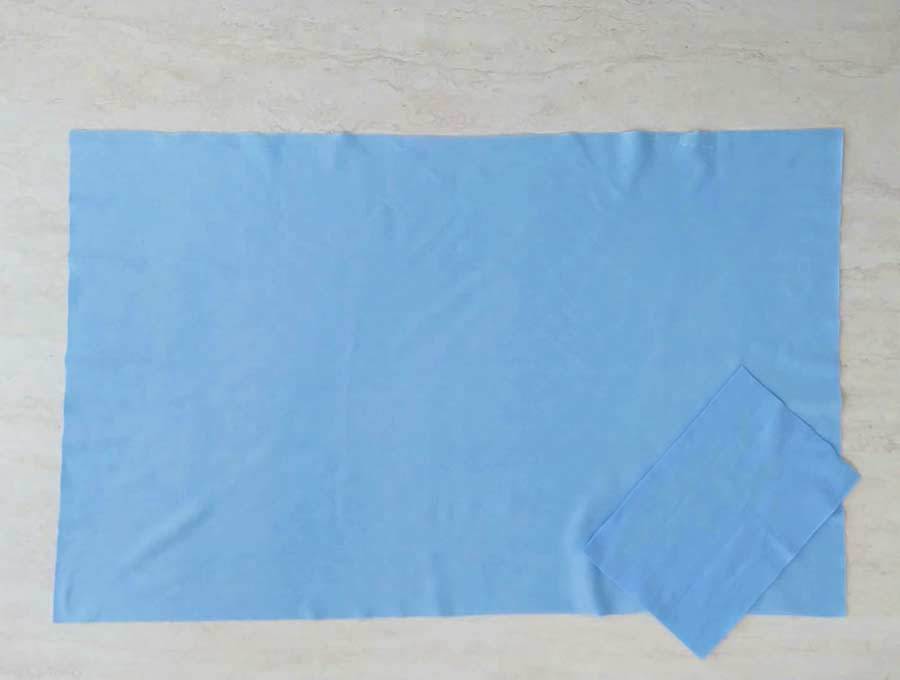
Use the two pattern rectangles to cut out two pieces of fabric. One bigger for the gaiter and one smaller rectangle for the optional filter pocket.
STEP 3: Prepare the fabric for sewing
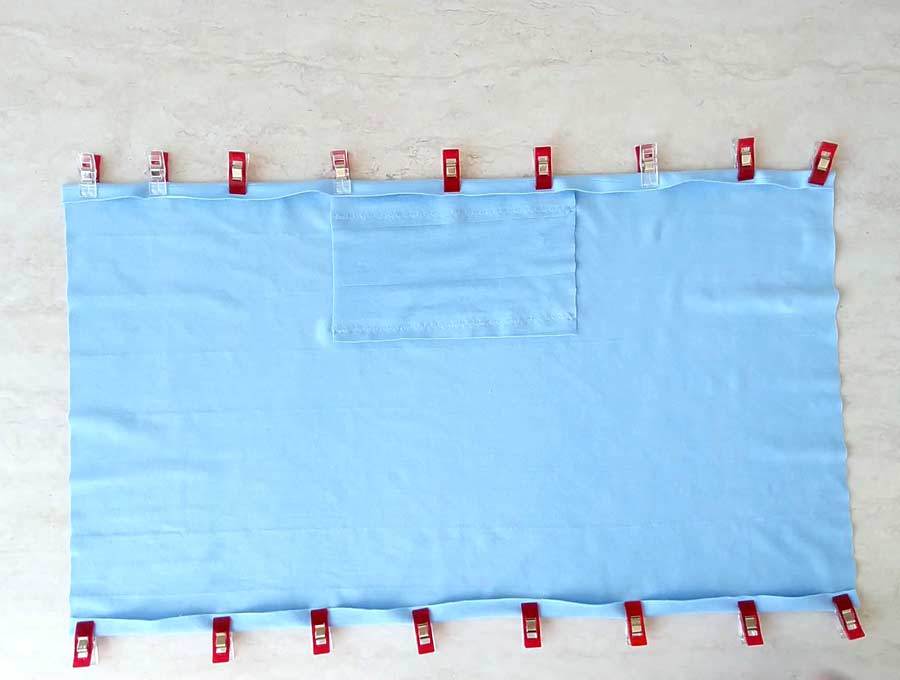
Lay the bigger fabric piece horizontally, with its right side down. Place the smaller piece at the center of it, about half-inch from the top edge. Its right side should go up. Pin in place.

STEP 4: Sew the filter pocket (optional)
Make two horizontal stitches across the smaller fabric piece, one next to the top edge, the other one next to the bottom edge.
The top stitch should be about one and a half-inch away from the edge. The bottom one should be about 3/8 inch from the edge.
STEP 5: Make the edges
Fold about half of an inch from the top edge and from the bottom edge. Press flat with an iron. Pin the edges and then sew across them with a stretch stitch.
Press flat once more.
STEP 6: Finish the mask
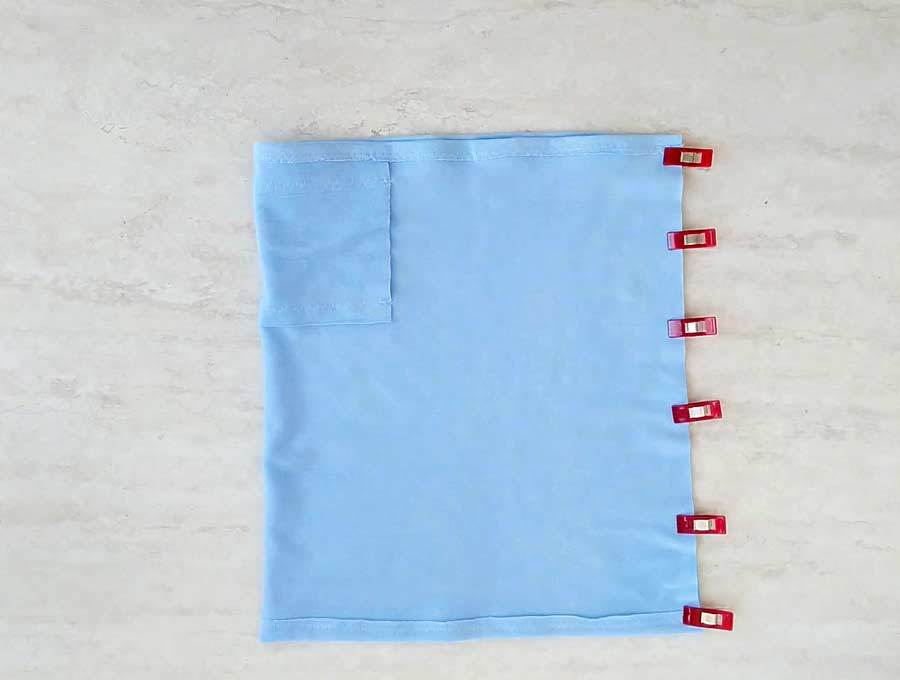
Fold the entire thing in half so that the short edges align. Make sure to put the right sides together. Secure with pins.
Sew with a 3/8 inch seam allowance along the short edges you just pinned together.
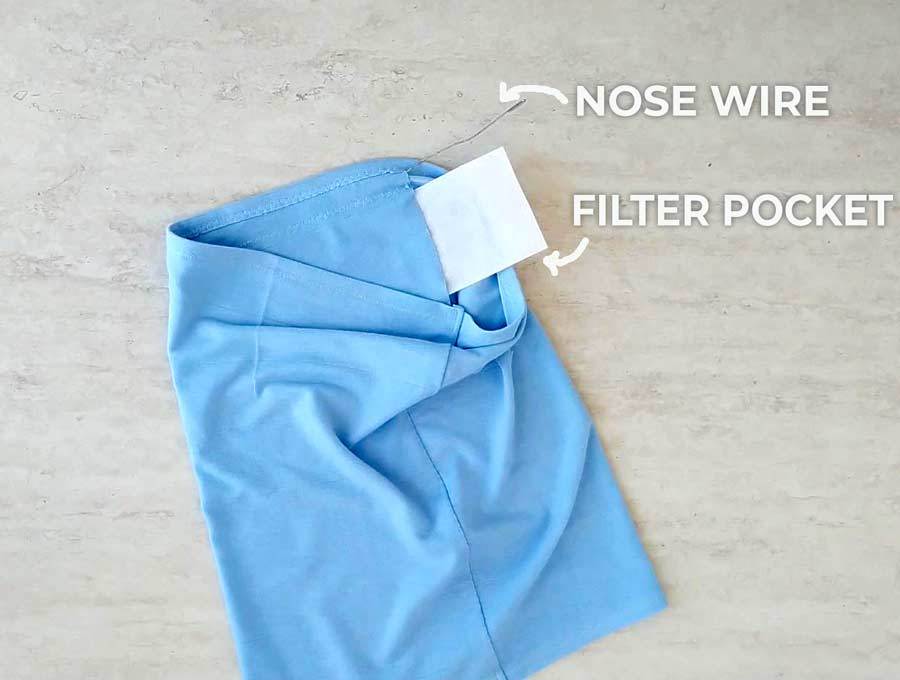
Turn the neck gaiter inside out. Insert the filter into the pocket, and insert the nose wire into the opening above it.
That’s it your unlined gaiter mask is ready!
—————————————————–
Option 2: LINED Gaiter Face Mask
Again, watch the video first and then follow written directions below.
Please enjoy and don’t forget to Like and SUBSCRIBE over on YouTube to be kept up to date with new videos as they come out.
Lined Gaiter VIDEO TUTORIAL
INSTRUCTIONS:
STEP 1: Prepare the pattern
Download the pattern from the link above, print it out without any scaling, tape pages 1 and 2 together, and cut out the size of your choice. For the lined option I highly recommend sizing up to allow for the thickness of the second fabric.
STEP 2: Cut the fabric
Cut two pieces of fabric, using the pattern for the main section.
If you want a filter pocket, cut one piece of fabric using the small pattern.
STEP 3: Sew the filter pocket (optional)
Lay one bigger piece of fabric so that the shorter edges are on the sides and the right side is up. Put the fabric for the filter pocket horizontally on the center of the upper edge, right side up. Pin in place.
Now you will be making two horizontal stitches over the filter pocket fabric. Sew them about an inch away from the edges, both the top one and the bottom one.
STEP 4: Start sewing the main section
Lay the fabric piece with the filter pocket on your workspace so that the short edges are on the sides. Put the other fabric piece on top, right sides together. Align the pieces and place pins along the bottom and top edge.
Sew with a 3/8 inch seam allowance along the edges you pinned.
STEP 5: Turn and sew some more
Take the fabric tube you just made and turn it towards the inside until the unstitched edges align. Pin them in place.
Now that the right sides are aligned on the inside, sew all around the whole thing. Leave a small opening of about two inches unstitched so that you can turn the neck gaiter mask inside-out.
STEP 6: Finish the mask
Turn the whole thing through the opening you left. Close the opening with glue or sew it shut stitching as close to the edge as possible.
Insert the filter into its pocket. Above the filter, you will see a small tube-like opening. Insert the nose wire into that opening.
Bonus: How to wear the neck gaiter face mask:
I mentioned at the beginning of the tutorial that you can wear this accessory in twelve different ways. So here they are!
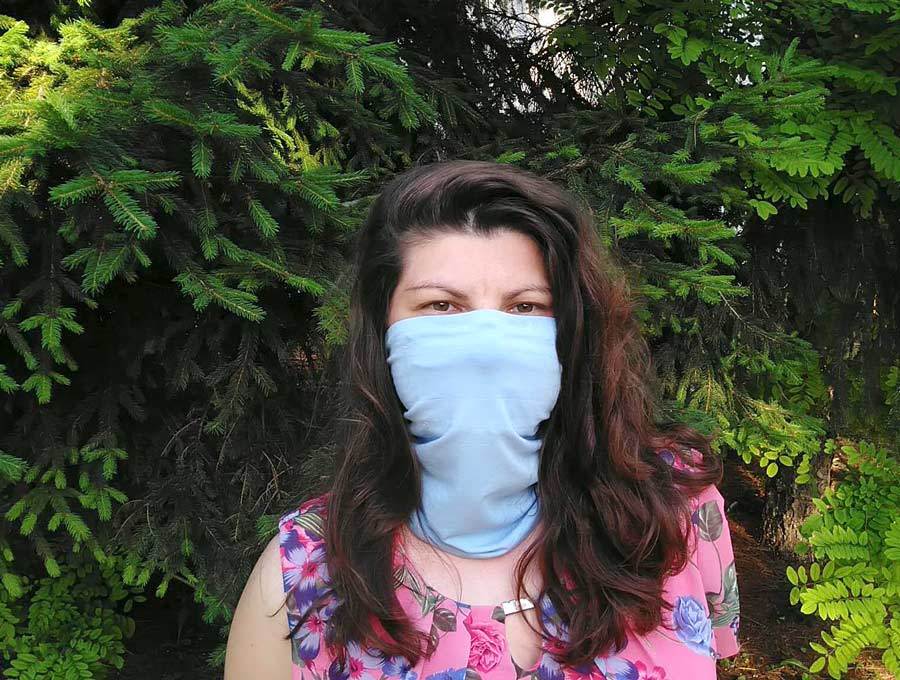
- As a face face mask
Put it over your nose, under your eyes, letting it cover everything from the nose down.
- On your neck
Fold it inwards a bit and place it around your neck.
- Sahariane
Put the tube over your forehead and pull your hair through it so that it covers the hair.
- Beanie
Fold inwards so that you get a beanie shape hat. Put on your head.
- Do-rag
Place over your hair and neck and tie up.
- Pirate
Similar to the previous one, but don’t cover your neck, and you can tie it on the side.
- Balaclava
Put your head through the tube. Pull from the back to make a hood. Then pull from the front and place over nose, leaving only your eyes uncovered.
- Eskimo hood
Same as balaclava but don’t cover your nose, leaving the entire front of the face uncovered.
- Headband
Fold inwards until it gets the shape of a bandana. Then tie around your head like a regular bandana.
- Ponytail
Identical to the headband, but you tie it around your ponytail.
- Bandana
Similar to the headband, just don’t tie it. Instead, pull it over your forehead.
- Wristband
Like bandana, but twist it and then put it over your wrist. Or just tie it around.
Do you like DIY gaiter face mask? Pin for later:
Wanna be friends? Click HERE and follow me on Pinterest
RELATED:
- Free Face mask pattern (fitted, contoured model)
- Best fit face mask
- DIY pleated cloth facemask with fabric ties
- How to make surgical face mask with elastic ear loops
- No elastic face mask (No elastic model, around the head ties – great for medical staff)
- Nose wire piece ideas
- Ear guard for nurses and doctors
- Surgical hat pattern (unisex model with ties)
- How to make a plastic face shield
- DIY reusable face shield with cute bow tie
- Breathable face mask tutorial
- 3d mask pattern and tutorial
- Kids face mask template
- Gaiter face mask (12 different ways to style it!)
- Face mask WITHOUT sewing machine (Video tutorial)
- DIY Scarf face mask