
How to Sew a Surgical Face Mask in 5 minutes
Have you considered making your own face mask or donating to hospitals or retirement homes? These masks are easy to make, and the pattern I will share is great for pros and beginners. Learn how to sew a super simple surgical face mask from fabric with this easy step by step tutorial! The instructions are simple, so keep reading for more.
Please note that the ability of homemade masks to protect against viruses is unknown. However, in the light of the current face masks shortage, when all compliant supplies have been exhausted, the CDC allows the healthcare providers to use homemade masks as a last resort option. Read more directly on CDC site here.
Table of Contents
How to make a DIY surgical face mask from fabric
Supplies and tools
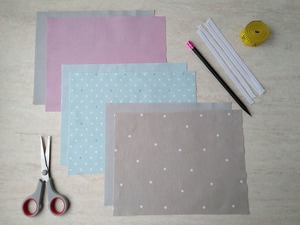 You actually need very little in terms of materials and tools:
- fabric – 2 pieces 9″x 7″ cotton (tightly woven, prewashed) – e.g. all white or medical themed
- elastic – 1/8″ or 1/4″ flat elastic 2 pieces x 7″ long each
- scissors (or rotary cutter and a cutting mat)
- clips or pins
- iron and ironing board for pressing
- sewing machine or sew it by hand
Downloads: Printable instructions for the surgical face mask (PDF)
Follow us for free patterns & tutorials! [easy-profiles]
Medical themed fabric picks inspired by a nurse wearing a stethoscope fabric mask. It is a great way to show appreciation to our awesome frontliners
We occasionally link to goods offered by vendors to help the reader find relevant products. Some of the links may be affiliate in nature meaning we earn a small commission if an item is purchased. Read full disclosure here
Our FREE face mask patterns:
PLEATED FACE MASK INSTRUCTIONS:
Prepare all your materials and tools, print out the instructions.(optional) Download and print the surgical face mask pattern at 100% (no scale).
You can watch the video first, and then follow the written instructions. Please enjoy and don’t forget to Like and SUBSCRIBE over on YouTube to be kept up to date with new videos as they come out.
STEP 1: Pin the elastic to the sides of your fabric
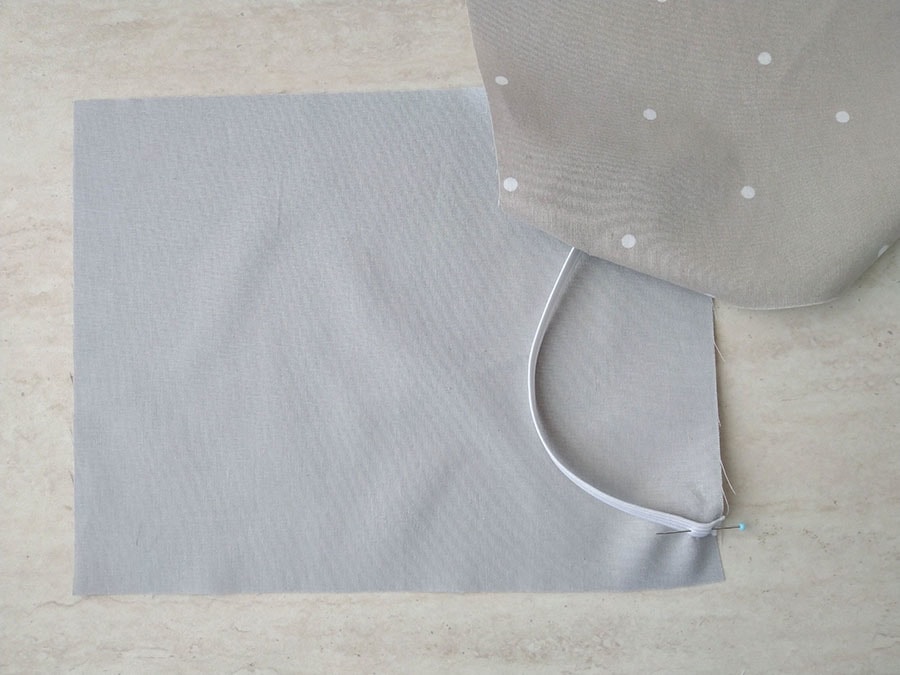 This step is quite straightforward. Simply place one piece of fabric on a flat surface. Then, pin the elastic to the short sides of your fabric. If you have clips – use them instead of pins. Sewing clips were a total game changer for me – they slide on and off so easily, don’t pierce the fabrics, and I know I won’t accidentally sew over them or prick my fingers.
Place one end at the top and the other end at the bottom. Remember to leave about 3/8 inches at the edge of the fabric.
Now turn your mask to the other side and repeat the same process.
STEP 2: Pin the fabrics together
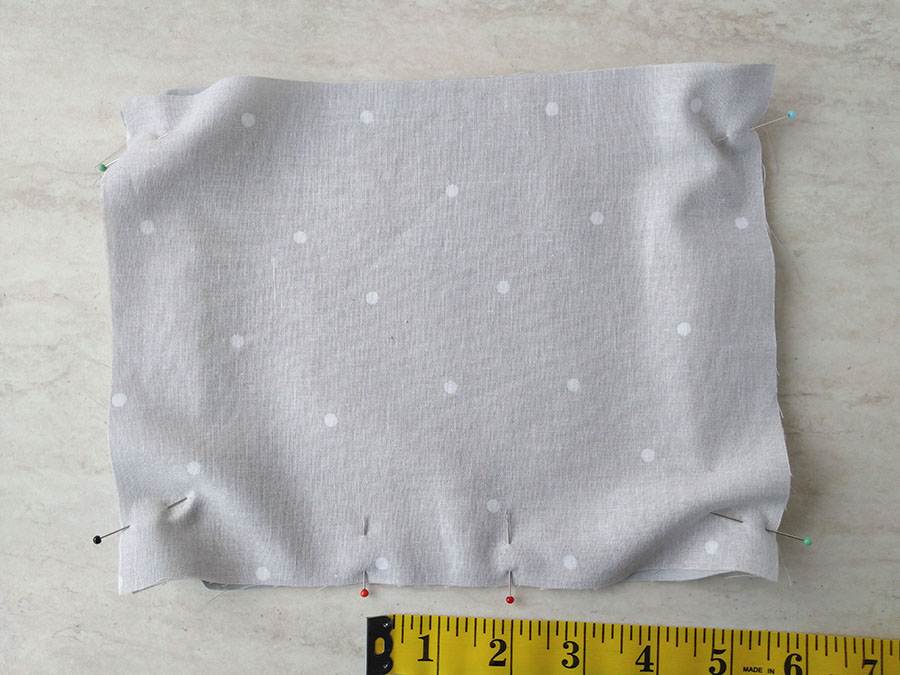
Next, place the second fabric with the pretty face down over the first fabric. Then, pin both sides together. Both pieces should have the pretty sides facing out because you will be pinning the elastic to the inner side. There should be a seam allowance of 3/8 inches at the top and bottom. Also, be sure to leave an opening of about 2 inches at the bottom.
Tip: Remember to keep the elastic inside when pinning the fabrics.
STEP 3: Sew your around the surgical face mask
 Now, starting from the opening at the bottom, sew around the entire face mask. Backstitch over the elastic so that it holds because there’s going to be a lot of tension around that area. Do not sew over the opening at the bottom because you will use that to turn the face mask inside out.
TIP: Remember to take out the pins just before you sew so that you don’t put a strain on your needles.
STEP 4: Turn the face mask around
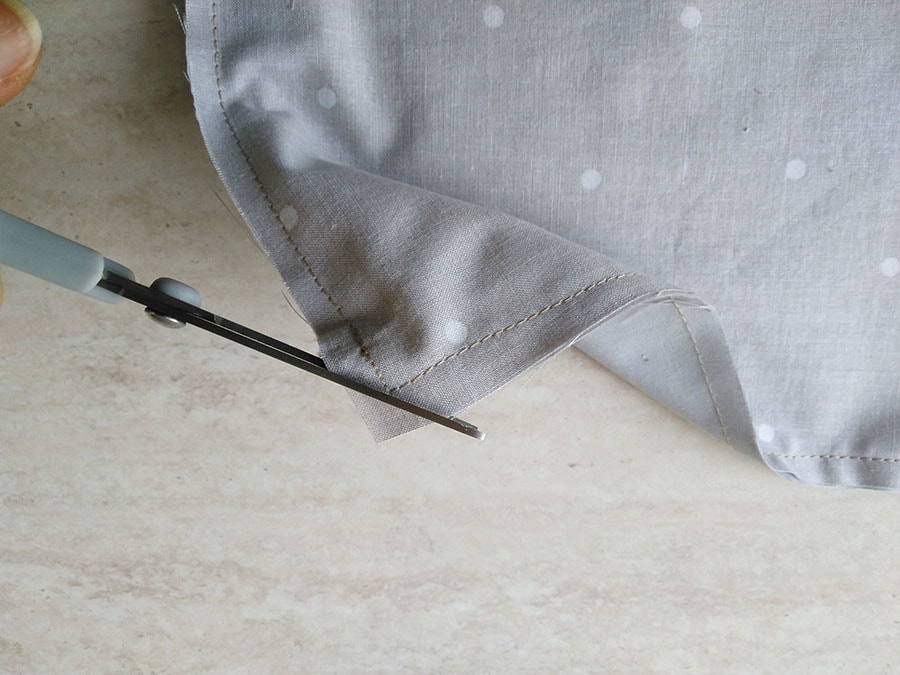 Before you turn the fabric, you could snip the corners to give your face mask a smoother feel. Be careful not to cut through your stitch line. Now, use the 2-inch opening at the bottom of the face mask to turn the right side up.
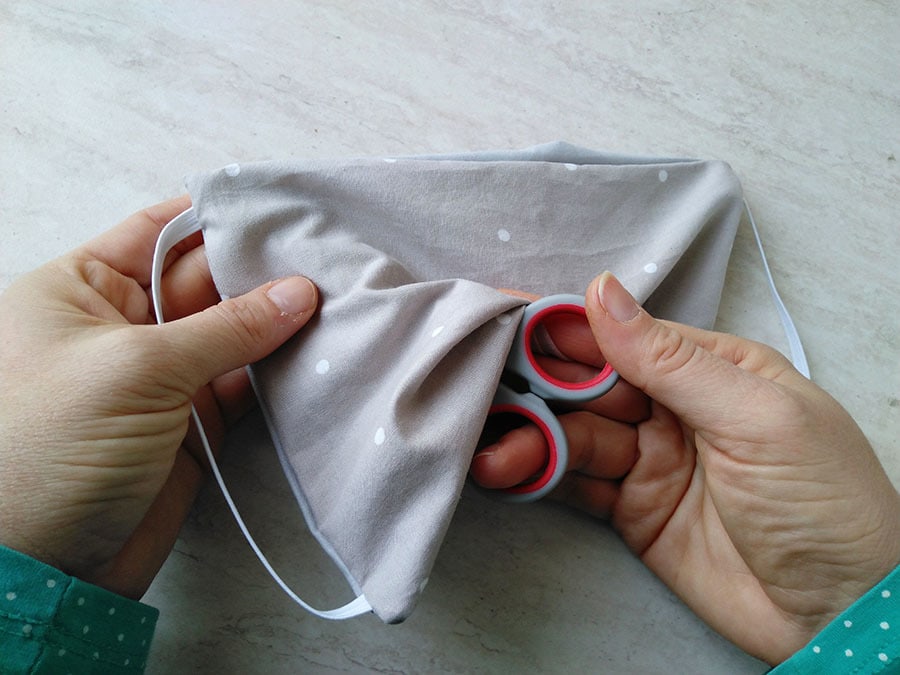
Use your fingers to push out the edges. If you still need to push them out a bit more, you can use a pointed object like the tip of the scissors. Be careful not to push too hard or you’ll tear through your sewing.
STEP 5: Fold and Press to create pleats
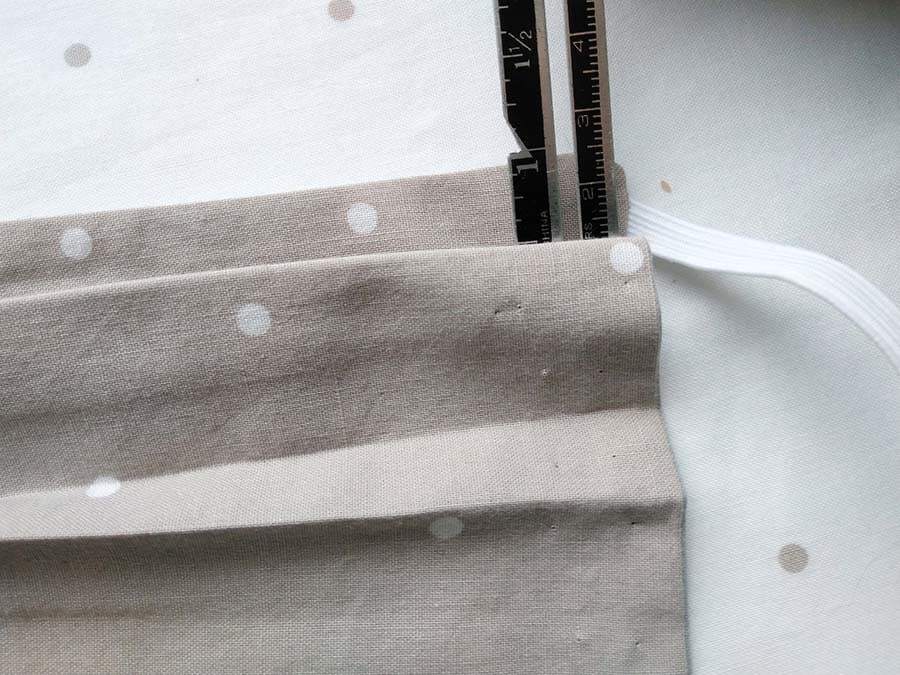 Use your hand to smooth out the face mask then press it so that it’s flat. Next, fold the face mask into three pleats. To create the pleats, first fold the mask in half, then press. Second, open the half and fold the top edge and the bottom edge to the middle and then press. Making three folds.
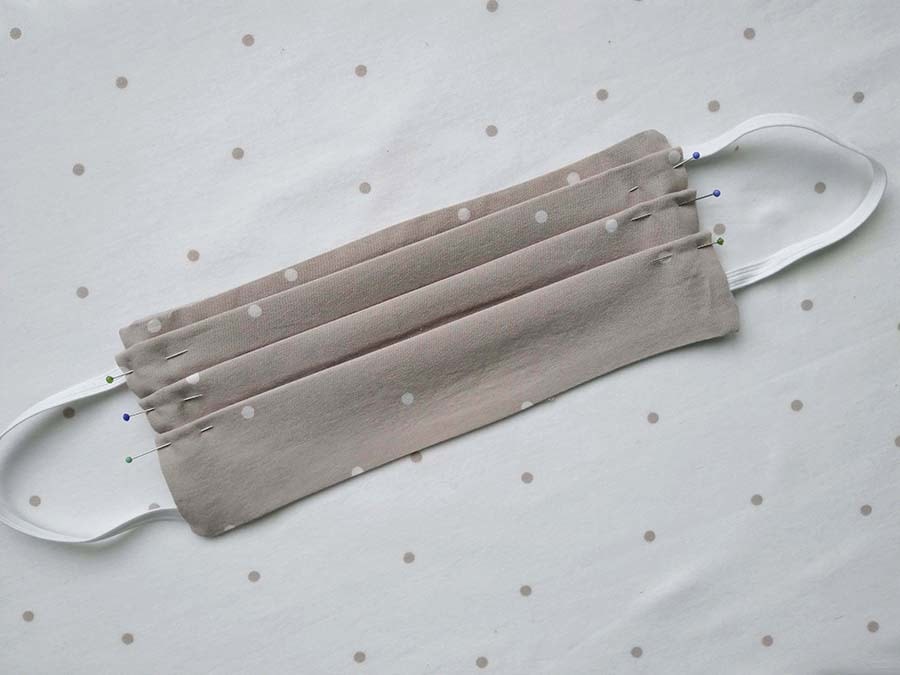 Third, pin or clip the folds until you have three pleats. Pin both ends and then, press again.
STEP 6: Topstitch
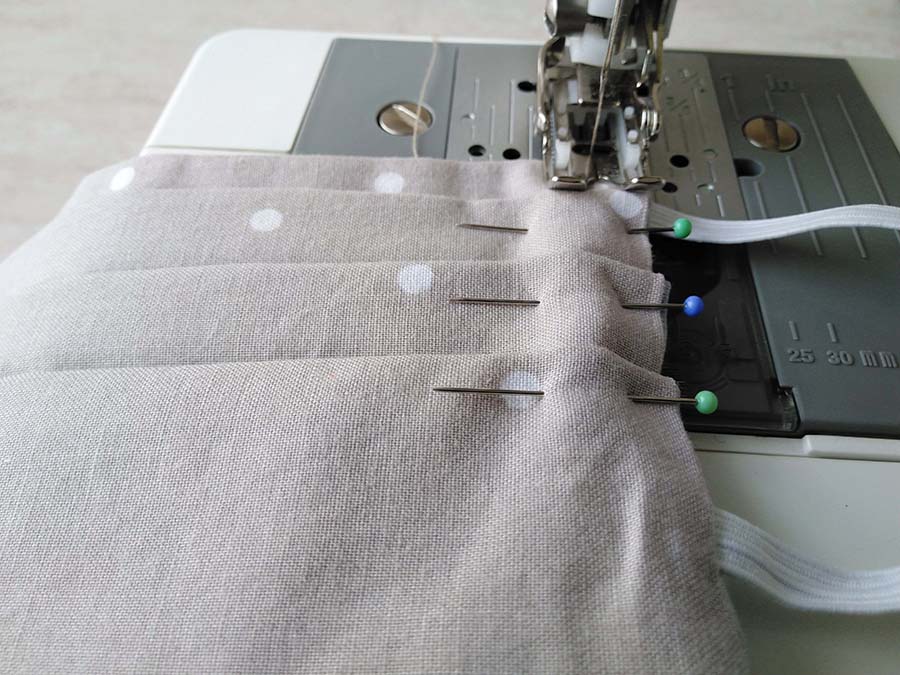 Next, topstitch around the mask, remembering to take out the pins or clips as you go around. This will also close up the opening at the bottom.
TIP: If you have a beginner sewing machine and it has troubles sewing over the pleats, consider using a walking foot attachment. It is exactly what I’m showing here, and it really helps making the pleats much easier. However, you should be just fine using a regular presser foot
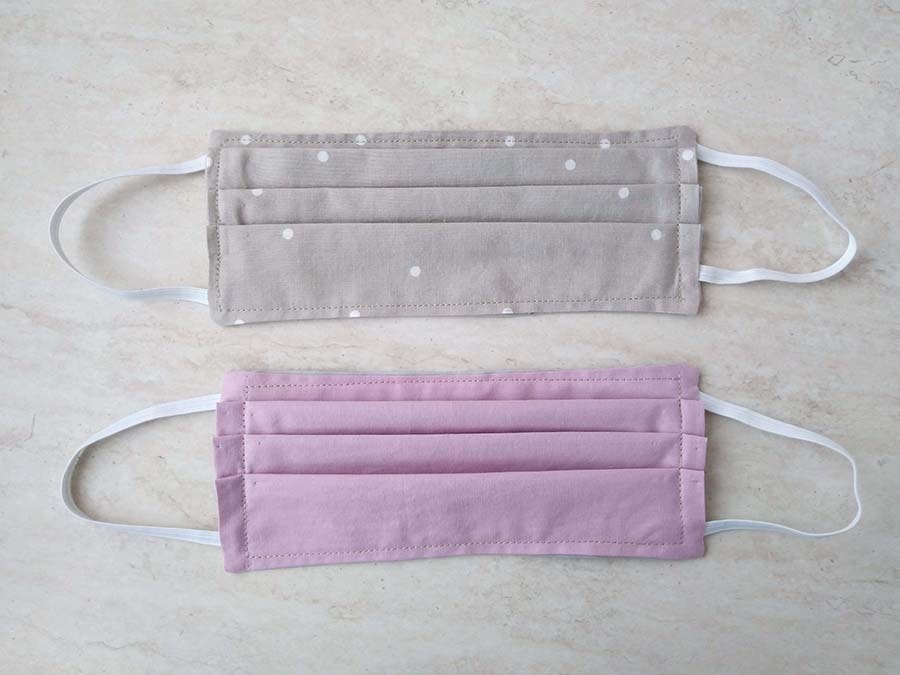
Voila! The surgical mask is ready!
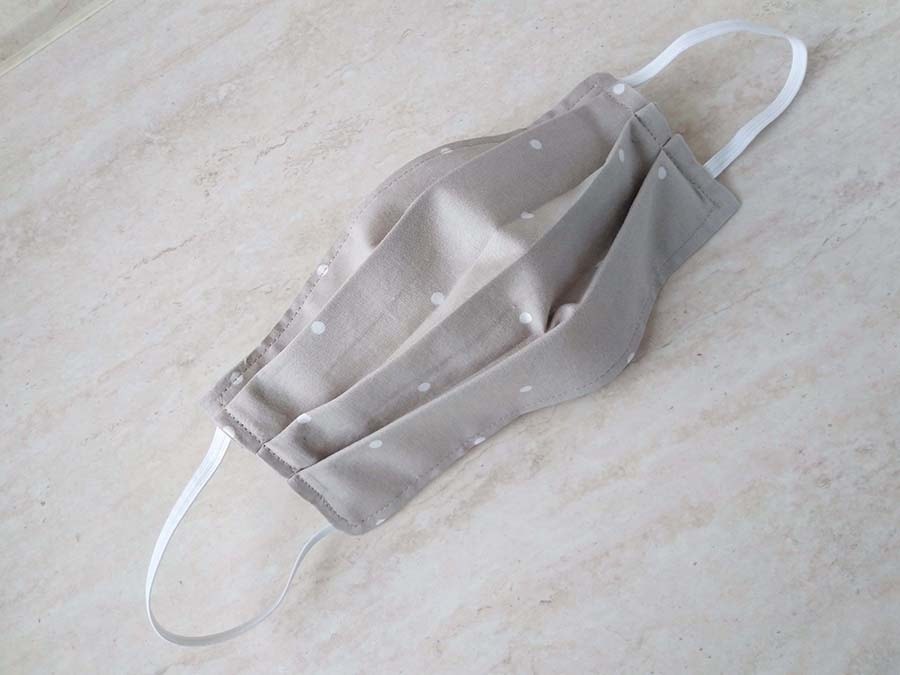
It is sooo easy to make, that you can make a bunch more to wear or donate them to others.
There are few tools/notions that can help make a bunch of masks faster and easier.
Many hospitals are in DIRE need of masks, so you can put your skills to good use and really make a difference.
FAQ and Troubleshooting Tips
Is this surgical face mask pattern suitable for a beginner?
This is a very simple pattern that is quite easy for beginners to make. There are several surgical face mask patterns all around, but this is one of the simplest.
It’s such an easy sew face mask that once you get the hang of it, you’ll be able to whip up one in 5 minutes or less!
Do I have to press the face mask?
Definitely. I understand that some people do not really like using their pressing irons, but in this case, you should. That way, your face mask will be neater and turn out much better. Plus you’ll need your iron to make the pleats (it’s the easiest way to make them) so there is almost no extra effort involved just to press it when finished.
What fabric should be used for homemade surgical face masks?
Basically, the recommendation is that you use a fabric that is 100% thickly woven cotton. Cambridge University shared a few recommendations about what fabrics work best when making a homemade face mask.
Additionally, if you are making masks to donate, before you start sewing, check the requirements of the hospitals /clinics or retirement homes in your area and see what they are accepting. You should also ask about the recommended fabrics as well.
Also, you might want to make a face mask that can fit a bendable nose wire. Why not check a simple pattern for that here.
RELATED:
- Fitted face mask with Filter Pocket insert and Bendable Nose Wire (w. FREE pattern)
- How to make a Flexible Nose Wire with just materials you have at home?
- Plastic Face Shield Tutorial with off-the-shelf materials
Do you like this? Pin for later:
Wanna be friends? Click HERE and follow me on Pinterest
WANT MORE?
Now that you’ve made the standard face mask and covered your bases, how about something more advanced? Our newest free DIY face mask pattern featured adjustable fabric ties, filter pocket and flexible nose piece. Check it out:
Find the full written instructions HEREOur FREE face mask patterns:
To conclude, these are tough times because of the COVID-19 pandemic. And, making surgical face masks for your local healthcare workers to help alleviate the current shortage of PPE is a great way to help your community.
So, why not give this surgical mask pattern a try and let us know how you do. Tell us, we’d love to hear from you!
Do you have any suggestions for improvements? Anything else you’d like to share?
Let us know in the comments
RELATED: