Skip to content
39

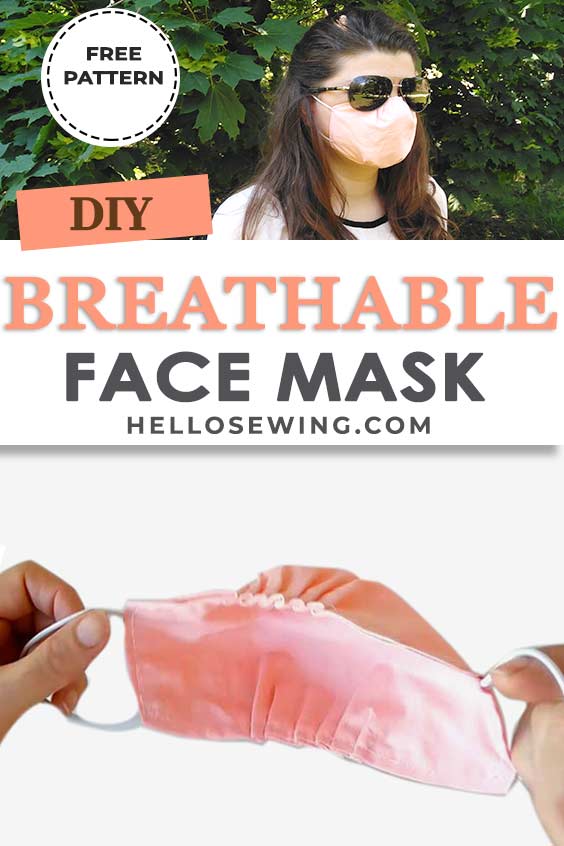
DIY Breathable Face Mask Tutorial to Stay Comfortable During Summer

Summer is already upon us and the hottest current trend are .. breathable face masks. Although they are certainly not the accessories we planned or expected on wearing this summer, this is the reality we have to accept and we’ll likely be rocking face masks during the hot summer days. The thing is face masks can feel a little bit more uncomfortable than usual during this time of the year. If you have to wear a mask – breathability is a must! This is why I came up with a solution that will hopefully help us breathe a bit more easily and feel a bit more comfortable – DIY breathable face mask for the summer!

Below you will find my step by step written tutorial how to make your own summer face mask from fabric with VIDEO instructions for all the visual learners.

We occasionally link to goods offered by vendors to help the reader find relevant products. Some of the links may be affiliate meaning we earn a small commission if an item is purchased.

How to make breathable face mask

Supplies and tools

DOWNLOAD: Breathable face mask pattern (Free PDF file)

Follow us for free patterns & tutorials!

How To Sew a DIY breathable face mask

Watch my newest summer face mask video first and then follow the written step by step instructions below.
Please enjoy and don’t forget to Like and SUBSCRIBE over on YouTube to be kept up to date with new videos as they come out.

Breathable Face mask VIDEO TUTORIAL

INSTRUCTIONS:

STEP 1: Download and print the pattern

Make sure you print the pattern at actual size (no scaling) on either US letter paper or A4 paper. Measure the  test box/line to make sure it printed correctly. Cut it out.
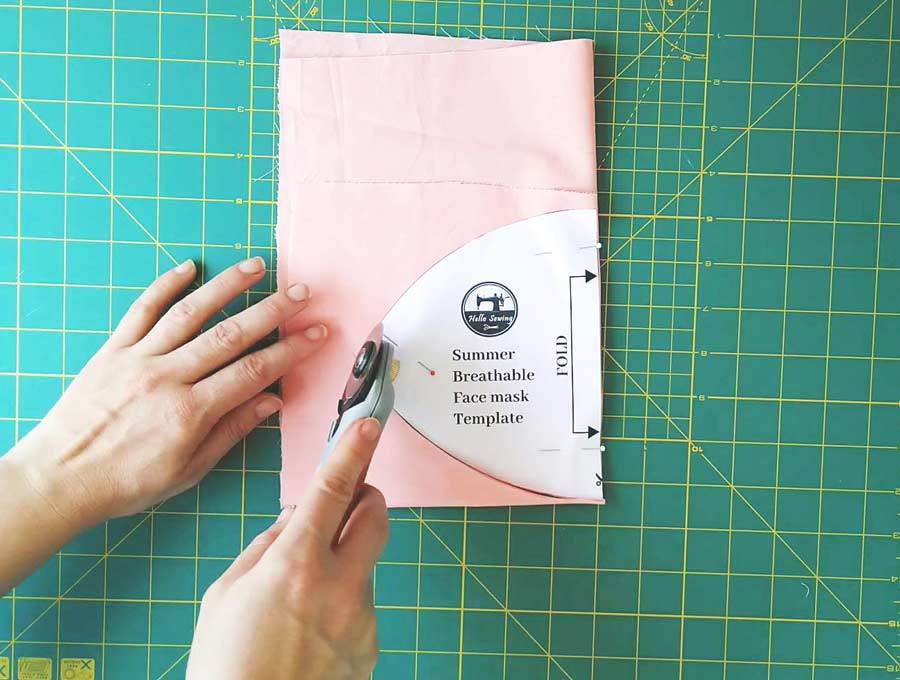
STEP 2: Cut fabric

Fold your fabric twice – once lengthwise and once width-wise so that it can accommodate the pattern on fold. Place the pattern on fold (you will have four layers of fabric at this point) and cut it out. You should have two pieces for your mask.

STEP 3: Pin

Place the fabric pieces with right (pretty) sides together and pin them either using pins or clips.

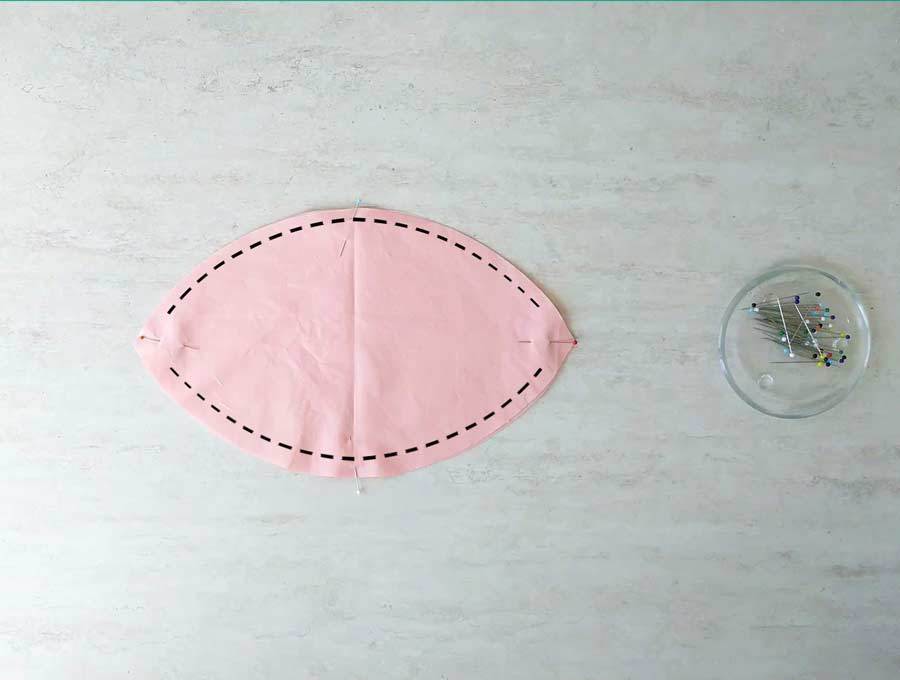
STEP 4: Stitch around

Stitch along the top and bottom edges using a 1/4″ seam allowance, leaving about 2 inches from each end unsewn. Backstitch at the beginning and end of each of the seams to make sure your stitching won’t come undone.

STEP 5: Clip the seam allowance

Clip around the mask, making sure not to snip through your stitching. This will allow the face mask to lay flat and will reduce the bulk at the seams.

STEP 6: Turn around

Turn the mask inside out through one of the side openings. Use something pointy like your scissors or a chopstick to smooth out the edge by pushing out the curved seam. Don’t use something that is too sharp or you’ll poke through the seams. Now give it a good press. Tuck in the side seams.
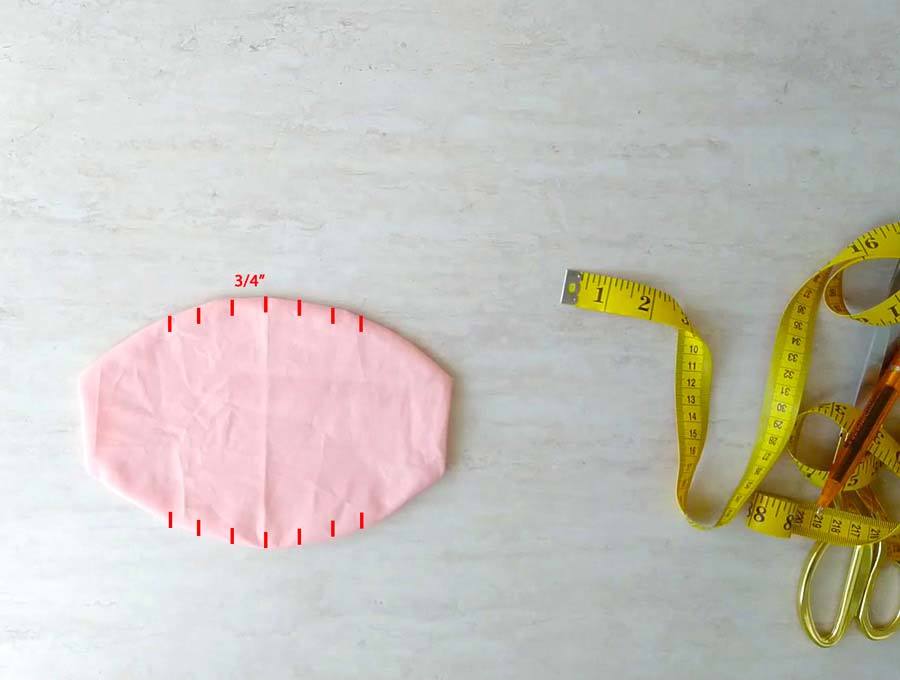
STEP 7: Mark pleats

Fold the mask in two and mark the center of the top and bottom curve. Unfold the mask and make 3 marks on each side of the top seam, 3/4 inches apart. Repeat for the bottom side. You should have 7 markings on top and 7 on the bottom. These mark the position of the pleats.

STEP 8: Make pleats

Fold the fabric between first two marks so that it makes a small pleat. Pin in place and repeat 5 more times for the top curve. Repeat for the opposite side, making sure both top and bottom pleats follow the same direction.

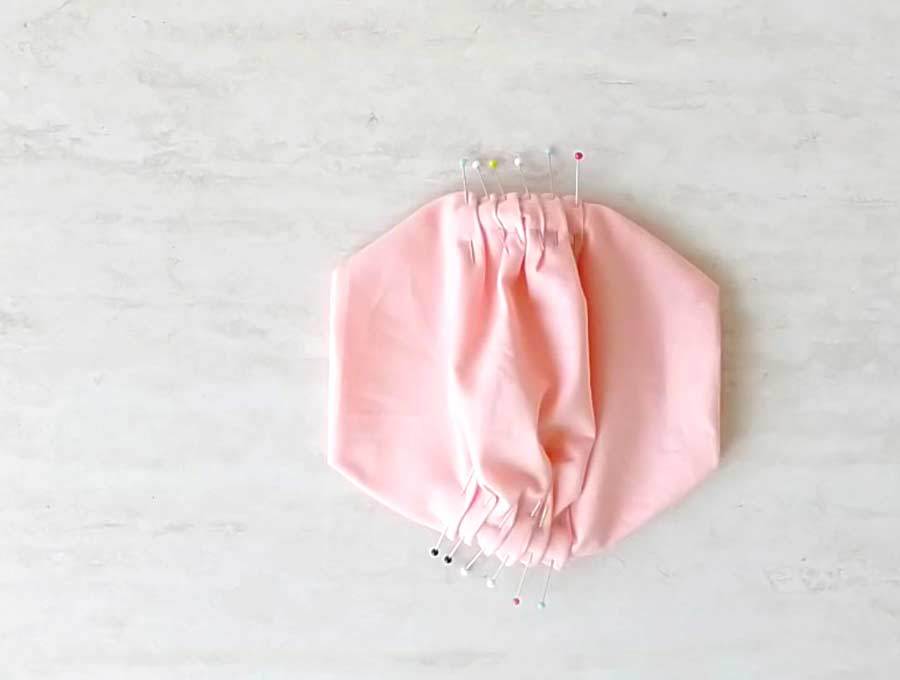
STEP 9: Sew around the mask

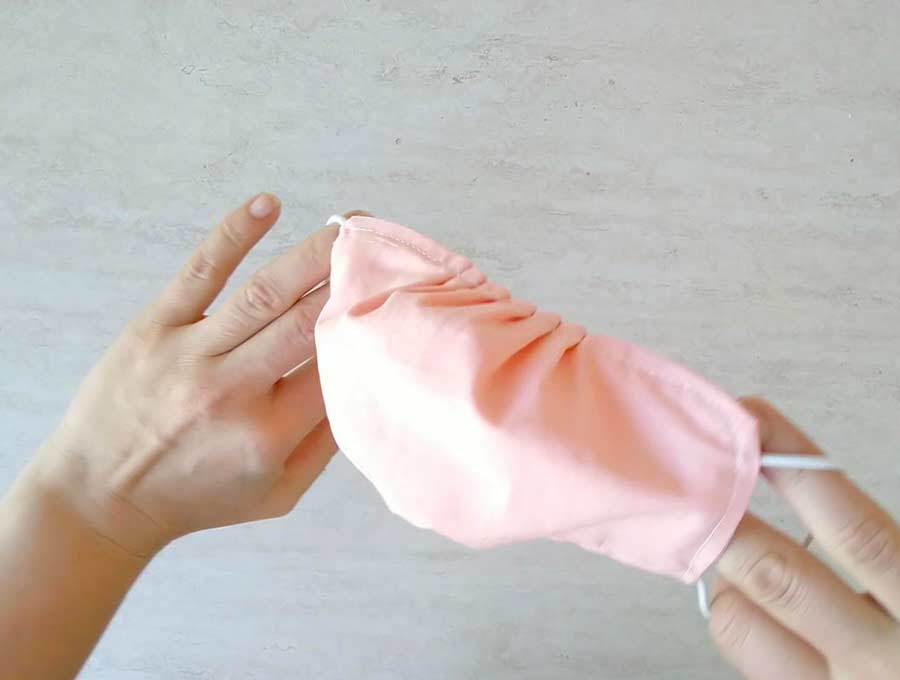
Starting from the top edge, slowly sew around the mask using a 1/4″ seam allowance, catching the pleats. When you reach the end of the top curve stop and insert both ends of the elastic through the side opening. Sew the elastic in place, closing the side opening. Repeat for the opposite sides.

Remove the pins as you go

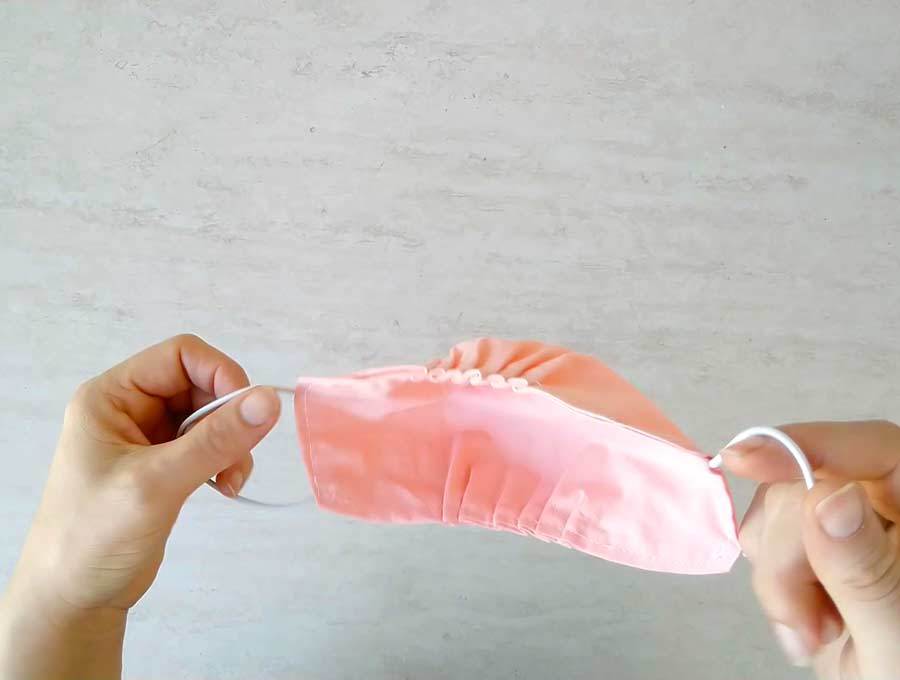
That’s it your breathable face mask is ready! Try it on and rock it with style!

Remember – you need to follow all current CDC recommendations for wearing and washing your face coverings as well as limiting the spread of the COVID 19 (coronavirus.)

Stay safe, healthy and hopefully comfortable and cool during the summer!

Do you like this? Pin for later:

Wanna be friends? Click HERE and follow me on Pinterest

RELATED:

Click Here to Leave a Comment Below 39 comments
Nancy Oliver - June 25, 2020

I work for a large medical organization and regular fabric masks do not provide any protection against viruses. Medical use of masks requires a certain amount of filtering for parts per million. The trend of fabric masks gives people a false sense of security.

Reply
    Helen - June 29, 2020

    Thank you for your comment, Nancy.
    Cloth face coverings recommended by CDC as covid can be spread by people who do not have symptoms and don’t know they are infected.

    Reply
Yvonne Chase - June 26, 2020

This post is so timely because just yesterday I said with Covid19 and the heat on the rise, how on earth will we make it through summer wearing masks and here you are with the solution; breathable masks. I can sew a little and this looks easy enough so I’ll give it a try. Thanks

Reply
    Helen - June 29, 2020

    Thank you, Yvonne. As the temperatures rise, I wanted to make sure I have a face mask that keeps me comfortable. Hope you’ll find it as comfortable as I do

    Reply
Donna Reidland - June 26, 2020

Since it looks like masks will be around for a while, I think we’ll all be looking for more comfortable ones for the summer. Thanks for sharing.

Reply
    Helen - June 29, 2020

    This is my new favorite model. It makes breathing much easier

    Reply
Deborah Davis - June 27, 2020

Thank you for sharing this DIY face mask tutorial. I hopped over from Traffic Jam Weekend and I am so glad I did. I have felt that my black cotton face mask was too hot for the summer so this mask will com in handy.

Reply
    Helen - June 29, 2020

    Thank you, Deborah! I’m so glad you find this useful!

    Reply
Shelbee on the Edge - June 27, 2020

This is so great especially for those who are getting anxious wearing face covers. Thanks for sharing and linking up.

Shelbee
http://www.shelbeeontheedge.com

Reply
    Helen - June 29, 2020

    I definitely find it easier to breath when wearing this model! Thanks for stopping by!

    Reply
Gale Leitch - June 28, 2020

You don’t mention the seam allowance. I assume it’s 1/4 inch. Is that correct? Perhaps you can put a dotted line on your pattern template. I create all my patterns in Adobe Illustrator. It’s so easy to create professional patterns in Adobe Illustrator if you have technical expertise in it.

Reply
    Helen - June 29, 2020

    Yes you are correct, it’s 1/4″. Thanks for the heads up – I’ll add it to the pattern

    Reply
Michelle - June 30, 2020

I love this idea! I’m pinning this, and featuring it on this week’s Creative Compulsions.

Michelle
https://mybijoulifeonline.com

Reply
    Helen - July 8, 2020

    Thanks for the feature, Michelle! I shared your articles with my followers on social media

    Reply
Lydia F - June 30, 2020

This looks like a pattern I will try soon. I am already tired of the mask sucking to my face when I wear it.

Reply
Antionette Blake - July 1, 2020

Thank you for sharing this DIY tutorial at the #TrafficJamWeekend Linky Party.

Reply
    Helen - July 2, 2020

    Thanks for commenting and hosting, Antionette!

    Reply
nancy - July 1, 2020

I would insert the elastic before sewing, between the layers and sew it together at the ends, leaving an opening towards one end for turning. Just make sure not to catch the elastic in the seams anywhere else but whee they attach. That way you have only one opening to deal with and the elastic is sewn on securely.

Reply
    Helen - July 8, 2020

    Thanks for sharing your idea. You can definitely do it either way.
    I would just sew over the sides twice if I’m worried the seams won’t stand to frequent washing or pulling.

    Reply
frugal hausfrau - July 3, 2020

I love the visuals, and love that this is breathable and has great coverage!! Thanks for sharing at Fiesta Friday this week!

Mollie

Reply
    Helen - July 8, 2020

    Indeed it is! Thanks for dropping by

    Reply
Karren Haller - July 6, 2020

Thank you for sharing your travel pillow, I decided to check out your mask pattern, I have tried so many and have sewn over 400 for charity, but really need on I can breathe through and this looks fun, I have not seen one with pleats on top and bottom. Good idea!! Just printed!!

Have a great week! Be sure to stop by later to share your blog again on #OMHGWW

Reply
    Helen - July 7, 2020

    Thank you, Karren. Hope you’ll like it. I love and use this one very often now as it is so hot and humid

    Reply
Diane - July 11, 2020

Hi I m lookin forward to trying this pattern. In response to the comment by the nurse. I am also a nurse. I obtained filter material that ups the filtration on the mask. It is supposed to be N95. In this mask I would just use the filters as another layer sewn in. It is capable of being wash many times. I would leave it out of the dryer and just air dry it. But this would help the mask be more effective. The filter material came from FILTI . They are a filter company that specializes in filter material for homes and businesses. I dont know for sure that it is N95 Capable. Just do your research.

Reply
Susan - July 11, 2020

My granddaughter cut about a 32-34″ length of elastic, and fed the single piece of elastic thru both ends of mask, resulting in 2 sections of elastic long enough to go around the head (and sit on two different parts of head). She knotted the elastic and pulled the knotted part inside the fabric so it didn’t show, but could be adjusted smaller or larger.

Hoping this makes sense. I loved the idea as I have hearing aids AND glasses and don’t need anything else wrapped around my ears! Also every time I took off a regular face mask, the hearing aid part that sits behind my ear was pulled away by the elastic.

Additionally the head sections can be adjusted for head shape and comfort, just by adjusting the elastic at the knotted part.

Much easer than tying two separate sets of ties in the back of head.

Reply
    Helen - July 12, 2020

    Thank you for sharing that this actually works with hearing aids. I’m glad it works so well for you.
    You have an amazing granddaughter!

    Reply
Lori - July 14, 2020

Thank you so much for sharing your pattern and time.

Reply
    Helen - July 15, 2020

    Thank you! Glad you liked it

    Reply
Henry - July 15, 2020

Randomly came across this searching for masks, showed it to my girlfriend who has been making masks for her friends and she says this is one of the best tutorials she’s seen! Thanks for helping her find more reasons to use her new sewing machine 🙂

Reply
Natalie - August 12, 2020

Thank you so much for sharing this pattern! I was wondering if you could answer why the ends on the pattern are pointed, since you end up tucking the “point” inside to make a straight edge (where the ties attach). I was finding this confusing because I wasn’t sure how much to tuck in at the sides. Thank you!

Reply
    Helen - August 12, 2020

    I left them on purpose because some people like more coverage on the sides while others have smaller faces and want to tuck in a bit more. Since this is one size fits most pattern, leaving them like that helps with the fit.
    On the other hand this allows people without a printer to easily replicate the pattern using a plate.

    Reply
Kathleen - September 25, 2020

I love this mask! I’ve made so many for family and friends and got nothing but positive feedback from them. My question is about kid’s mask. I have to make masks for 6-8 year olds and 3-4 year olds. Any suggestions about reducing the pattern size when I print it out? Also what size elastic should I used. Unfortunately, I don’t have these age groups around to try them on.
Thank you for sharing this wonderful mask!
Sincerely,
Kathleen

Reply
    Helen - September 25, 2020

    Hi Kathleen, I’m thrilled to hear that! I’d love it if you share the tutorial with your friends on social.
    Unfortunately I have not tested this design on kids and that’s why I have not added a kids version. If you had the kids around you I would suggest to reduce the pattern to about 85% and adjust from there, but in your case you’d better go with another design. I have plenty of masks designed for kids. Have you seen my 3d mask (also very breathable) or the kids face mask.
    You’ll find the links to both masks at the bottom of this article. Hope that helps!

    Reply
      Kathleen - September 28, 2020

      Thank you for getting back to me. I will try your kid’s mask! Kathleen

      Reply
Alice - January 6, 2021

Hi. I printed the pattern of the Summer Breathable Face Mask and the scale measures
1 and 1/2″ not 2″. What can I do? I love your website, there are so many things on it to do. Can you help me?

Reply
    Helen - January 6, 2021

    Hi Alice, thank you so much for your kind words! I hope you stick around, I have many cool things coming up
    As for the pattern – first of all make sure you are not printing from the browser, as sometimes this is causing issues. Download the file from your email or click the download button (top right) and open the file with adobe reader or a similar program, and print from there.
    Before you print – check your settings – make sure it’s not scaled in any way. It must be printed on a 100% (or no scaling) on a US letter or A4 paper.
    Hope that helps! Let me know how it goes!

    Reply
Sue - March 3, 2021

Hi,
I want to try this mask because it looks really easy and I could make many in a day. I have a question though, since there are pleats at the top, does this eliminate the need for a nose wire?
Thank you!
Sue

Reply
    Helen - March 4, 2021

    Hi Sue, depends what you want to accomplish.
    I’ve designed this mask to be worn without a nose wire. It’s not a super tight fit. I think you *may* add a nose wire under the pleats on the top or choose to try any or my other 13 designs. The 3d mask for example is really popular

    Reply
Nanci - August 15, 2021

Well….here we are, back to wearing masks. But, at least I have this simple, comfy mask to make and wear. Love this patten..after trying at least 8 different patterns last spring, I happened on this one and now it’s the only one I use. Made dozens for myself, family and friends. I like how I can be custom fitted by sewing more or less pleats. Thanks you and be safe!

Reply

Leave a Reply:

Send this to a friend