
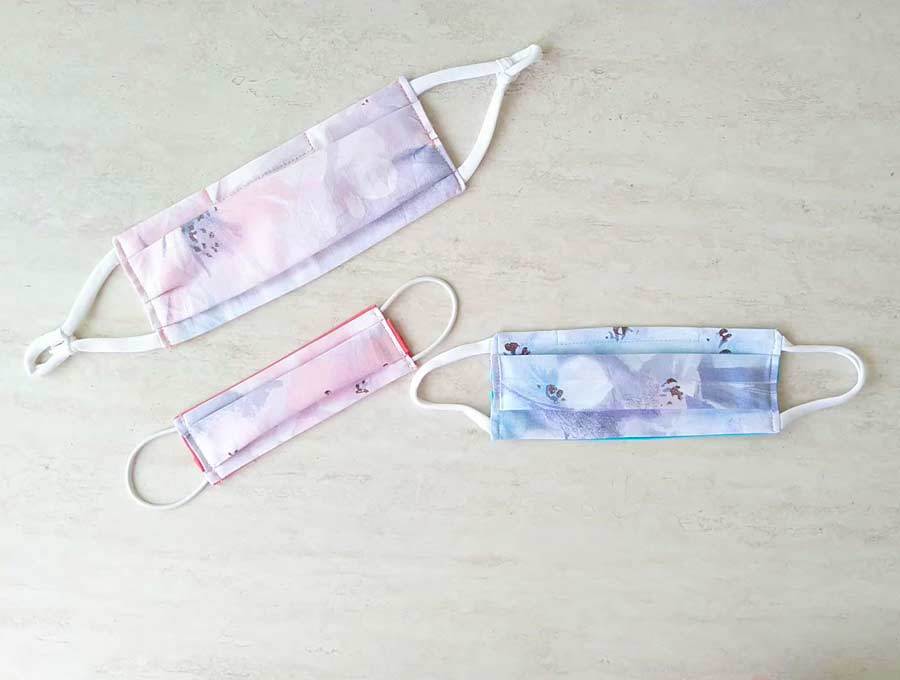
DIY Kids Face Mask Template + Free VIDEO tutorial
I had many readers reaching out and asking for a child face mask pattern. Although we have many patterns for all ages, we clearly needed a post dedicated to kids masks. With schools opening soon, many parents want to make child face mask for their kids, just in case. This mask I’m about to show you is easy to make, it doesn’t require a lot of time, and it doesn’t feel uncomfortable on a child’s face. And your kids will surely want to wear them because you are also wearing them. That’s what mine thought. All you have to do is just follow this kids face mask sewing tutorial and you’ll be finished in no time.
Below you will find my step by step written tutorial with VIDEO instructions how to make face mask for kids in just 10 minutes.
We occasionally link to goods offered by vendors to help the reader find relevant products. Some of the links may be affiliate meaning we earn a small commission if an item is purchased.
Table of Contents
How to make kids face mask
Supplies and tools
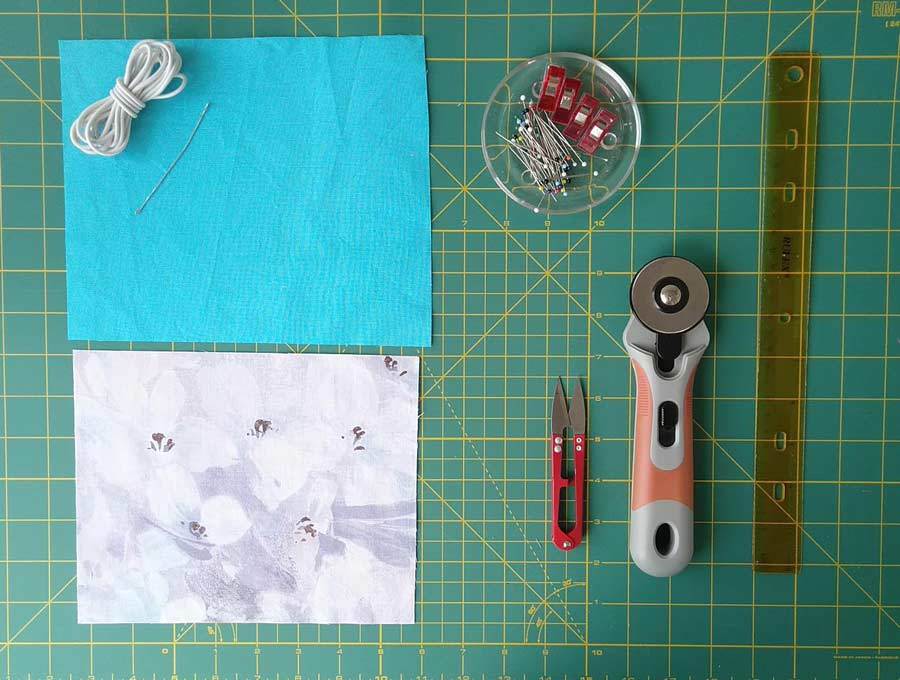
- fabric – 2 pieces of 100% tightly woven cotton (one main, one lining)
- 1/16″ round elastic (preferable) or 1/8″ flat elastic – 2 x 5-7″ long
- matching thread thread
- scissors (or rotary cutter and a cutting mat)
- ruler or measuring tape
- iron and ironing board
- sewing clips or pins
- sewing machine (it’s an easy sew, even a child sewing machine or a mini stitching machine can handle this)
- nose wire (optional)
Follow us for free patterns & tutorials! [easy-profiles]
How to make homemade face masks for kids
Watch the diy child mask video first and then follow the written step by step instructions below.
Please enjoy and don’t forget to Like and SUBSCRIBE over on YouTube to be kept up to date with new videos as they come out.
KIDS FACE MASK VIDEO TUTORIAL
INSTRUCTIONS:
Prepare the fabric
The first thing you should do is thoroughly wash the fabric and iron it well. You might already know this, but doing so will prevent the fabric from deforming after you have finished sewing it. You don’t want the mask to shrink after you wash it for the first time, right?
It’s wise to do this at the beginning of any sewing project, to prevent deformation or shrinkage of the fabric.
STEP 1: Cut the fabric and elastic
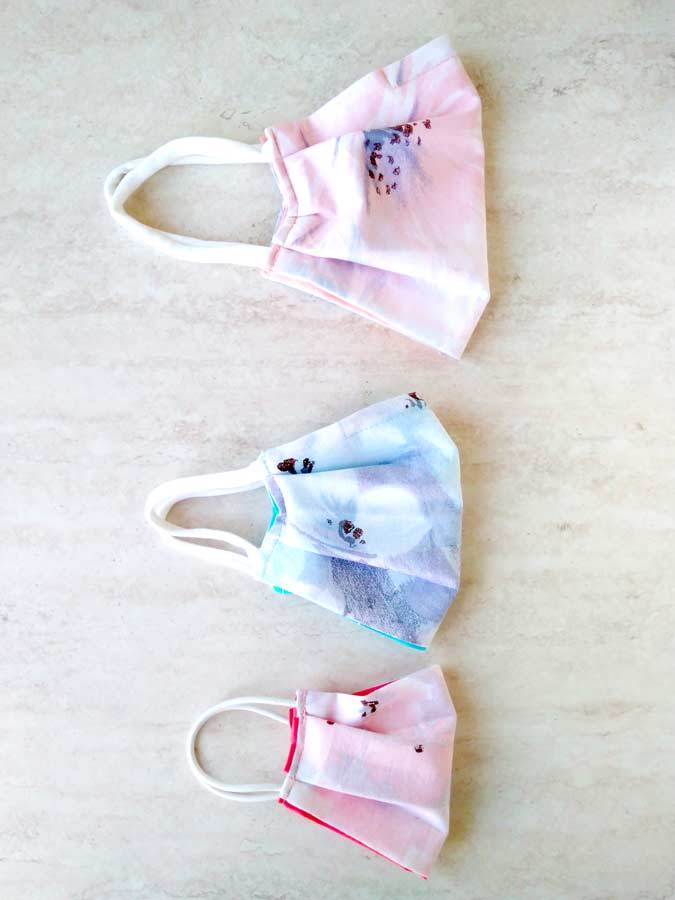
You will need two fabric pieces – one main and one lining depending on the size you want. We have three sizes: toddler face mask, big child face mask and teen face mask.

KIDS FACE MASK SIZES
size S (2-4 years):
fabric: cut 2 pieces 4 x 6″
elastic: 2 x 5 ”
size M (4-12 years):
fabric: cut 2 pieces 5 x 7″
elastic: 2 x 6″
size L (teens)
fabric: cut 2 pieces 6 x 8″
elastic: 2 x 7 inches
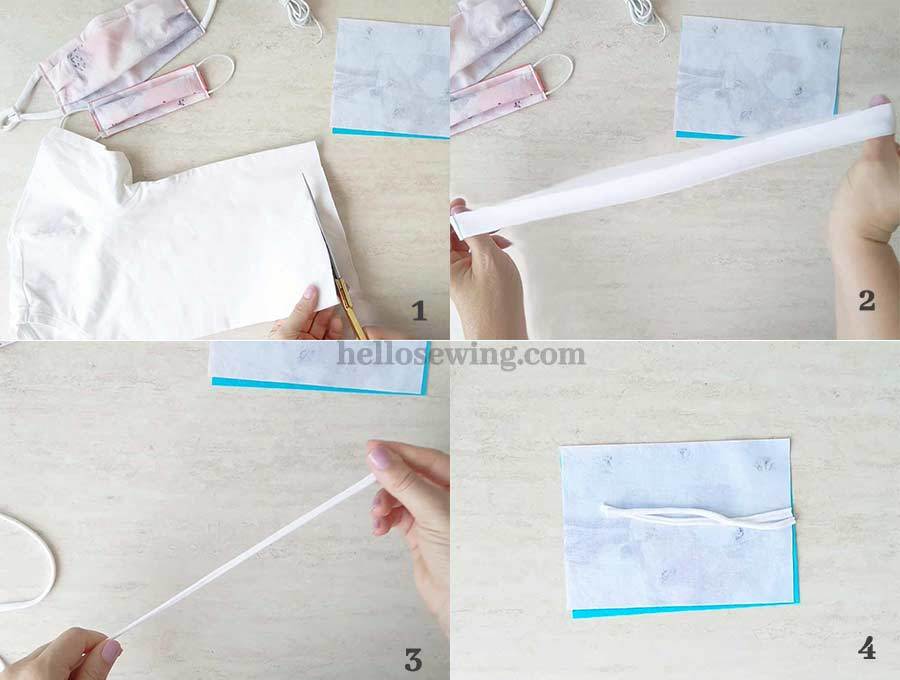
You will also need two ties. If you don’t have or don’t want to use elastic, you can cut up an old t-shirt and make t-shirt ties. I’ll show you how in the next step
STEP 2: (optional) T-shirt ties
Making t-shirt ties is super easy and a great use of old t-shirts. Cut 1″ strip of t-shirt material. Pull the strip to stretch and curl. Cut ties to desired size.
TIP: You can cut your tshirt either horizontally or vertically. If you t-shirt is solid colored it does not really matter which way you’ll cut. However if you cut it horizontally, it will curl with the wrong sidefacing up, if you cut it vertically, the right side will be showing.
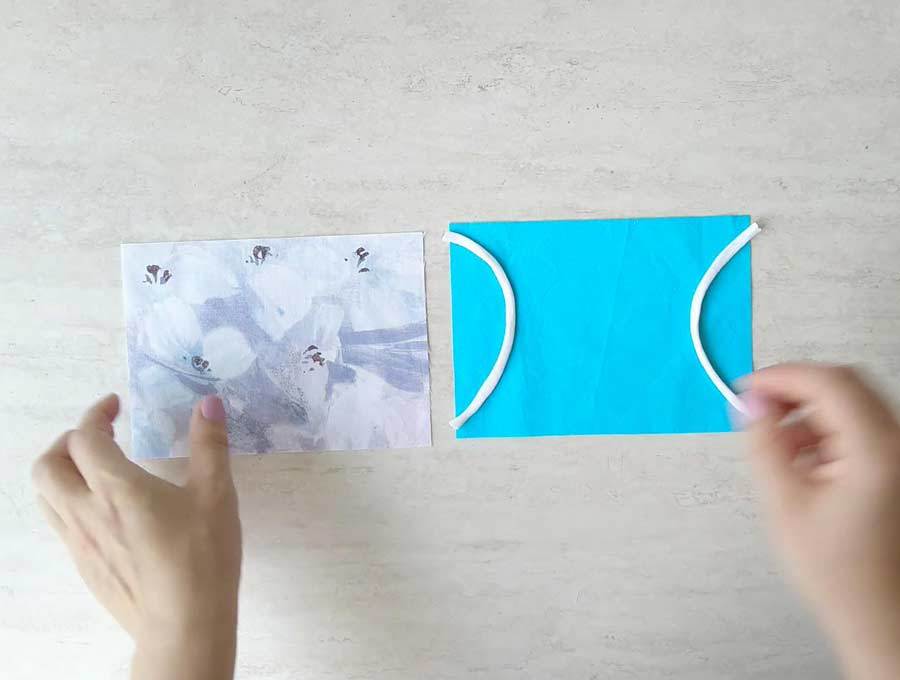
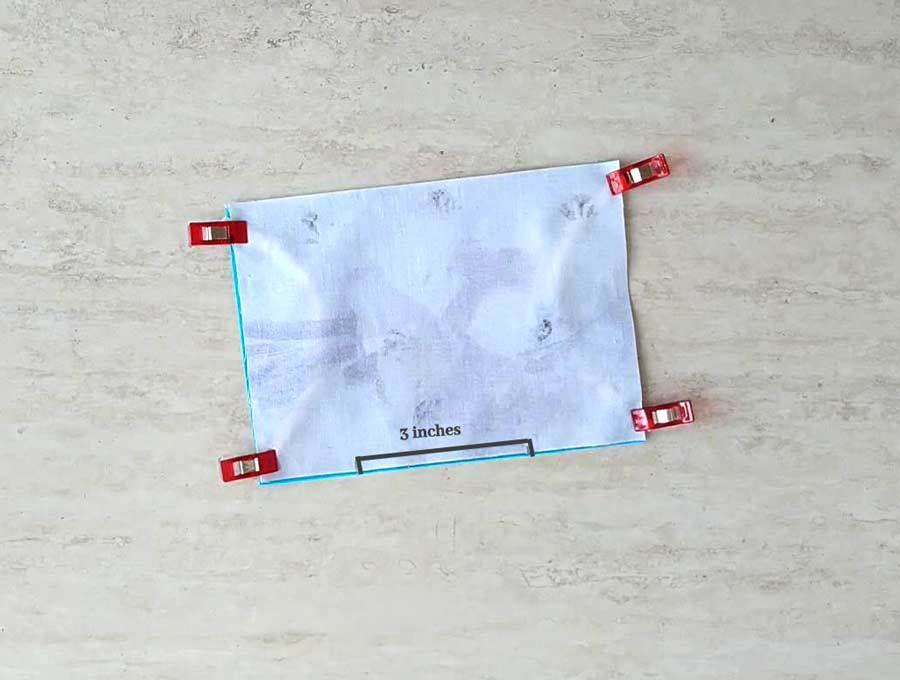
STEP 3: Layering the mask
Place the one of the fabric pieces with right side facing up. Place the ties/elastic on the short edges 1/2 inch from top and bottom. Place the other fabric piece on top with the right side facing down and pin everything.
Mark a 3 inch opening for filter along the bottom of the mask.
STEP 4: Sew
Sew around the mask using a 1/4 inch seam allowance, leaving the opening unstitched. Backstitch over the ties to reinforce the stitching and prevent in from coming undone.
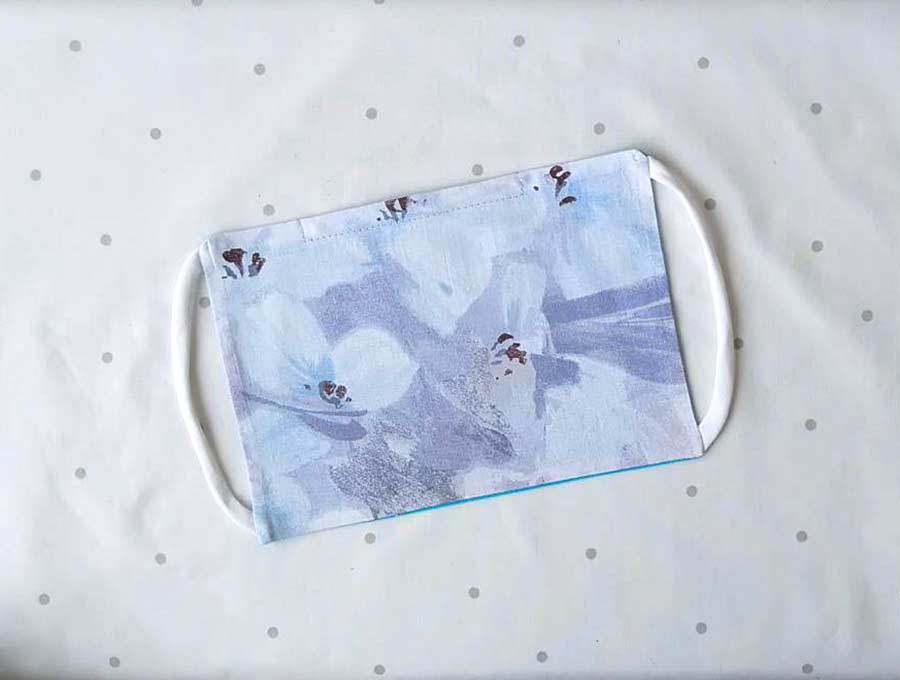
Turn it right side out and press
STEP 5: (optional) Nose wire piece
This step is completely optional, but if you want the closest fit, having a nose wire to fit around the nose is a good idea. Take a 4 inch wire and curl the edges a bit so that they don’t poke through the fabric. Insert it trough the opening and push it to the top of the mask. Make sure it is centered, stitch carefully around the nose wire.
STEP 6: Making the box pleats
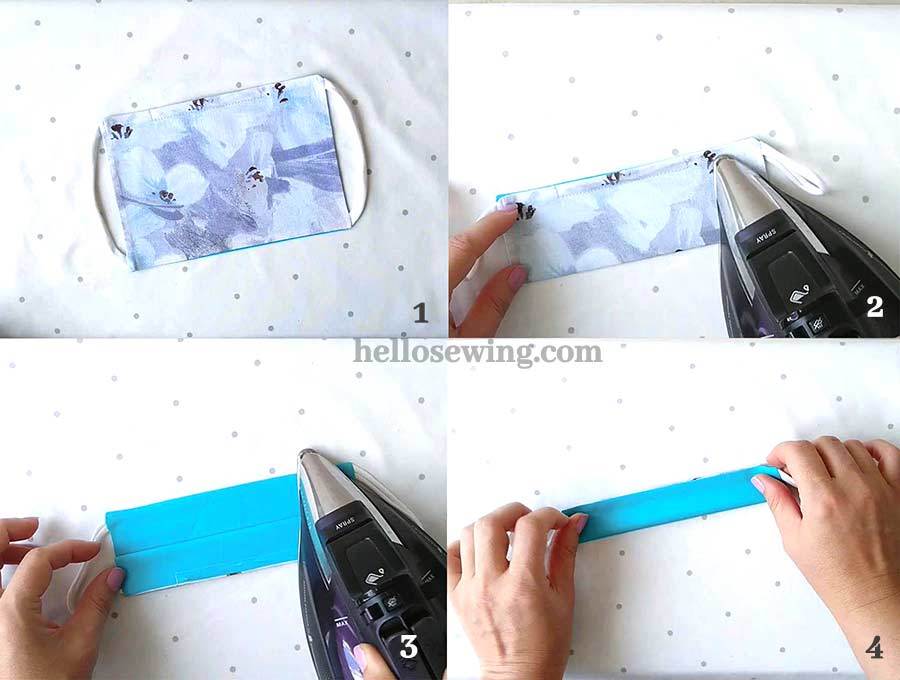
Most face masks have a few folds so that they don’t slide off your face as you talk while wearing it. This kids face mask pattern has them as well. To make them, first lay the mask so that the short edges are on the left and the right. Make sure that the front of the mask on the outside and that the main fabric is facing down.
Fold the mask in half lenghtwise and press with an iron to create a crease. Fold again one of the edges to meet the crease
you’ve just created. Press again. Flip the mask over and fold the opposite edge to meed the middle crease. Press one last time.
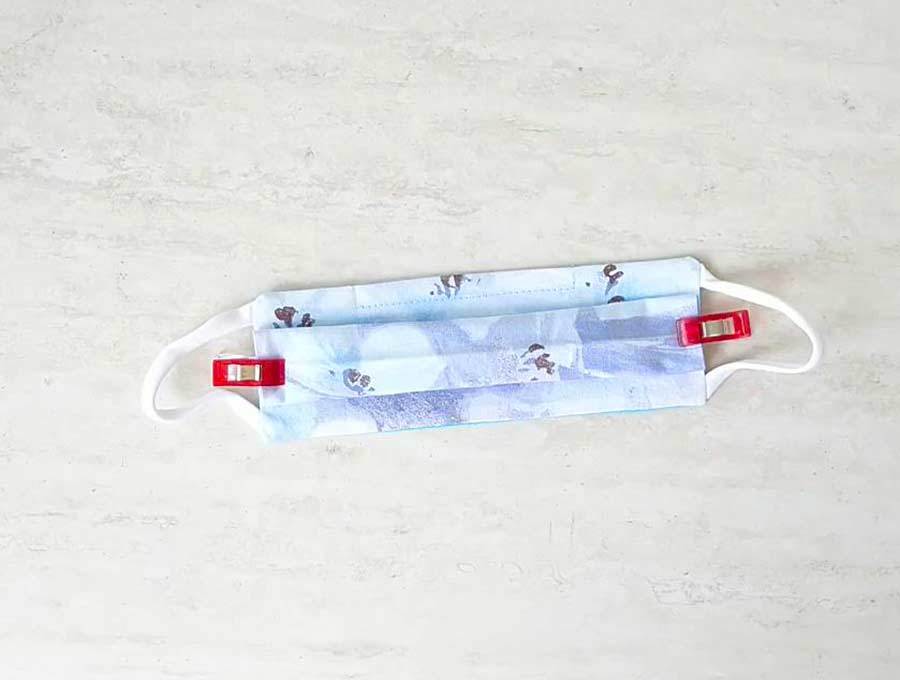
Unfold the mask with the lining facing you – you will see the three creases you’ve just made. Going from the top down meet the top crease and the middle crease. Repeat from the bottom up and meet the bottom crease with the middle crease. Pin. Repeat for the other side.

Congrats you’ve just made a box pleat!
STEP 7: Sew the pleats
Sew both short sides using a 1/4 inch seam allowance. Don’t forget the backstitch at the beginning and the end. If you want the mask to be extra strong stitch the sides twice.
Give it one final press and …
Your DIY kids face mask is now complete!
I hope you liked this tutorial and that you consider it useful. Share your thoughts about it in the comment section below and let us know what you think. If you know a different or better child face mask pattern, do tell us! Stay safe and responsible, and make a good example for your kids!
Do you like this? Pin for later:

Wanna be friends? Click HERE and follow me on Pinterest
RELATED:
- Face mask template
- 3d mask pattern and tutorial
- reverse nose fold face mask for glasses
- Kids face mask template
- Breathable mask pattern
- Gaiter face mask (12 different ways to style it!)
- Face mask WITHOUT sewing machine (Video tutorial)
- DIY Scarf face mask
- Best fitting face mask
- DIY cloth facemask with fabric ties (pleated)
- How to make surgical face mask with elastic ear loops
- Face mask without elastic (No elastic model, around the head ties – great for medical staff)
- Nose wire stay
- Ear guard for nurses and doctors
- Scrub cap pattern (unisex model with ties)
- How to make a plastic face shield
- DIY reusable face shield with cute bow tie