
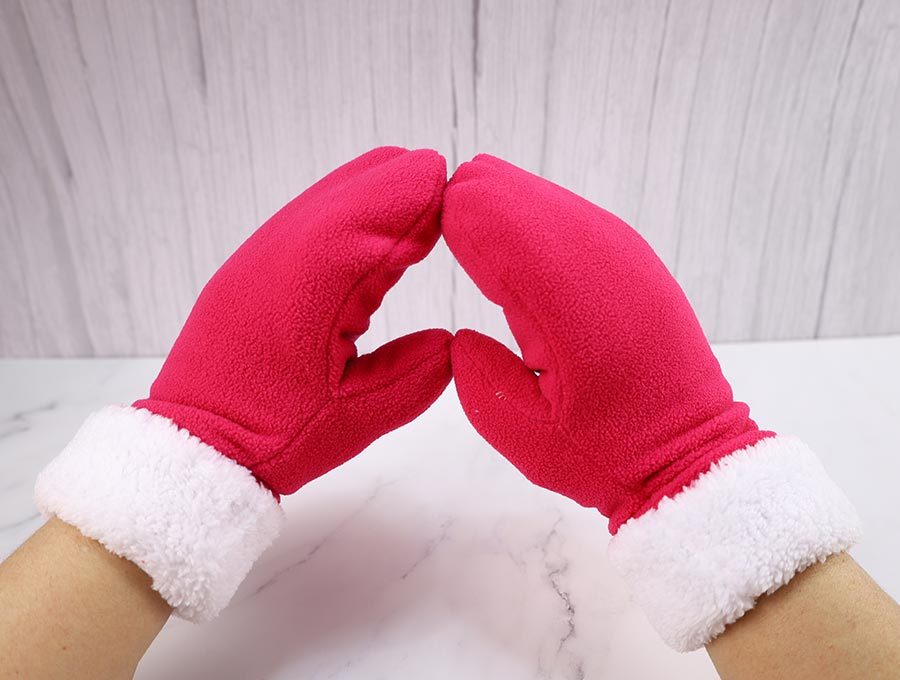
How to Make Fleece Mittens with Faux Fur Lining – Free Mitten Pattern
I’ve never been a big fan of winter gloves. My hands are always cold, and most gloves simply aren’t as warm as I’d like them to be.
That’s why I decided to switch over to wearing mittens! They are super cozy and warm, and they’re great for snowball fights with the kids! Plus, I get to make them myself!
Thanks to this neat printable fleece mitten pattern I have made, sewing mittens becomes a quick and fun project suitable for sewing enthusiasts of all skill levels.
Just download the free pattern below, then follow this tutorial and you’ll be done in no time! After making the sweater mittens last week, I decided that I badly need a pair of fur lined mittens with cuff. A gal can never have enough accessories, right?
Now let’s go learn how to make mittens!
We occasionally link to goods offered by vendors to help the reader find relevant products. Some of the links may be affiliate meaning we earn a small commission if an item is purchased.
Table of Contents
- 1 How to make mittens
- 2 Supplies and tools
- 3 How to Sew Mittens
- 3.1 DIY MITTENS VIDEO TUTORIAL
- 3.2 DIY MITTENS INSTRUCTIONS:
- 3.3 STEP 1: Prepare the mitten pattern
- 3.4 STEP 2: Cut out the fabrics
- 3.5 STEP 3: Start sewing the mittens
- 3.6 STEP 4: Assemble the mitten body
- 3.7 STEP 5: Make the fur lining
- 3.8 STEP 6: Join the lining and the fleece
- 3.9 STEP 7: Finish the fleece mittens
- 3.10 STEP 8 (OPTIONAL): Fold and secure the cuff
How to make mittens
Supplies and tools
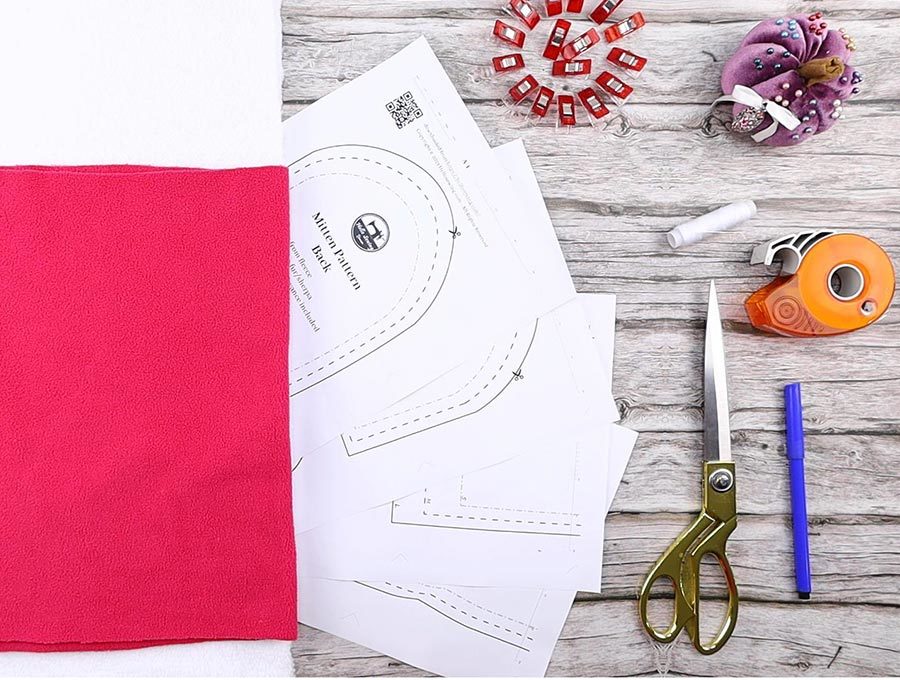
- fleece fabric – 1/4 yard
- sherpa fabric – 1/4 yard
- free fleece mitten pattern (download it below)
- matching thread
- scissors (or rotary cutter and a cutting mat)
- ruler or measuring tape
- iron and ironing board
- sewing clips or pins
- sewing machine
DOWNLOAD: printable mitten pattern (Free PDF file)
Follow us for free patterns & tutorials! [easy-profiles]
How to Sew Mittens
Watch the diy mittens video first and then follow the written step by step instructions below.
Please enjoy and don’t forget to Like and SUBSCRIBE over on YouTube to be kept up to date with new videos as they come out.
DIY MITTENS VIDEO TUTORIAL
DIY MITTENS INSTRUCTIONS:
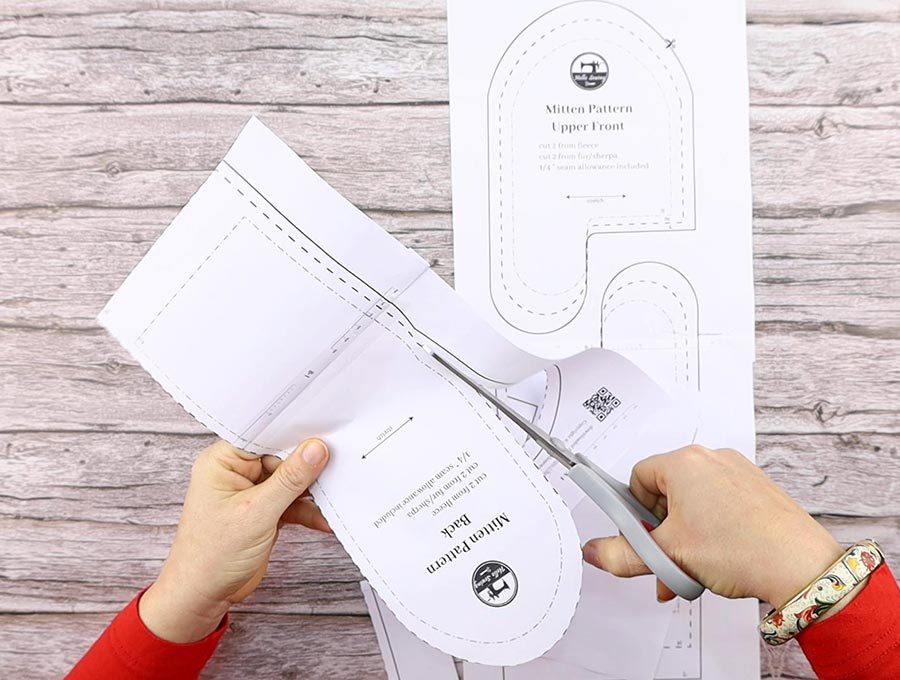
STEP 1: Prepare the mitten pattern
The first thing you’ll be doing in this project is preparing our free fleece mitten pattern for use.
Download the printable mitten pattern and print it out on a piece of paper. Set the size to 100% on US settings.
This mitten sewing pattern of ours comes in three different sizes, so you’ll need to choose the most adequate for you.
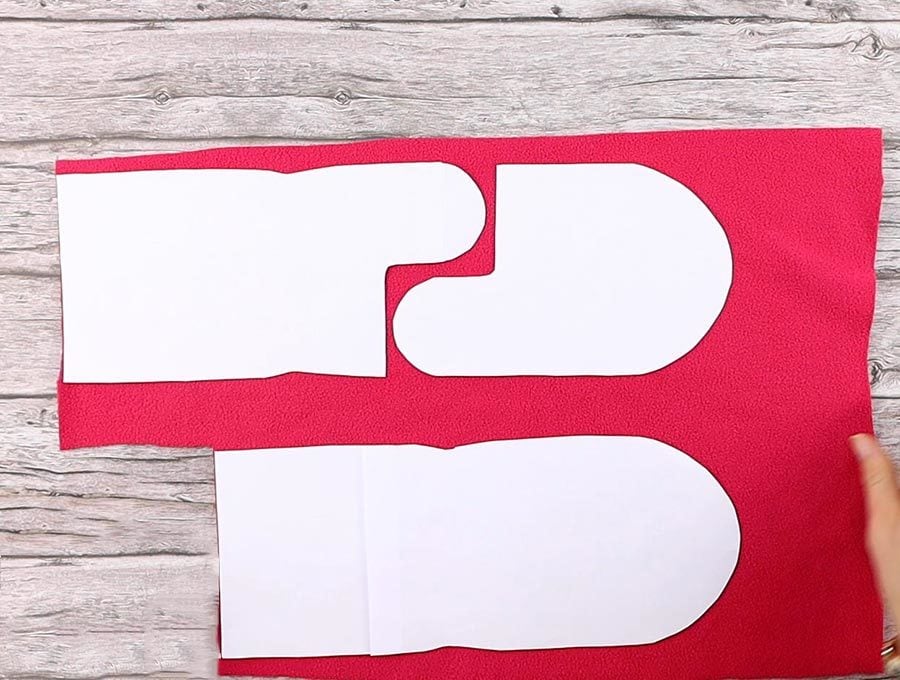
Cut out the excess paper and the fleece mitten pattern will be ready for action. You will have three pattern pieces, one for the front of the mitten, one for the back, and one for the body.
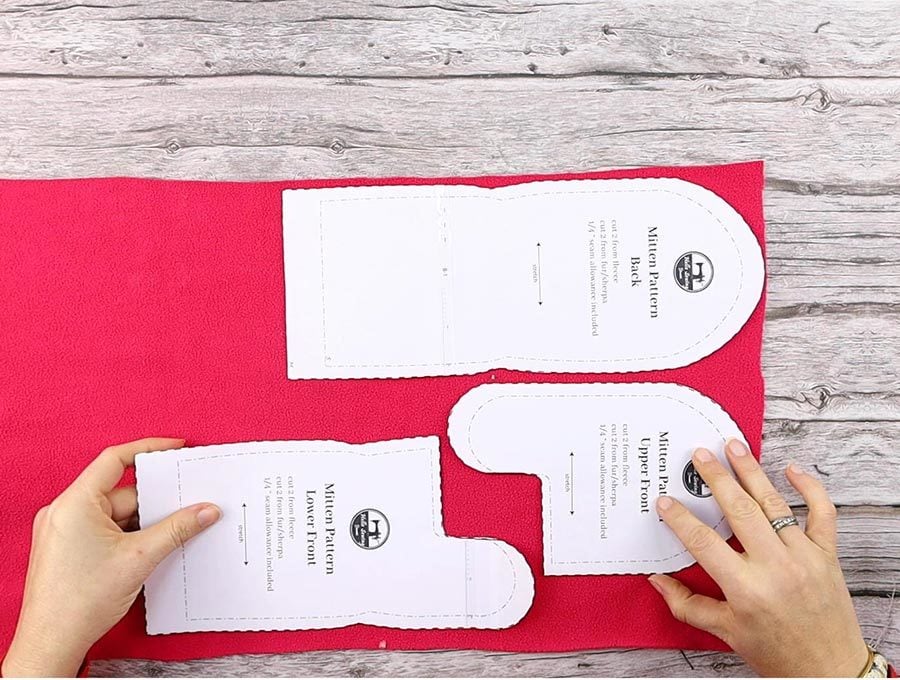
STEP 2: Cut out the fabrics
Set the main fabric on your workspace with its wrong side up. Use your mitten pattern printable as a guide and cut out the fabric. You will need one piece of fabric from each pattern piece for one mitten. Flip the pattern with the wrong side up and cut again all three pieces.
Repeat the cutting process with the faux fur, but flip the pattern pieces to the other side before you cut. Be careful while you cut it, make short cuts so that you doesn’t cut the pile too much.
TIP: Remember to wash the fabric thoroughly before you start cutting it. This will prevent it from deforming or shrinking later on when the DIY mittens are finished.
STEP 3: Start sewing the mittens
Place an upper and lower fleece front on top of each other with their right sides facing inward. Align the edges and secure everything with pins.
Make a stitch around the thumb and the short straight edge next to it. Use an eighth of an inch seam allowance and reinforce the seam with a backstitch.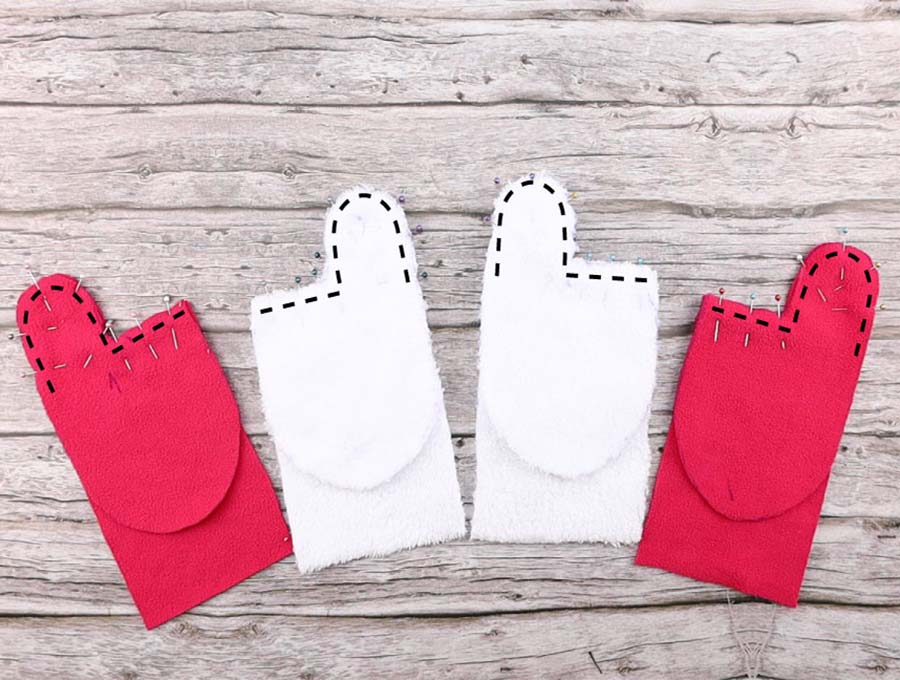
Repeat the same with the second pair of fleece fronts for the second mitten.
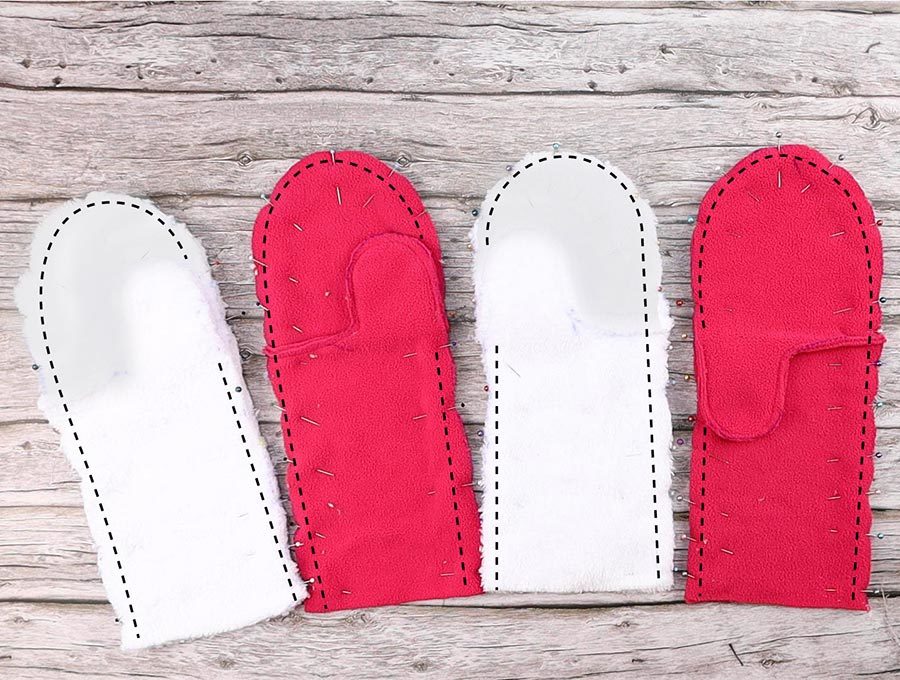
STEP 4: Assemble the mitten body
Put one mitten front piece on top of one back piece with their right sides facing each other. Align the edges and secure the layers with pins.
Sew around the mitten, leaving the bottom unstitched. Once you reach the thumb, stop your stitch. Flip the thumb over and then keep sewing on the other side of the mitten..
Repeat the steps with the remaining fleece pieces.
Cut off the excess fabric around the fleece mittens and turn them both inside-out.
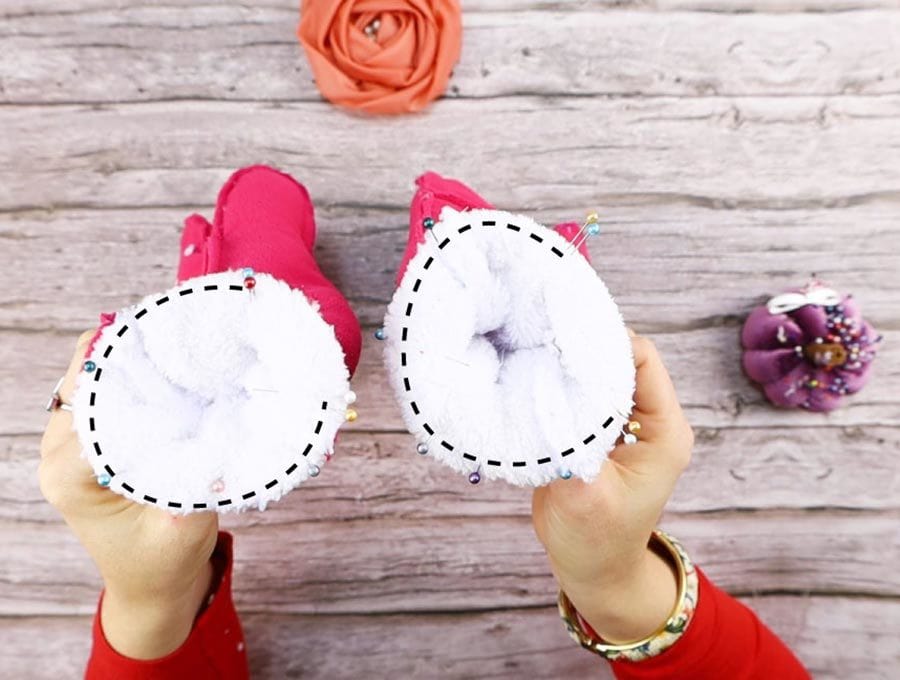
STEP 5: Make the fur lining
Now you’ll need to repeat the previous two steps with the fur fabric pieces.
Sew the front pieces first and then join them with the back pieces as you did with the fleece fabric pieces.
STEP 6: Join the lining and the fleece
Check if the lining fits your hand. If it does, everything is alright and you can proceed. If it doesn’t, the size you chose isn’t adequate, so you’ll need to start over with a slightly larger size.
Turn the fur lining right side out. Turn the fleece main body wrong side out.
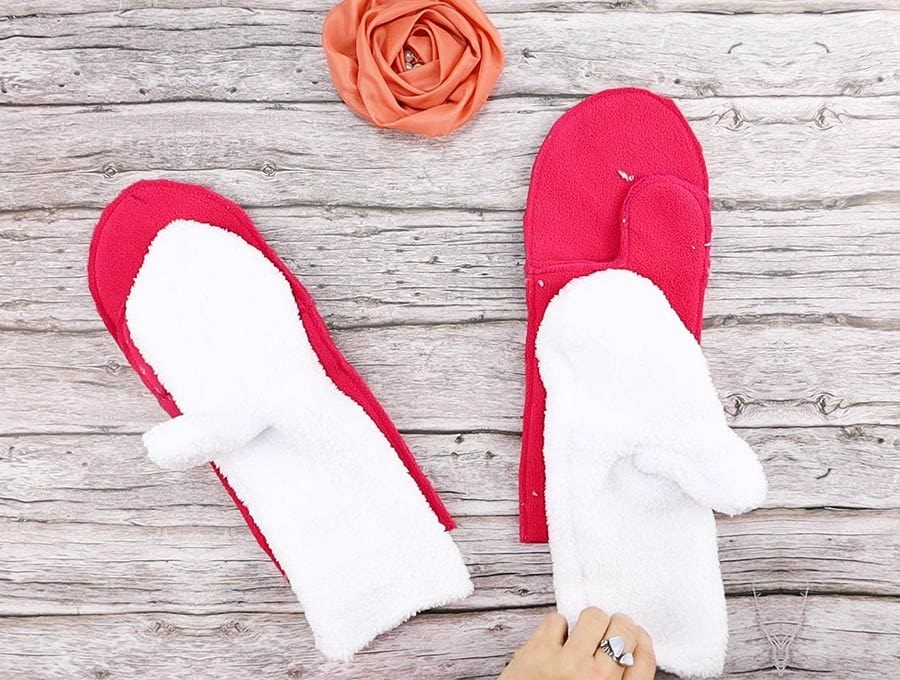
Put the lining into the fleece body and make sure they are aligned on the inside. Pin the two layers together around the bottom opening.
Sew around the bottom with a quarter-inch seam allowance. Leave a small opening unstitched so that you can turn the mitten inside-out.
Repeat the process with the second pair of fleece and fur.
STEP 7: Finish the fleece mittens
Pull the fleece out through the gap you left unstitched earlier. After that, put the fur into the fleece main body. Straighten and align everything inside the mitten.
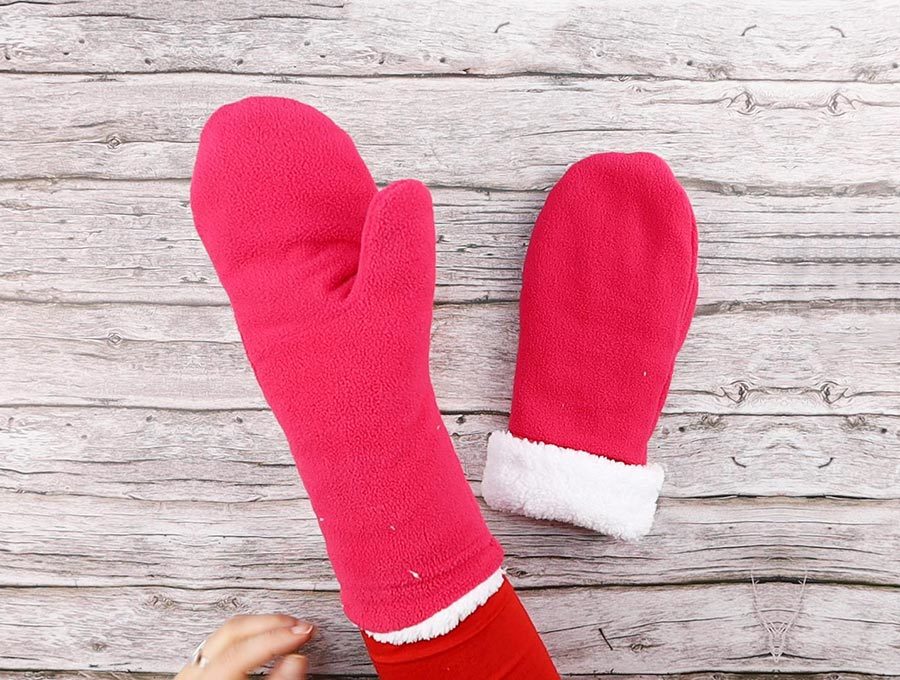
Grab a needle and a thread and sew the opening between the lining and the fleece shut with a hidden stitch.
Do the same with the second mitten.
Your new fleece mittens are now officially complete! But there is one more thing you can do if you want to, so check out the next, optional, step.
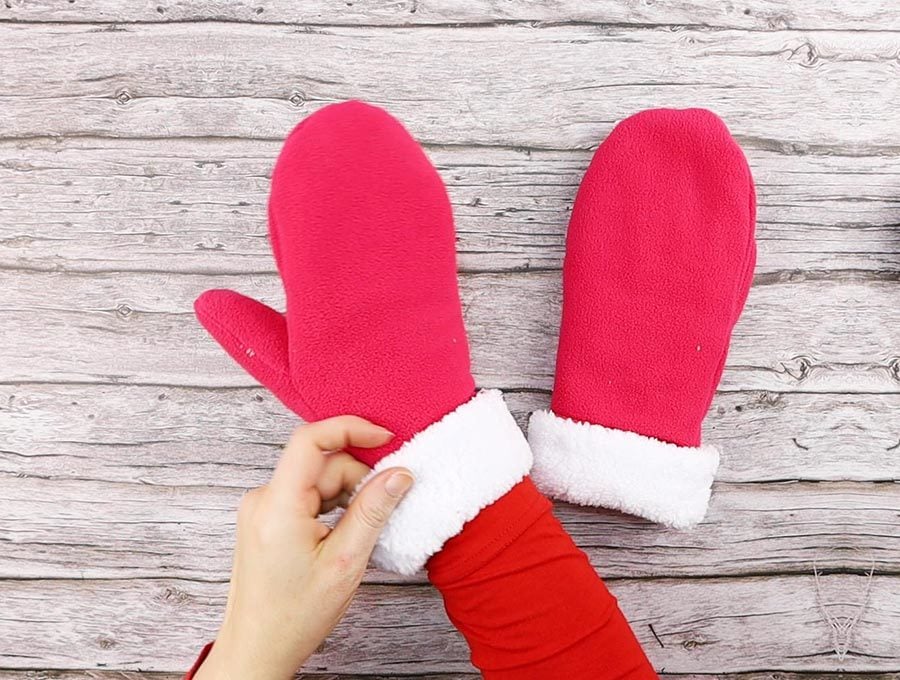
STEP 8 (OPTIONAL): Fold and secure the cuff
If you want your mittens a bit longer and warmer, you can leave them as they are. But if you want to give them a look that’s a tad more stylish, fold down the cuff about 3 inches.
Now you can secure it in place with a few stitches on each side or leave it unsewn so you can either fold it down or keep them longer.
I hope you liked this tutorial! Now that you know how to make mittens, go ahead and make a pair for all your family members! Then come back here and let us know how they turned out down in the comment section. Enjoy those snowball fights with your new fleece mittens!
Do you like this? Pin for later:
[***pin img****]Wanna be friends? Click HERE and follow me on Pinterest
RELATED: