
How to Make a Fleece Poncho with a Hood [Using Just 2 Seams]
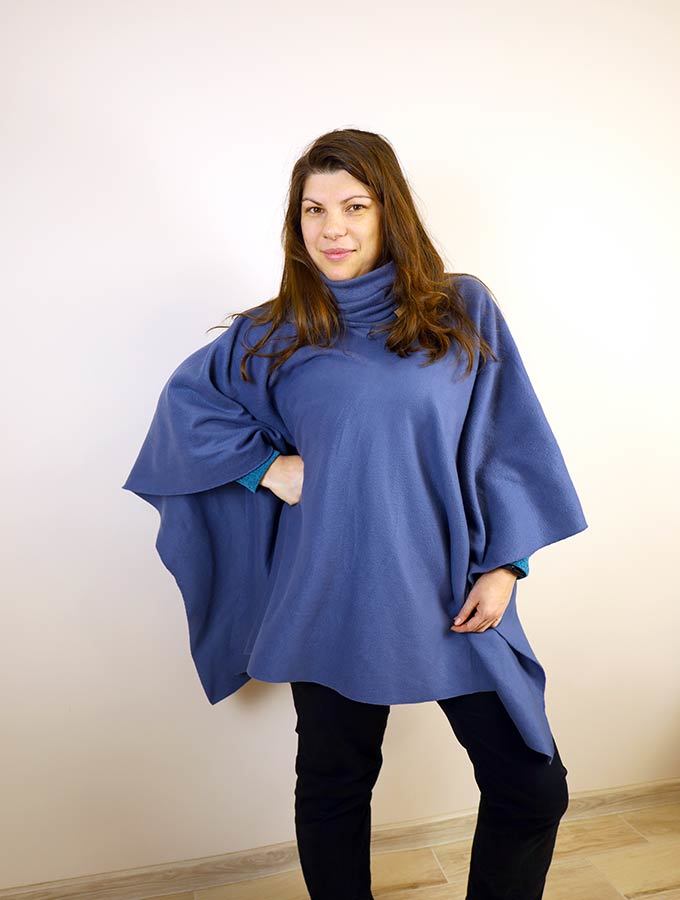
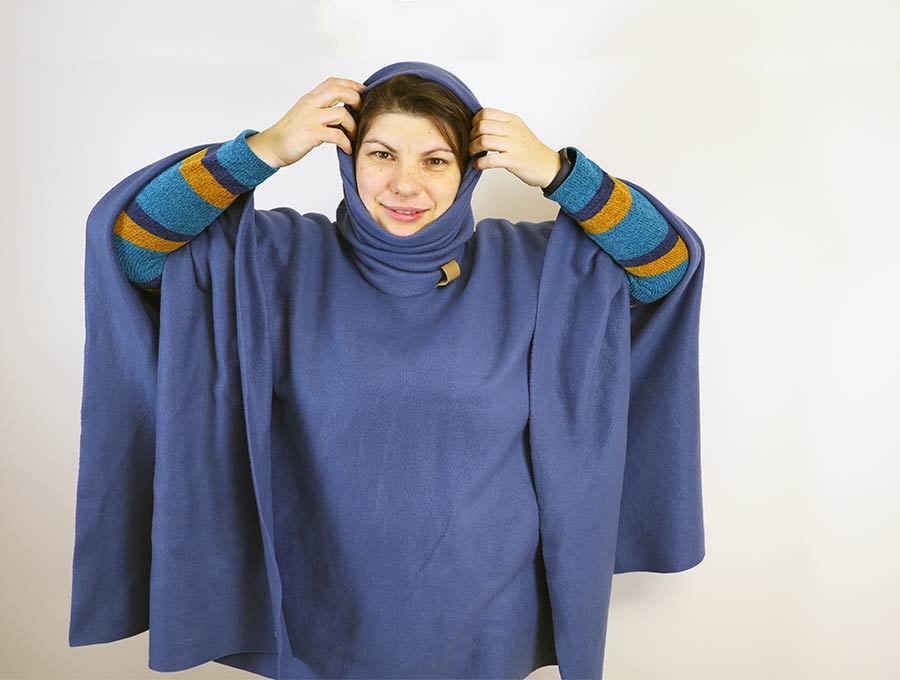
Making ponchos is easy. We show you how to make a poncho in a short space of time, so you have a stylish garment you can either use outdoors to keep warm when the ice and snow lies thick on the ground, or even to snuggle in on the couch with a hot cup of coffee or hot chocolate. Our homemade fleece poncho with a hood will keep you toasty warm. The best part is that we show you how to sew a poncho without a pattern. Try our DIY poncho for yourself first, then make some as gifts. They will also be welcomed by various charities who need warm items for those in need. Ponchos are great for anyone aged 2 to 102. The dimensions given here are for an adult poncho and by using polar fleece, you will only need to sew two seams for your hooded poncho to come together. You can scale it down for children.
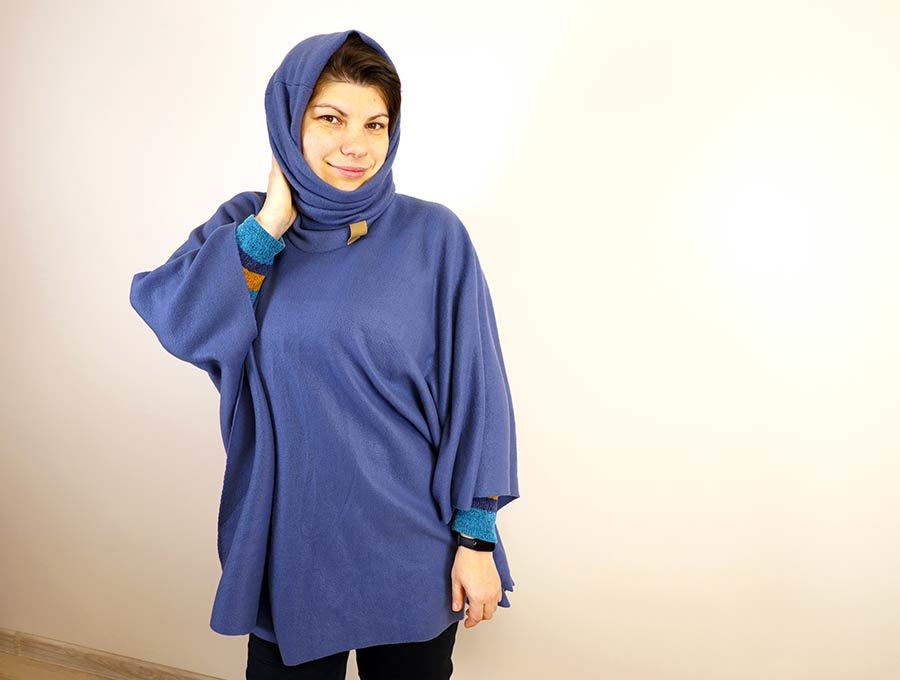
Now there are here are different styles of poncho. Some have cowl necks so you don’t need to worry about a scarf – it’s all in one, some, like ours, have a hood that pulls up from the cowl neck making it super practical in keeping wind and snow off your head and back of the neck, plus keeping the throat and chest warm. Others have a plain V neck, but those are the types often seen at festivals with fringing and embroidery. If you haven’t got the chance to browse my free poncho patterns roundup, you might want to check them out now for inspiration and style examples.
Below you will find my step by step written tutorial how to sew a poncho with a cowl neck or hood with VIDEO instructions for all the visual learners.
We occasionally link to goods offered by vendors to help the reader find relevant products. Some of the links may be affiliate meaning we earn a small commission if an item is purchased.
Table of Contents
- 1 How to make a poncho with a Cowl or Hood
- 2 DIY poncho Supplies and tools
- 3 How to Sew a Poncho the Easy Way
- 3.1 Hooded fleece poncho VIDEO TUTORIAL
- 3.2 HOMEMADE PONCHO INSTRUCTIONS:
- 3.3 STEP 1: Cut the fabric
- 3.4 STEP 2: Fold the body of the poncho
- 3.5 STEP 3: Mark the neck opening
- 3.6 STEP 4: Create the neck opening
- 3.7 STEP 5: Measure the neck curve and cut cowl
- 3.8 STEP 6: Stitch the cowl
- 3.9 STEP 7: Open the seam
- 3.10 STEP 8: Mark quarters
- 3.11 STEP 9: Attach cowl to poncho
- 3.12 STEP 10: Sew
- 3.13 STEP 11: Turn around
- 3.14 STEP 12: (Optional) Add a leather strip as an accent
- 4 Sewing Poncho FAQs, Tips and Troubleshooting:
How to make a poncho with a Cowl or Hood
DIY poncho Supplies and tools
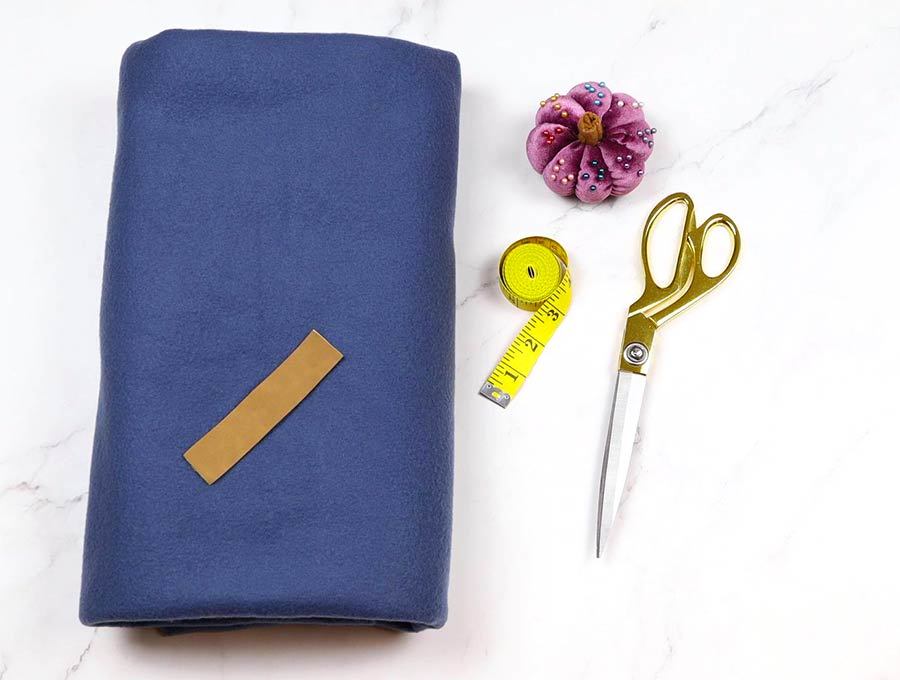
- fleece – 2 1/4 yards or meters
- matching thread
- scissors (or rotary cutter and a cutting mat)
- ruler or measuring tape
- fabric marker
- sewing clips or pins
- sewing machine
- Optional: faux leather strip for an accent 4 x 1″ (10 x 2.5cm)
Follow us for free patterns & tutorials! [easy-profiles]
How to Sew a Poncho the Easy Way
Watch the diy hooded poncho video first and then follow the written step by step instructions below.
Please enjoy and don’t forget to Like and SUBSCRIBE over on YouTube to be kept up to date with new videos as they come out.
Hooded fleece poncho VIDEO TUTORIAL
HOMEMADE PONCHO INSTRUCTIONS:
STEP 1: Cut the fabric
To sew a poncho, you will need a piece of fleece fabric that is 2 1/4 yards or meters long for the adult poncho we are making. The width of fleece fabric is almost always 60 inches wide, so opt for this standard width.
Cut off the selvage from both sides of the fleece, ensuring you cut straight. You may need a ruler and marker pen for this but if the fleece has a regular printed pattern involving straight lines that can guide you then you are in luck.
Cut the large piece down to 52 inches in length. I’ll give you rough measurements for an adult poncho below but DO NOT cut the cowl just yet if you want to be extra precise.
BODY: 60″ x 52″ (150 x 130cm)
COWL: 24 x 22″ (60 x 55cm)
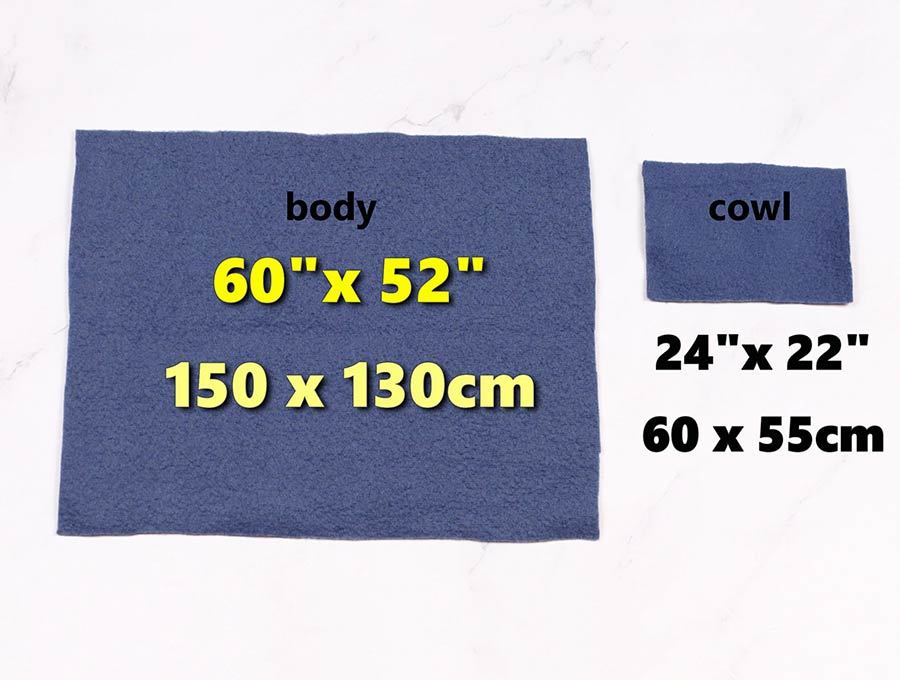
PRO TIP: If you only have 2 yards/meters of fleece you can make it work by making the hood slightly shorter. In this case you will have an offcut piece that is 20 inches long by 60 inches wide. Cut the length down so the piece is 20 x 24 inches, to form the cowl.
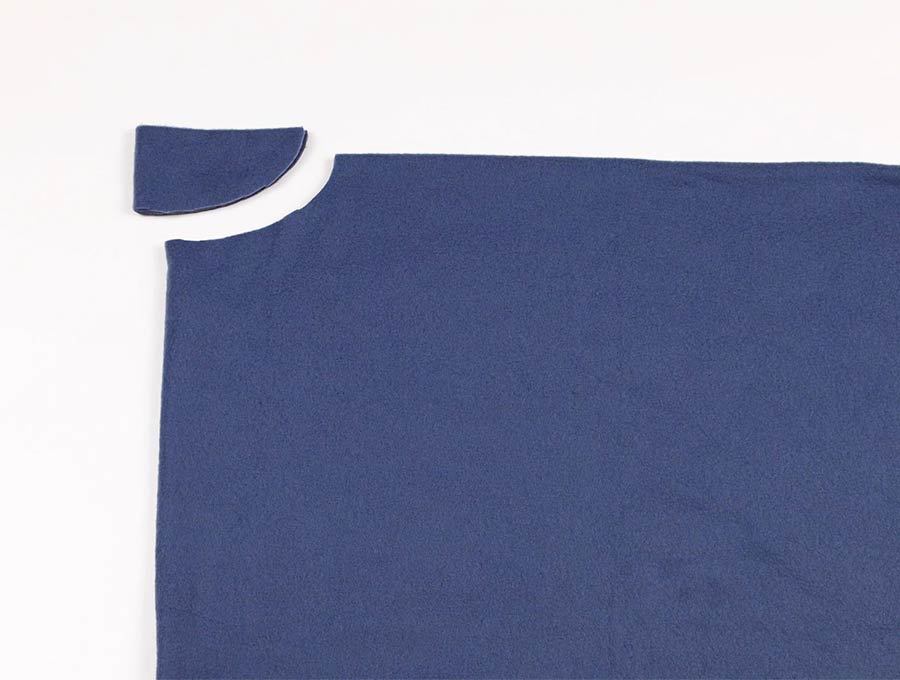
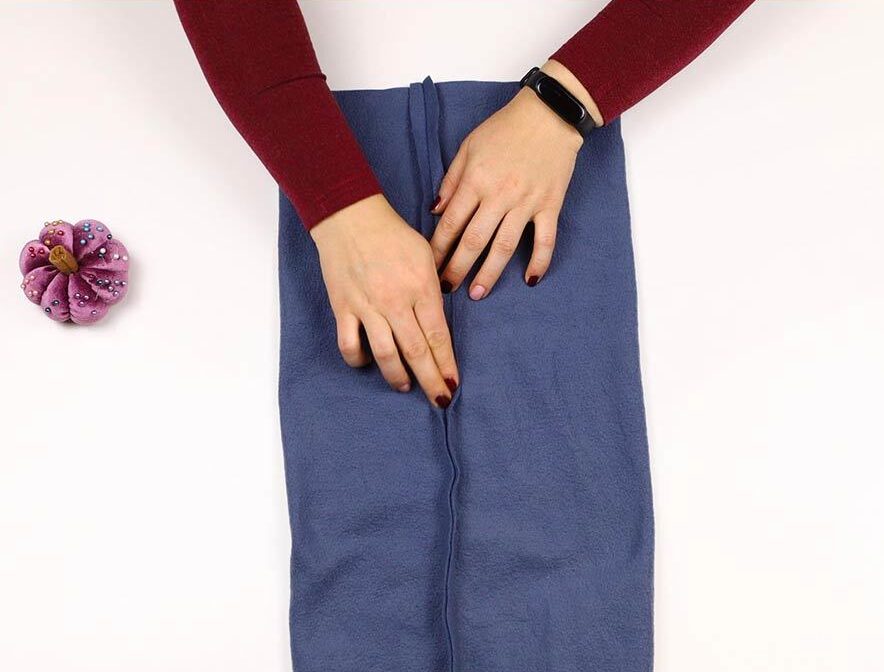
STEP 2: Fold the body of the poncho
With the wrong side facing the work table, fold the large piece in half lengthways, then in half again along the width, so you have four layers of fabric neatly lined up at the corners measuring 30 x 26 inches (75 x 65 cm).
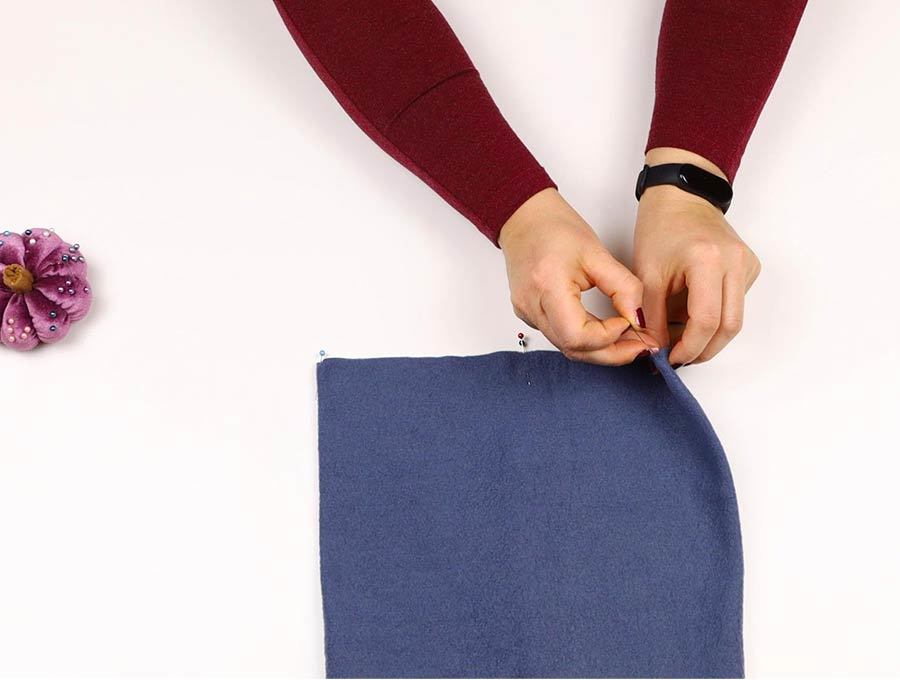
STEP 3: Mark the neck opening
To create the neck opening: at the folded corner without any raw edges measure 4 inches (10cm) along the long side and mark with a pin. Then measure 2 inches (5cm) down the short side.
STEP 4: Create the neck opening
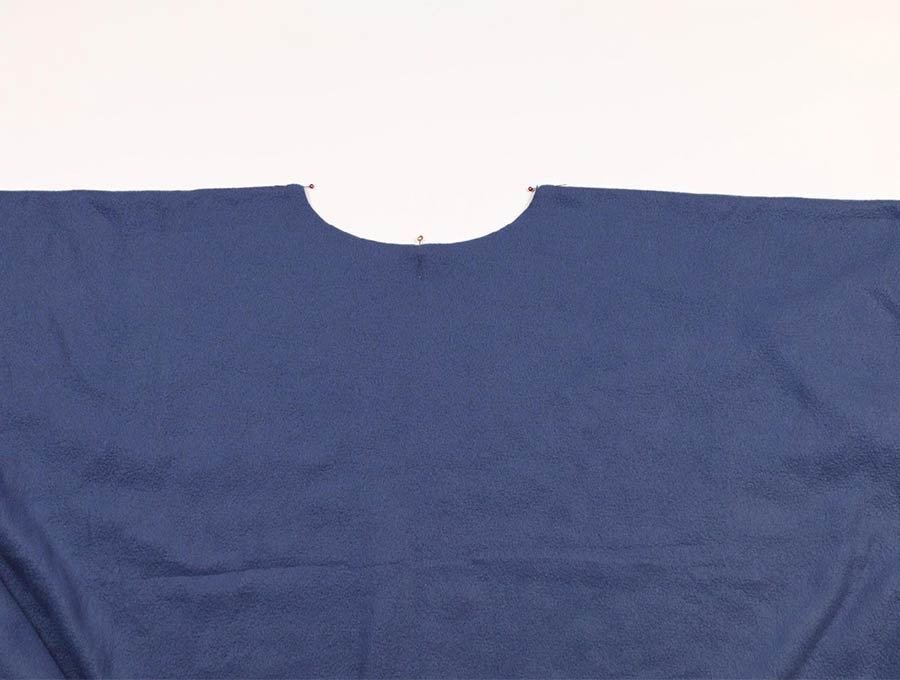
Draw a curve between the two pins using an erasable fabric marker. Once you are satisfied with the curve cut through all four layers of fabric. Check that it fits over your head or the head of the person for whom it is being made. If it is too small you may need to cut out a little more on the curve.
STEP 5: Measure the neck curve and cut cowl
Measure along one side of the neck opening 1/2″ (12mm) from the edge. Double that measurement and add 1 inch (12mm) for the seam allowance. Cut the cowl that wide and 22″ tall.
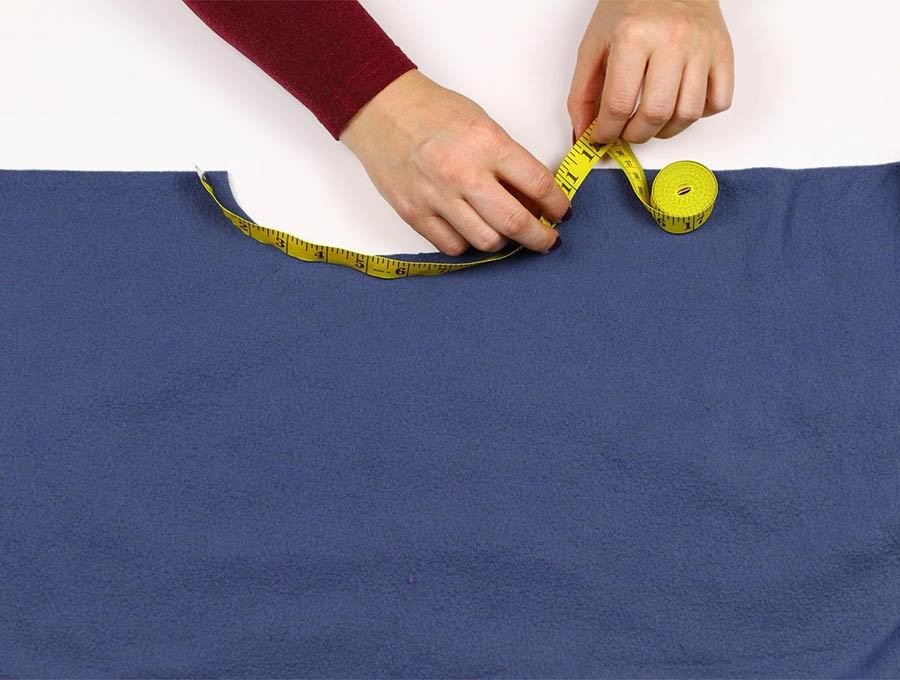
e.g. I measured 11.5″ along the front of the neck opening. I need to double that which gives me 23 inches and then add 1 inch for the seam allowance, so the total is 24″. So my cowl/hood is 24″ x 22″
STEP 6: Stitch the cowl
Take the smaller cowl piece and identify the right and wrong side – the wrong side will be more nubbly than the right side, then with the right sides facing each other pin the shorter ends together, and stitch a line ½ inch (12mm) from the ends to join the piece into a tube shape. Use a zig zag stitch as the fleece is stretchy.
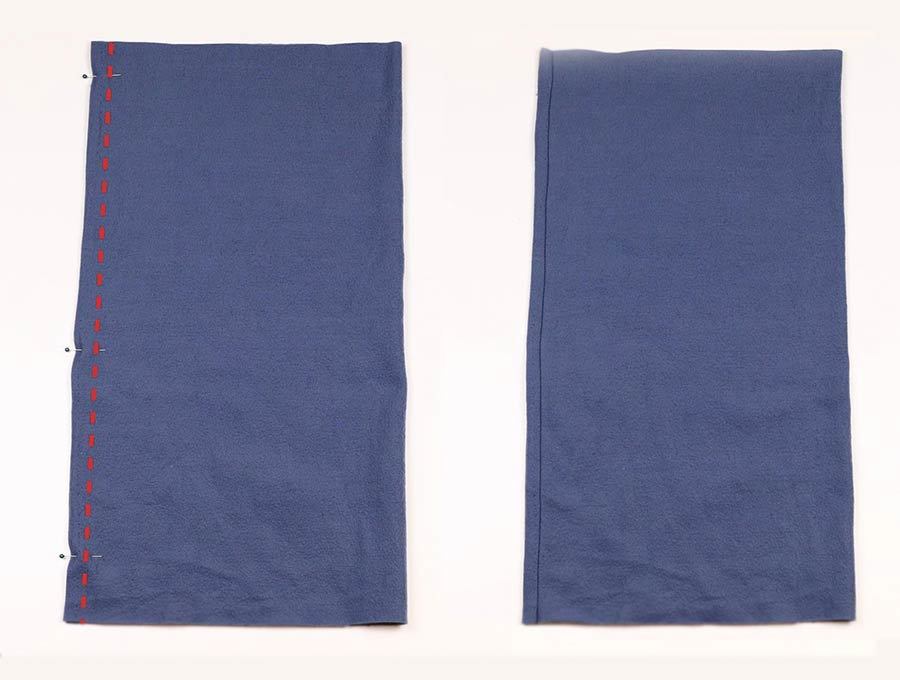
STEP 7: Open the seam
Open out the seam and press flat with your fingers. It is unwise to iron fleece fabric as it gets shiny flat patches.
STEP 8: Mark quarters
Use pins to mark the cowl in quarters, one of which is the opened out seam.
Use pins to mark the neck opening of the fleece poncho in quarters.
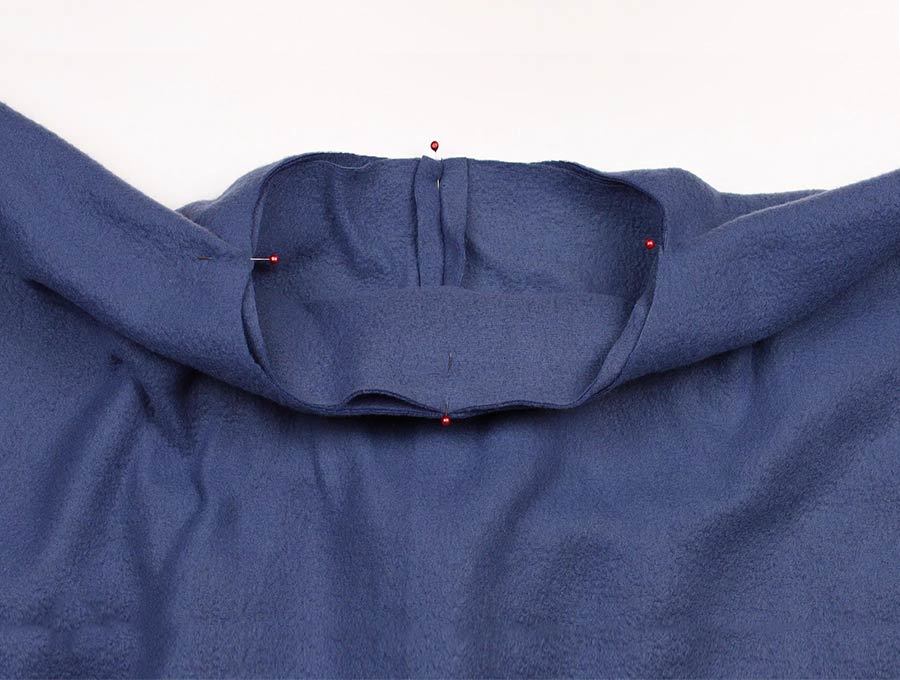
STEP 9: Attach cowl to poncho
The right side of the cowl needs to be pushed through the neckline so it faces the right side of the poncho.
Pin the center back of the poncho to the cowl seam. Align the pins of the cowl with the pins on the neckline and join them together.
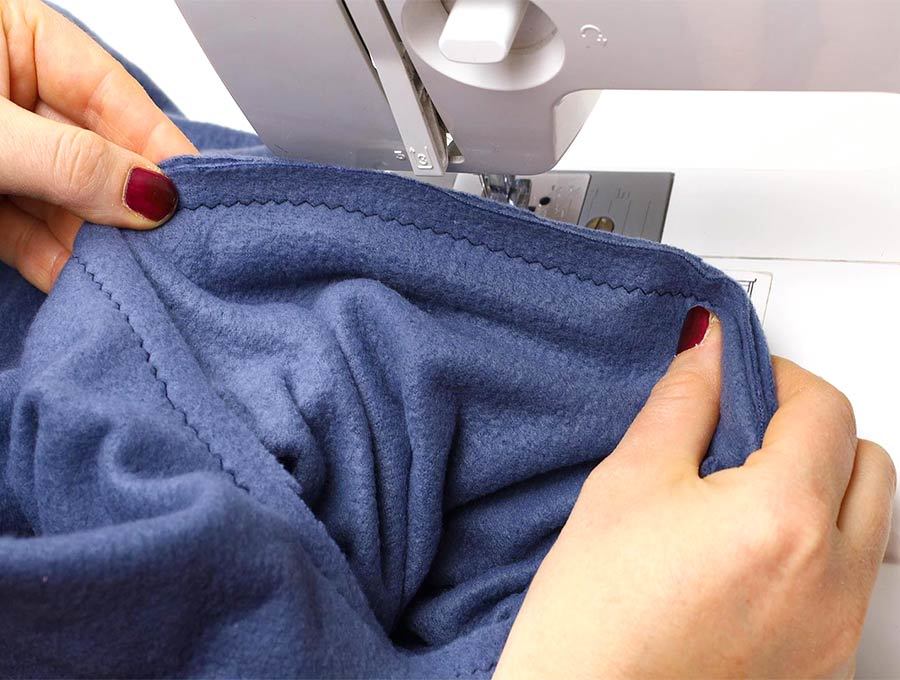
STEP 10: Sew
Stitch the cowl to the poncho with a zig zag stitch ½ inch (12mm) from the edge. You may need to make fine snips between the edges of the fabric and the stitch line to ease the fabric, being careful not to get too close to the stitch line. Fleece does not fray, so you don’t need to finish the raw edges
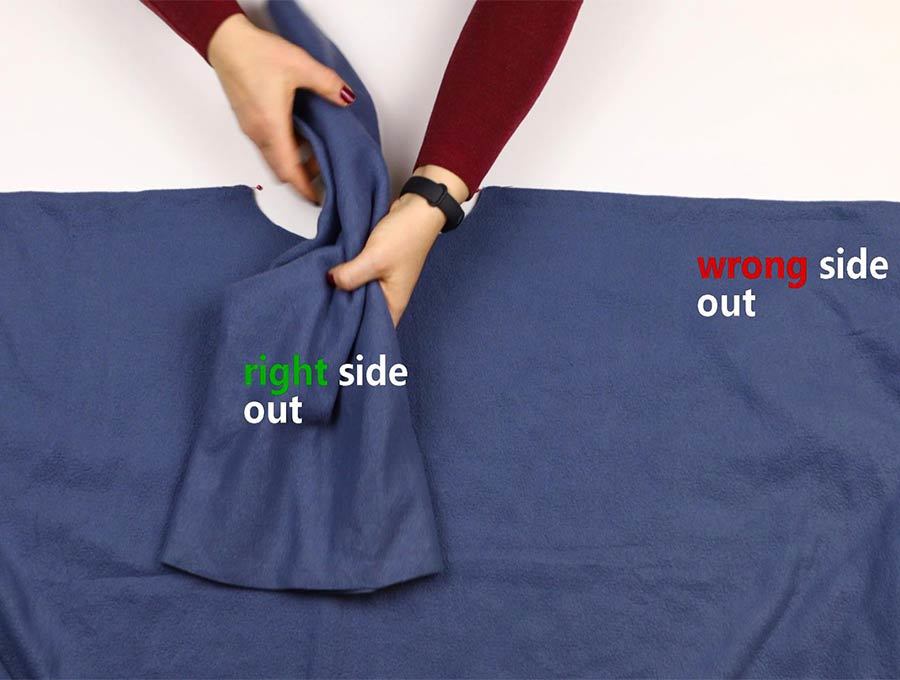
STEP 11: Turn around
Turn the poncho right way out.
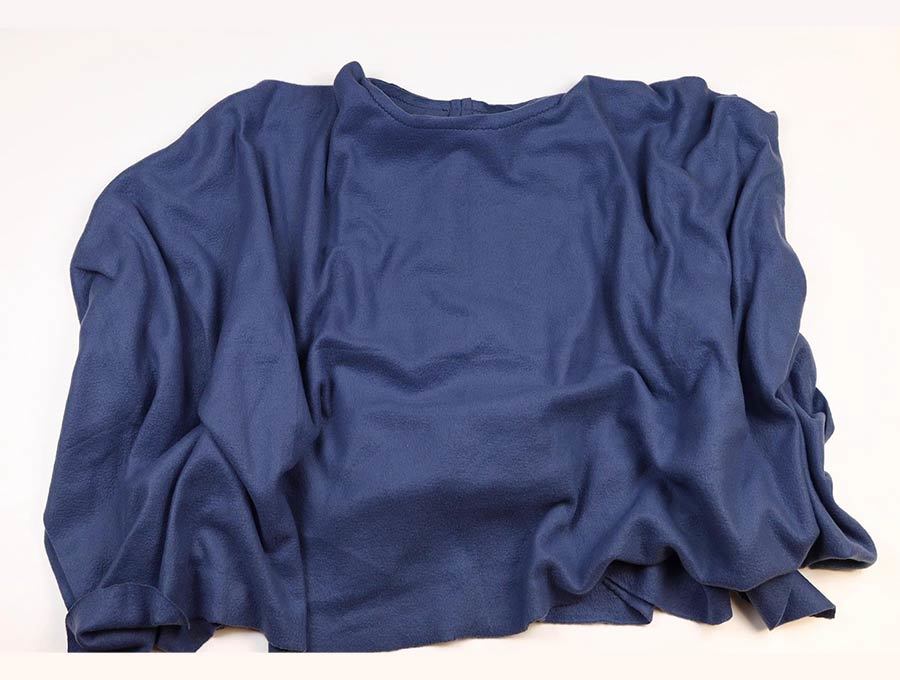
There is no need for any seams on the edges or around the hood. Step out in your new stylish and warm winter garment.
STEP 12: (Optional) Add a leather strip as an accent
If you want to add some extra flair to your hooded poncho you can add a (faux) leather strip either to the front of the cowl, or to gather the cowl and sew the strip on both sides of the cowl to keep the gather in place.

That’s it your DIY poncho is ready!
Ponchos were back in fashion on the fall runways in Europe recently, so now that you know how to make a poncho, sew it up and wear yours with pride. Also share the warmth by making a couple for those less fortunate. If you loved our easy poncho tutorial then please subscribe so we can share other easy sewing projects with you. They will come directly to your inbox, enabling you to get onto projects quickly.
Sewing Poncho FAQs, Tips and Troubleshooting:
- Do you need to pre-wash fleece? No, you don’t. Generally speaking, fleece don’t shrink, except in some rare occasions.
Do you like this? Pin for later:
Wanna be friends? Click HERE and follow me on Pinterest
RELATED:
20+ Poncho sewing patterns for women, kids and men!