
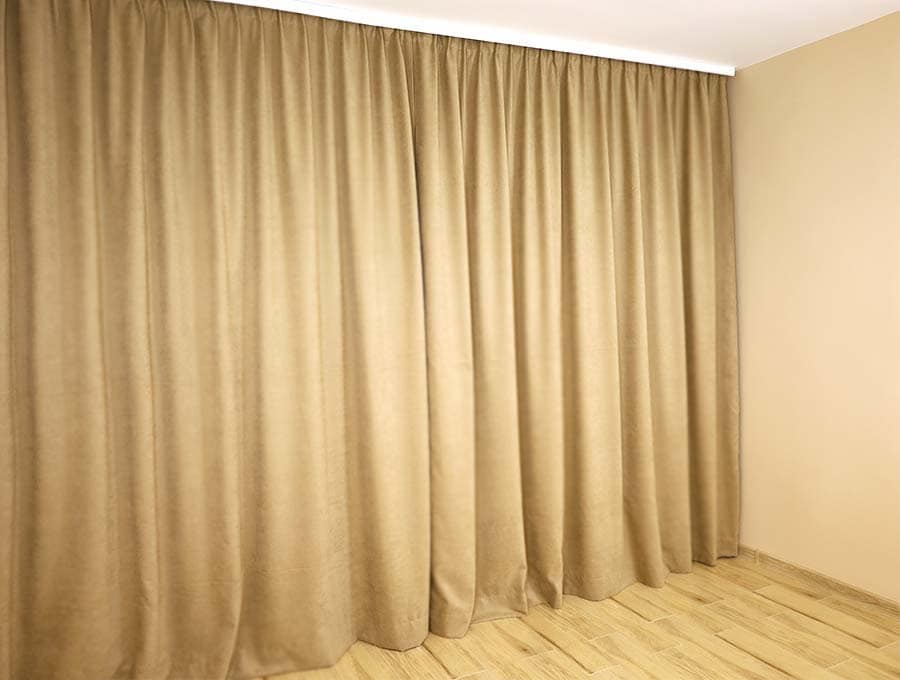
How to Make Curtains to Spruce up Your Home
It may be daunting to think of making your own curtains, but with our tips and easy step-by-step tutorial how to make curtains you’ll be able to make gorgeous curtains. What is so wonderful about making your own is that you can pick and choose fabrics rather than being limited by the few ready-made curtains homeware stores provide. You’ll get quality fabric and could save hundreds of dollars off getting a curtain professional to measure and sew the drapes for you. If you think about it logically, making an unlined curtain is basically four seams and attaching tape to hang the curtains – how easy.
Below you will find my step by step written tutorial how to make curtains with VIDEO instructions for all the visual learners.
We occasionally link to goods offered by vendors to help the reader find relevant products. Some of the links may be affiliate meaning we earn a small commission if an item is purchased.
Table of Contents
- 1 How to make curtains
- 2 DIY curtains Supplies and tools
- 3 How to Sew Curtains
- 4 Tips to get your curtains looking professional
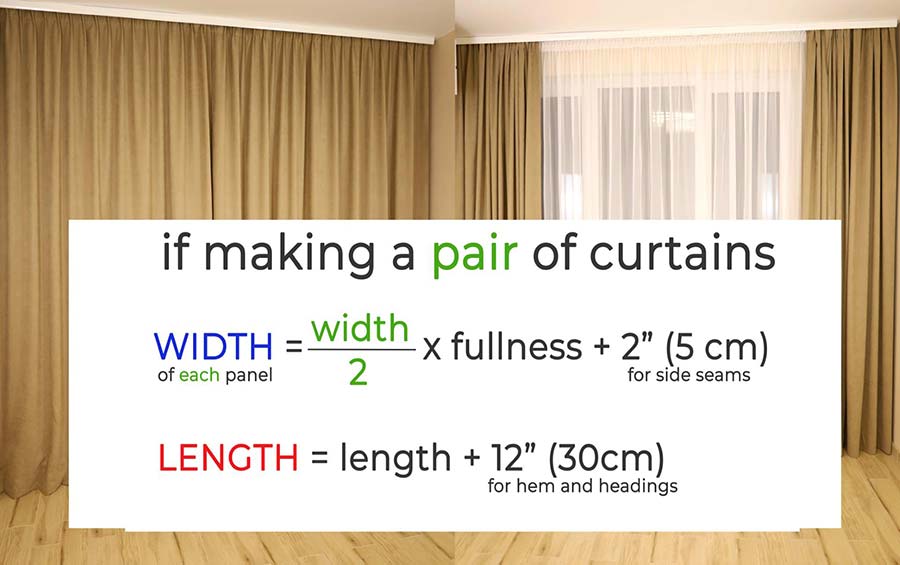
- 5 Calculating Width
- 6 Calculating length
- 6.1 Sheer curtains – calculating length
- 6.2 Plain curtains – calculating length
- 6.3 Patterned curtains – calculating length
- 6.4 INSTRUCTIONS:
- 6.5 STEP 1: Cut the fabric
- 6.6 STEP 2: Fold and iron the side seams
- 6.7 STEP 3: Sew the side seams
- 6.8 STEP 4: Fold and iron top seams
- 6.9 STEP 5: Pin the shirring/pleating tape
- 6.10 STEP 6: Stitch the top seam
- 6.11 STEP 7: Fold and press the hem
- 6.12 STEP 8: Stitch the hem
- 6.13 STEP 9: (Optional) Press the curtains
- 6.14 STEP 10: Adjust the pleats
- 6.15 STEP 11: Attach the hooks
How to make curtains
DIY curtains Supplies and tools
- fabric – home décor fabric, cotton or polyester fabric or sheer fabric (see below how to calculate how much you need)
- matching thread
- scissors (or rotary cutter and a cutting mat)
- ruler or measuring tape
- iron and ironing board
- sewing clips or pins
- sewing machine
Follow us for free patterns & tutorials! [easy-profiles]
How to Sew Curtains
Watch the diy curtains video first and then follow the written step by step instructions below.
Please enjoy and don’t forget to Like and SUBSCRIBE over on YouTube to be kept up to date with new videos as they come out.
DIY Curtains VIDEO TUTORIAL
=== 4k resolution now available, enjoy the video! ===
Tips to get your curtains looking professional
Tip 1: Length
There is nothing that looks more unprofessional than curtains that are too short or placed an incorrect height above the window frame. Make sure the curtain rod is positioned around 8 to 10 inches (20 to 25cm) above the top of the window. Length equals elegance. The curtains should just skim the floor.
Tip 2: Width
It is tempting to measure the window frame width and then think you need to buy sufficient material for that width. No, no, no. Extend the curtain rod beyond the window frame by about 6 to 10 inches (15 to 25cm) on either side – this will depend on the size of the window – larger windows will need the 10 inches (25cm) and for smaller windows with less bulk in the curtains reduce to 6 inches (15cm) overlap of the curtain rod beyond the window frame on either side. This allows more light into the room, and these days décor is all about light-filled rooms. By being able to open the curtains so that the curtains expose all of the window, will make the room look bigger.
Tip 3: Fullness
When buying fabric, it is tempting to skimp on the cost by not adhering to the professional curtain maker’s advice of buying 2 times the width of the window. Why not do just 1.5x the width you may think? When you go for less fabric it doesn’t look professional. Besides, if you skimp you are going to be have curtains that don’t quite meet in the middle or at the edges of the frame and don’t allow in beams of sunlight in that will wake you by falling across your face, or fade furniture and carpeting in their path.

Tip 4: Accurate measurements
Measuring the window frame correctly and calculating the fabric measurements are vitally important. Rather a little too much fabric than too little. You can’t add an inch onto curtains if they are too short, but you can easily cut off an inch if they are too long.
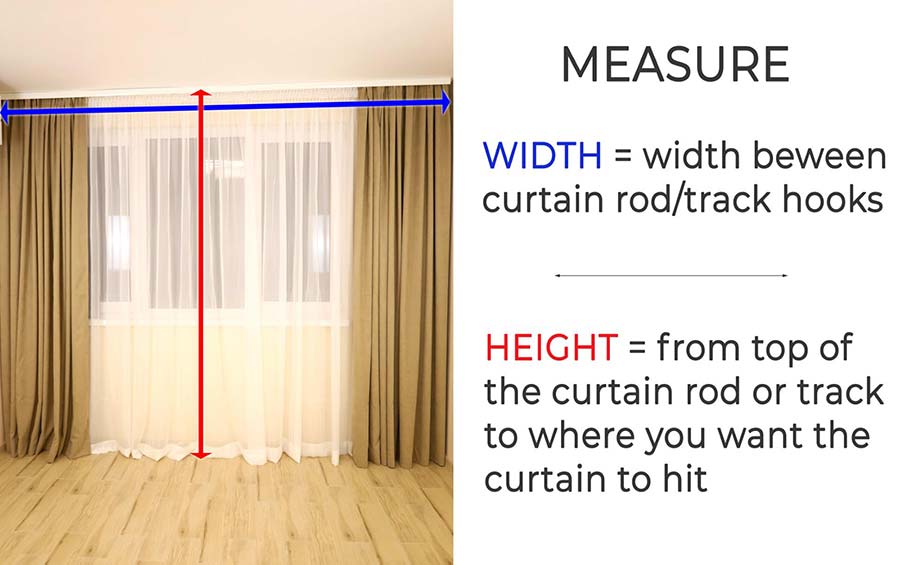
Calculating Width
Measure the curtain rod between the end hooks – not the window itself. So, let’s say the curtain rod is 2.5 yards long. You will need 2 times that width of fabric: 2.5 x 2 = 5 yards across the window. Now most curtain fabrics are 1.5 yards wide. So, 5 yards divided by 1.5 = 3.33 widths. Always round the widths up and not down – so you will need 4 widths of fabric to cover the window. This will give a little extra fullness, and make covering the window easier than an odd number of panels. You can sew two panels together to make two large curtains from the 4 widths.

Calculating length
Measure the length from the top of the curtain pole or track where it is in place above the window to the floor. Let’s say the drop is 2.5 yards. Now you need to factor in the number of inches needed for the hem and the seam at the top of the curtain. The hem for curtains is a standard 4 inches (10cm). If the fabric is sheer you double that because you can’t have one small and one bigger turnup as the first turnup it will show through.
You can do a one-inch turnup on an opaque fabric followed by the 4-inch hem. The top seam will also depend on the type of shirring or pleating tape you are using – some is 3 inches wide and some 4 inches, and some even more. Select your tape before having the curtain length cut, so you can calculate the top seam accurately.
If you are making a PAIR of curtains that draw in the middle, you need to adjust your math a bit
Sheer curtains – calculating length
For sheer curtains with a 2.5 yard (90 inch) drop and a seam allowance at the top of 4 inches x 2 = 8 inches and a hem of 4 inches x 2 = 8 inches that will be a total of 106 inches (2.95 yards – round up to 3 yards. This is assuming the sheer curtains are plain and don’t have a repeat pattern that needs to be matched. Some sheer curtain fabric comes with a ready-made hem complete with a weighted tape stitched into the hem to keep them hanging straight. In that case and if you like that look, you won’t need to calculate the hem measurements.
Plain curtains – calculating length
For plain curtains where no pattern has to be matched then take the drop – let’s say it is 2.5 yards (90 inches) and add 1 inch for the first turn of the seam at the top then the width of the tape for the second turn – let’s say the tape is 4 inches. 1 + 4 = 5 inches extra at the top and the same amount at the bottom – 5 inches for the hem. You will need to purchase 100 inches (2.78 yards). As curtain fabric stores cut per yard or ½ yard you will need 3 yards multiplied by the number of drops.
Patterned curtains – calculating length
You know you need a number of drops – but if the fabric has a repeat pattern that has to be matched you will need to check the depth of the repeat and allow extra fabric per drop in order to match up the patterns when you sew two panels together and to ensure that across the window the curtains are all at the same level of repeat. Only once you are in the store can the assistant help you. If ordering online, calculations as to what lengths you need, will have been worked out to accommodate various repeat patterns.
INSTRUCTIONS:
STEP 1: Cut the fabric
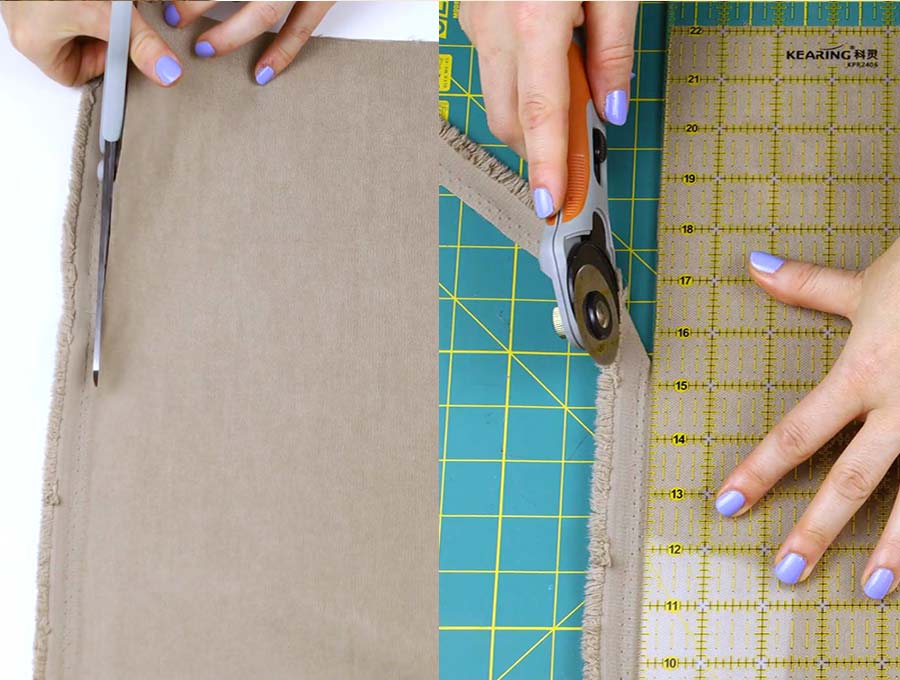
Once you have your fabric in front of you, cut it according to the lengths you have measured.
If you need to sew two panels of fabric together to create a wider curtain, make sure the fabric is running the same way.
Do not cut off the selvage but simply sew the panels together ½ inch from the edges.
If the selvage is tight and looks like it may pull your curtain then by all means cut it off, also cut it off if it has printed names and color samples on it. This would just draw attention to the curtain on the wrong side as remember these are unlined and will be seen from the outside of the window.
STEP 2: Fold and iron the side seams
Fold over ½ inch (12mm) twice to encase the raw edges towards the wrong side of the fabric. Do this for both sides of each panel
STEP 3: Sew the side seams
Sew the side seams by stitching down the length of the panel along the top of the hem.

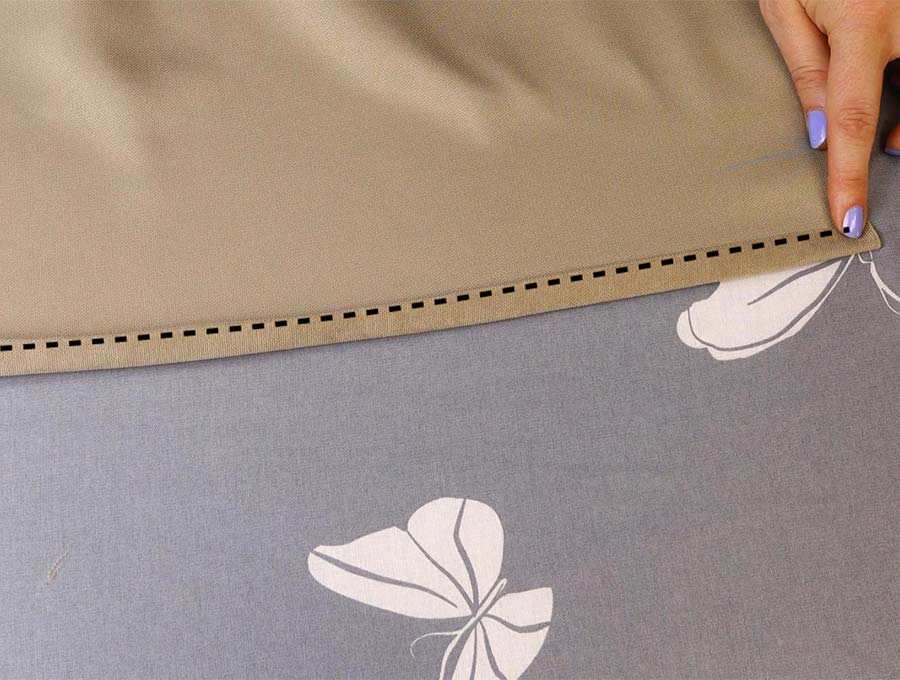
STEP 4: Fold and iron top seams
To make the top seam on a sheer fabric, fold the 3 or 4 inches (depending on the tape width) and fold again, pinning the fabric in place and making sure the seam is exactly the same width all the way along the top. Press along the edge of the seam. This provides a firm triple layer of fabric to which you can attach the shirring/pleating tape.
On an opaque fabric fold over just one inch then fold over 3 or 4 inches, pin in place and move on to step 5
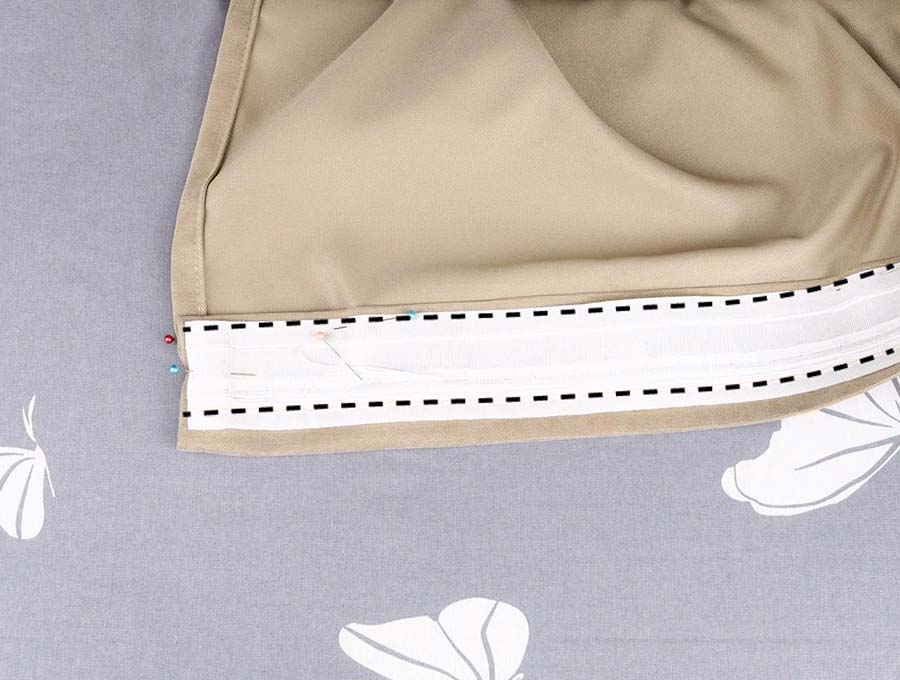
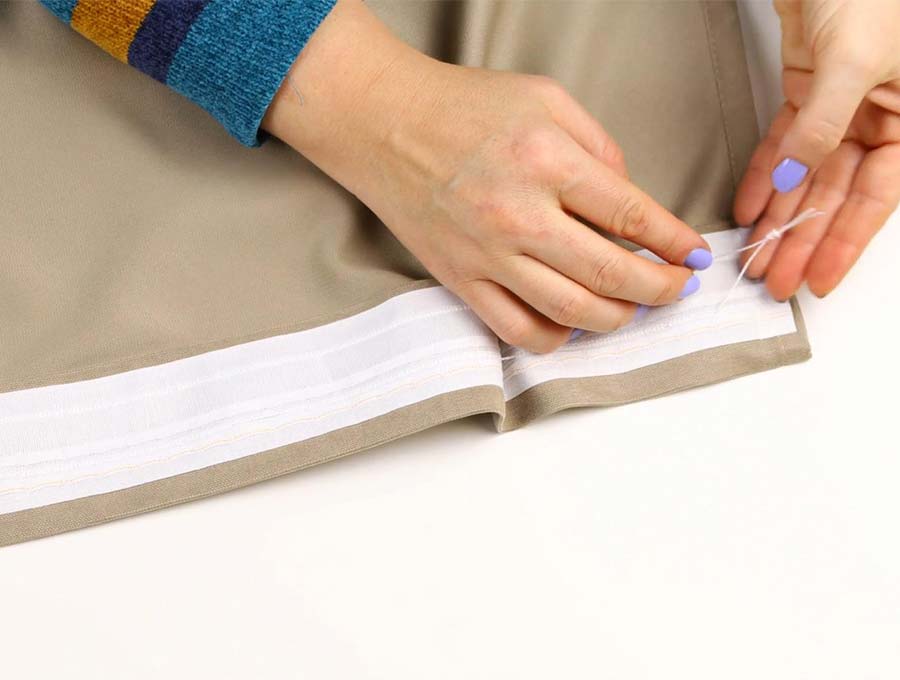
STEP 5: Pin the shirring/pleating tape
Pin the shirring/pleating tape in place, one inch from the top edge of the curtain on the wrong side of the fabric. Turn over ½ inch (1cm) of the tape at each end of the curtain panel so no raw edges show.
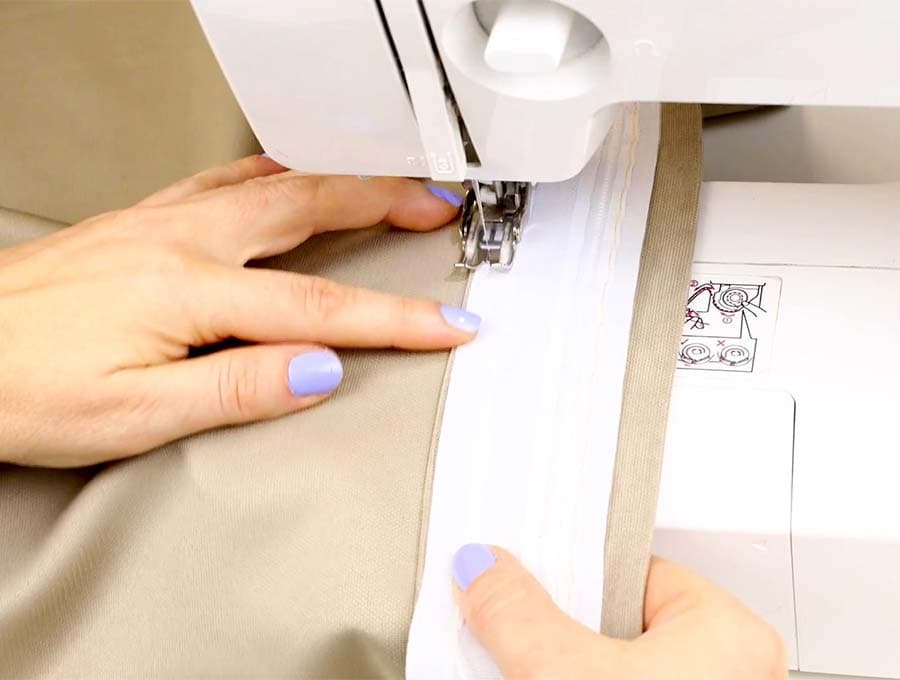
STEP 6: Stitch the top seam
Stitch along the top edge of the tape, backstitching at the beginning and the end, then stitch along the bottom edge of the shirring.
Be careful to keep/pin the shirring cords out of the way of the machine while you stitch. You will use the two loose cords to adjust the shirring of the curtain and tie off the ends once you are happy with the fullness.
If using pleating tape, it is easier as there are no cords to worry about and you just stitch around all four sides.
STEP 7: Fold and press the hem
To do the hem you can rely on your measurements or put the curtains up first before pinning the hems.
METHOD 1: If relying on the accuracy of your measurement:
- Then for sheer curtains turn up the hem 4 inches then 4 inches again towards the wrong side of the curtain, and press the seam.
- For opaque curtains you have a choice – turn up 4 inches twice as you did with the sheer curtains OR turn up 1 inch, then 4 inches and pin in place before stitching the hem either by machine or slip stitch by hand so no there is no visible seam.
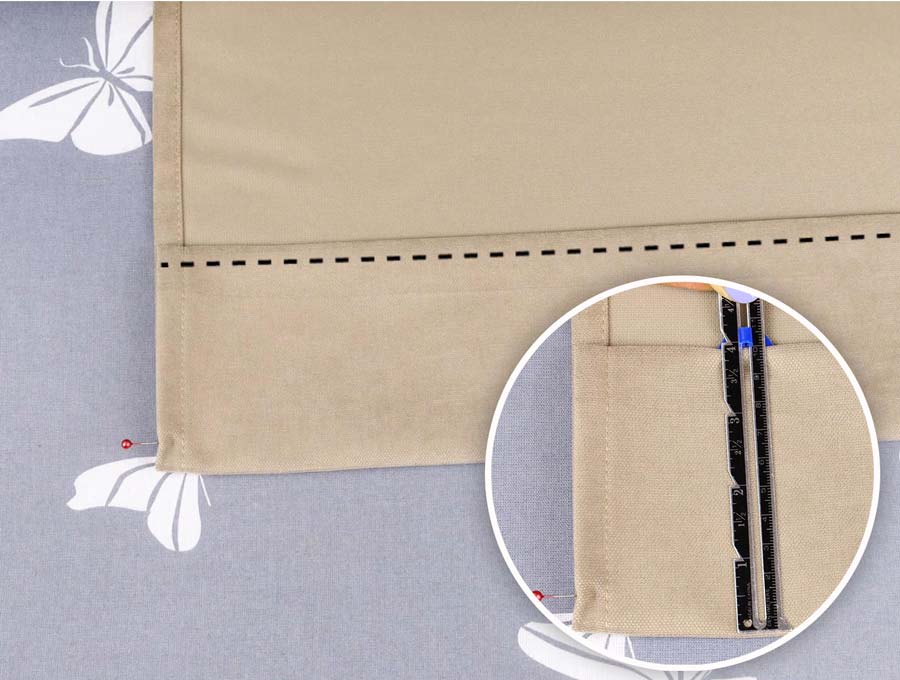
METHOD 2: If you prefer to hang your curtains first, then form the pleats/gathers, attach them to the curtain rail and turn the seams up according to whether they are sheer or opaque curtains as described in Method 1 above. By doing this you will be able to get the curtains the exact length so they just skim the floor and you can adjust the hem depth if needed.
STEP 8: Stitch the hem
Sew along the seam ¼ inch (6mm) from the top edge of the hem, back tacking at start and finish. You can either hand-stich or machine-stitch the hems.
STEP 9: (Optional) Press the curtains
Lastly, press the curtains to ensure they hang uniformly, and trim off any excess threads.
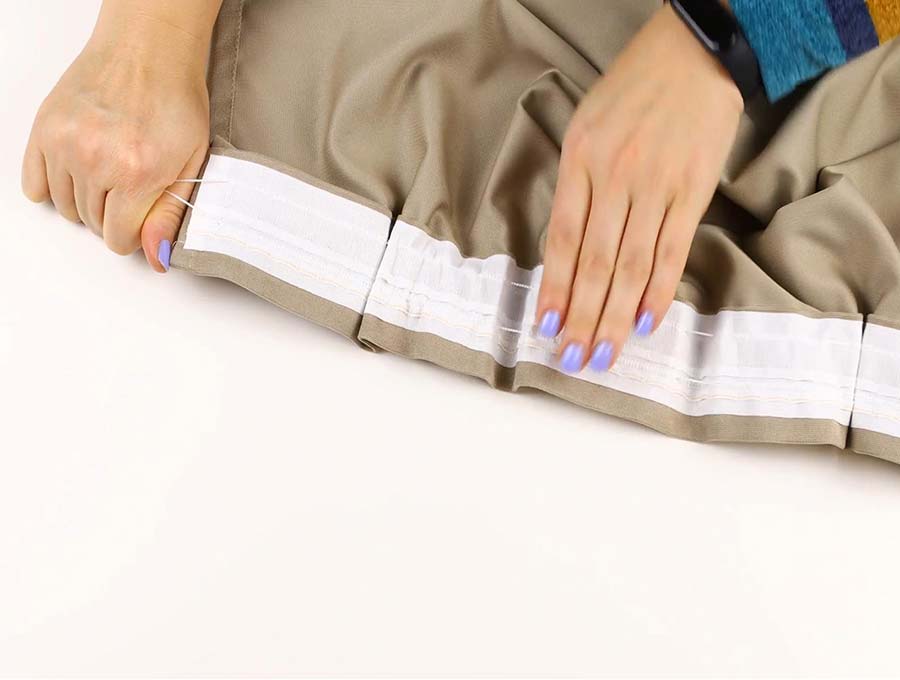
STEP 10: Adjust the pleats
Knot the cords of the shirring tape together on one end of the curtain.
Adjust the shirring of the curtain by pulling the cords on the other end of the tape. Once you get to the correct width, tie a slipknot, and don’t cut the cords. Just wrap them around your fingers to make a little bundle and insert the bundle between the curtain and the shirring/pleating tape or between the first and second pleat.
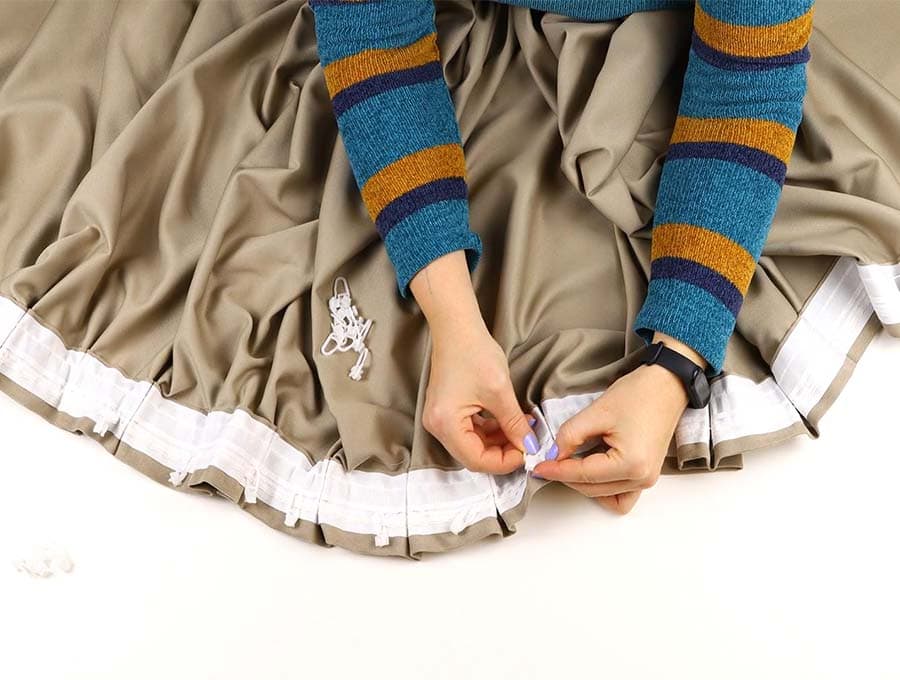
STEP 11: Attach the hooks
Attach the hooks to the top pockets of the shirring/pleating tape. First attach the hooks at the either end of the tape, and then spread the rest evenly, about 4 inches /10cm apart.
That’s it your DIY curtains are ready!
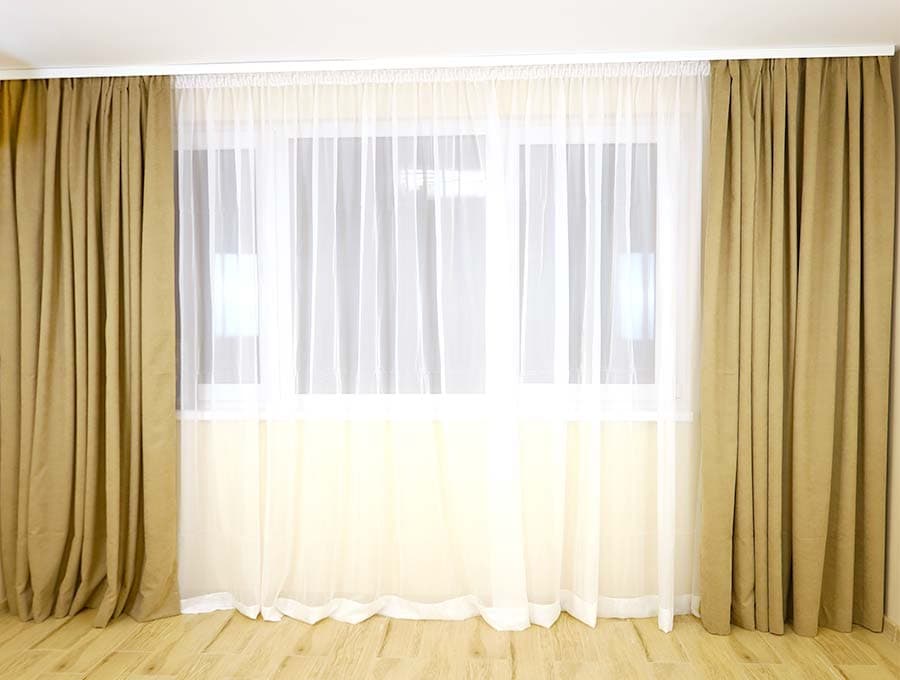
Curtains are an expensive household item, but if you decide to DIY and learn how to make curtains yourself you will save a huge amount of cash. Choose earth-toned fabrics in natural cotton and linen blends for a classy look, then follow our easy step-by-step instructions to make ‘designer’ unlined curtains. You’ll be able to choose the type of fabric interior designers are using instead of putting up with the mass-produced ready-made offerings from homeware stores. With the huge number of quality fabrics on offer you really can afford make your home unique with DIY curtains that have a professional look.
Do you like this? Pin for later:
Wanna be friends? Click HERE and follow me on Pinterest
RELATED:
DIY Simple Rod Pocket Curtains (NEW) – Don’t let the thought of sewing curtains put you off. These are the easiest curtain to sew. To create the pocket for the rod to slide through all you do is stitch two parallel lines at the top seam and thread the curtain rod through it.