
How to Make Rod Pocket Curtains – Simple and Elegant DIY Curtains
Also known as the pole pocket curtain, it is just the easiest curtain to sew. To create the pocket for the rod to slide through all you do is stitch two parallel lines at the top seam and thread the curtain rod through it. It is perfect for lined or unlined curtains that are not too heavy, and instead of fiddling with tape and pleating hooks all you do is sweep back the curtain with a curtain tie and it frames your windows beautifully. Even if you have never sewn a curtain before, our easy step-by-step tutorial will explain exactly how to make a rod pocket curtain for both lined and unlined curtains.
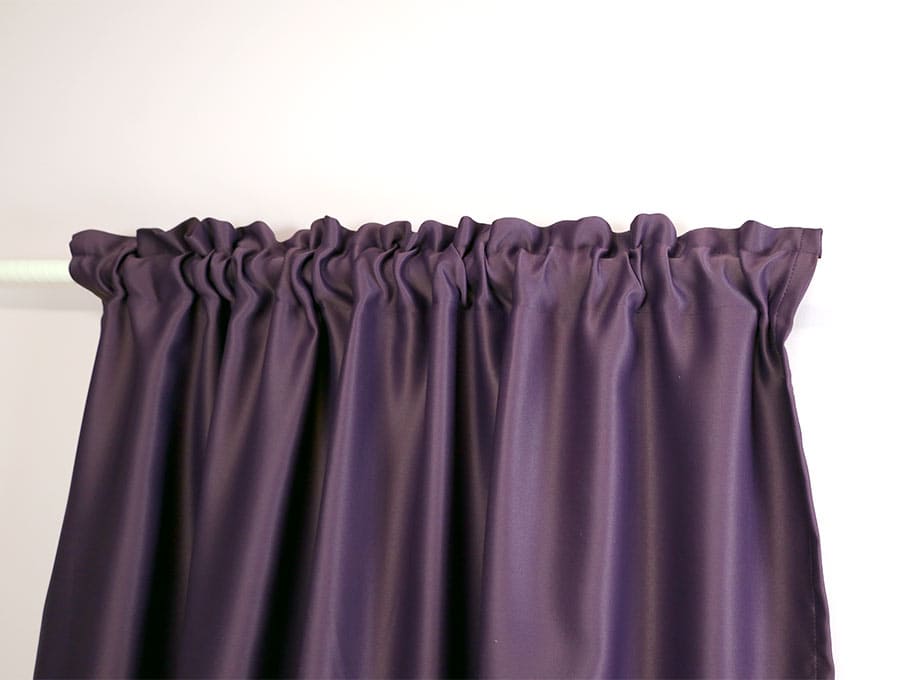
Table of Contents
- 1 What is a rod pocket curtain?
- 2 How to make Rod Pocket Curtains
- 3 Rod Pocket Curtains Supplies and tools
- 4 How to Sew Rod Pocket Curtains
- 5 A. Preparations before you start
- 5.1 Measure Correctly
- 5.2 Calculate curtain length
- 5.3 Calculating curtain width for a single curtain (based on desired fullness)
- 5.4 Calculating width for a pair of curtains
- 5.5 UNLINED Rod Pocket Curtains TUTORIAL:
- 5.6 STEP 1:
- 5.7 STEP 2:
- 5.8 STEP 3:
- 5.9 STEP 4:
- 5.10 STEP 5:
- 5.11 STEP 6:
- 5.12 STEP 7:
- 5.13 STEP 8:
- 5.14 STEP 9:
- 6 How to make lined pocket curtains TUTORIAL:
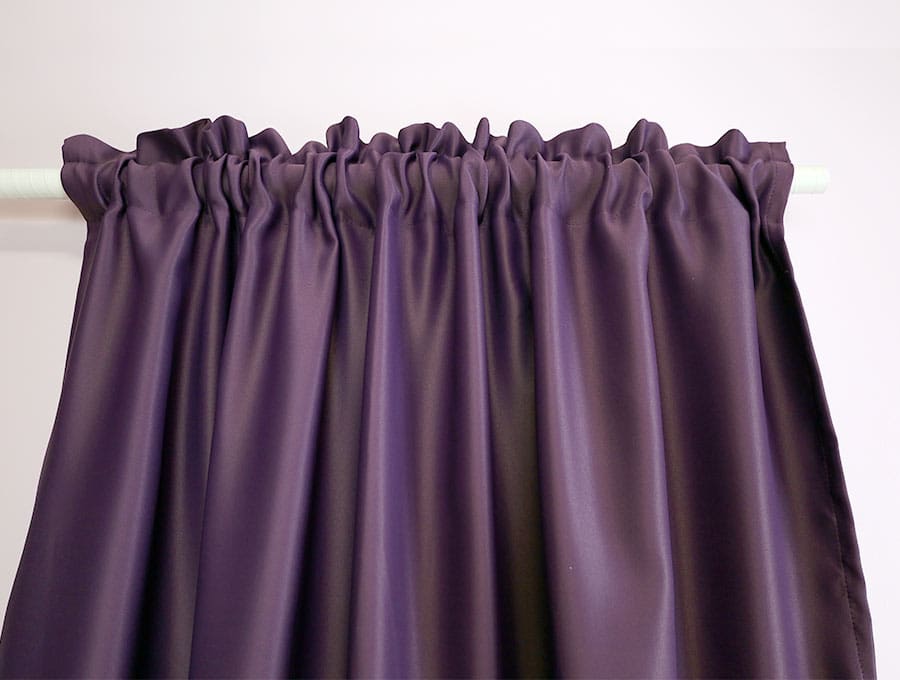
What is a rod pocket curtain?
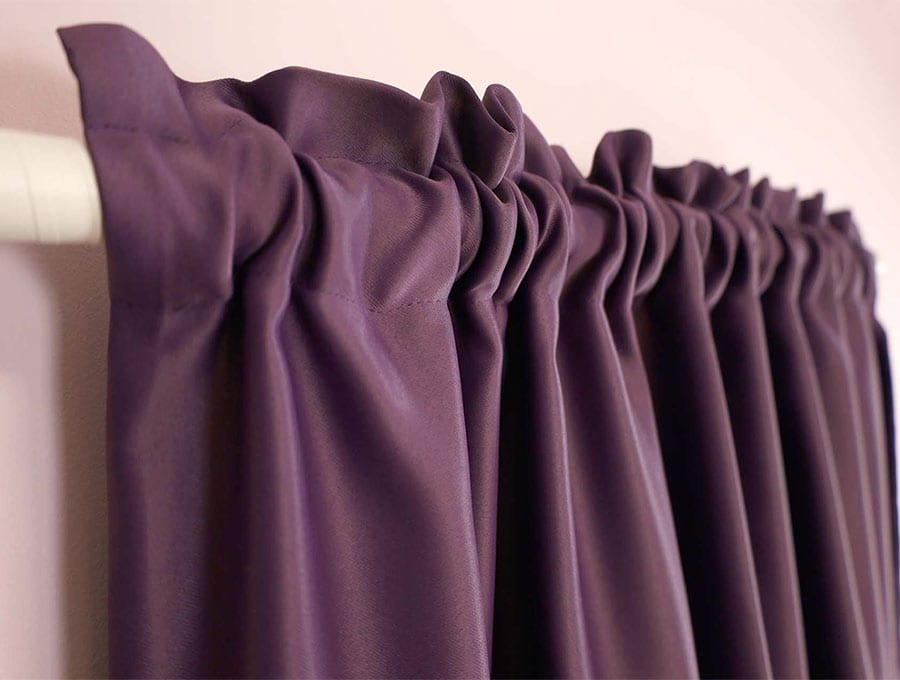
This is a curtain with a little pocket or casing is created, through which the curtain rod can be inserted. It is a casual look that requires no other hardware, like curtain rings or pleating hooks.
All you need is the curtain rod and finials. It is the easiest way to create a lovely draped curtain with no fuss. It is best used for curtains that you don’t intend drawing open and closed as this is not so easy, considering the fabric is on the rod and does not have the benefit of curtain rings or pleating hooks and gliders for smooth movement. Use a rod pocket curtain where you will simply sweep the drapes back with a tie-back. Rod pocket curtains are used in various ways – sometimes the rod is hidden under a valance, giving a full and luxurious effect. Sometimes the rod pocket style is used on French doors where the top and bottom of the curtain slide into rods mounted on the French door creating privacy. If a sheer fabric is used plenty of light still comes in.
Below you will find my step by step rod pocket curtains tutorial with VIDEO instructions for all the visual learners.
We occasionally link to goods offered by vendors to help the reader find relevant products. Some of the links may be affiliate meaning we earn a small commission if an item is purchased.
How to make Rod Pocket Curtains
Rod Pocket Curtains Supplies and tools
- drapery fabric or sheer fabric
- matching thread
- scissors (or rotary cutter and a cutting mat)
- ruler or measuring tape
- iron and ironing board
- sewing clips or pins
- sewing machine
Follow us for free patterns & tutorials! [easy-profiles]
How to Sew Rod Pocket Curtains
Watch the diy rod pocket curtain video first and then follow the written step by step instructions below.
Please enjoy and don’t forget to Like and SUBSCRIBE over on YouTube to be kept up to date with new videos as they come out.
DIY Rod Pocket Curtains VIDEO TUTORIAL
A. Preparations before you start
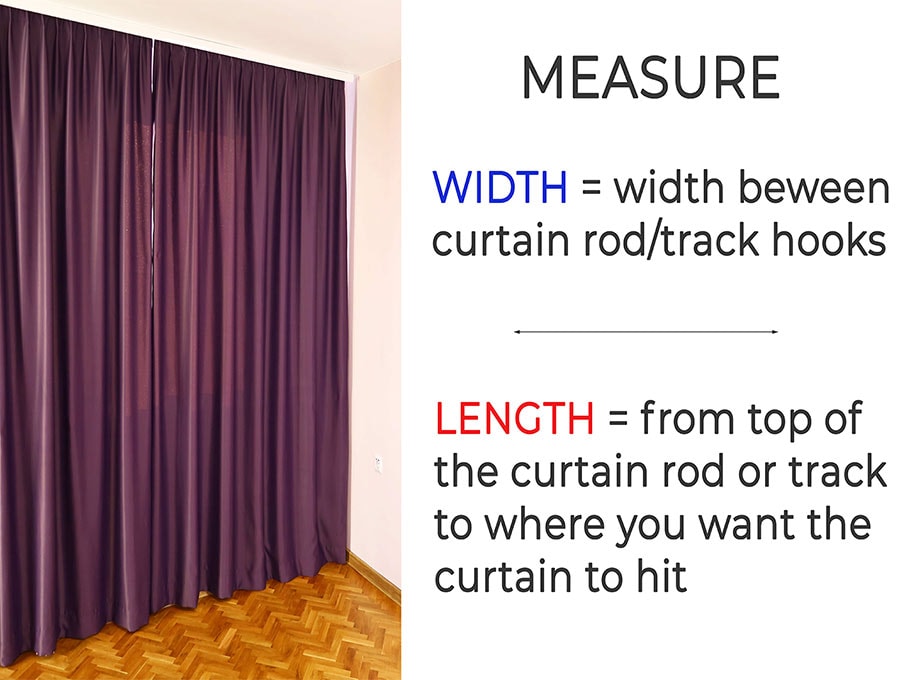
Measure Correctly
Don’t just measure the window size – you need to measure from the position of the curtain rod to where you want the curtain hem to end, and to allow for the curtain rod to extend past the edge of the windows by about 6 inches or so on either side – it can be less for smaller windows. The mantra is measure twice, cut once.
Calculate curtain length
To calculate curtain length use this formula: Length = length + 14 inches (35 cm)
Measure the distance from the top of the curtain rod to the floor or wherever you want the curtain to end – a couple of inches below the base of the window-frame is usual on windows that are not full length. This gives you the drop you need. Add another 12 inches to the length which will allow for a double fold seam of 3 inches at the top and another double fold of 3 inches for the hem.
Calculating curtain width for a single curtain (based on desired fullness)
The formula is as follows: Width = Actual width measured x fullness + 2 inches (5cm).
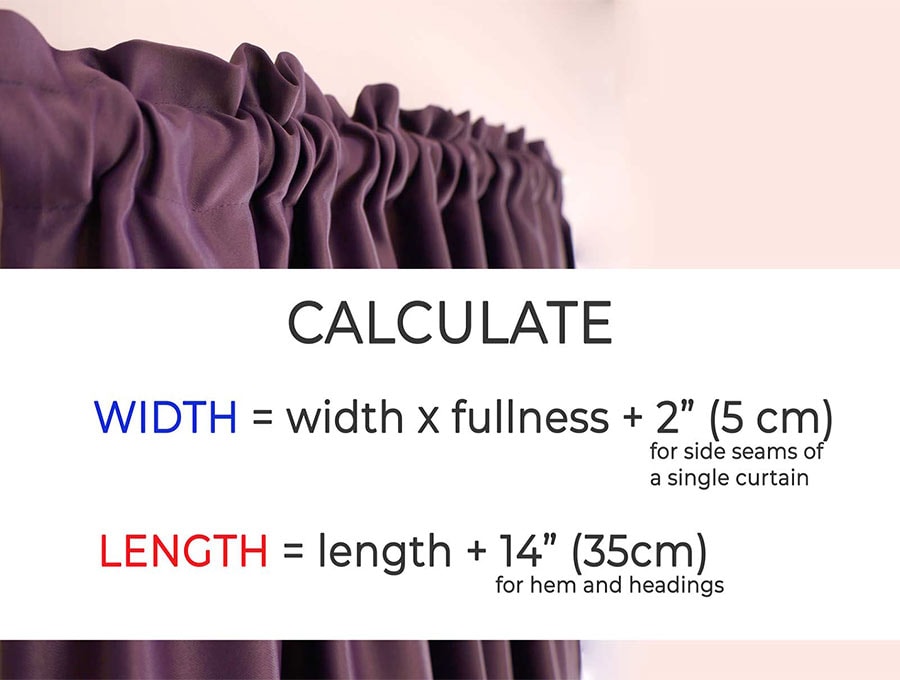
To work this out measure the length of the curtain rod. Once you have measured the length of the curtain rod you will want to allow for some fullness in the curtains. The standard used by professionals is 2 ½ times the width of the window frame or curtain rod. You can go a for a less full curtain by going to 1 ½ to 2 times the width.
Calculating width for a pair of curtains
The formula for two drops is:
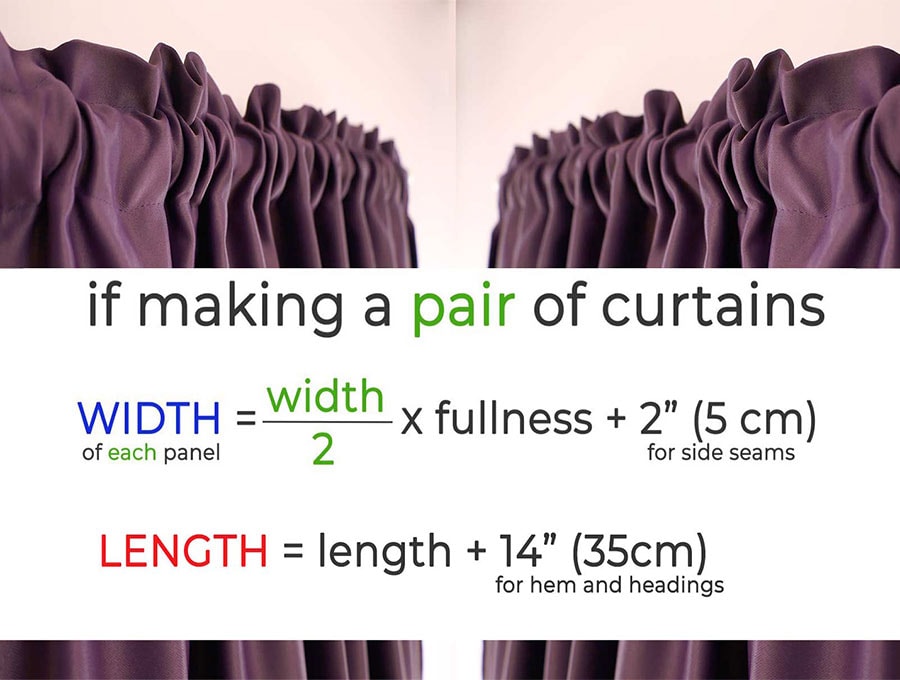
Now you have the width and length of the curtain you need to decide how many drops you need. If the fabric you have chosen for your 36-inch window is 36 inches wide you’ll have two drops of 36 inches wide, losing 2 inches per drop for the side seams = 34 inches. This makes two drops of 34 inches each equaling 68 inches total to give you a fullness close tow 2 times the window width. Always try to choose fabric so it accommodates the width. If for example you were using 45-inch wide fabric your finished pair of curtain drapes would be 43 inches across once you have lost an inch each side for the side seams. These would be suitable for a 40 to 45-inch window.
UNLINED Rod Pocket Curtains TUTORIAL:
STEP 1:
Cut the fabric to the correct length, then remove the selvages neatly, cutting the fabric straight.
Use either a rotary cutter, a ruler and a mat or use scissors but pull a thread first to cut the fabric perfectly straight
STEP 2:
Fold over ½-inch (~1cm)along the side facing the wrong side of the fabric, press in place, then fold over ½-inch (~1cm) again and press the double fold flat. Pin or clip.
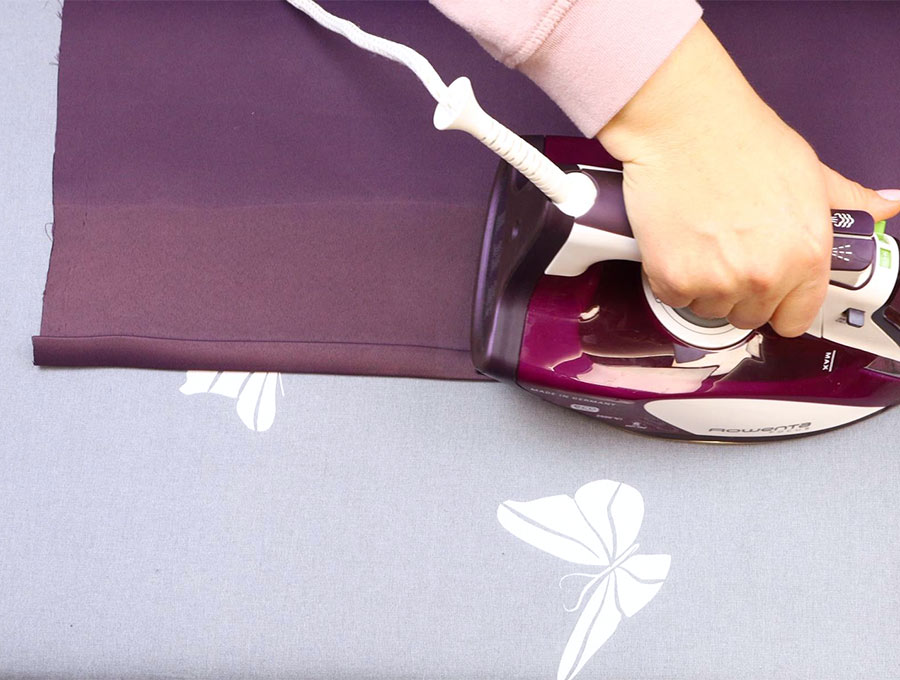
STEP 3:
Stitch along the side seam from top to bottom around 1/8 inch (3mm) in from the edge, back tacking at start and finish. Repeat on the other side of the curtain, and for all drops being used.
STEP 4:
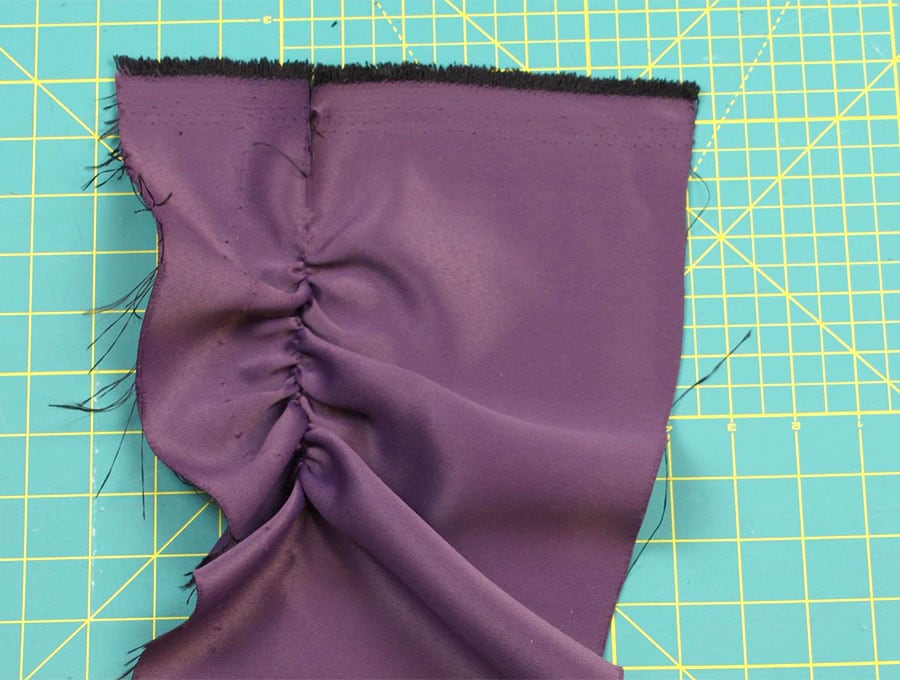
To create the seam at the top fold over 3 inches (7.5 cm) of fabric onto the wrong side, press, then fold over another 3 inches(7.5 cm) and press again. Pin or clip.
STEP 5:
Sew along the folded edge on the wrong side of the curtain 1/8-inch (3mm) in from the edge to create a seam. Repeat steps 4 and 5 if you have more than one drop.
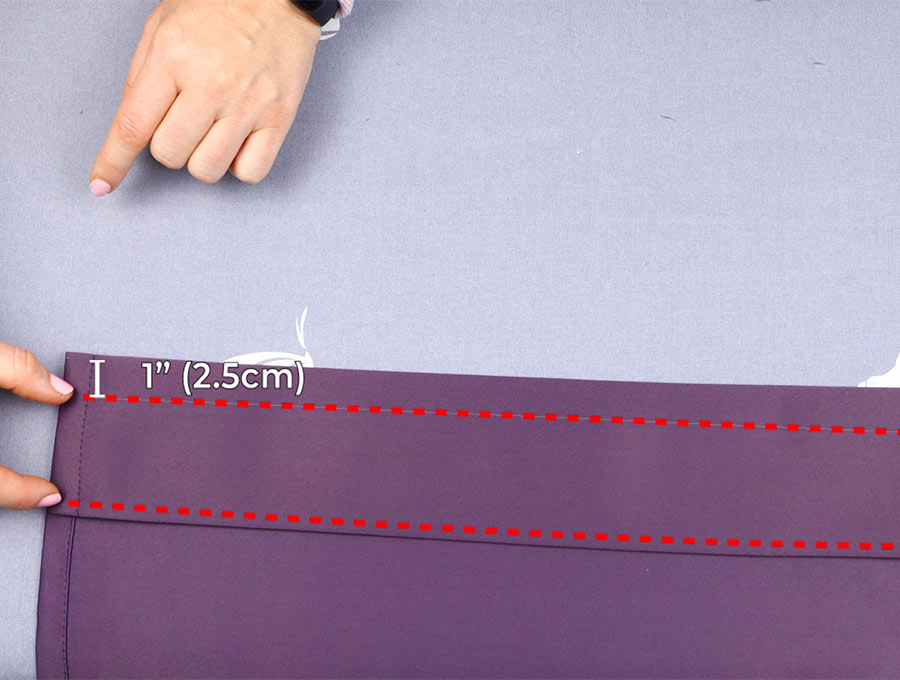
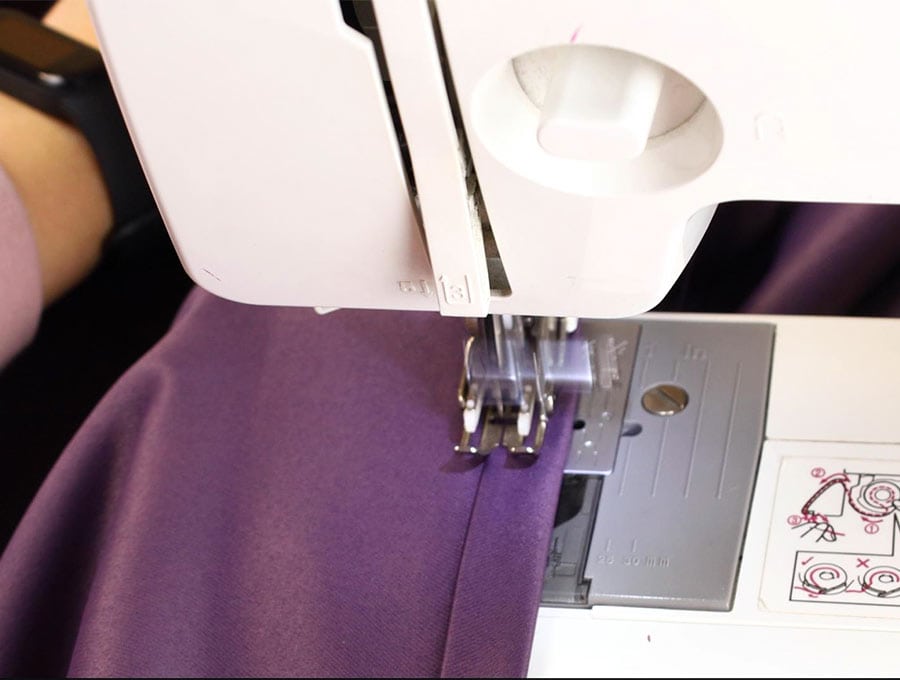
STEP 6:
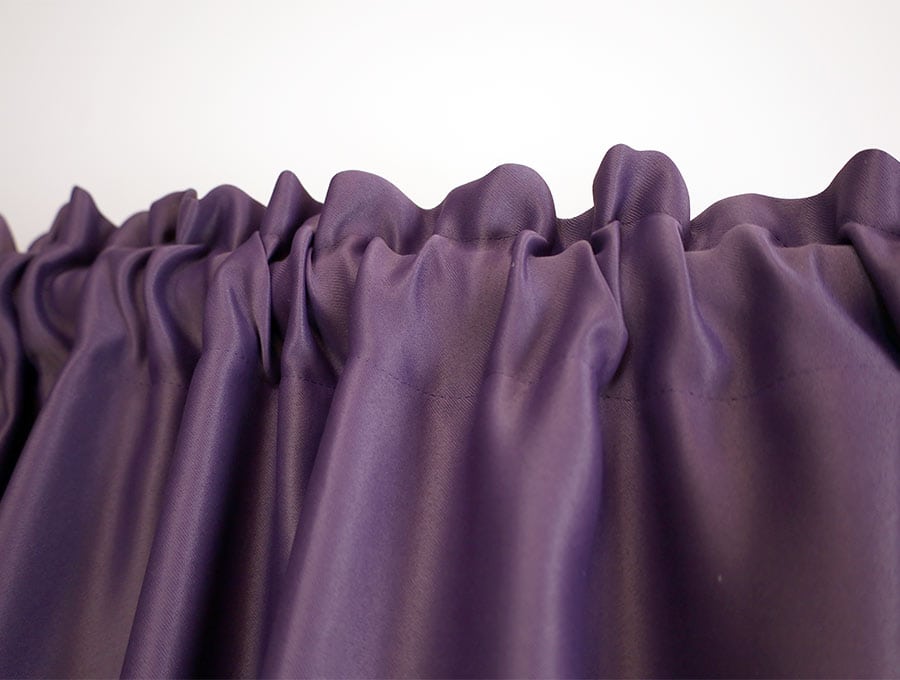
It is your choice if you want to create a header for the curtain rod. Personally, I think this gives a more finished look to the curtain. This can be done on the right side of the fabric. Make sure to mark accurately with an erasable fabric pen so the line is straight. Also make sure your rod fits through the pocket or casing you will create between the stitching 1 inch (2.5cm) from the top and the second row of stitching 3 inches (7.5cm) from the top. If you prefer not to have a header piece you can simply thread the curtain onto the rod after step 5.
STEP 7:
Some people are happy to proceed to the hem next, but some prefer to thread the curtain onto the rod and hang it in place before marking the hem with pins to show where it should hit the floor. It is so easy to slip the pocket rod curtain off the curtain rod and proceed with sewing the hem, once you are absolutely sure that the pins are at the right length.
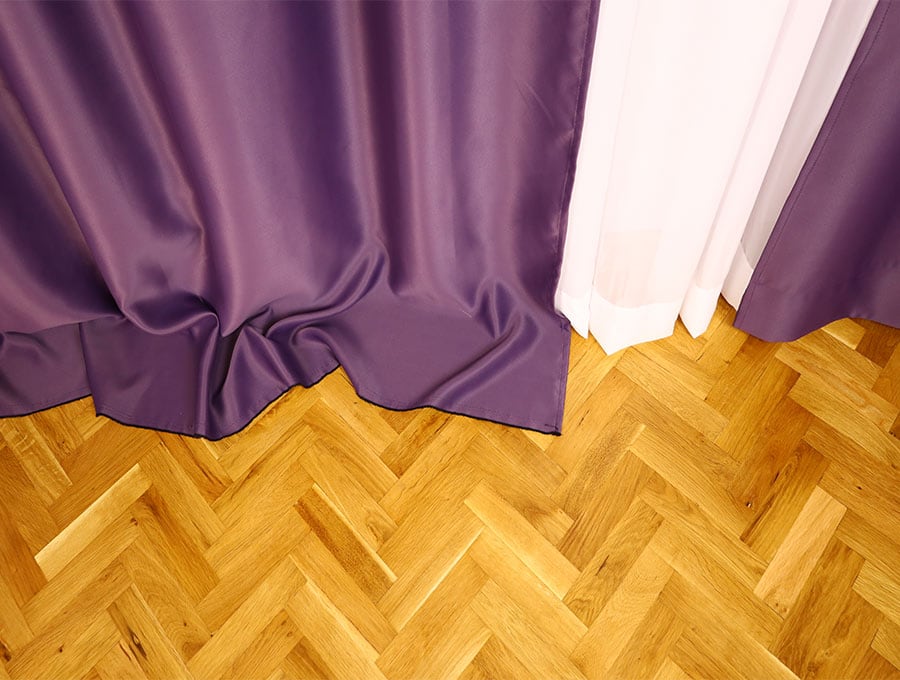
STEP 8:
Once you have marked where the finished hem should be add 8 inches (20 cm) for the hem and cut the fabric. Fold up 4 inches(10cm) on the wrong side, press and then fold up to exactly where the hem should end – again it should be around 4 inches (10cm). Press and pin or clip in place. You will adjust the depth of the hem if it needs to be longer or shorter than the standard 4 inches you allowed for in the cutting.
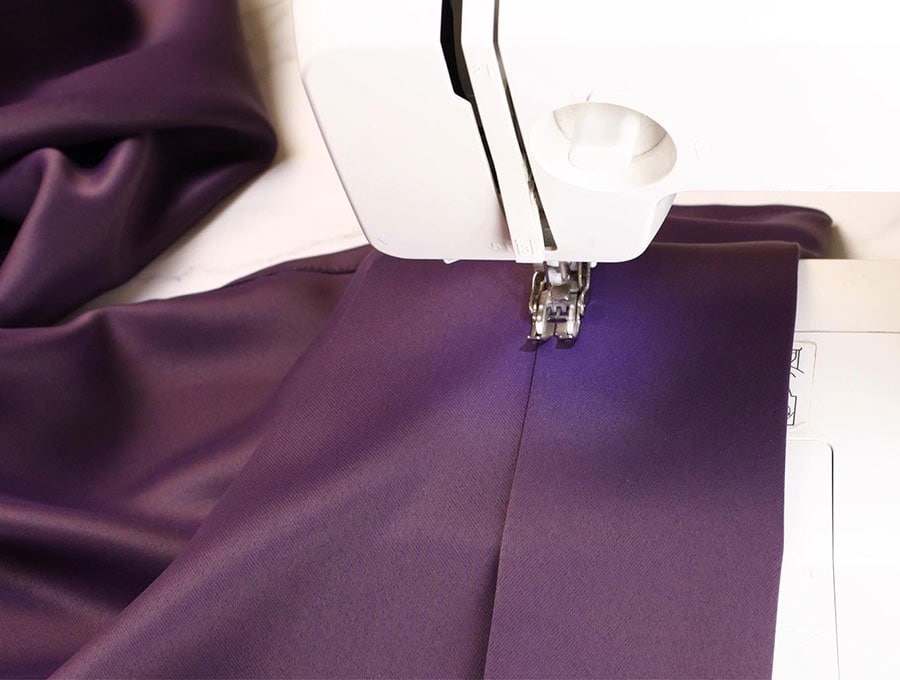
STEP 9:
Sew the hem 1/8 inch (3mm) from the edge of the second fold, back tacking at start and finish.
Repeat steps 7 and 8 if you have a second drop.
How to make lined pocket curtains TUTORIAL:
If the curtain fabric is a bit thin then you may want to add a lining. The easiest way to do this is to cut the lining at the same time as you cut your curtain drape, to the finished dimensions of the curtain.
Step 1
Once curtain and lining fabric is cut, proceed to press the folds first for sides top and bottom, but do not pin or stitch.
Step 2
Lay the lining flat, lifting the folds to make sure the lining edges will be stitched under the folds. Pin the two together and proceed as you would for unlined curtain, sewing the curtain and lining all in one at the side, top and bottom seams. This way the drapery lining does not show at the front of the curtain.
Don’t let the thought of sewing curtains put you off. Our step-by-step instructions will guide you through creating rod pocket curtains – the easiest curtains to sew. These are perfect for those smaller spaces – like bathrooms and kitchens, enabling you to create a fresh look according to the seasons at very little cost. There are no extras to. The fabric, thread, curtain rod, sewing machine, and our free tutorial, are all you need. Come and get creative with us.
If you really liked this super easy way to create curtains then please subscribe to have new sewing projects delivered straight to your inbox. We have some exciting projects lined up with easy-to-follow instructions, that will have you creating the home of your dreams with soft furnishings. We also have great projects for various holidays like Valentine’s Day, Easter, Halloween, and Christmas.
Do you like this? Pin for later:
Wanna be friends? Click HERE and follow me on Pinterest
RELATED:
A home is a work in process. Making subtle updates to a room is fun and a satisfying form of self-expression and creativity. Your guests and family will enjoy your changes, as well. Swap a few pillows, give your windows something new to wear, add a statement bowl on the table and add some greenery. Simple steps can brighten any room.
DIY Curtains with pleating tape