
Large Flower Scrunchie
Make a statement this season with our flower scrunchie, created from our free printable pattern at HelloSewing.
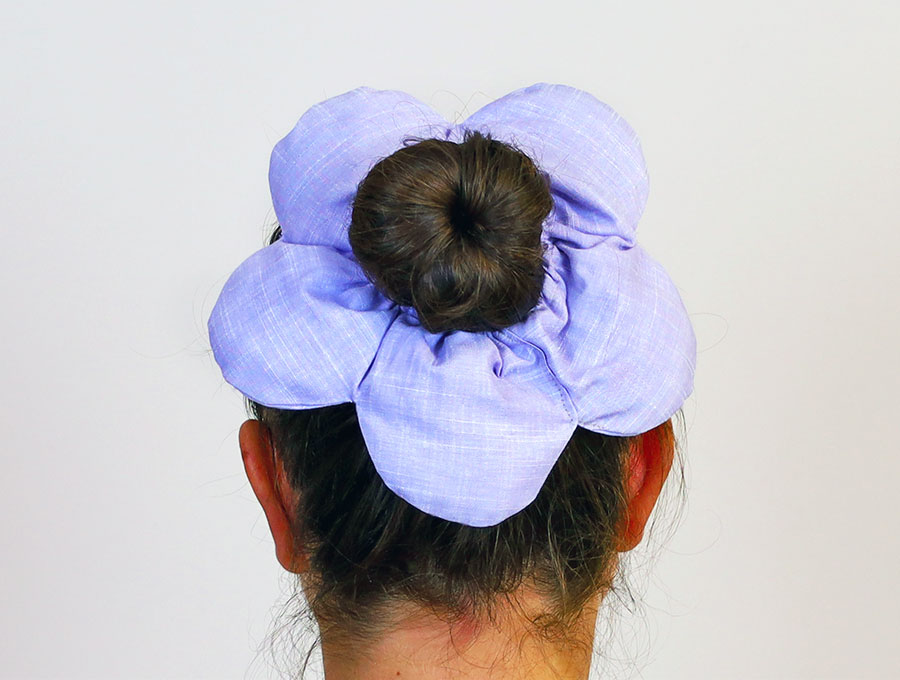
If your kids are into flower fairies then make our flower scrunchie in their favourite flower fairy colour and shape of petal. We provide a free printable pattern with five rounded petals, but, if you want, you can change the petals to elongated, pointed or daffodil type petals. Made in a thin velvet or satin these are a sumptuous way to adorn a costume for a performance or for dress up days. In a bright cotton they’re great for play school or hanging out, keeping hair in a ponytail or bun, up and off the face for busy kids and adults.
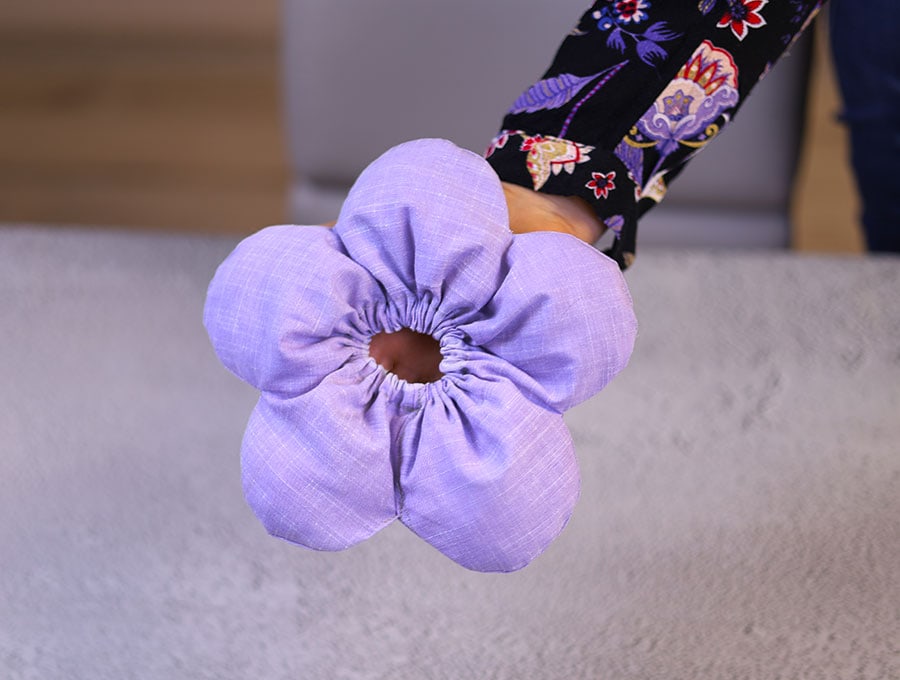
There are two sizes – the smaller flower scrunchie and the large one. They’re a bit different with their puffy appearance that makes them stand out from the crowd. The method is the same for both, the only difference is the size of the petals. And they are super easy to make too.
Below you will find my step by step written tutorial with VIDEO instructions for all the visual learners.
We occasionally link to goods offered by vendors to help the reader find relevant products. Some of the links may be affiliate meaning we earn a small commission if an item is purchased.
Table of Contents
How to make the Large Flower Scrunchie
Supplies and tools
- fabric – silk, satin, velvet or cotton 9.5 x 20.5 inches (24 x 51 cm)
- ¼ inch (6 mm) wide elastic
- a handful of polyester stuffing
- matching thread
- scissors (or rotary cutter and a cutting mat)
- ruler or measuring tape
- iron and ironing board
- sewing clips or pins
DOWNLOAD: Large Flower Scrunchie Pattern[Free pdf file]
Follow us for free patterns & tutorials! [easy-profiles]
How to Sew a Large Flower Scrunchie
Watch the diy large flower scrunchie video first and then follow the written step by step instructions below.
Please enjoy and don’t forget to Like and SUBSCRIBE over on YouTube to be kept up to date with new videos as they come out.
Large puffy flower scrunchie VIDEO TUTORIAL
INSTRUCTIONS:
STEP 1:
Print out our large scrunchie pattern and glue or tape the pieces together on the marks indicated – you will have 3 A4/letter sheets to join. Print at 100% (no scaling). Measure the test line at the top to ensure the pattern printed correctly.
Cut out the pattern using scissors or a rotary cutting knife and a self-healing cutting mat.
STEP 2:
You will need a piece of fabric 9.5 x 20.5 inches (24 x 51 cm) to make a scrunchie.
STEP 3:
Place the pattern piece on the wrong side of the opened out fabric and turn in the ends of the fabric, finger pressing them in line with the ends of the scrunchie pattern. Remove the paper pattern.
Follow the finger pressed line down the short sides of the fabric, press and stitch 1/8 of an inch (3 mm) from the edge.
STEP 4:
Fold the fabric lengthwise so you have a piece 4 ¾ x 20.5 inches (12 x 51 cm) right sides facing each other.
STEP 5:
Place the straight side pf the pattern piece on the fold and use a fabric marking pen to draw around the curves of the scrunchie pattern.
STEP 6:
Cut out the curves using scissors or a rotary cutter and self-healing cutting mat. In the video I used a pair of pinking shears to avoid fraying.
STEP 7:
Stitch around the curves backtacking at the start and finish with a ¼ inch (6 mm) seam allowance.
STEP 8:
Turn the scrunchie the right way out – you can use a safety pin or a tube turning tool.
STEP 9:
Use the turning tool to make sure the petals are pressed out evenly and lie flat, then give the scrunchie a press with your iron.
STEP 10:
You will notice a dotted line near the base of the scrunchie pattern. Mark this line on the fabric as it is where the elastic will be encased to create the scrunchie.
STEP 11:
Stitch along the line which will be ¼ of an inch (6 mm) from the folded edge.
STEP 12:
Add a little Poly fill to each petal – do not overstuff the fabric, but you don’t want it floppy either- just enough to make the petals stand out when it is in use.
STEP 13:
Cut 6 ½ inches (16.5 cm) of ¼ inch (6 mm) wide elastic and insert it through the casing you created in Step 12. Use a safety pin or a bodkin to thread the elastic through the casing.
STEP 14:
Pin the elastic in place on each side, leaving a little overlapping outside of the casing.
STEP 15:
Stitch together the ends of the elastic by hand, or you can use your sewing machine, stitching back and forth on the overlapping ends to make sure the elastic is firmly held in place by the stitches.
STEP 16:
Push the stitched ends away from the seam line by easing the elastic through the completed casing – you don’t want too much bulk where you will join the petals to complete the flower scrunchie.
STEP 17:
Place the seam ends of the scrunchie over each other, slipping one end of the scrunchie just inside the other and pin, then stitch to complete.
The flower scrunchie is now ready to wear. This project is great for plays and ballet performances for youngsters. Like and subscribe here for more projects like this. For the festive season you could make these in red or green and add a couple of bells, or some sequins.
Do you like this? Pin for later:
Wanna be friends? Click HERE and follow me on Pinterest
RELATED: