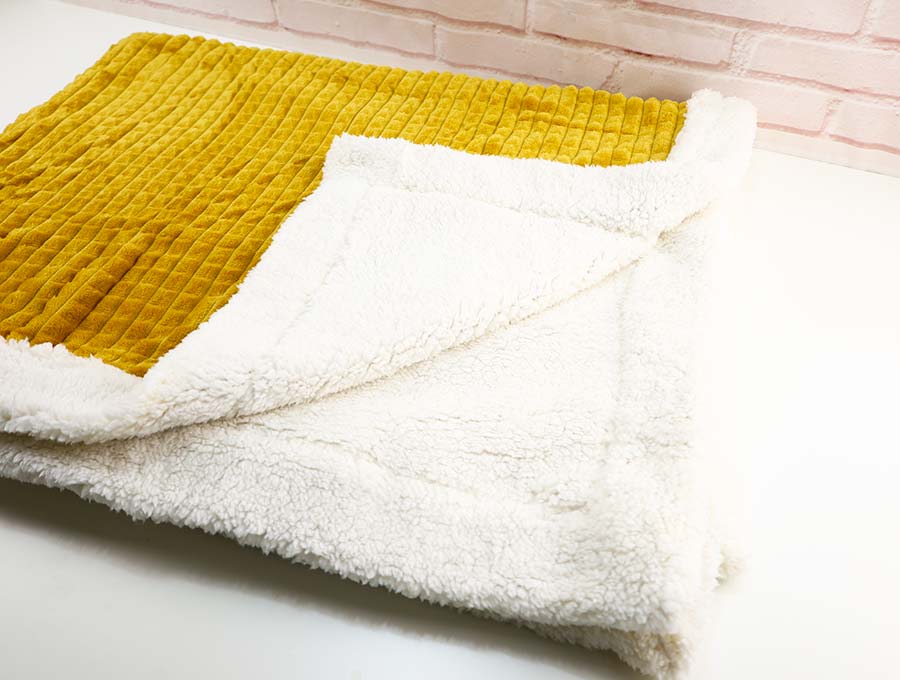
How to Make a Self-Binding Sherpa Fleece Blanket
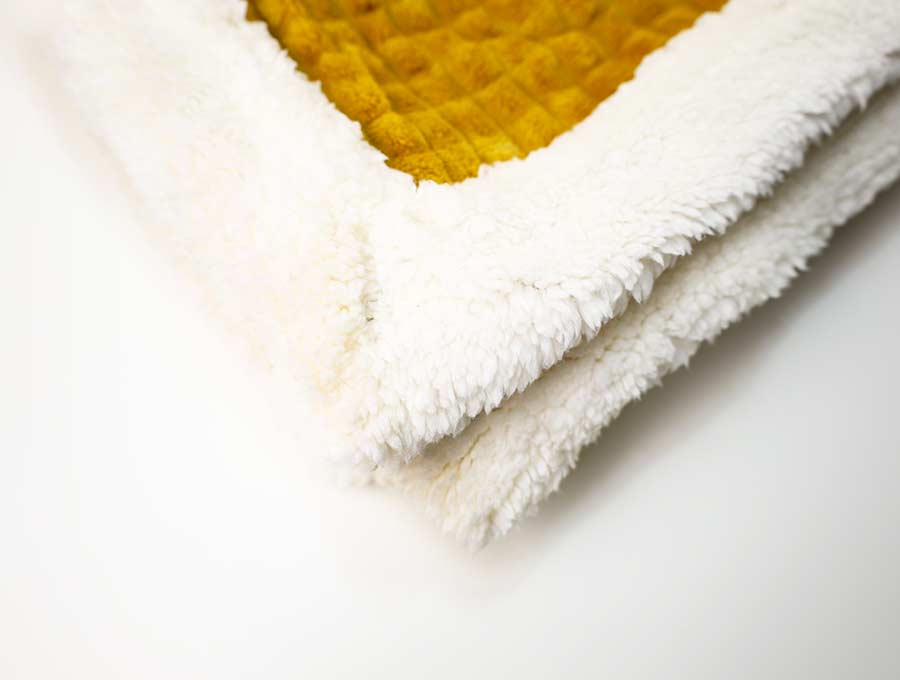
Who doesn’t love snuggling up under a soft warm blanket in winter? We adore the soft feel of a DIY Sherpa fleece blanket, a curly piled fabric originally invented by an American manufacturer. It provides an animal-friendly alternative to the real sheepskin used by the Sherpa people of Nepal to line their clothes against the bitter conditions in the foothills of the Himalayas. Today we are going to make an easy self-binding Sherpa fleece blanket with step-by-step instructions. Use attractive prints for the upper or even create your own quilt upper. This is going to be a hit with all ages as they cuddle into their Sherpa fleece blanket.
Below you will find my step by step written tutorial how to make a sherpa blanket with VIDEO instructions for all the visual learners. Today we will be making sherpa fleece throw blankets, but I’ll also give you the sherpa fleece blanket sizes and suggested measurements as well and you can make sherpa lined blanket in ANY size you want.
We occasionally link to goods offered by vendors to help the reader find relevant products. Some of the links may be affiliate meaning we earn a small commission if an item is purchased.
Table of Contents
- 1 How to make a sherpa blanket
- 2 Supplies and tools
- 3 How to Sew a Sherpa Fleece Blanket
- 3.1 Self binding fleece blanket VIDEO TUTORIAL
- 3.2 Sherpa Fleece Blanket INSTRUCTIONS:
- 3.3 STEP 1: Cut your fabrics
- 3.4 STEP 2: Fold
- 3.5 STEP 3: Align
- 3.6 STEP 4: Pin or spray baste
- 3.7 STEP 5: Quilt both fabrics
- 3.8 STEP 6: Mark where you’ll cut the corners
- 3.9 STEP 7: Cut the corners
- 3.10 STEP 8: Stitch the corners
- 3.11 STEP 9: Finish the blanket
- 3.12 STEP 10: Topstitch
- 3.13 STEP 11: (OPTIONAL) Run a second line of topstitching
- 4 Sherpa Fleece Blanket FAQs, Tips and Troubleshooting:
How to make a sherpa blanket
Supplies and tools
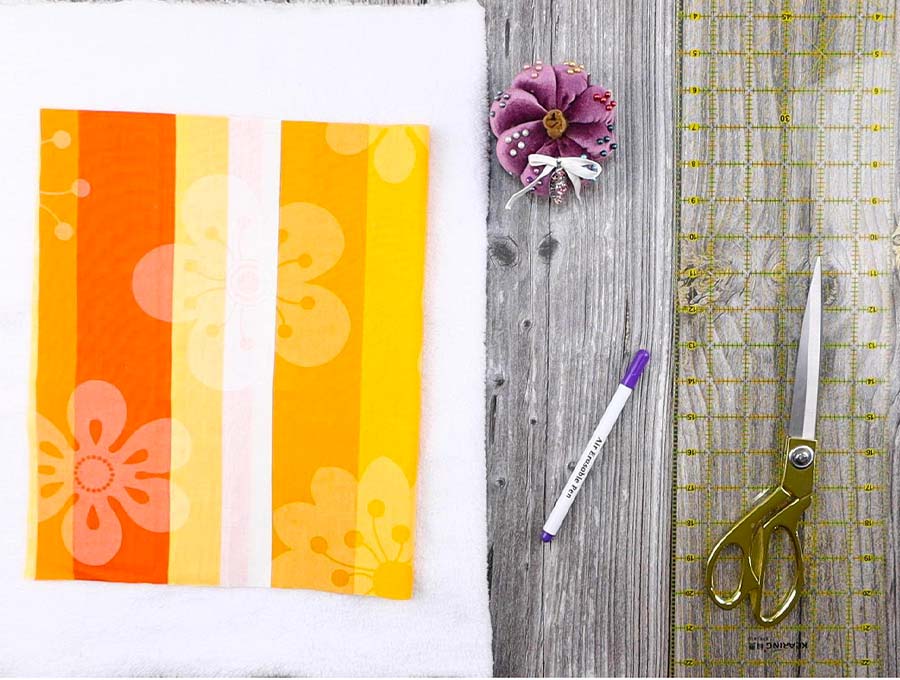
- upper fabric – 100% tightly woven cotton
- sherpa fleece
- matching thread
- scissors (or rotary cutter and a cutting mat)
- ruler or measuring tape
- iron and ironing board
- sewing clips or pins
- sewing machine
Follow us for free patterns & tutorials! [easy-profiles]
How to Sew a Sherpa Fleece Blanket
Watch the diy sherpa lined blanket video first and then follow the written step by step instructions below.
Please enjoy and don’t forget to Like and SUBSCRIBE over on YouTube to be kept up to date with new videos as they come out.
Self binding fleece blanket VIDEO TUTORIAL
Sherpa Fleece Blanket INSTRUCTIONS:
First off, you need to decide what size you want to start making the fleece and sherpa blankets. It is probably best to start with a smaller blanket to get familiar with the technique before going on to the large projects, but that is totally up to you. You can make the blankets any size you choose, but the common sizes of blankets from bassinet covers for babies, to large throw blankets, are set out in the table below.
here’s the smallest blanket I’ve ever made so you can see everything better on camera
When you cut the upper piece, it will be the same size at the finished blanket. The Sherpa fleece will be cut 4 inches larger in length and width on smaller blankets as 2 inches will be turned up on each side, then ½ inch turned under to provide a 1 ½ inch finished border.
You will notice that on the smaller blankets, up to the baby stroller size have a narrower edging of 1 ½ inches when finished – this is to keep the proportions looking right. The larger blankets have a 2 ½ inch finished edging.
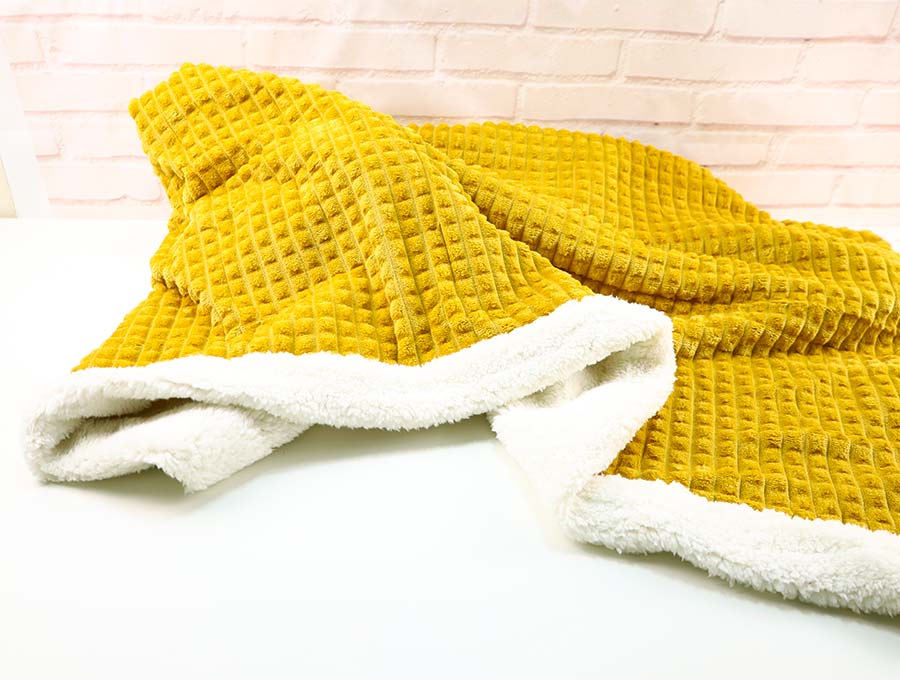
By turning the sides of the Sherpa fleece over the edges of the upper you’ll create a self-binding that gives the blanket a professional finish.
Fabric cutting chart:
![]()
If you want to make a blanket with proportions that are different to those laid out in the chart then you will cut the size you desire for the upper, then if it’s a smaller blanket simply add three inches on each of the four sides – so if you choose 30 x 30 inches you will cut 36 x 36 inches of Sherpa fleece. If it is a large sherpa blanket then cut 4 inches extra on each side – for example 50 x 50 inches for the upper will be 58 x 58 for the Sherpa fleece. Just remember that Sherpa fleece comes in a maximum width of 60 inches, so don’t exceed that width.
Guiding the Sherpa fleece and fabric through the machine will require you to use both hands as it is quite thick – you can use your normal foot or if you prefer can use the walking foot. The needle suggested is a 90/14 and preferably a ball point needle.
The upper fabric can be a cotton, flannelette or even a quilt that you have created. The sky is the limit with the choice of prints for the blanket, as you can match the print to suit the age and interests of the person you’ll be making it for. What you do need is the Sherpa fleece for the ultimate in a soft, lightweight, super cuddly blanket to keep out those winter chills.
STEP 1: Cut your fabrics
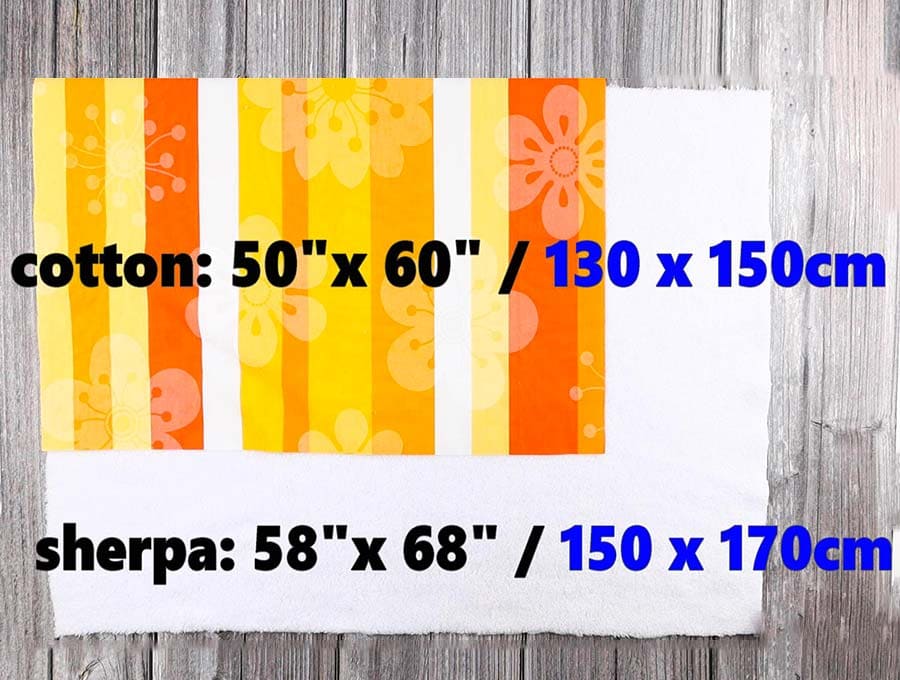
the sizes shown are for a sherpa fleece throw blanket
Choose your upper fabric and cut it to the finished size you desire – using the information in Column 2 if cutting in inches, or Column 3 if cutting in centimeters.
Cut the Sherpa fleece according to the size indicated in Column 4 if working in inches or Column 5 if working in centimeters.
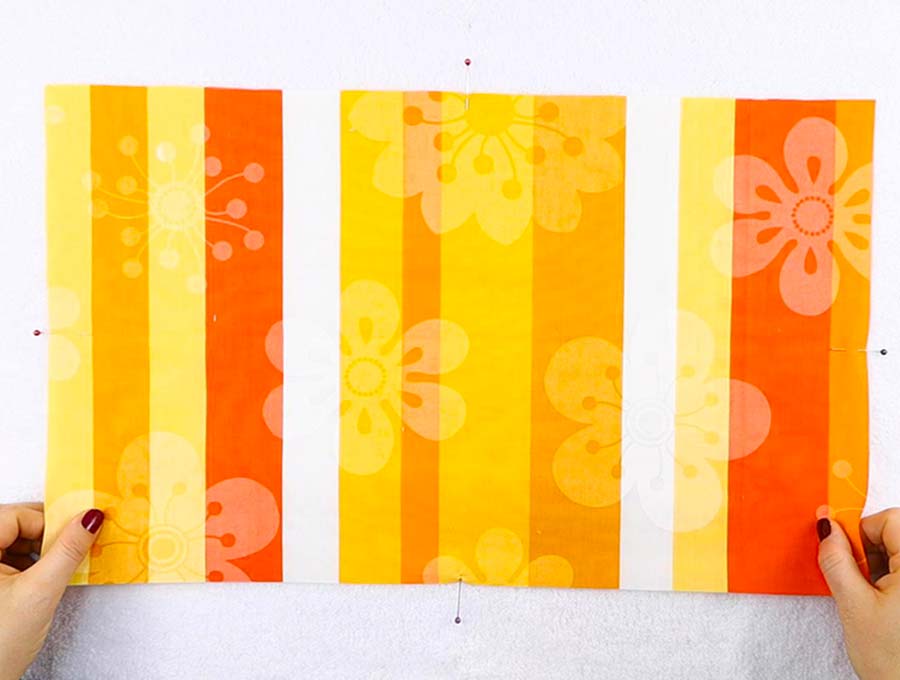
STEP 2: Fold
Fold your Sherpa fleece in half and mark the center with a pin on each side, repeat with the other side, so you have 4 pins indicating the center of each side. Repeat with the upper fabric.
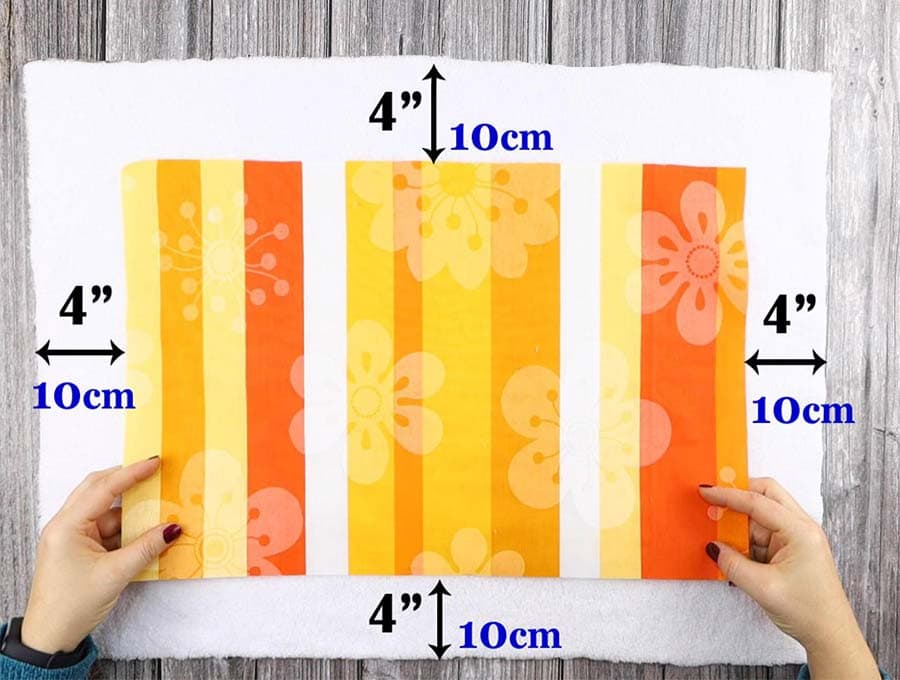
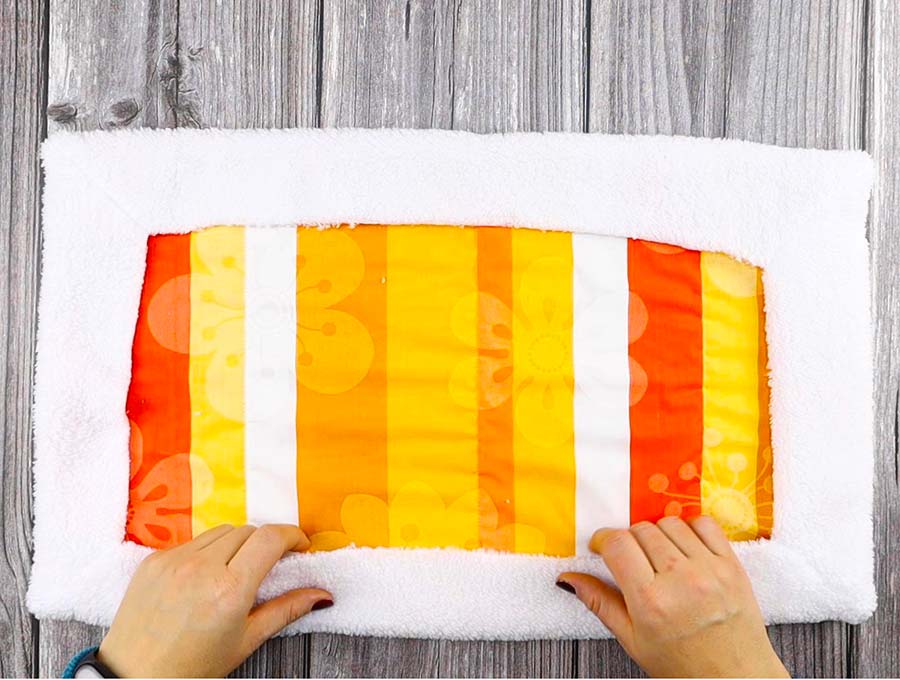
STEP 3: Align
Lay down the Sherpa fleece with the wrong side uppermost. Over the fleece, position the upper fabric with the right side uppermost. To position it equally, the pins should be lining up and there should be a 3 to 4-inch gap (depending on the size blanket you are making) all the way around. Adjust and measure to ensure the upper is centrally placed so when you fold up the edges they will be equal on all four sides.
STEP 4: Pin or spray baste
Take care not to stretch the fabric layers as you secure the upper to the fleece with pins or with spray baste, to hold it in place while you stitch.
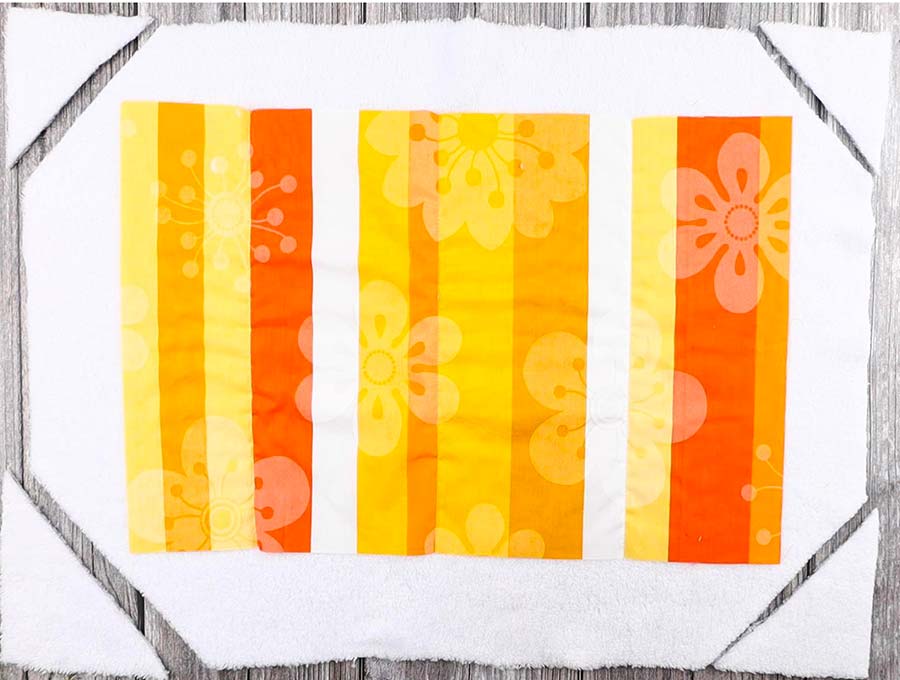
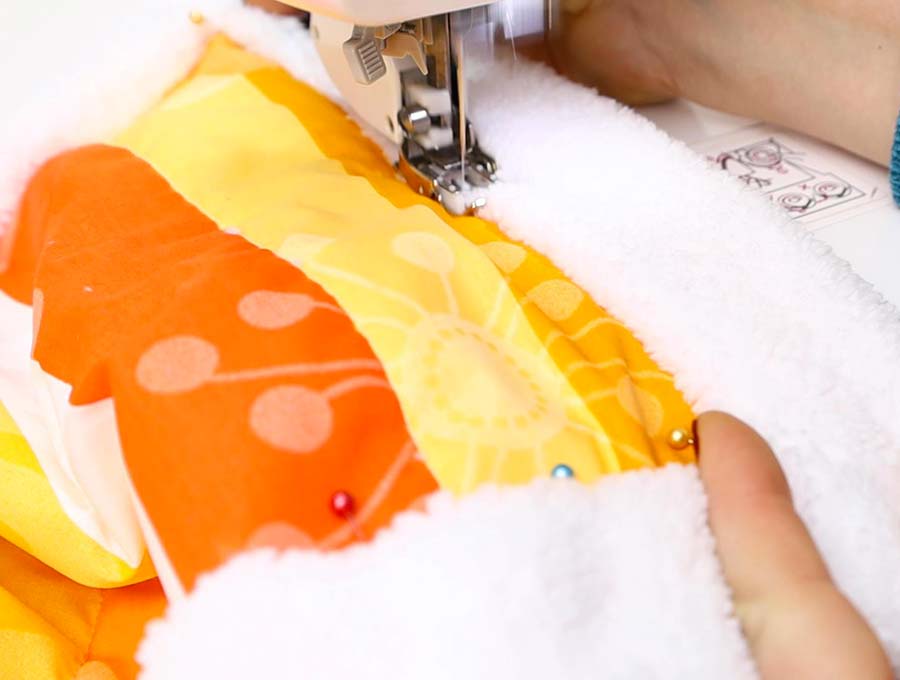
STEP 5: Quilt both fabrics
If your upper print is dark, thread the machine with a thread to match, and keep the thread in the bobbin white or cream to match the color of the Sherpa fleece. You can secure the layers in a grid pattern, starting at the edge of the upper, and not stitching into the fleece border. The lines will have to be accurately measured and marked with erasable fabric pen before you start.
Secure the upper to the fleece layer by stitching along the lines slowly making sure that the fabric is not stretching and bulging in areas. Backstitch at the start and finish of each line of stitching and trim excess thread.
STEP 6: Mark where you’ll cut the corners
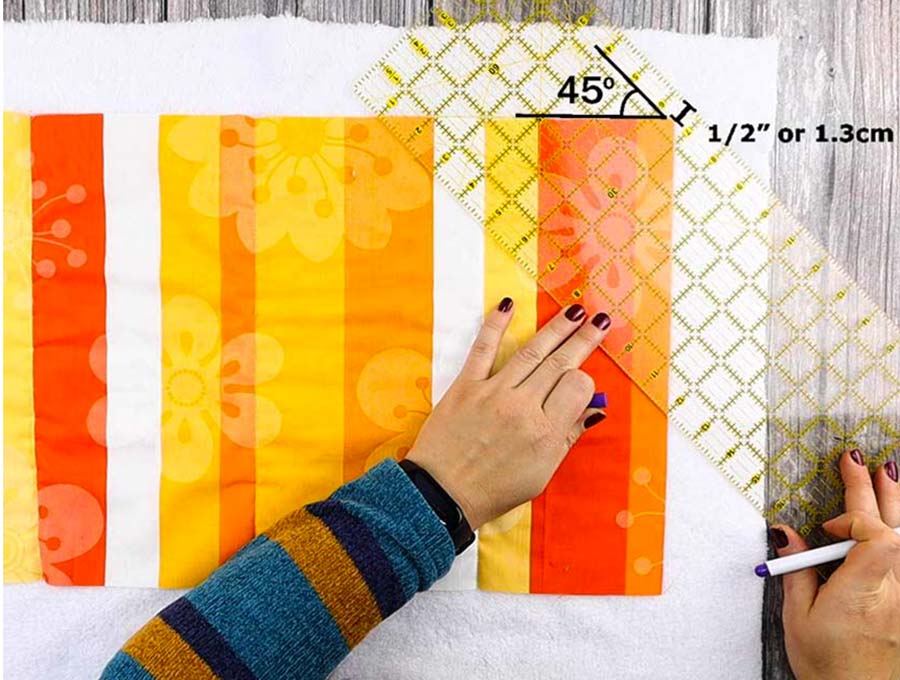
Lay out the blanket with the right side of the printed fabric uppermost. Using a ruler and an erasable marking pen draw lines extending from the four corners of the right side of the upper fabric to the edge of the Sherpa fleece.
Take a ruler and measure across the corners ½ inch from where the upper fabric ends. Mark off with a fabric pen as you see in the right-hand corner of the image below. Make sure the two sides of the triangle closest to the corner are equal. Repeat on all four corners
STEP 7: Cut the corners
Cut off the 4 triangles along the line you marked. This is to reduce bulk on your mitered corner
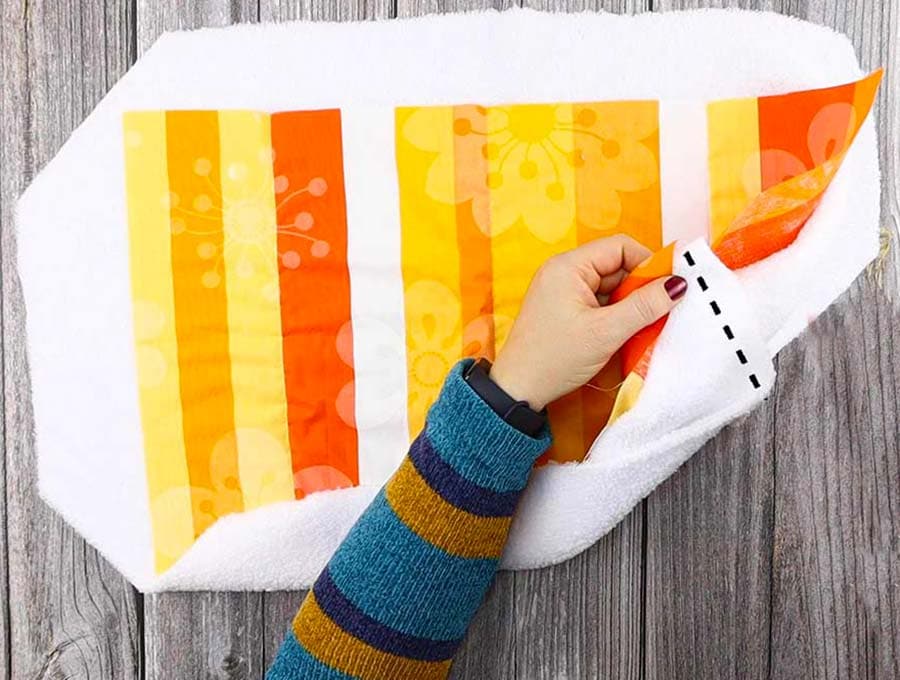
STEP 8: Stitch the corners
Now starting with one corner fold the corner in the middle so the right sides of fleece are facing each other and you are stitching on the wrong side of the fleece.
Stitch all four corners with 3/8″ (1cm) seam allowance, back tacking at start and finish.
STEP 9: Finish the blanket
You are now ready to turn finish the blanket. You can do this either by 1. turning the edges up and straight stitching on top or by 2. zig zaggging all around the blanket without turning up the edges. Personally I like the first method more, but if your machine has trouble stitching through all those layers, definitely go with method #2 zig zagging.
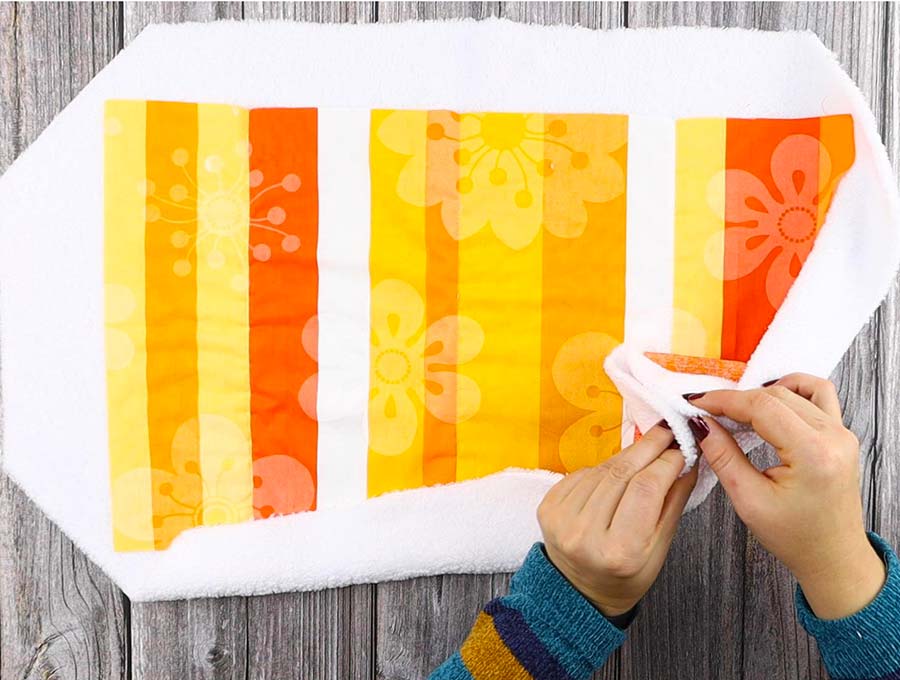
To finish the blanket, turn the edges up.
With the printed fabric right side up on your work table, fold up the edges of the Sherpa fleece to cover the raw edges of the upper, flattening out the corner seams. Fold ½ inch under before pinning the edging securely in place. Make sure it’s all lying flat and the edges are even at 1 ½ inches or 2 ½ inches all the way round the blanket.
STEP 10: Topstitch
Time to topstitch around the edges where you have pinned. Because you will be stitching through four layers of fabric on the sides, and five layers on the corners you will need to set the stitch length to a longer length or to a zig zag. Stitch 1/8 of an inch from the edge all around.
STEP 11: (OPTIONAL) Run a second line of topstitching
It is optional if you want to run a line of topstitching ¼ inch from the outside edge of the blanket.
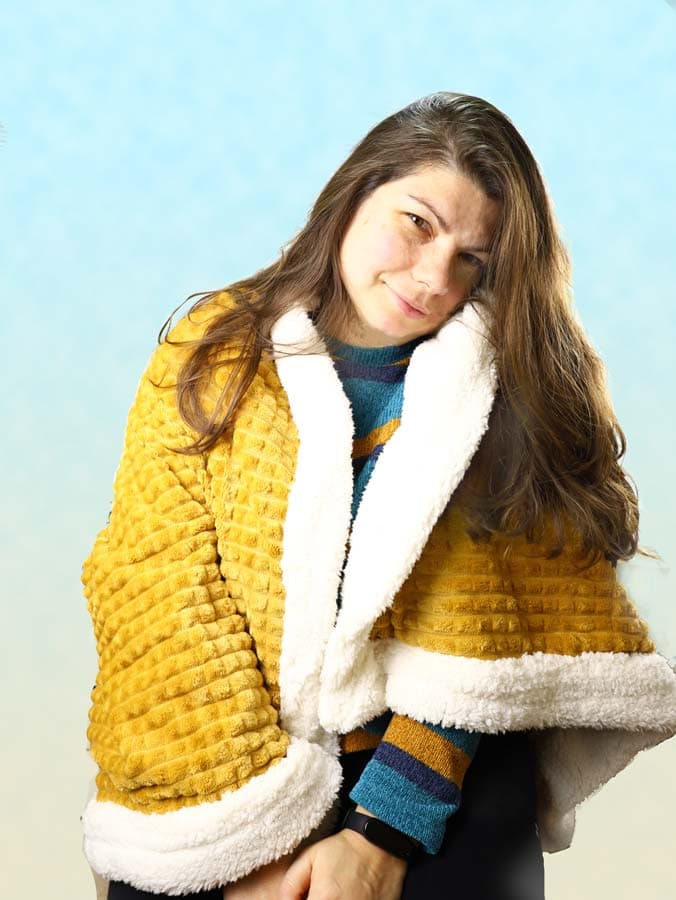
That’s it your sherpa fleece blanket is ready!

Sherpa Fleece Blanket FAQs, Tips and Troubleshooting:
Q: What if my machine cannot cope with stitching through all the layers of fleece?
A: You can still have a Sherpa fleece blanket but it will not have the mitered corners.
- Cut the upper and Sherpa fleece backing the same size by taking the finished dimensions you require and adding ½ inch seam allowance all round.
- Place right side to right side of the upper and fleece and secure with pins. Starting in the middle of one side, backtack, then stitch all the way around, lifting the pressure foot, but leaving the needle in the fabric on the corners and turning before lowering the foot, until you finish up about 6 to 8 inches from where you started.
- Back tack and trim your thread.
- Cut across the corners, being careful not to get too close to the stitching. This removes extra bulk so the corners can be turned out neatly.
- Now carefully pull the fabric through the gap so the blanket is the right way out. Press out the corners using a knitting needle or chopstick.
- Fold under the raw edges, and slip stitch closed by hand.
- Run a top stitch all the way around the blanket ½ inch from the edges – this way you will only be going through two layers of fabric instead of four, as with the mitered corners.
Q: Can I secure the upper to the fleece using diagonal lines or another pattern?
A: You can. You will have to measure your diagonals from corner to corner and ensure they are equidistant from each other to create a uniform diagonal grid. If you choose instead to follow the swirls in a large pattern then pin along the lines and go ahead and stitch.
Q: What is the easiest fabric print to use for the upper?
A: A plaid or striped fabric will probably be the easiest as you don’t have to draw lines but simply follow the lines printed on the fabric.

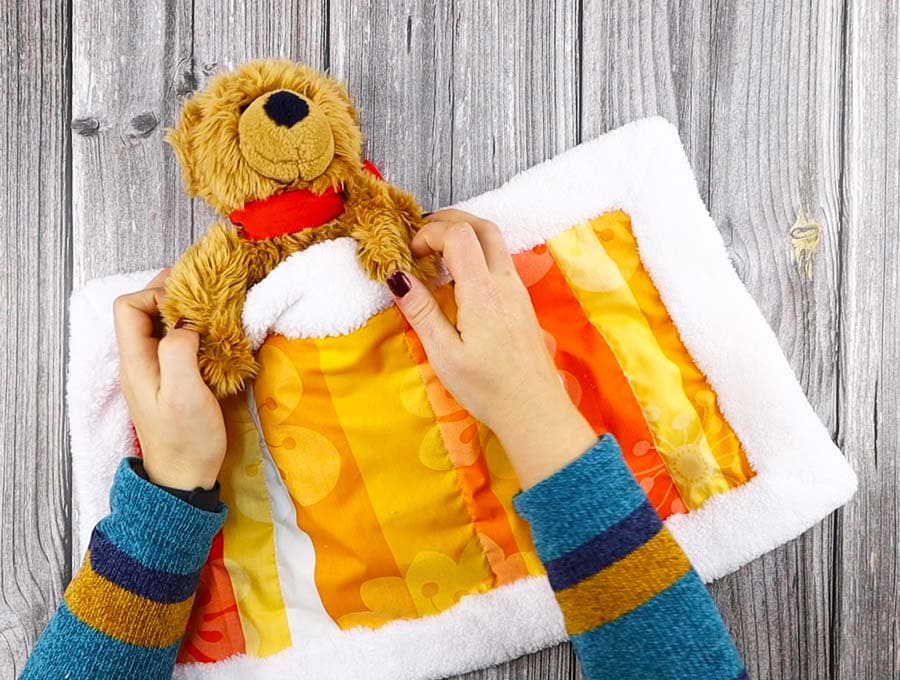
When you have completed one of these easy self-binding Sherpa fleece blankets you will probably be inspired to create more. Give a thought to those in need around you, and gift to children and the elderly in need. There are many charities who would be very grateful for blanket donations – especially one as beautifully light and warm as the self-binding Sherpa fleece blanket.
Do you like this? Pin for later:
Wanna be friends? Click HERE and follow me on Pinterest
RELATED:
Reversible Neck warmer (w.Free pattern)
Reading pillow (it’s not just for the kiddos! We all need one of these)
Hair towel wrap you need one of these in your life