
DIY Christmas Angel out of Toilet Paper Roll // Stunning DIY Christmas Decor
Transform a Toilet Paper Roll into a Whimsical Christmas Angel! Create this beautiful Christmas angel complete with wings and a halo. All you need is a toilet roll inner, a large wooden bead, a couple of toothpicks, chenille stems, golden string, a bit of left over yarn and a hot glue gun – plus your creativity.
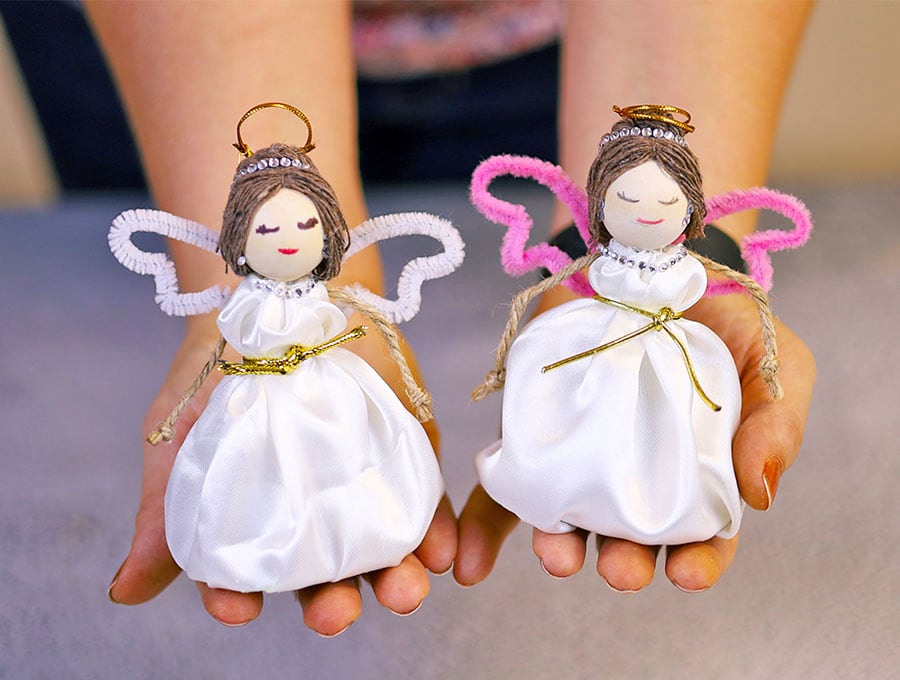
The DIY Christmas angel as a decoration for your tree or mantelpiece is a quick make – it honestly takes longer to describe in the instructions than to actually make one. Once you have made one you may want to create a choir of angels! All you need is a toilet roll inner and some white satin to get started. Have fun with the kids creating this cute angel that rises way above the usual toilet roll angels you’ve probably seen on crafty websites.
Below you will find my step by step written tutorial with VIDEO instructions for all the visual learners.
We occasionally link to goods offered by vendors to help the reader find relevant products. Some of the links may be affiliate meaning we earn a small commission if an item is purchased.
Table of Contents
- 1 How to make the Toilet Paper Roll Christmas Angel
- 2 Supplies and tools
- 3 How to Sew a Christmas Angel from Toilet Paper Roll
- 3.1 Christmas Angel from Tissue Paper Roll VIDEO TUTORIAL
- 3.2 INSTRUCTIONS:
- 3.3 STEP 1:
- 3.4 STEP 2:
- 3.5 STEP 3:
- 3.6 STEP 4:
- 3.7 STEP 5:
- 3.8 STEP 6:
- 3.9 STEP 7:
- 3.10 STEP 8:
- 3.11 STEP 9:
- 3.12 STEP 10:
- 3.13 STEP 11:
- 3.14 STEP 12:
- 3.15 STEP 13:
- 3.16 STEP 14:
- 3.17 STEP 15:
- 3.18 STEP 16:
- 3.19 STEP 17:
- 3.20 STEP 18:
- 3.21 STEP 19:
- 3.22 STEP 20:
- 3.23 STEP 21:
- 3.24 STEP 22:
- 3.25 STEP 23:
- 3.26 STEP 24:
- 3.27 STEP 25:
- 3.28 STEP 26:
- 3.29 STEP 27:
- 3.30 STEP 28:
- 3.31 STEP 29:
How to make the Toilet Paper Roll Christmas Angel
Supplies and tools
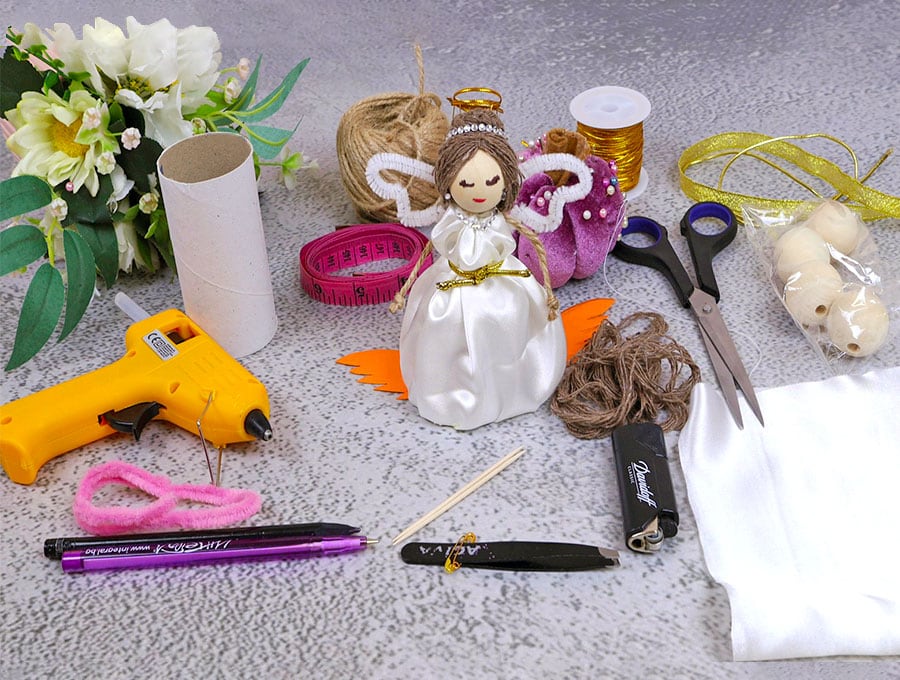
- fabric – white or off-white organza, satin or silk
- white, pink or gold pipe cleaner for the wings
- 1 empty toilet paper roll
- 2 toothpicks
- wooden ball or bead – 28mm (1 inch) to 38mm – (1.5″)
- a length of golden string or thin ribbon for the belt and the halo
- 2 tiny golden safety pins
- 3mm (1/8″) wide jute rope string for the hands – 15cm long
- matching thread
- light brown macrame or yarn for the hair
- scissors (or rotary cutter and a cutting mat)
- ruler or measuring tape
- handsewing needle and white thread
- iron and ironing board
- sewing clips or pins
- glue gun and glue sticks or fabric glue
- lighter
Follow us for free patterns & tutorials! [easy-profiles]
How to Sew a Christmas Angel from Toilet Paper Roll
Watch the diy Christmas angel from toilet roll video first and then follow the written step by step instructions below.
Please enjoy and don’t forget to Like and SUBSCRIBE over on YouTube to be kept up to date with new videos as they come out.
Christmas Angel from Tissue Paper Roll VIDEO TUTORIAL
INSTRUCTIONS:
STEP 1:
Cut the toilet paper roll down the length.
STEP 2:
Fold so the one piece meets the other at the top – do this by angling the one side down, then bring the other side to overlap and mark the edge where it overlaps with a pencil.
STEP 3:
Grab your hot glue gun and glue inside the line you drew, then bring the overlapping piece over and secure with the glue, holding just a few seconds until the hot glue dries.
STEP 4:
Take two toothpicks and insert in the tiny gap at the top of the angel shape, half way down, and secure with some drops of hot glue dropped in from the inside.
STEP 5:
Take a tape measure and measure the shortest distance from the top of the toilet roll inner. Mine was 3 ½ inches (9.5 cm). Keep moving the top of the tape measure from where the toothpicks join the cardboard, measuring the distance so it is equal to the shortest distance all the way around what will be the angel’s skirt.
STEP 6:
Cut the excess cardboard at the bottom away.
STEP 7:
Take a large wooden bead to make the head of the angel and push it over the toothpicks, then secure with some hot glue dripped down the bead hole.
STEP 8:
Cut away the excess bits of toothpick sticking out the top, so they are level with the top of the bead.
STEP 9:
Take a piece of white satin 11 ¾ inches (30 cm) long by 5 ½ inches (14 cm) wide and use a hand sewing needle threaded with white cotton to gather one of the long sides. Pull up the gathers so they fit snugly around the neck of the angel, just below the wooden bead forming the head.
STEP 10:
Secure the thread with a knot, securing both ends of the cotton to prevent it from coming loose.
STEP 11:
Use a lighter to lightly singe the ends of the satin where you have gathered it, to prevent it from fraying.
STEP 12:
Put some hot glue around the neck of the angel, then fold the satin around the neck, overlapping the one end of the satin.
STEP 13:
Put some hot glue down the one side of the length of satin skirt and over it place the other end of the satin, folding in the raw edge.
STEP 14:
Take a piece of thin golden ribbon or string and tie around where the waist of the angel should be, finishing with a bow at the front of the angel – the part of the skirt opposite the folded and glued seam at the back. Secure the bow in place with a drop of hot glue.
STEP 15:
Put a little hot glue around part of the rim of the base and pleat the satin, turning up the end of the satin inside the toilet roll and securing with glue. You want a puffy skirt for the angel so don’t pull the satin too tight – it should be soft and billowy.
STEP 16:
Work your way around the base, making pleats and securing with glue as you go.
STEP 17:
To make the arms cut a length of string 7 inches (18 cm) long and tie a knot near the end of each side of make the hands.
STEP 18:
Fold the string in half to find the middle, then put some hot glue at the back center of the neck and put the middle of the string there. Bend the string slightly to create arm shapes by bringing the ends forward.
STEP 19:
Time to create the angel hair. Use yarn or a thin string – it can be brown, a pale yellow, black or even red. Fold it around four of your slightly spread fingers 10 to 12 times.
STEP 20:
Slip the yarn/string off your finger, take an extra small piece and tie it securely in the middle, then cut through the folds at the ends so you have a bundle of angel hair.
STEP 21:
Apply some hot glue to the top of the head, lining up the central string tie with the drop of hot glue. Then glue a little down each side of the head. Lastly put some glue at the back of the head and move the yarn pieces to cover the head.
STEP 22:
To create the angels braid wind the yarn around your slightly wider spread fingers 9 times. Slip off and secure with a piece of yarn at the top.
STEP 23:
Cut through the loops at the bottom, then divide the piece equally and make a braid, securing the end with a piece of yarn tied tightly.
STEP 24:
Hot glue the top end of the braid to the center of the head of the angel and then wind it around to create a bun on the angel’s head, hot gluing the end in place by putting a drop of glue then tucking in the end under the rest of the bun so the hot glue is not visible.
STEP 25:
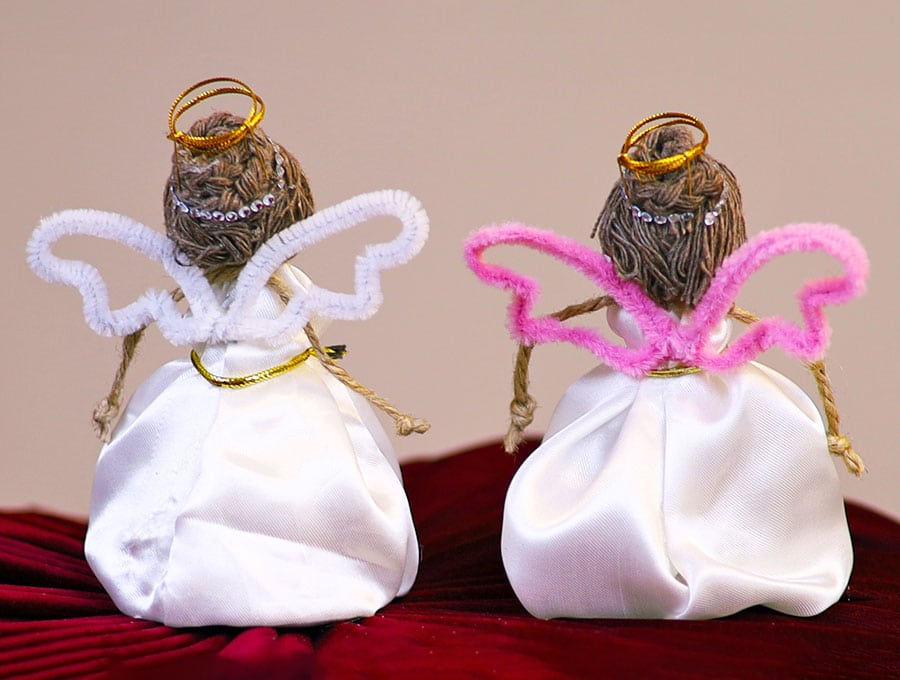
Make the angel wings from white, gold or silver chenille stems (aka pipe cleaners) bending them into a pair of angel wings – the actual shape is up to you – deep and dramatic like an archangel or shallower like butterfly wings. Twist the ends so the wings are attached to each other.
STEP 26:
Hot glue the centre of the wings to the center back of the angel, up near the neck.
STEP 27:
Add the angel’s jewelry – we used stick-on diamante strips – two little diamante’s to create the earrings, and a strip to create the necklace. We then added a strip of diamante around the base of the bun.
STEP 28:
To create the angel’s halo take two smallish golden safety pins and cut off the heads, then stick them into a roll of washi tape ½ an inch (1.5 cm) apart to hold them steady. You can use a polystyrene block or anything else suitable to hold the pins in place while you thread some golden string through the two small circles at the end of the safety pines – thread it through three times so you have three circles to create the halo. Adjust the size of the circles until you are happy, then cut off the extra ends of golden string, singe the ends so they don’t fray and remove the pins from the base and stick into the bun.
STEP 29:
The last step is to draw the face – mark out the eyes, and mouth in pencil first then use colored pencil crayons to mark in the eyes and mouth.
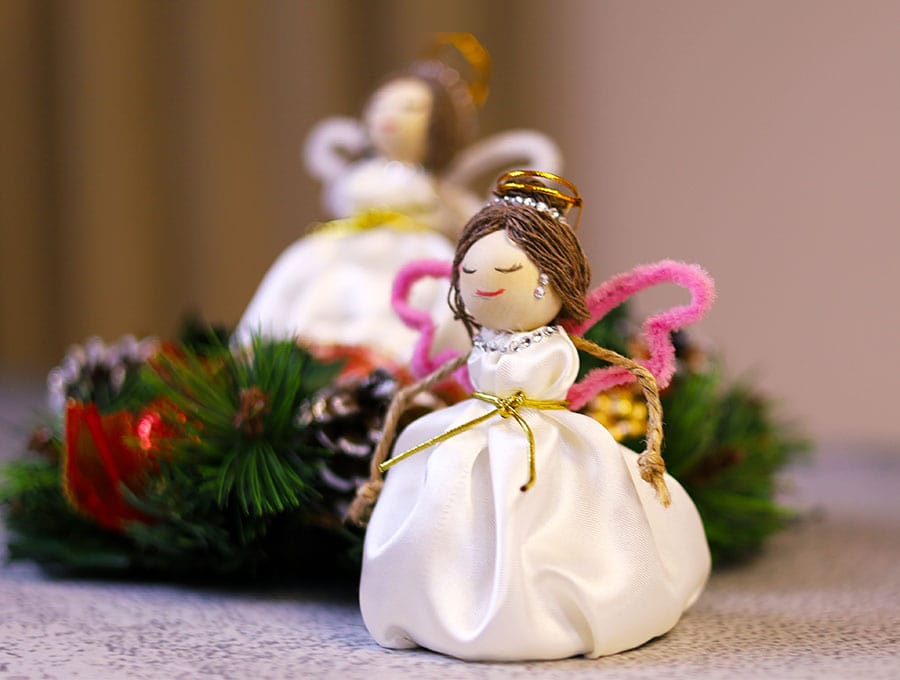
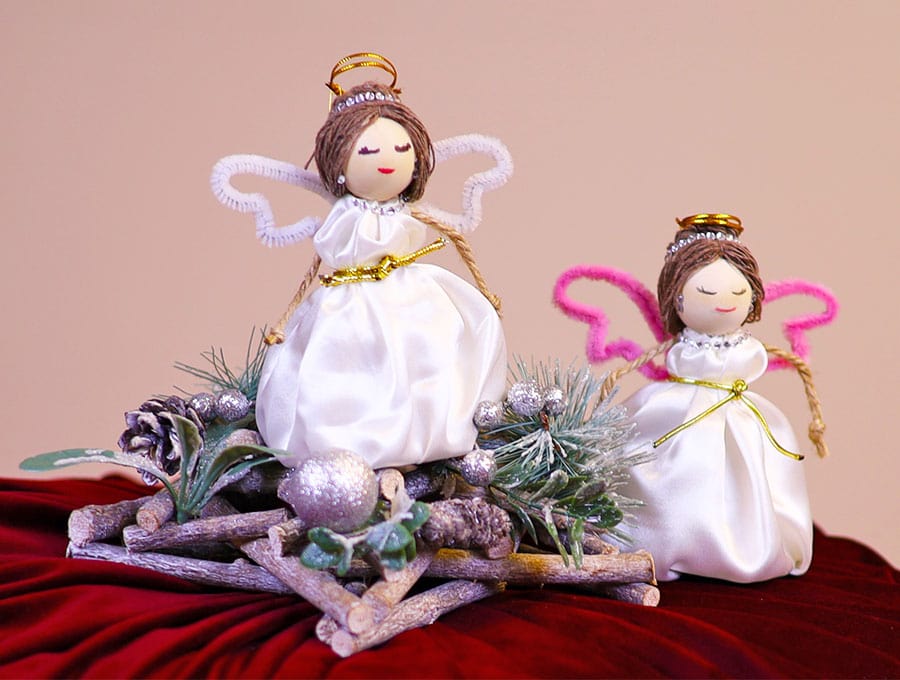
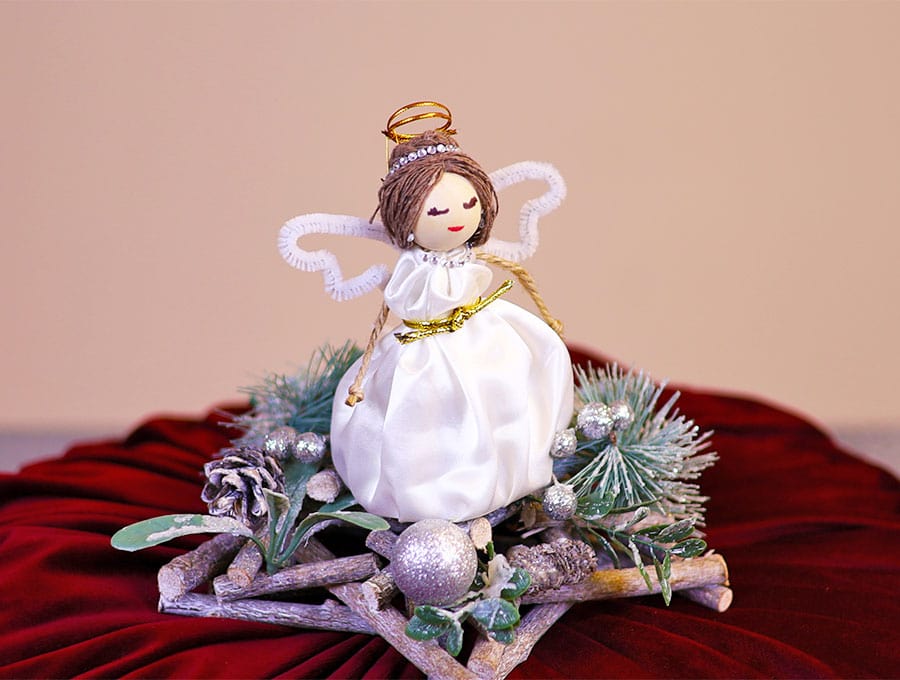
The angel is now ready to perch on top of the Christmas tree, be placed on a mantelpiece – or form part of a table centrepiece. If you enjoyed this fun project you can complete with kids then give us a like and subscribe to get more great projects delivered to your inbox year round. We love sustainable, affordable projects that allow the creativity of our subscribers to shine.
Do you like this? Pin for later:
Wanna be friends? Click HERE and follow me on Pinterest
RELATED: