

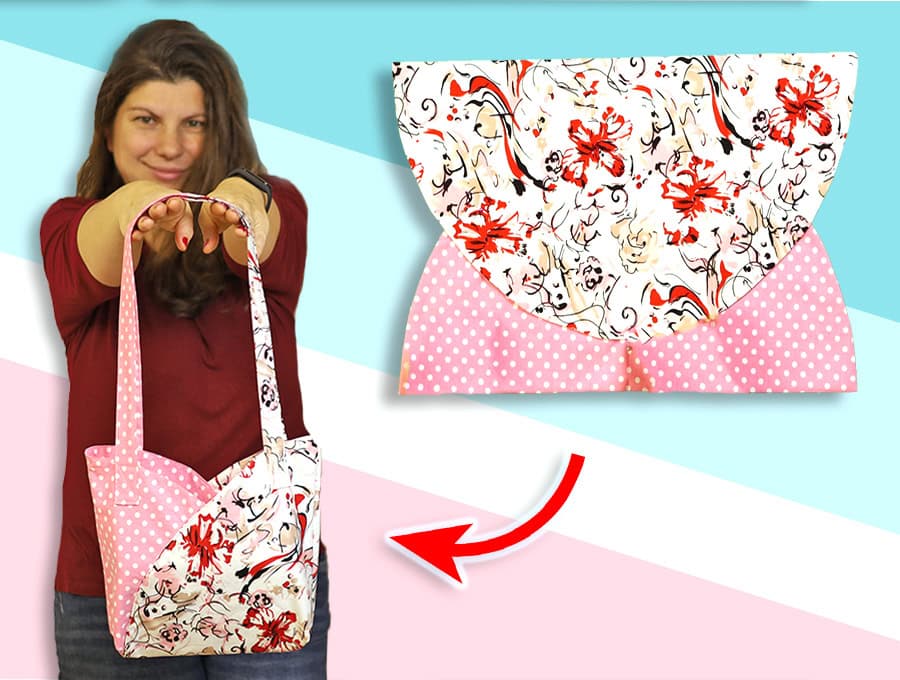
DIY Handbag from 2 Fabric Circles // Easy Fabric Tote Bag
This stylish lined handbag with two pockets is made from two circles of fabric. It looks best when made in a combination of a plain and printed fabric or two contrasting or matching plain colors. With the internal pockets all cleverly worked into the circle pattern there’s no extra fuss of stitching on pockets.
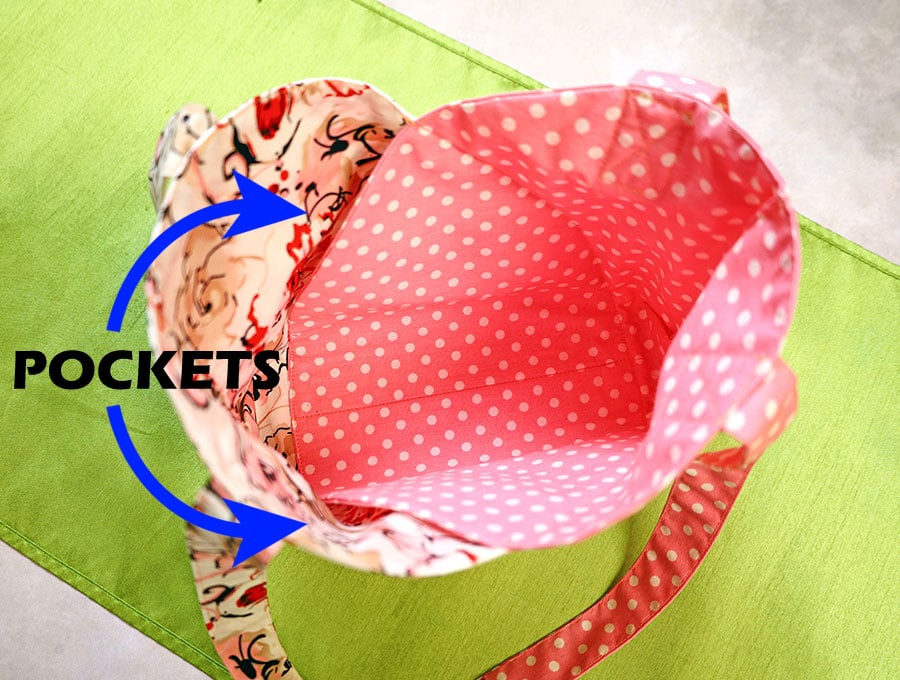
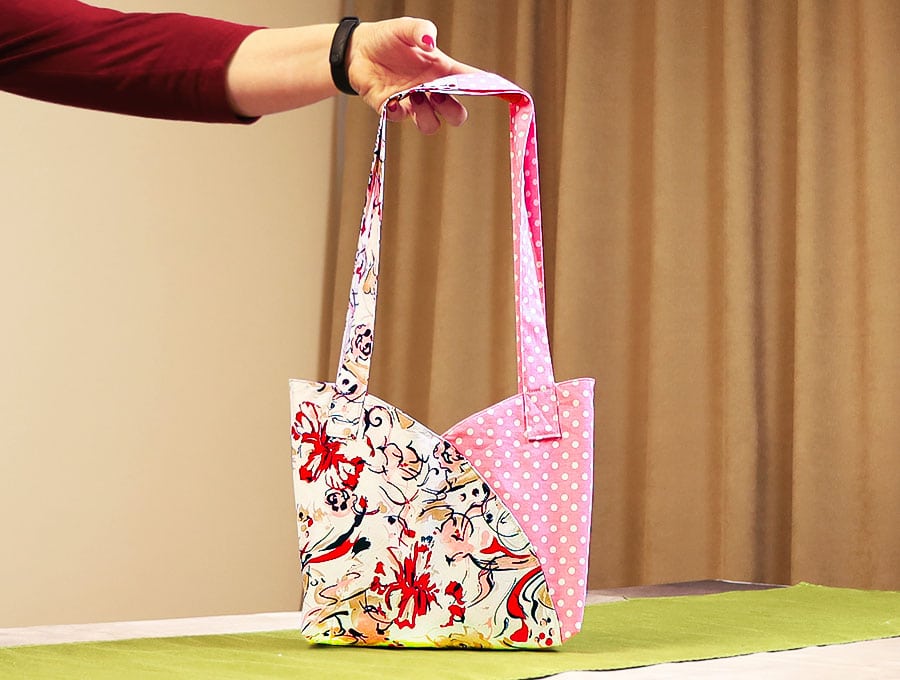
This is a quick make that uses circles – a print and a plain, two matching prints, or two plain fabrics, so there is plenty of choice. Best made in a sturdy cotton this bag will take you from the country to the beach and town shopping trips.
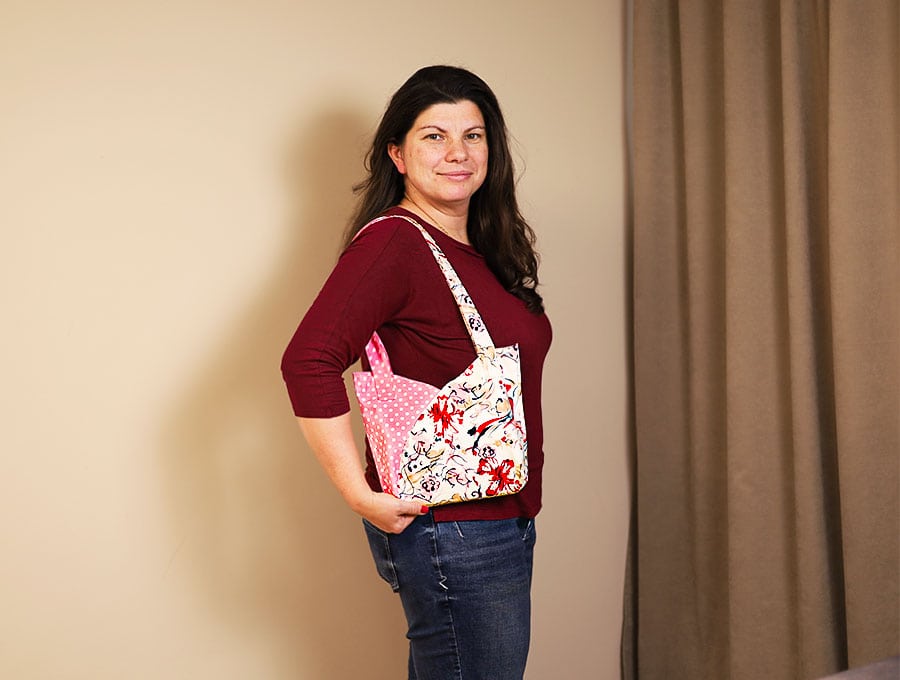
Below you will find my step by step written tutorial with VIDEO instructions for all the visual learners.
We occasionally link to goods offered by vendors to help the reader find relevant products. Some of the links may be affiliate meaning we earn a small commission if an item is purchased.
How to make the Handbag from 2 Fabric Circles
Supplies and tools
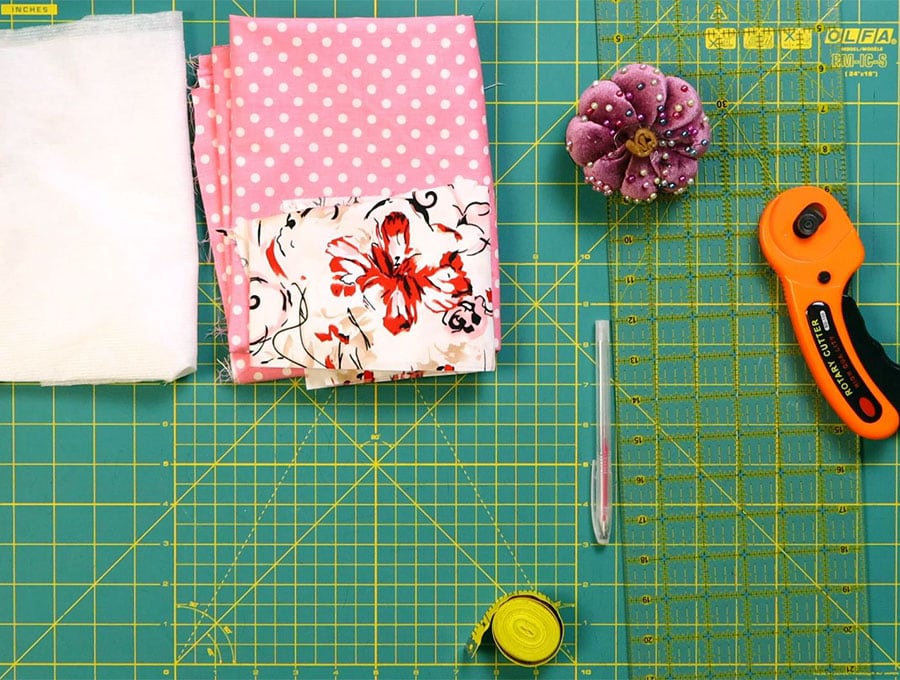
What you need for the main body of the bag:
- 1 piece of printed fabric 22 x 22 inches (55 x 55 cm)
- 1 piece of plain fabric 22 x 22 inches (55 x 55 cm)
- 2 x pieces of fusible (iron-on) interfacing 22 x 22 inches (55 x 55 cm)
Fabric for strap:
- 2 of the plain fabric 13 ¾ x 4 inches (35 x 10 cm)
- 2 of the printed fabric 13 ¾ x 4 inches (35 x 10 cm)
Other supplies:
- matching thread
- scissors (or rotary cutter and a cutting mat)
- ruler or measuring tape
- iron and ironing board
- sewing clips or pins
DOWNLOAD: Easy bag from 2 half circles pattern [Free pdf file]
Follow us for free patterns & tutorials! [easy-profiles]
How to Sew a Handbag from 2 Fabric Circles
Watch the diy Handbag from 2 Fabric Circles video first and then follow the written step by step instructions below.
Please enjoy and don’t forget to Like and SUBSCRIBE over on YouTube to be kept up to date with new videos as they come out.
Handbag from 2 Fabric Circles VIDEO TUTORIAL
INSTRUCTIONS:
STEP 1:
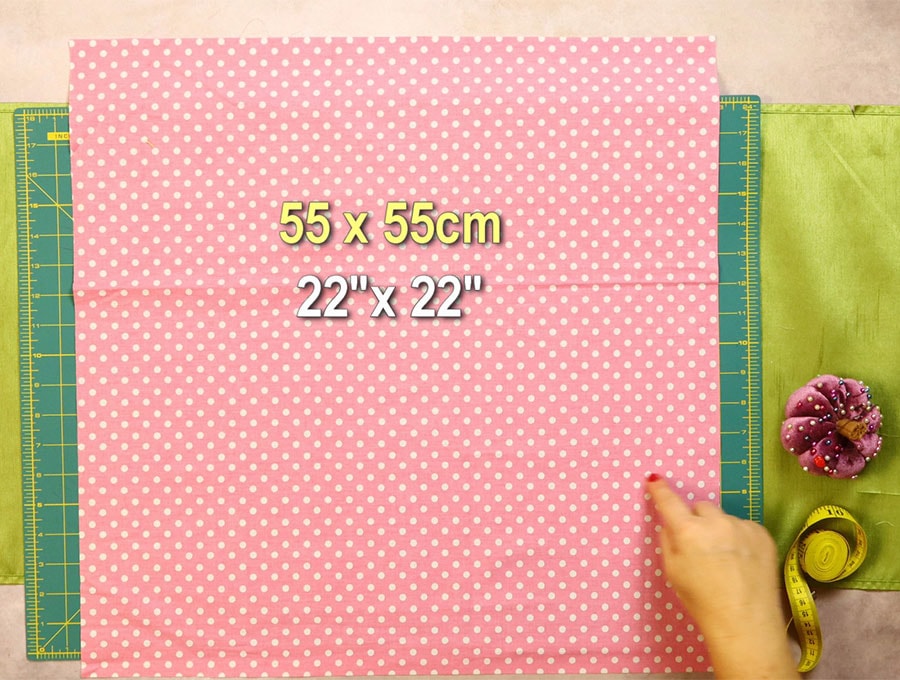
To create the circle take one piece of fabric 22 x 22 inches (55 x 55 cm) and place right side up on your worktop, then fold from the bottom upwards in half, next, either depending on whether you use the paper pattern or not do the following:
- USING THE PATTERN:
place the pattern of the bag body along the fold and cut out one piece of main fabric, one piece of lining from the pattern. Then cut the pattern along the dashed line and cut 2 pieces of interfacing. Proceed with step 4 - NOT USING THE PATTERN:
fold across from the right to the left, so you have 4 layers.
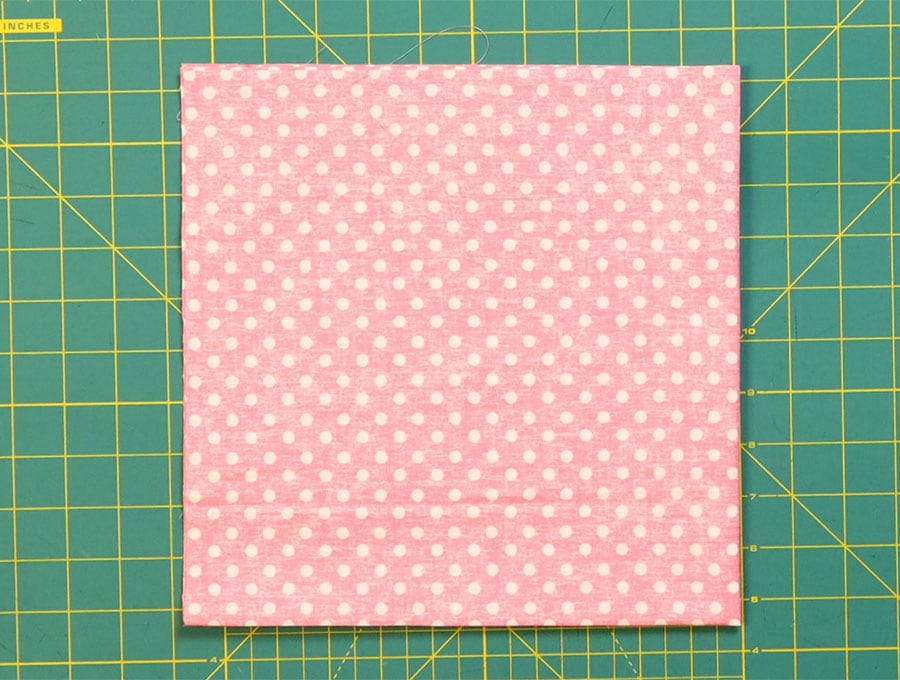
The center of the fabric will be in the bottom right corner. Repeat with the second piece of fabric then set that piece aside for the moment.
STEP 2:
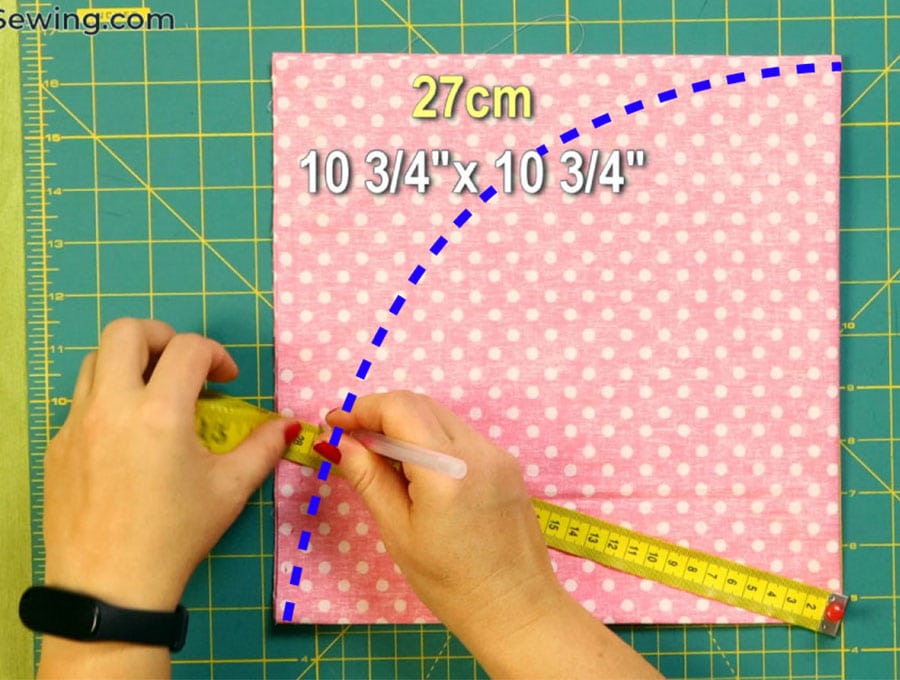
Take a ruler or measuring tape and measure 10 3/4 x 10 3/4 inches (27 x 27 cm) from the right lower corner to the left lower corner, then continue up in an arc making small marks all along to create the curved line until you reach the top right corner. Pin the fabric on the folds and in the top left hand corner to keep the layers together when you cut the circle
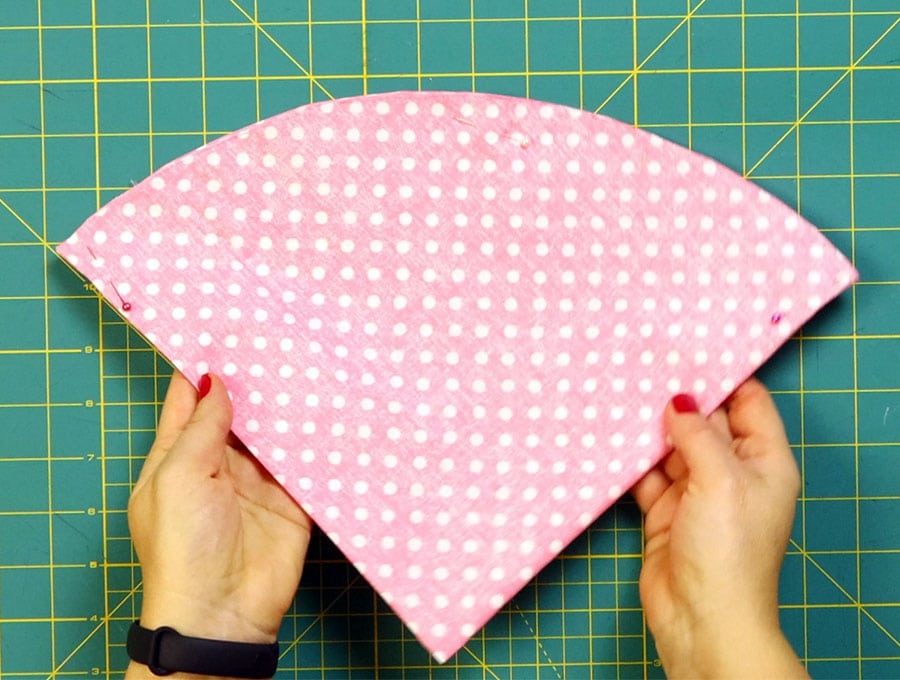
Cut along the arc you made.
STEP 3:
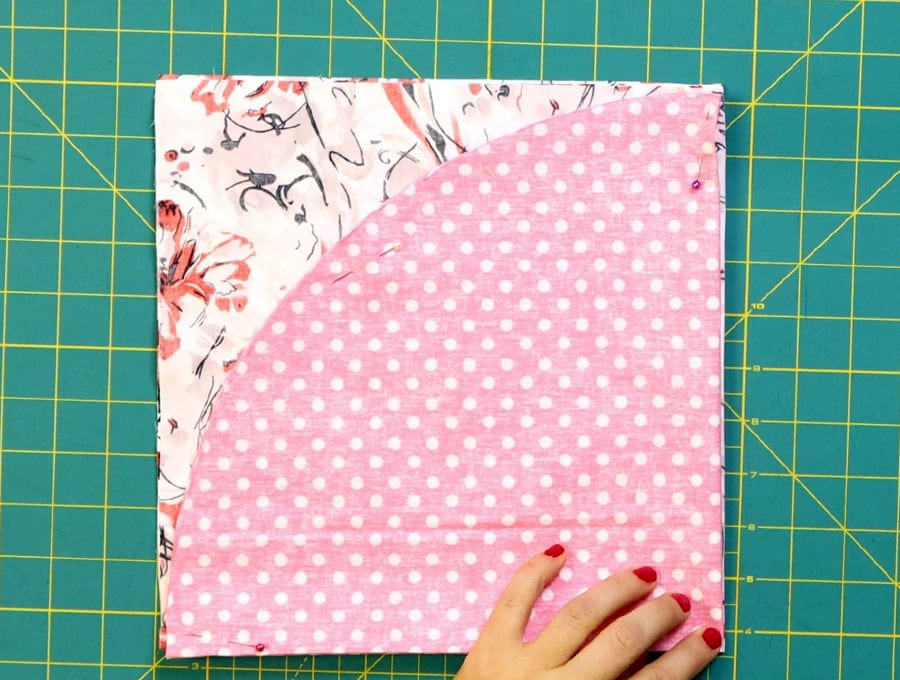
Lay that fabric over the second piece of fabric you folded in Step 1. It is very important to line up the folds exactly as they are with the first piece you folded otherwise when you cut you will end up with bits instead of a full circle!
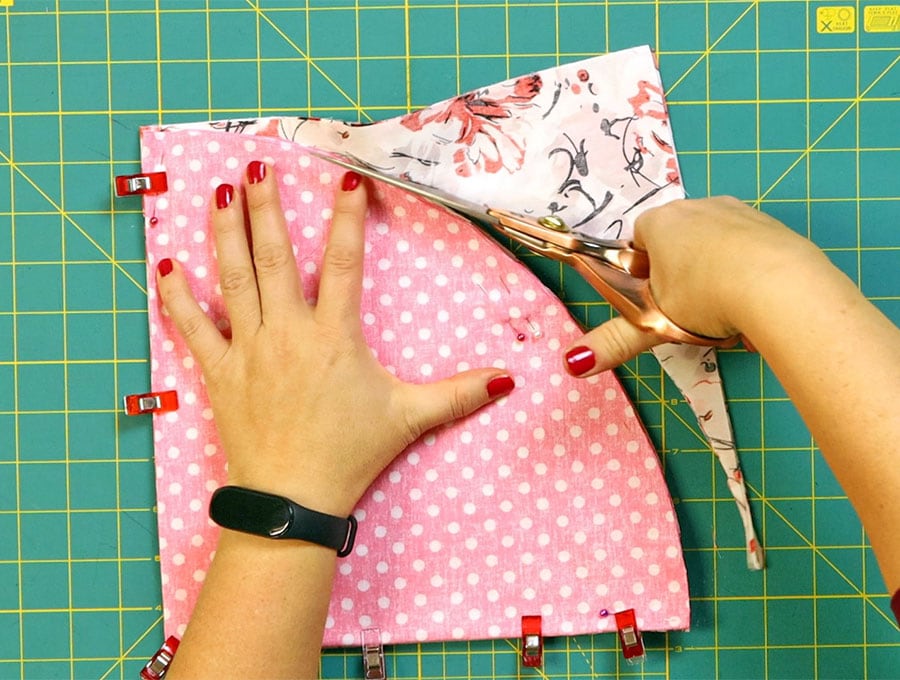
Pin the one folded circle over the uncut fabric then cut out the second circle following the arc of the first.
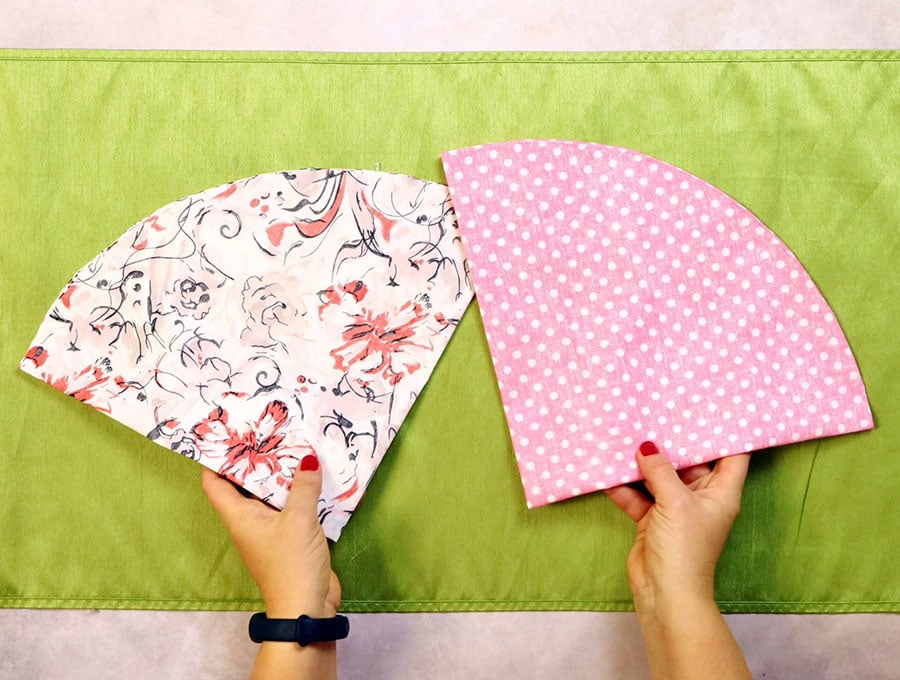
Unpin both fabrics
STEP 4:
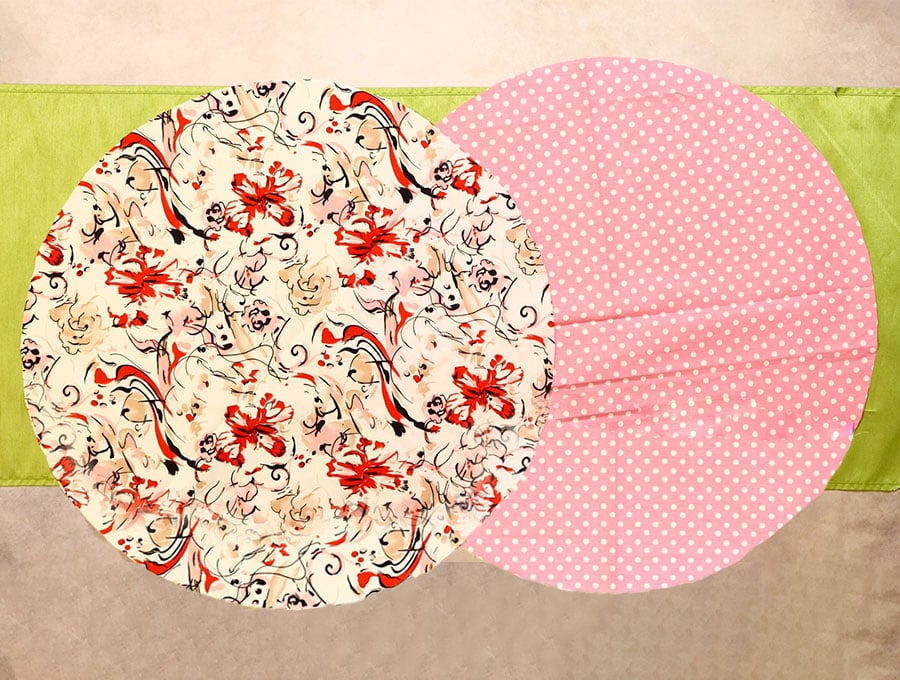
Unfold the two fabric circles and place them on your worktop, then over each one place the fusible interfacing with the fusible side down.
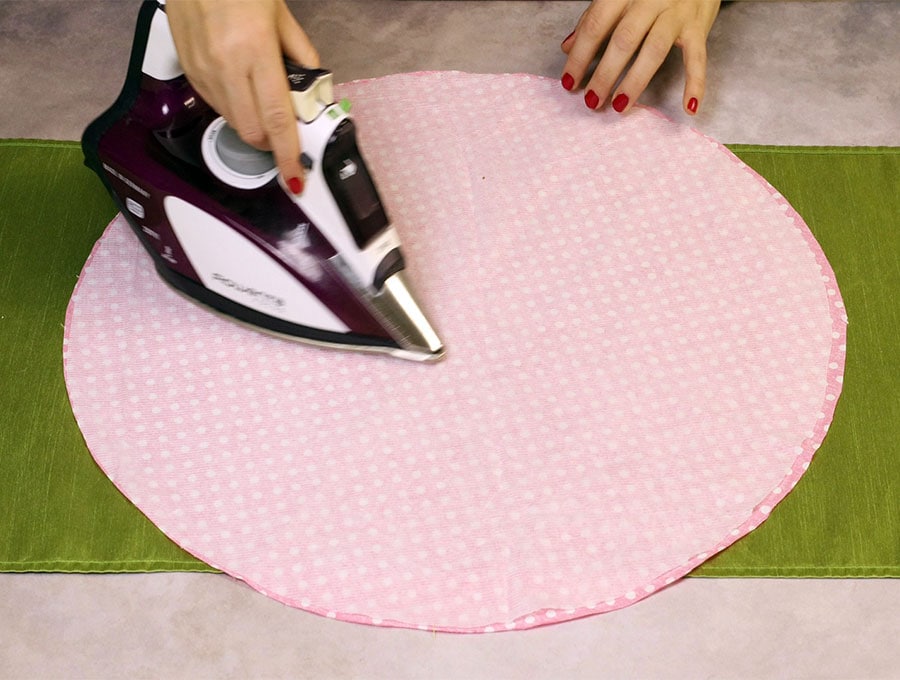
Attach with an iron according to the manufacturer’s instructions.
STEP 5:
Take each circle and fold in half with the right sides together and pin or clip.
STEP 6:
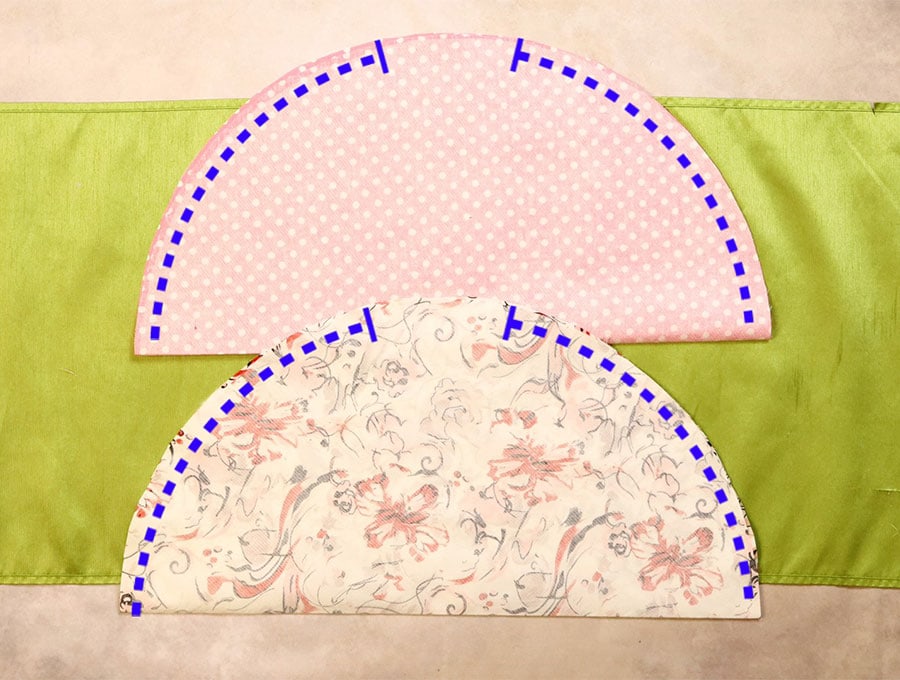
Stitch 3/8″ (1 cm) from the fold line up to near the top of the half circle, leaving a gap of approximately 2 inches (5cm) then continue stitching round to the fold. Repeat with the other piece of fabric. Backtack at the start and finish and each side of the gap.
STEP 7:
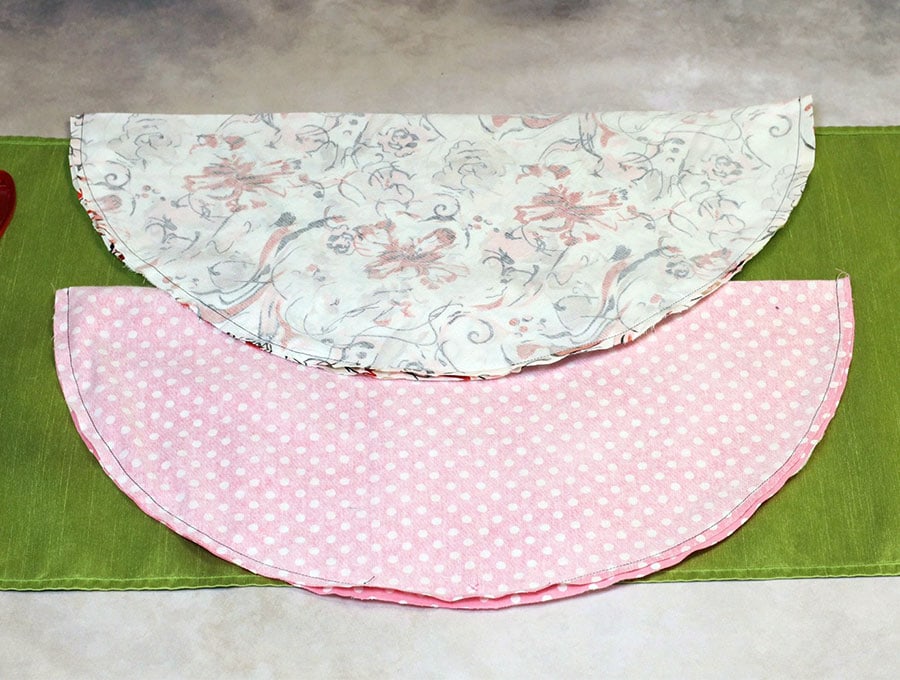
Finger press the edges around each gap open, then snip around the stitched edge taking care not to cut too close to the stitching on both half circles.
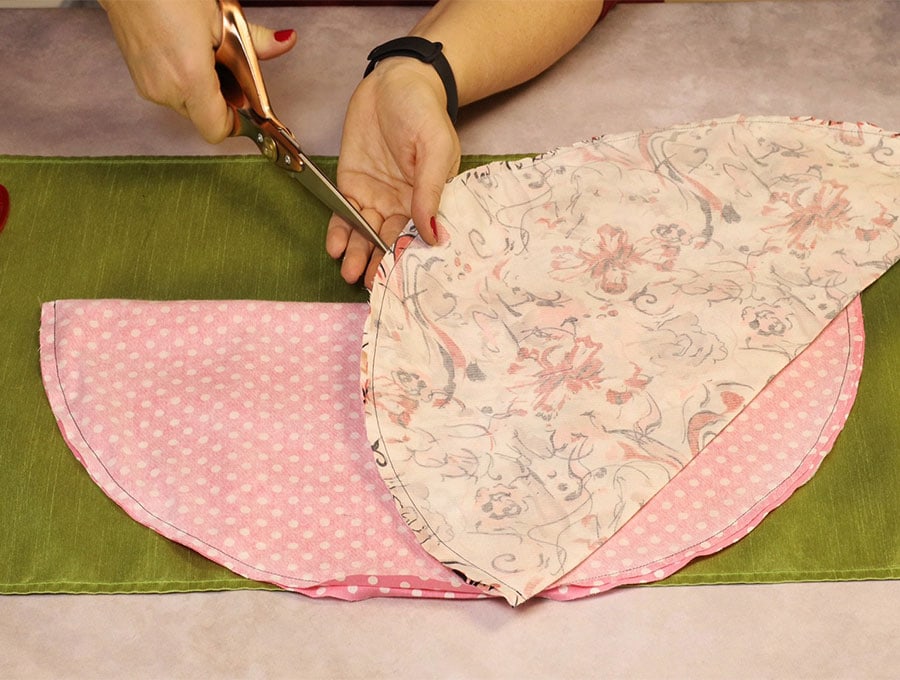
This allows the fabric to lie flat when turned. Finally snip off a little fabric at the corner near the fold on each end so it also lies flat when turned.
STEP 8:
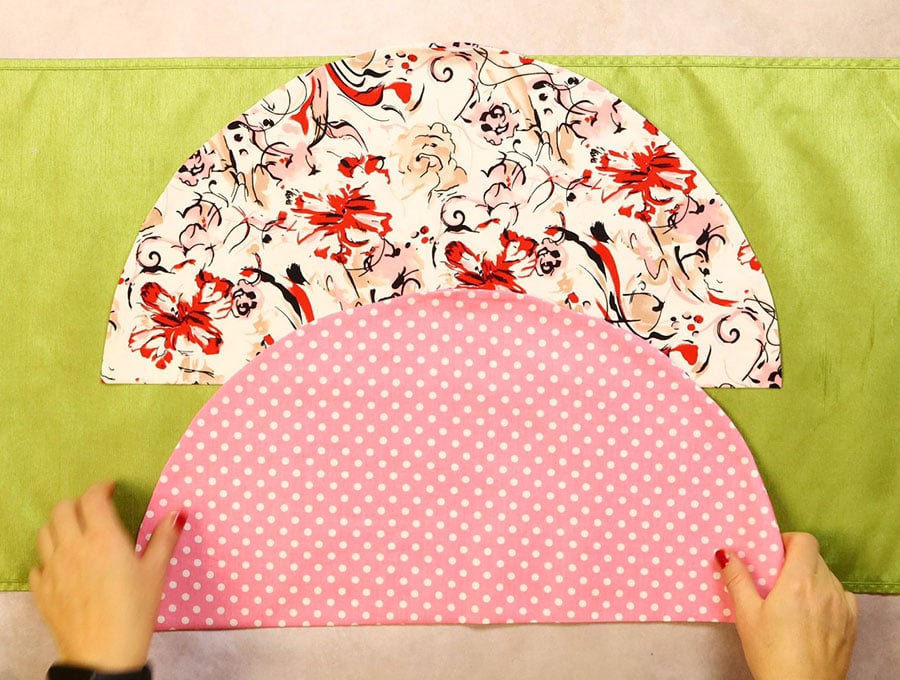
Turn both circles the right way out and press, making sure the edges of the gaps are neatly turned in and pressed.
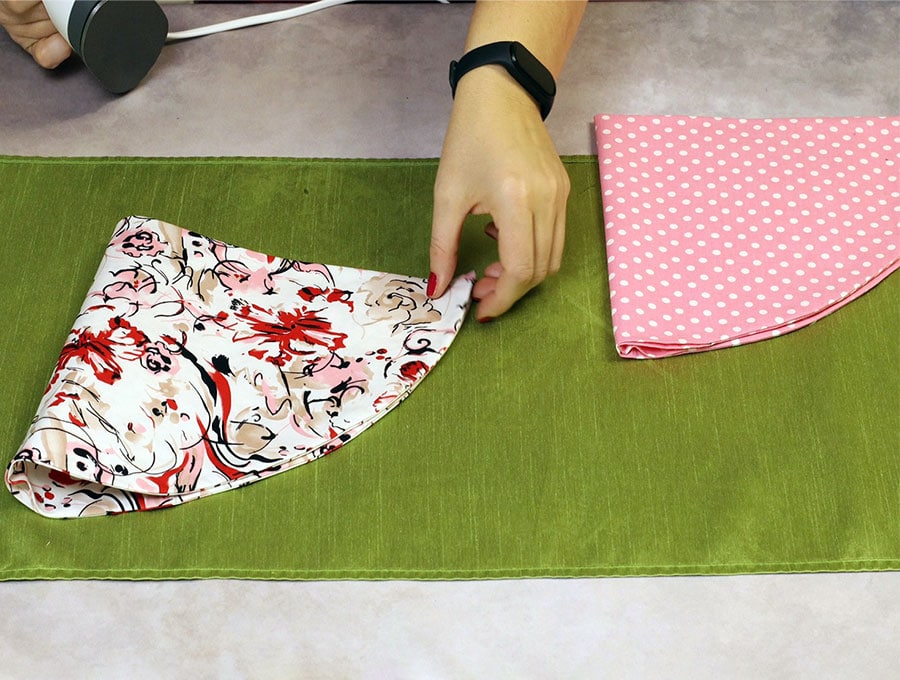
Fold each piece of fabric in half to create a ¼ circle and press.
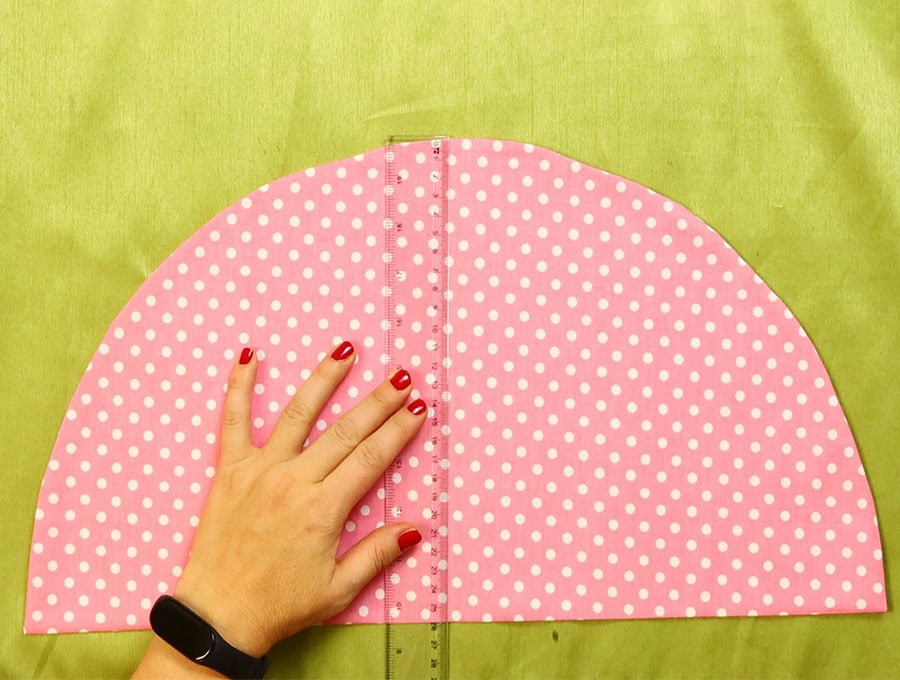
Unfold and mark the line with a fabric marking pen and ruler on the fold.
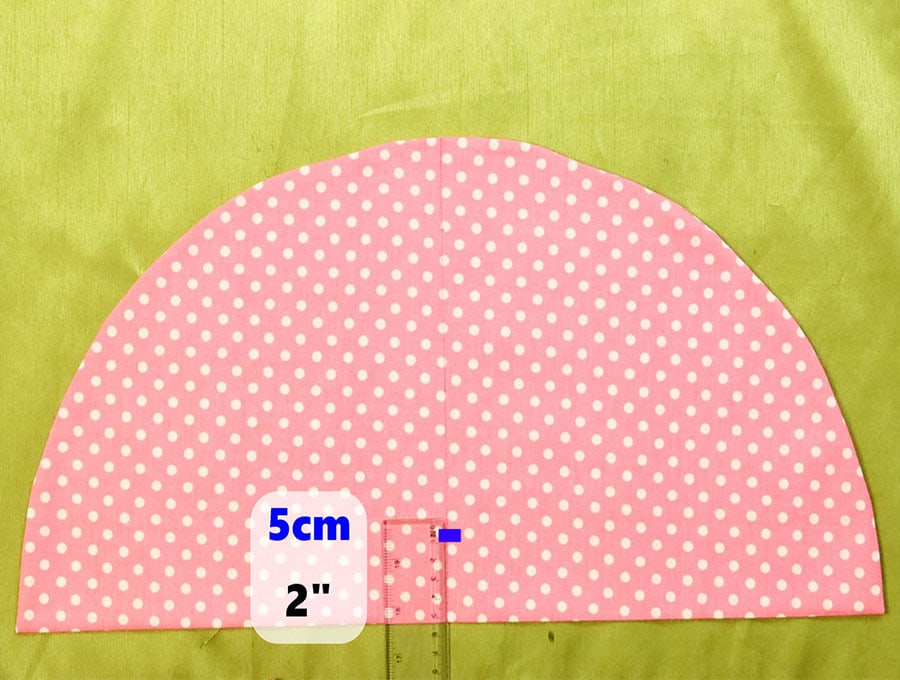
Then make a mark 2 inches (5 cm) up from the folded edge on the line just on one piece.
STEP 9:
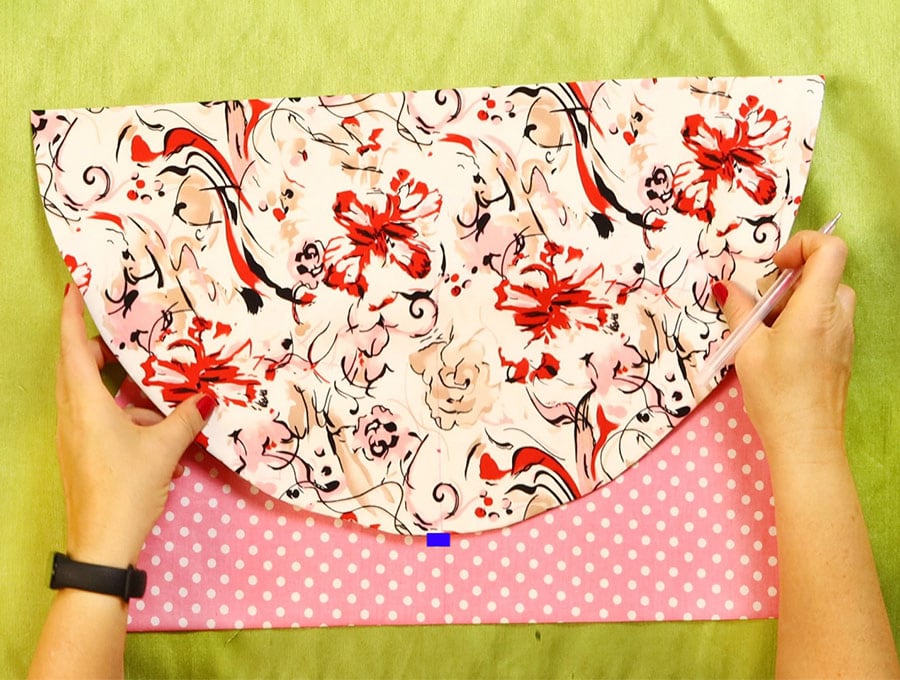
Place one half circle with the folded side parallel to the bottom of your worktop. Then over it place the other half circle with the folded side parallel to the top of your worktop. Ease the semi-circles into position with the top of the circle lining up with the 2 inch (5 cm) mark and pin in position. You may want to use a ruler to check the distances are equal from top to bottom – you don’t want to stitch them together skew.
STEP 10:
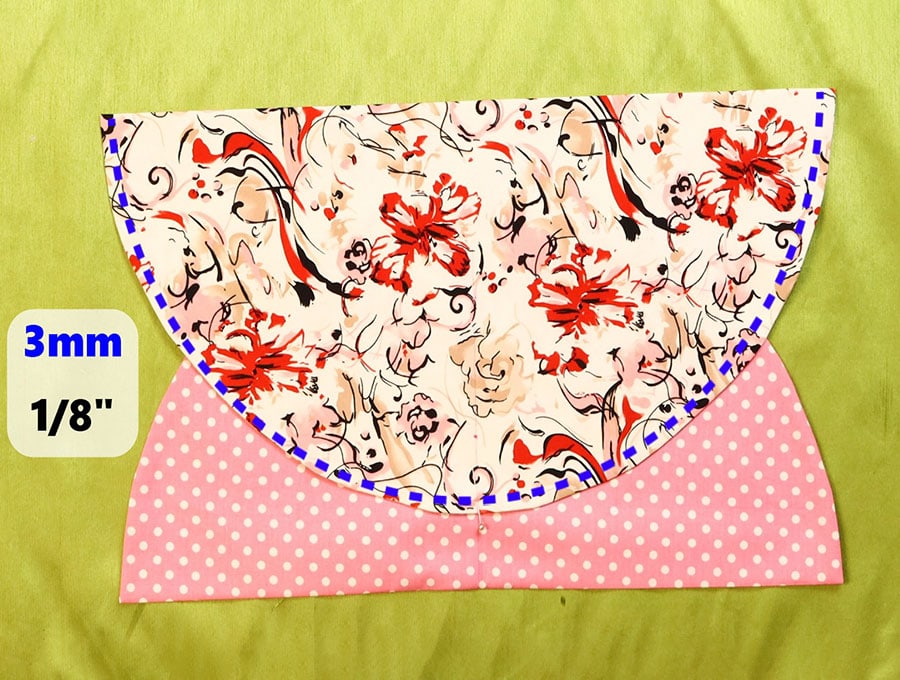
Top stitch around the uppermost piece 1/8 of an inch (3mm) from the edge from the one folded side to the other.
STEP 11:
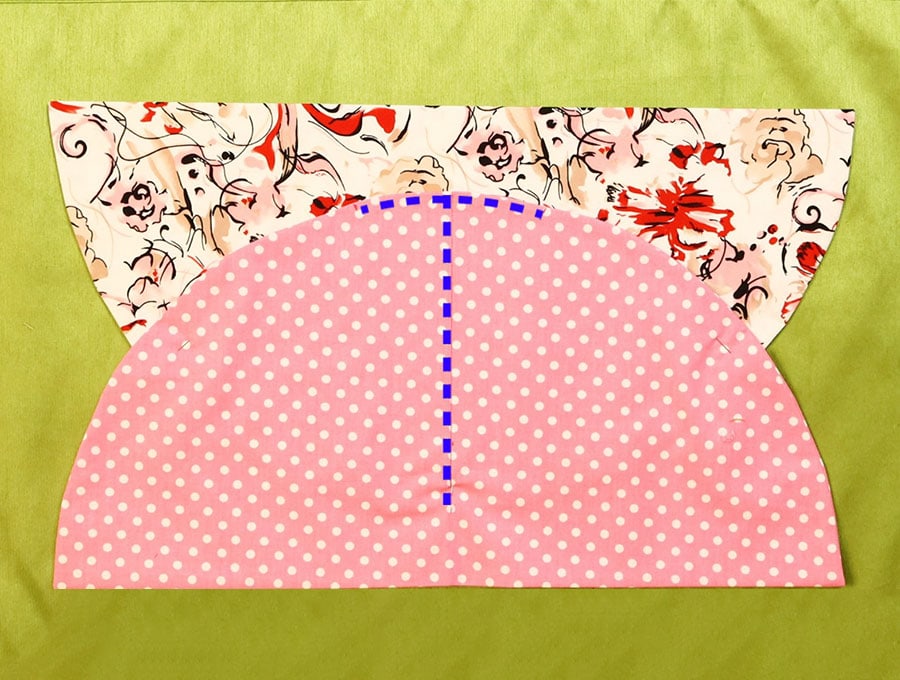
Flip over the fabric and stitch the gap closed first, 1/8 of an inch (3mm) from the edge on the half circle, then stitch down to the two inch mark. Back tacking at the start and finish.
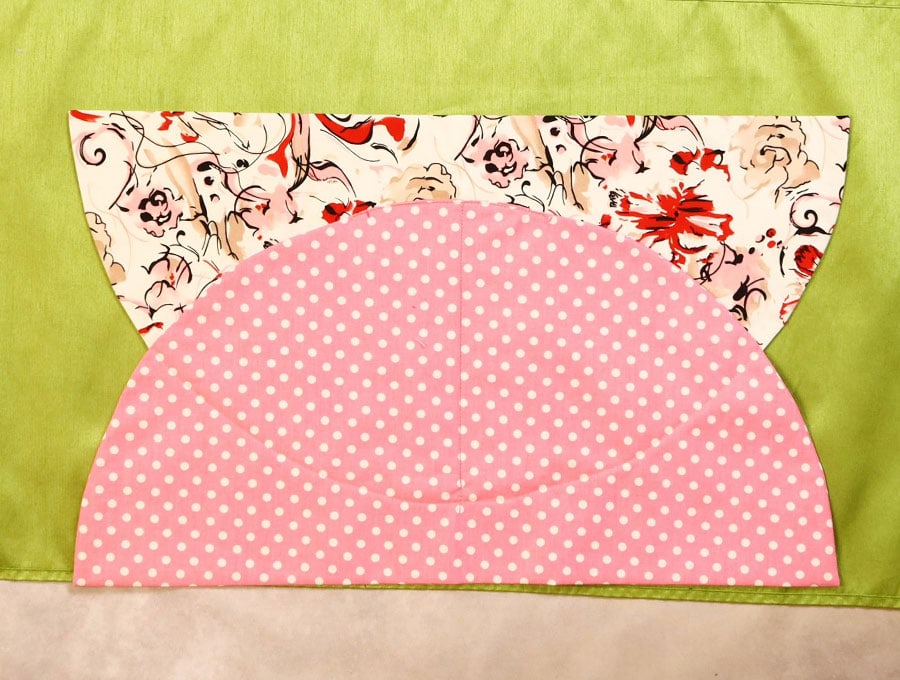
This forms the inner pockets.
STEP 12:
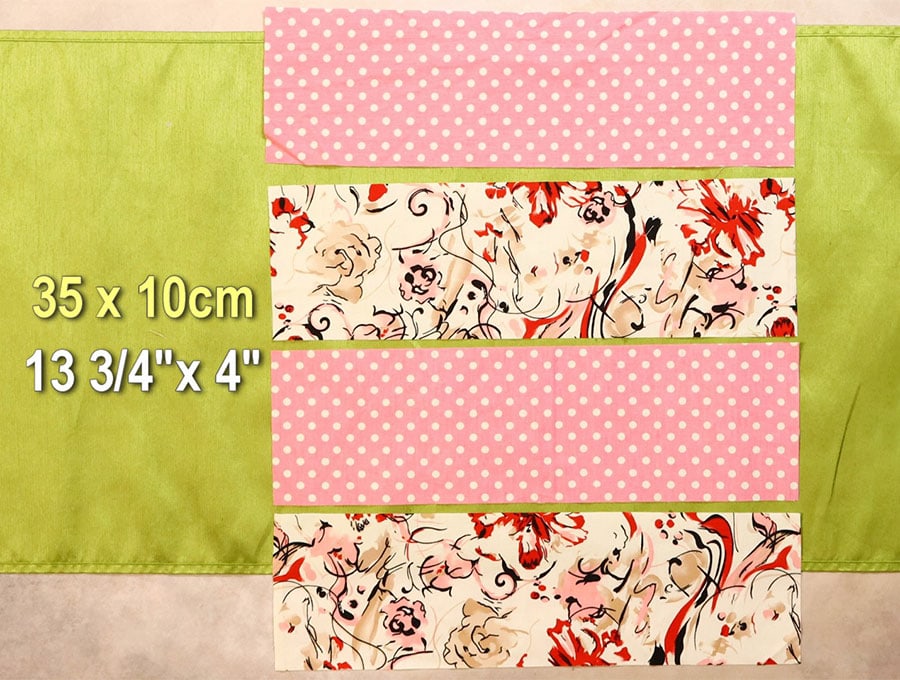
Make the bag straps by taking your strap fabric, and joining one piece of printed to one piece of plain and repeat with the other two pieces. Stitch ¼ of an inch (6 mm) from the edge, backtacking at start and finish.
STEP 13:
Fold out the fabric and press open the seams.
STEP 14:
Fold each joined strap piece in half along the length and press.
STEP 15:
Place the right side down on your worktop and fold each long side in towards the pressed mark, press, then fold again in half so no raw edges are visible and pin or clip in position.
STEP 16:
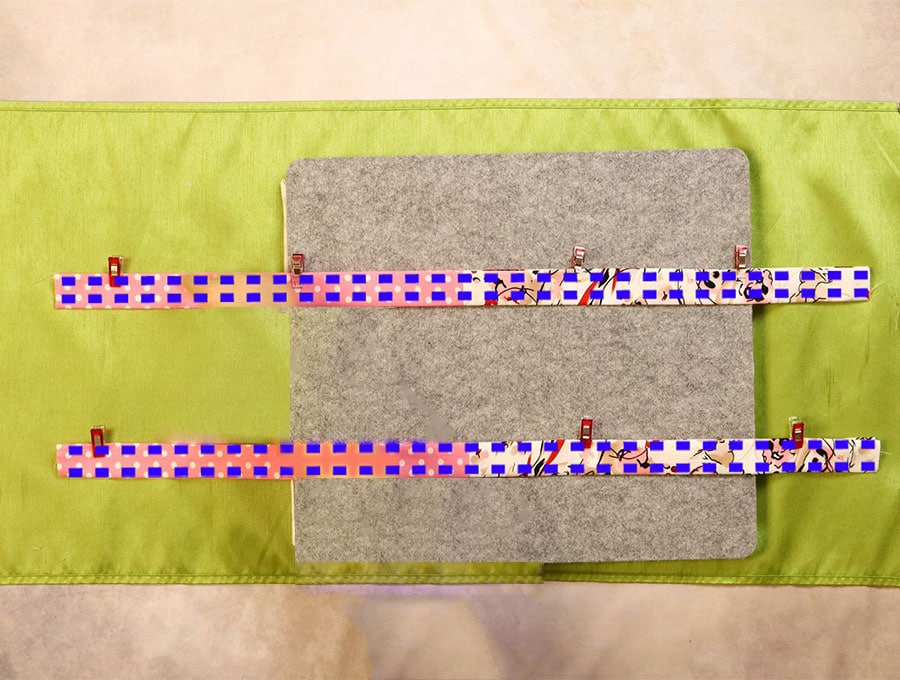
Stitch down the two long sides of the strap 1/8 of an inch (3 mm) from the edge and set aside for the moment.
STEP 17:
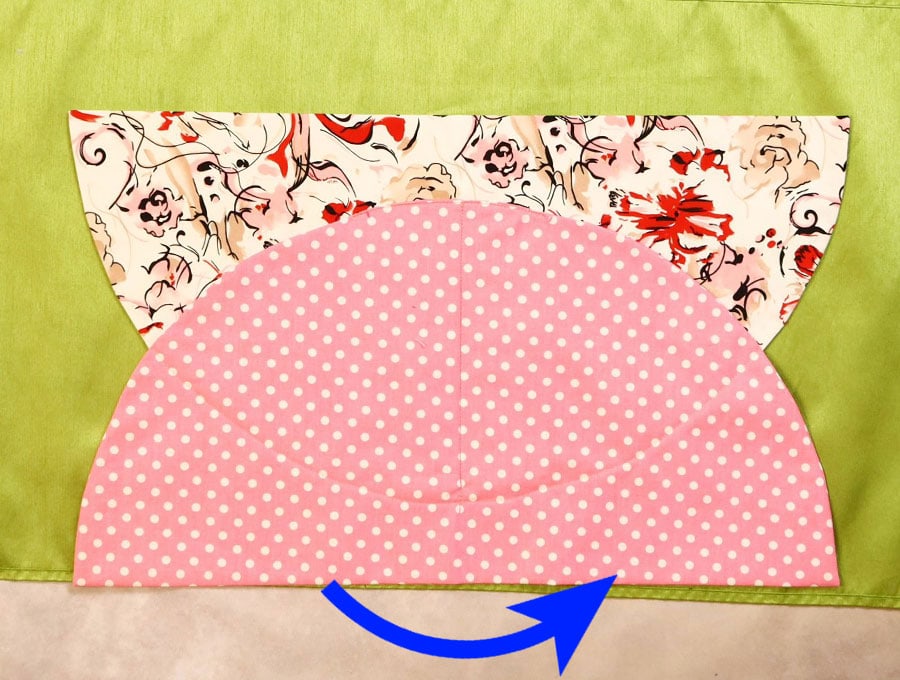
Fold the main bag piece in half so the two half circles meet at points on each side. The side with the pockets will be on the outer side. Clip or pin the sides.
STEP 18:
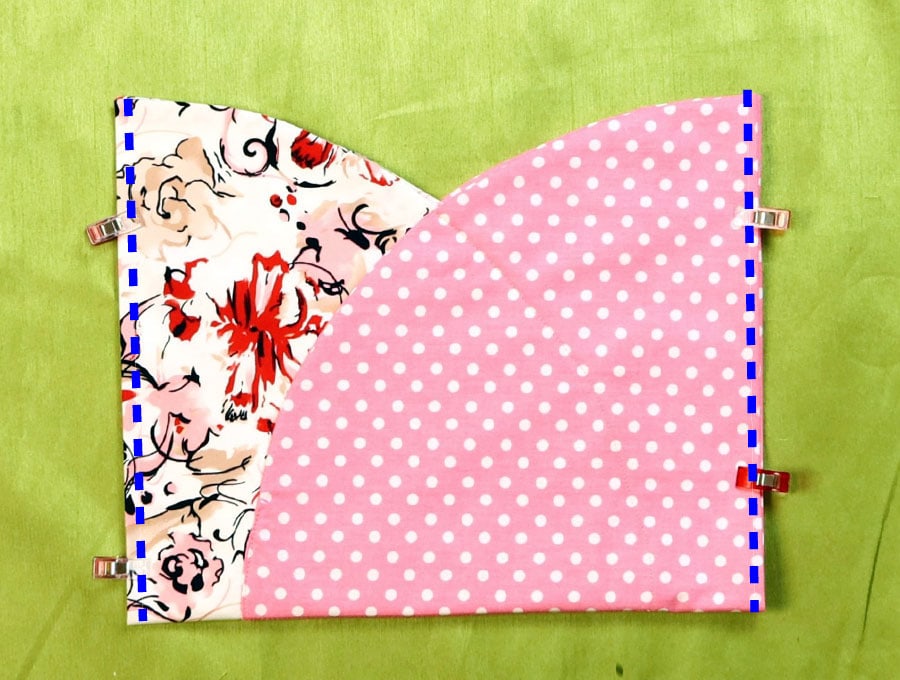
Stitch down each side ¼ of an inch (6mm) from the edge, backtacking at the start and finish.
STEP 19:
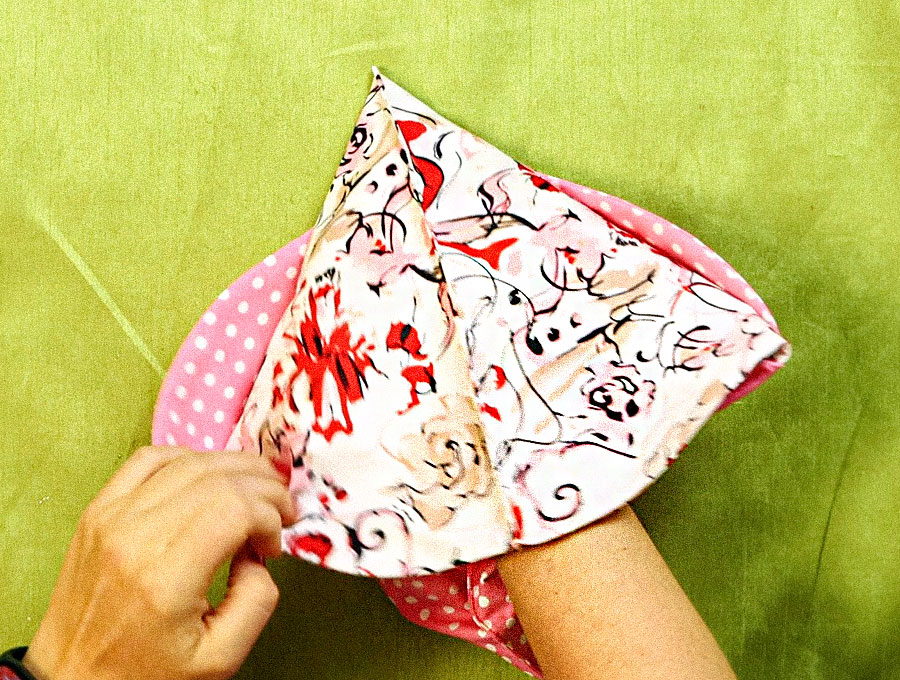
To create the boxed corners on the base of the bag open out the seam to create a point and draw a line 2 ½ inches (6 cm) long, up from the point.
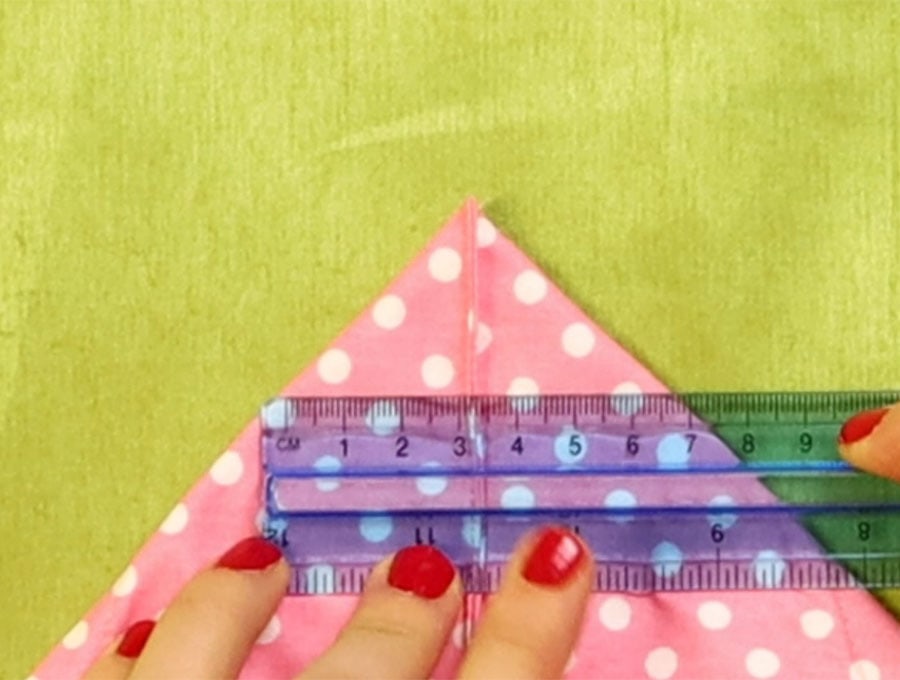
Repeat with the other side of the bag.
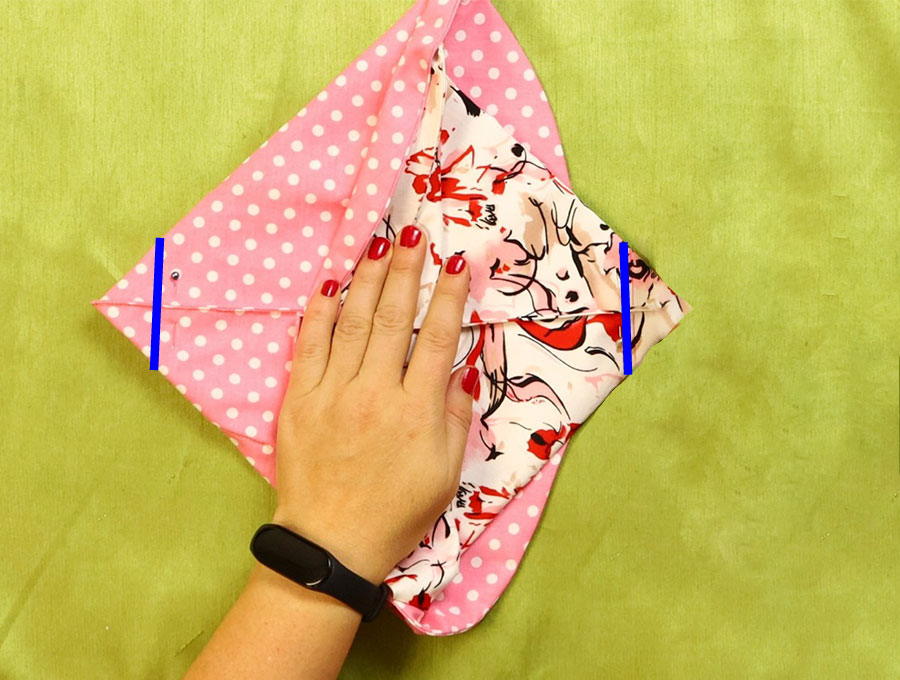
STEP 20:
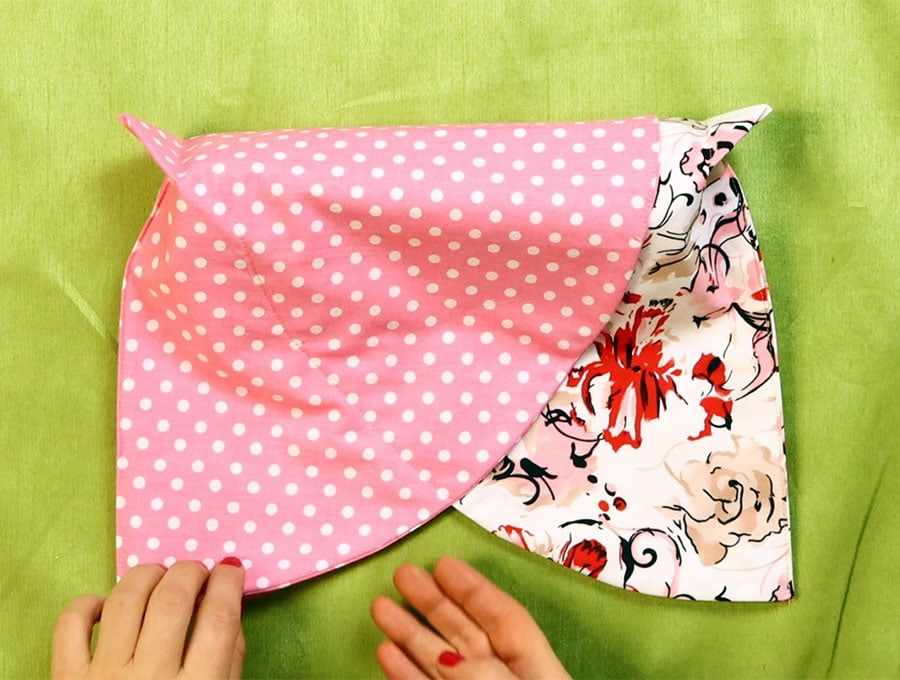
Stitch along the ruled lines, backtacking at the start and finish.
STEP 21:
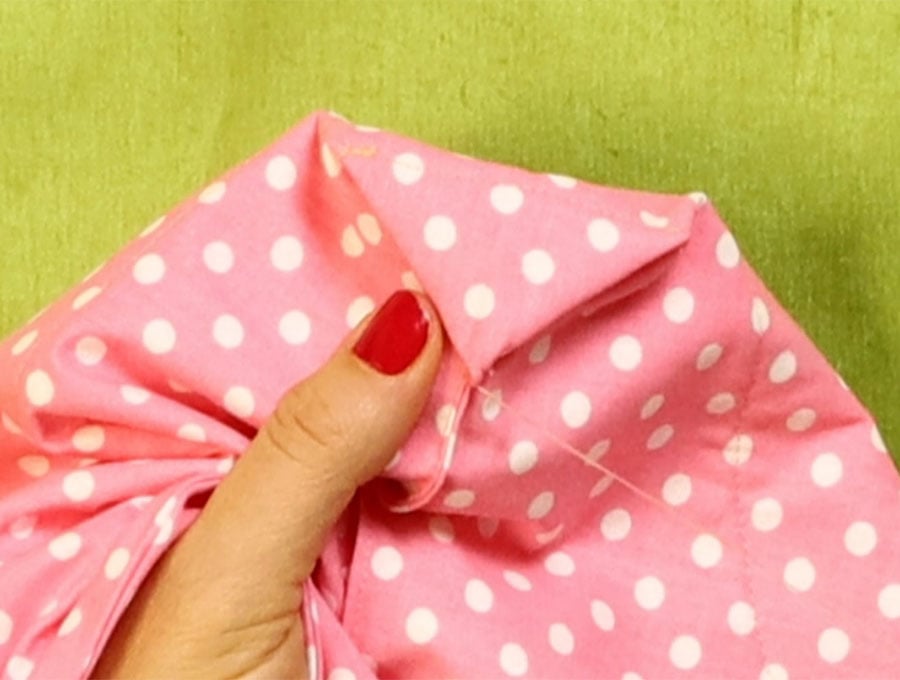
Using a hand sewing needle and matching doubled thread fold up the point to the side seam on each side of the bag and stitch.
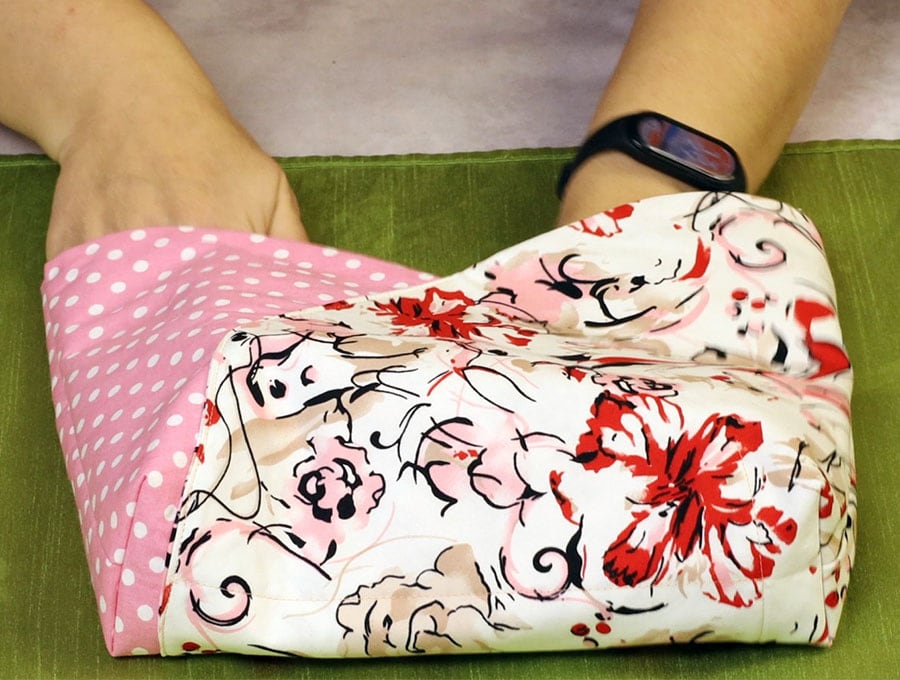
Turn the bag the right way out.
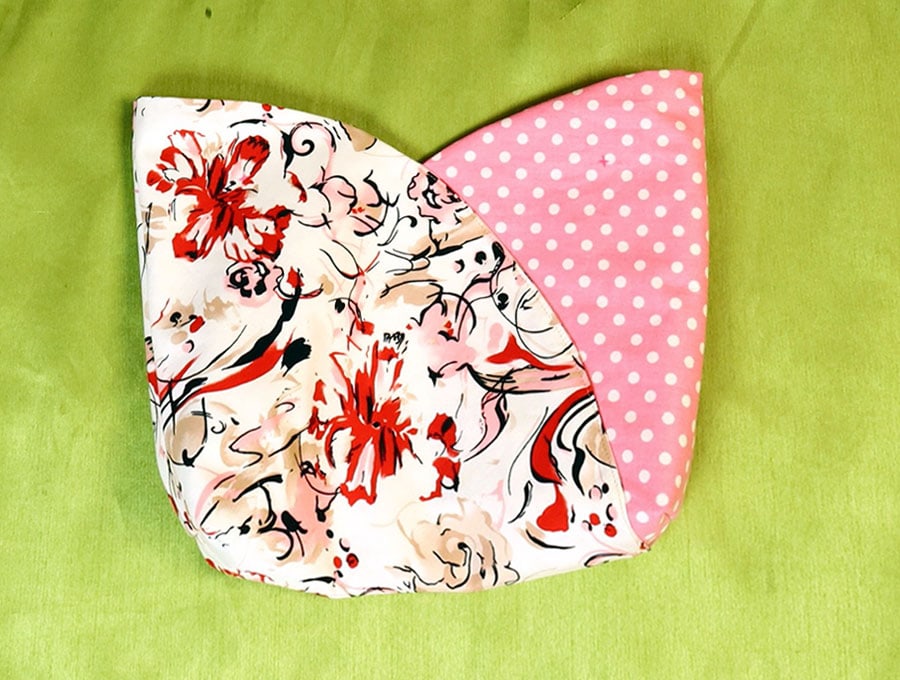
STEP 22:
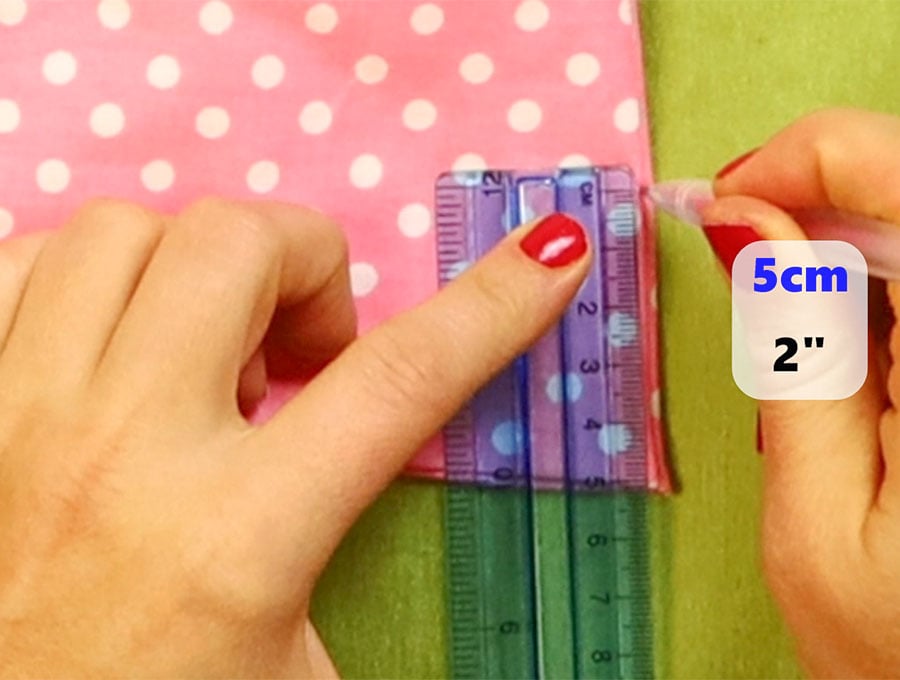
To mark where the straps attach, mark 2 inches (5 cm) down from the top along the side seam
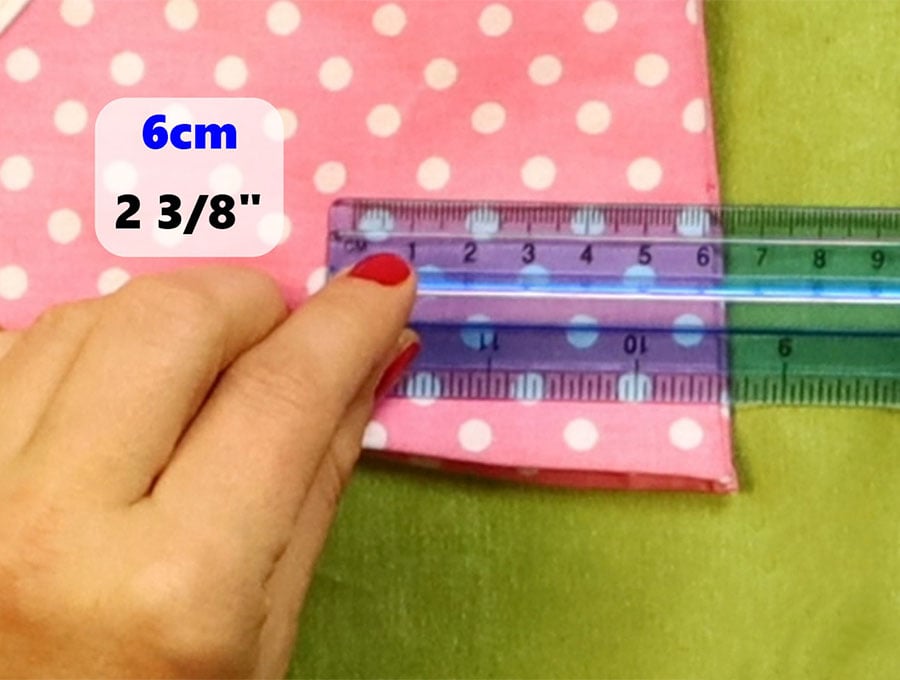
then 2 3/8″ (6 cm) in from the edge of the bag on the outside. Flip the bag over and make the same markings on the other side of the bag.
STEP 23:
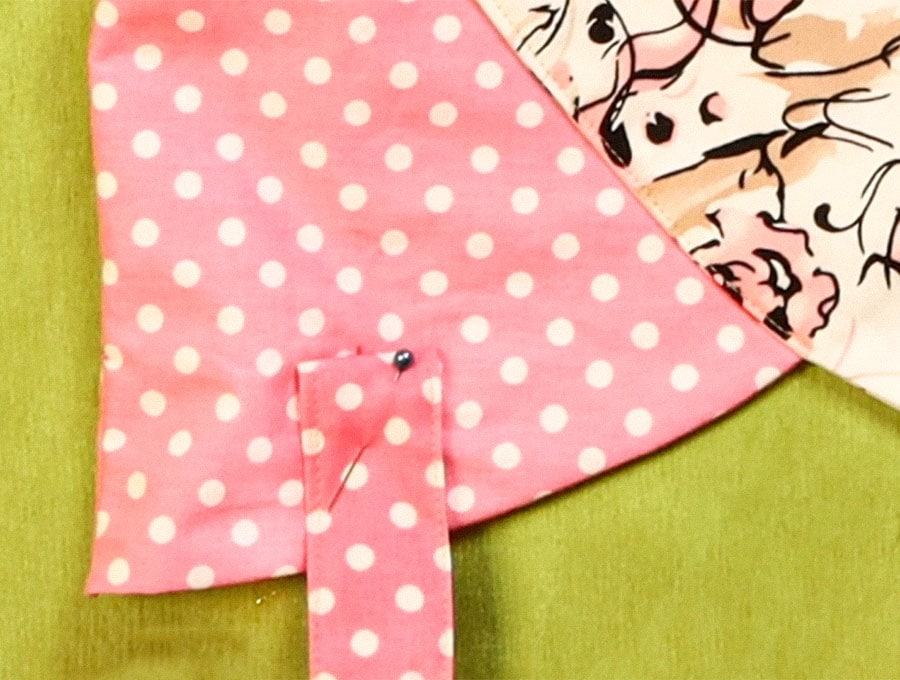
Fold the end of the strap over 3/8″ (1 cm), then line up the center of the end of the strap with the mark and pin in position. Make sure you match the fabric plain side of the fabric strap to the plain side of the bag, and printed end of the strap to the printed side of the bag. Once you have these in position you can repeat with the other side of the bag.
STEP 24:
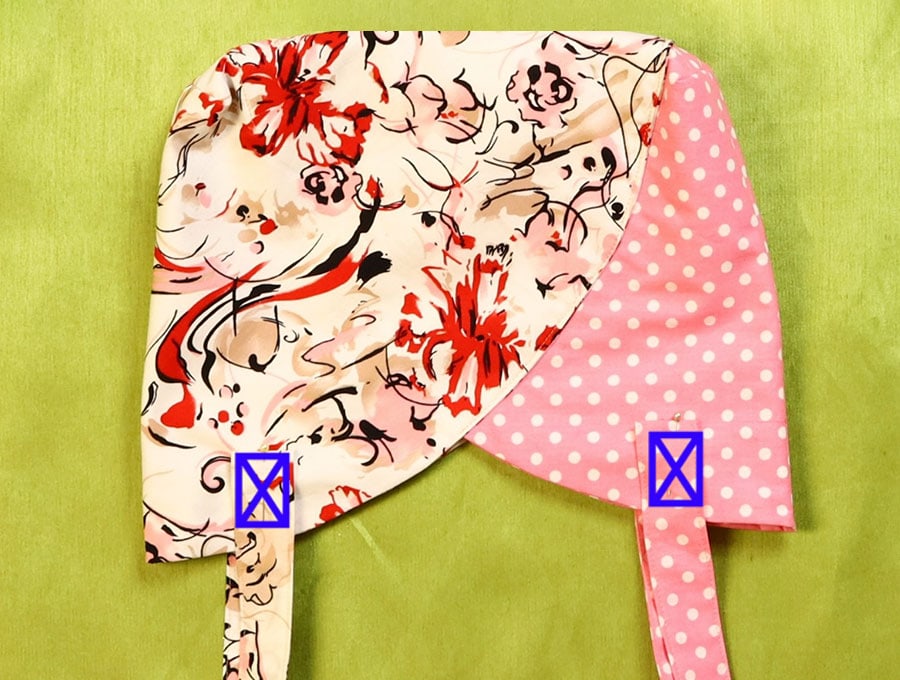
To attach the straps firmly stitch in a 1 inch (2.5 cm) square on the edge, up the sides and along the top. Finish with an X in the middle. Repeat with the other ends of each strap.
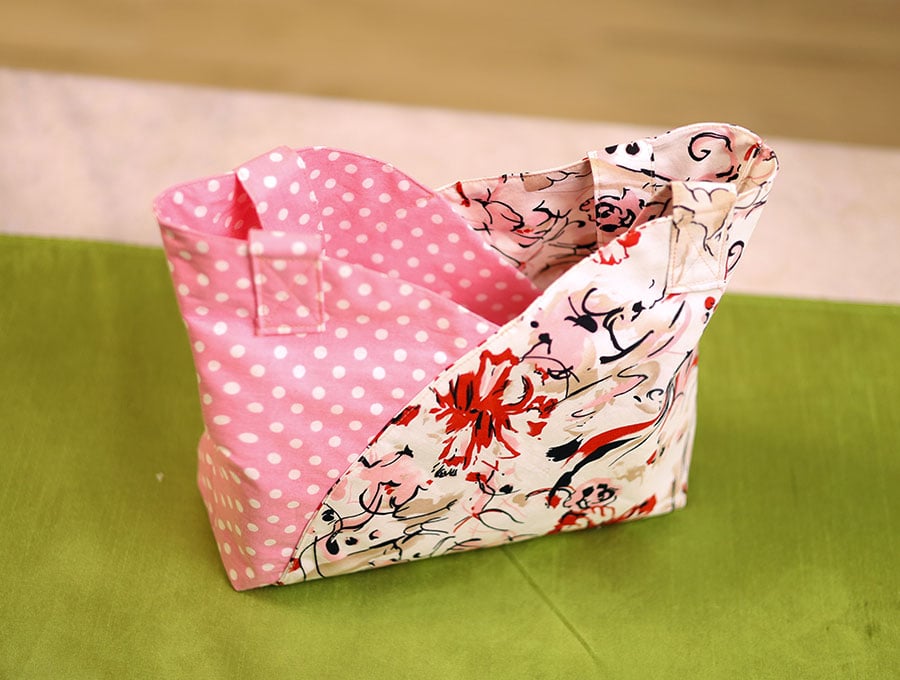
Your bag is now ready to go – enjoy using it for all sorts of activities with the inner pockets that keep your phone and wallet safe and easy to find.
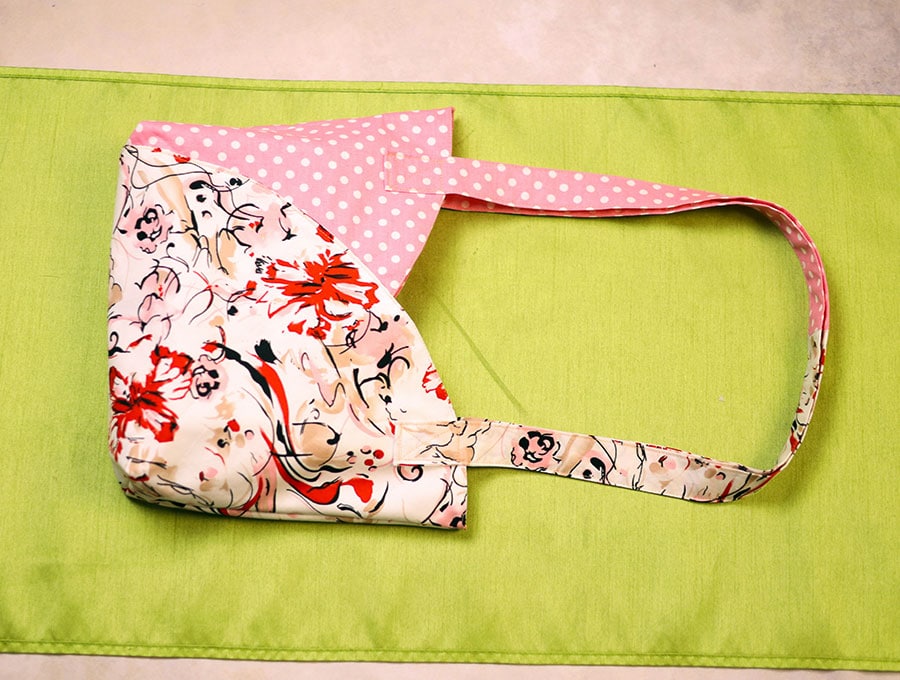
This bag will take you from a shopping trip, to the beach and around town. Like and subscribe for more quick and easy projects like this delivered to your inbox. Our projects are perfect for using up those leftover bits of fabric and turning them into something beautiful.
Do you like this? Pin for later:
Wanna be friends? Click HERE and follow me on Pinterest
RELATED: