
DIY Yin Yang Christmas Twisted Wreath // Simple Wreath Weaving Technique // DIY Christmas Decoration
This Twisted Ying-Yang Christmas Wreath the perfect holiday project for older kids as it teaches them sequential thinking as they learn the weaving technique with the braid. Then everyone gets to watch the magic as the section of weaving automatically twists into the Yin-Yang shape once they join the ends. Younger kids will enjoy getting in on the action when it comes to deciding where the decorations for the top of the wreath are to be placed.
Christmas is not just about the decor, the eating and the drinking, but the fun of being together and creating the magic as a family when you make decorations, bake cookies and mince pies, and craft festive drinks like hot chocolate with mini marshmallows, whipped cream and a sprinkle of chocolate flakes or golden flakes, and then share them.
Below you will find my step by step written tutorial with VIDEO instructions for all the visual learners.
We occasionally link to goods offered by vendors to help the reader find relevant products. Some of the links may be affiliate meaning we earn a small commission if an item is purchased.
Table of Contents
- 1 How to make the Twisted Ying-Yang Christmas Wreath
- 2 Supplies and tools
- 3 How to Sew an Ying-Yang Christmas Wreath
- 3.1 Twisted Christmas Wreath VIDEO TUTORIAL
- 3.2 INSTRUCTIONS:
- 3.3 STEP 1:
- 3.4 STEP 2:
- 3.5 STEP 3:
- 3.6 STEP 4:
- 3.7 STEP 5:
- 3.8 STEP 6:
- 3.9 STEP 7:
- 3.10 STEP 8:
- 3.11 STEP 9:
- 3.12 STEP 10:
- 3.13 STEP 11:
- 3.14 STEP 12:
- 3.15 STEP 13:
- 3.16 STEP 14:
- 3.17 STEP 15:
- 3.18 STEP 16:
- 3.19 STEP 17:
- 3.20 STEP 18:
- 3.21 STEP 19:
- 3.22 STEP 20:
How to make the Twisted Ying-Yang Christmas Wreath
Supplies and tools
- 2 webbing straps in coordinating or contrasting colors
- glue gun and a glue stick
- some decoration for the top: a red Christmas ornament, couple of fir three branches, artificial red holly berries and white mistletoe berries
- matching thread
- scissors (or rotary cutter and a cutting mat)
- ruler or measuring tape
- iron and ironing board
- sewing clips or pins
Follow us for free patterns & tutorials! [easy-profiles]
How to Sew an Ying-Yang Christmas Wreath
Watch the diy Twisted Ying-Yang Christmas Wreath video first and then follow the written step by step instructions below.
Please enjoy and don’t forget to Like and SUBSCRIBE over on YouTube to be kept up to date with new videos as they come out.
Twisted Christmas Wreath VIDEO TUTORIAL
INSTRUCTIONS:
It’s best when you watch this on the video first and maybe go back to rerun sections, but here are the instructions for the four way plait.
MATERIALS:
Use 2 colors of webbing, Beltcraft band or polypropylene type braid. We used gold and red for this example.
- Large wreath (24cm or 9.5″ diameter) – use 14 yards (13 m) long of each colour and with a width of 1 1/4 inch (3 cm)
- Standard wreath (20cm or 8″ diameter) – use 12 yards (11 m) long of each colour and with a width of 1 inch (2.5 cm)
STEP 1:
Find the midpoint of your webbing lengths by folding each in half. Make a small mark on each ribbon to indicate the middle.
STEP 2:
Lay your red webbing strap vertically down your worktop, over it lay the gold/beige ribbon horizontally, making sure the middle marks are over each other.
STEP 3:
Fold the red webbing strap down over the gold, and somewhat towards the right, leaving a little room for threading other webbing strap through – you will tighten this all up later.
STEP 4:
Fold the gold over from the left to the right, angling it slightly downward, and over the red strap.
STEP 5:
Fold the red strap upward over the gold, and slightly to the left.
STEP 6:
Take the gold strap on the top left and thread it under the red strap loop on the right.
STEP 7:
Even up the webbing so you have a square that is gold on the top left, red on the top right, red on the bottom left and gold on the bottom right.
STEP 8:
Flip the square you just built right over, and working from the back this time, bring the bottom right gold strap to the bottom left.
STEP 9:
Take the bottom left red up, then flip over the top gold strap from the left.
STEP 10:
Take the top right red webbing strap and thread it through the gold loop on the bottom right, evening out the loops so it all sits neatly.
STEP 11:
Still working from the same side flip the bottom gold across from right to left, flip the bottom red ribbon up, then the top gold on the left to the right and finally the red on the right down, threading it through the loop in the bottom right gold.
STEP 12:
Continue, alternating the sequence from left to right – the video makes it very clear, until you have a long strand with between 48 to 50 folds.
STEP 13:
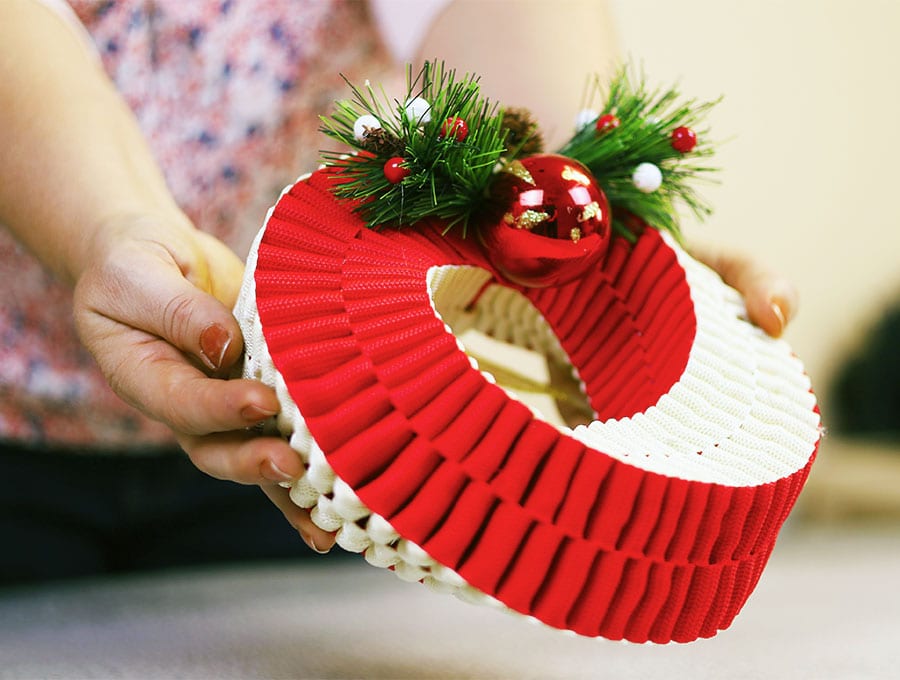
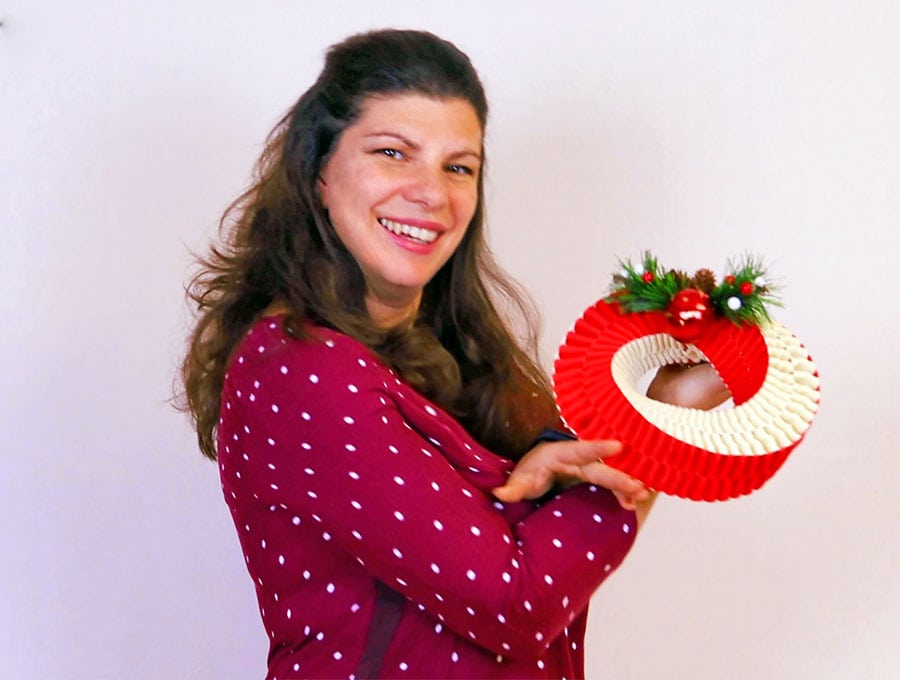
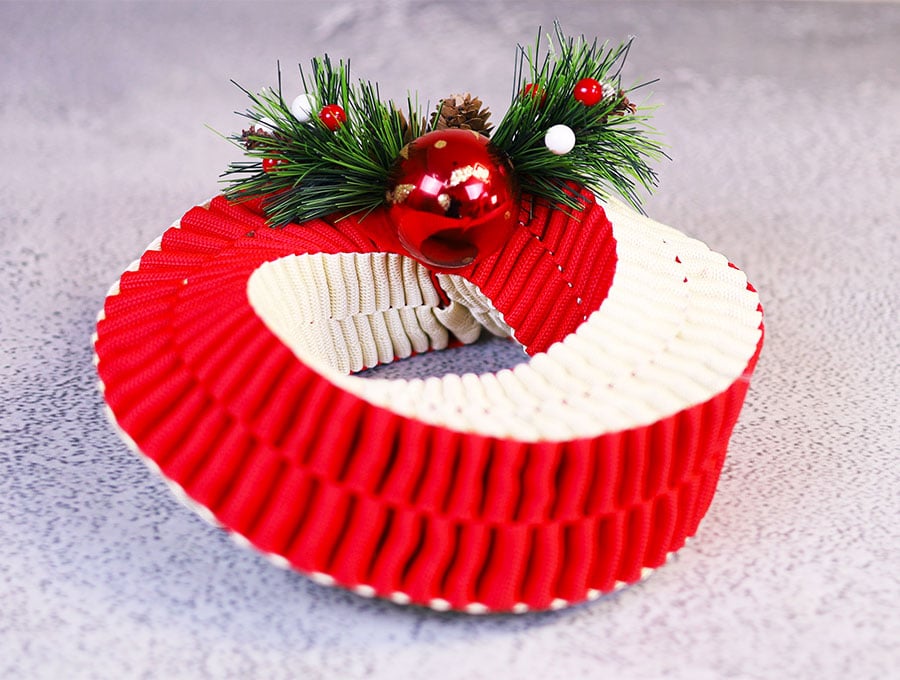
The fold will automatically twist into the Yin Yang curve when you bring the ends together.
If you want to hang the wreath take a piece of golden string, decide the length then fold in half and knot the ends together. Have your hot glue gun ready and glue the beginning and end together and at the same time hot glue the string to the wreath by placing the knotted end in between where you will join the wreath, placing it more towards the back of the width of the wreath.
Do not worry about the extra bits of braid – we deal with those in the next step.
STEP 14:
Cut the 4 extra bits of braid from the weaving off about one inch (2.5 cm) from the weaving and singe the ends so the braid does not fray.
STEP 15:
Tuck each extra piece into the fold next to the ones you have glued together – separating the fold a little to get some hot glue in, then tucking in the ribbon strand next to its own color, so it becomes really hard to tell where the strand begins and ends. Use a sharp pointed instrument to do this as it’s a small space and you don’t want to get your fingers burned by the hot glue.
STEP 16:
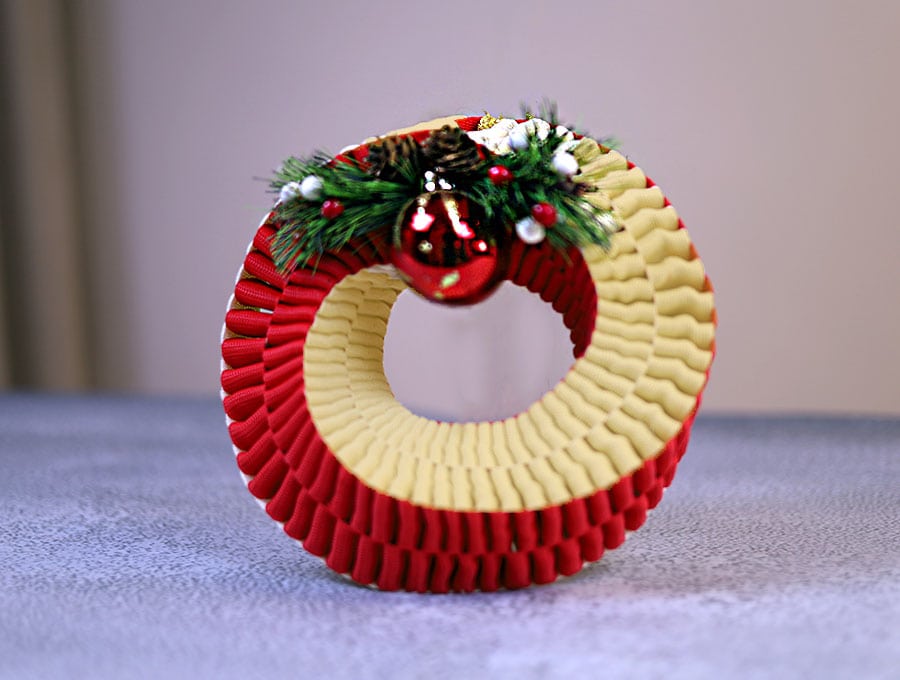
Now comes the fun part to decorate the top of the wreath. Cut a small circle of red felt with the diameter the width of the wreath, then hot glue it to the area where you joined the wreath, making sure the center of the circle lines up with the golden string to hang the wreath. The string should be towards the back of the wreath and the red felt circle on the front of the wreath.
STEP 17:
Now for the fun part of creating the holly and Christmas bauble effect.
Place a piece of greenery on either side of the center of the circle – I used fake pine branches, but you could use holly leaves. Ensure you are happy with the position then hot glue them in place.
STEP 18:
Choose your Christmas bauble and hot glue it in the center between the two bits of greenery and slightly lower down than the exact center. You don’t have to use a large bauble – you could use a readymade cluster of small red or gold baubles, or a red or gold fake poinsettia, or even a beautiful glittery bow.
STEP 19:
Above the exact center hot glue two small pine cones, one slightly to the left and the other slightly to the right, facing upwards and outwards so they cover the ends of the greenery and the top of the bauble. If you like you can add some glitter glue to the ends of the pine cones.
STEP 20:
To embellish the greenery take some small red and white fake holly and mistletoe berries, cut the wire stems short with pliers and hot glue them to the greenery. The finished size of your wreath will be 9 ½ inches (24 cm) in diameter, and the smaller one 8 inches (20 cm).
All you need to do now is to hang your wreath in the perfect spot. Here at HelloSewing we would love to see how you decorated your Yin-Yang Christmas wreath. Please drop a photo in the comments section after you have subscribed, as we love seeing the creativity of our subscribers.
Do you like this? Pin for later:
Wanna be friends? Click HERE and follow me on Pinterest
RELATED: