
DIY Shoe Laundry Bag
Tired of shoes banging around in the washer? Shoelaces taking ages to untangle? Well, shoes bags for washing are being sold online, but you can easily make your own shoe laundry bag with soft chenille fabric to protect your shoes. Best news it’s a an easy 15 minute make – what’s not to love about that!
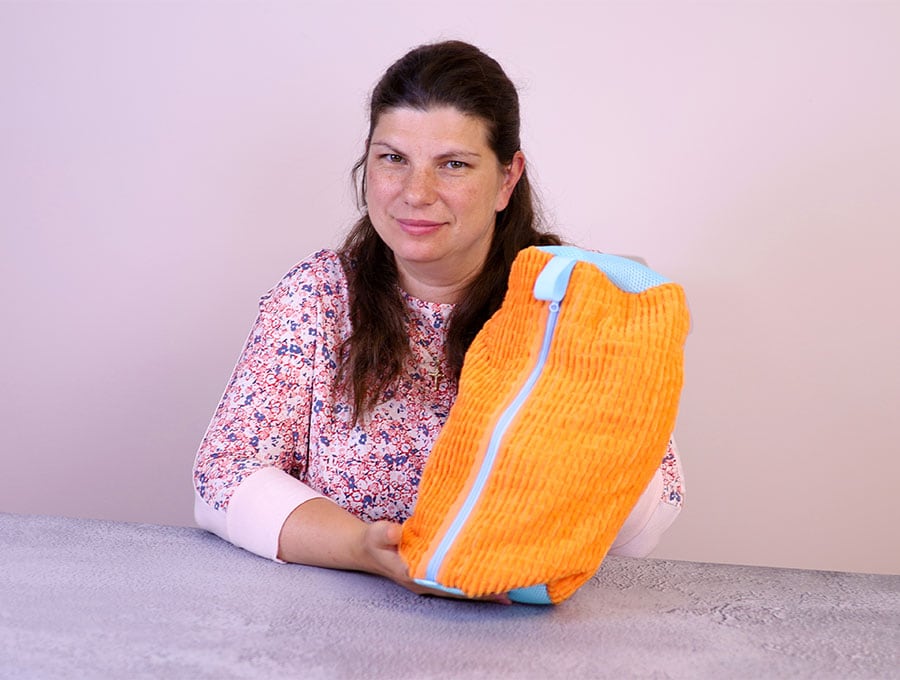
Quick projects are our speciality at HelloSewing and we’re bang on trend with a chenille shoe bag to pop grubby trainers into the wash. It only takes minutes to make. Protect your shoes and have them come out squeaky clean with the help of this shoe laundry bag.
Below you will find my step by step written tutorial with VIDEO instructions for all the visual learners.
We occasionally link to goods offered by vendors to help the reader find relevant products. Some of the links may be affiliate meaning we earn a small commission if an item is purchased.
Table of Contents
How to make a shoe laundry bag
Supplies and tools

- microfiber chenille
- mesh fabric
- elastic
- zipper
- grossgrain ribbon
- matching thread
- scissors (or rotary cutter and a cutting mat)
- ruler or measuring tape
- sewing clips or pins
- fabric marking pen
Follow us for free patterns & tutorials! [easy-profiles]
How to Sew a shoe laundry bag
Watch the diy shoe laundry bag video first and then follow the written step by step instructions below.
Please enjoy and don’t forget to Like and SUBSCRIBE over on YouTube to be kept up to date with new videos as they come out.
Shoe Laundry bag VIDEO TUTORIAL
Materials:
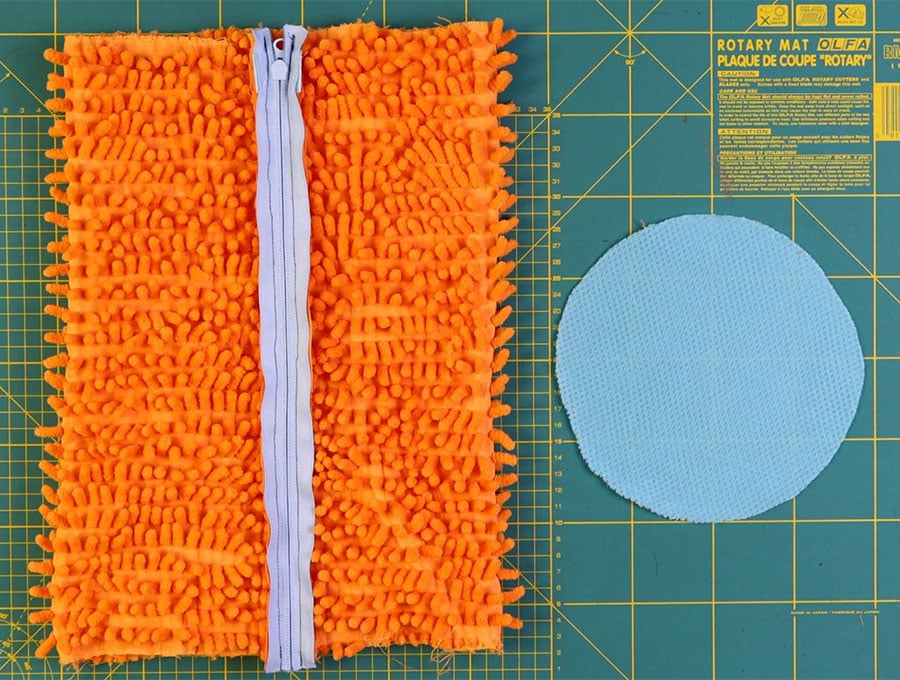
- 1 piece of microfiber chenille fabric 22 ½ x 15 inches (57 x 38 cm)
- 1 zipper of 15 ¼ inches (39 cm)
- Grosgrain ribbon:
- 1 of 6 inches (2.5 x 15 cm)
- 1 of 1 x 1 ¼ inches (2.3 x 3 cm)
- Elastic 1 of 1 x 1 ½ inches (2.5 x 4 cm)
- 2 mesh circles with a 7 ½ inch (19 cm) diameter
INSTRUCTIONS:
STEP 1:
With the right side of the zipper uppermost, open the zipper about a third of the way down, then measure ½ an inch(1.3 cm) from the open ends and make a mark on each side.
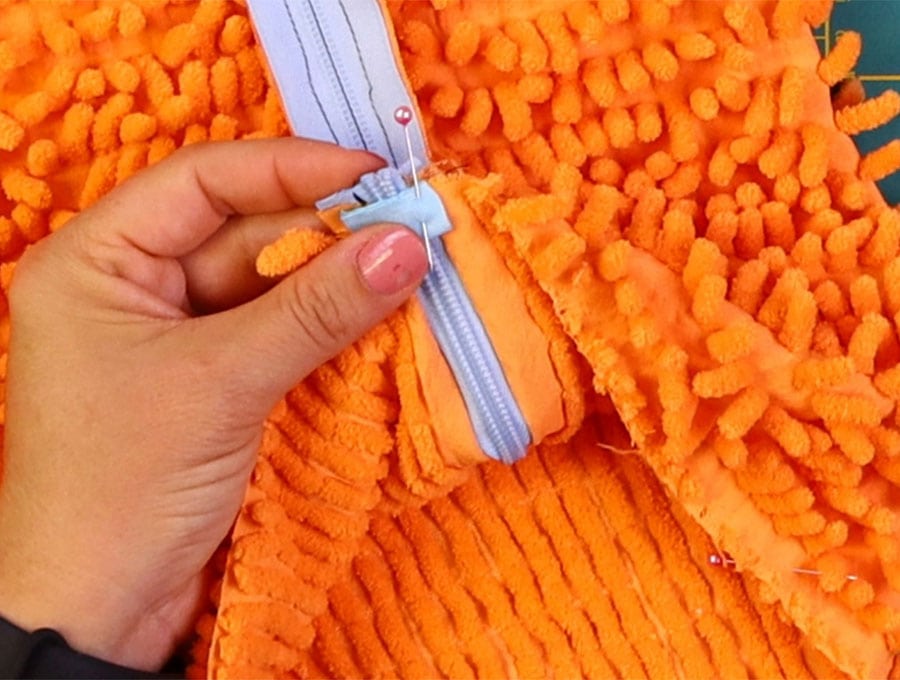
STEP 2:
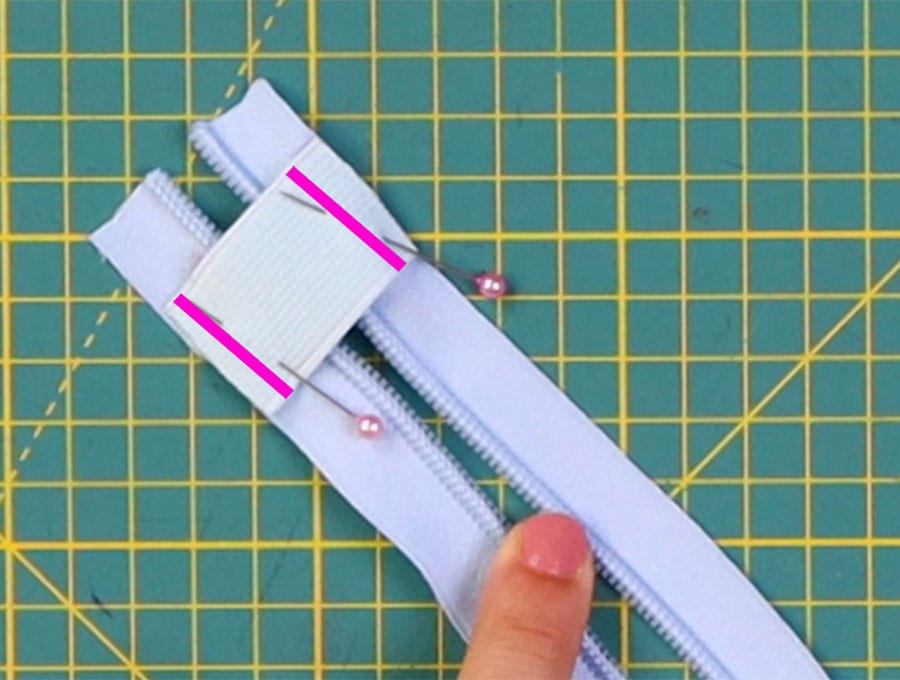
Pin the small piece of elastic of 1 x 1 ½ inches (2.5 x 4 cm) with the top edge of the elastic on the marks.
STEP 3:

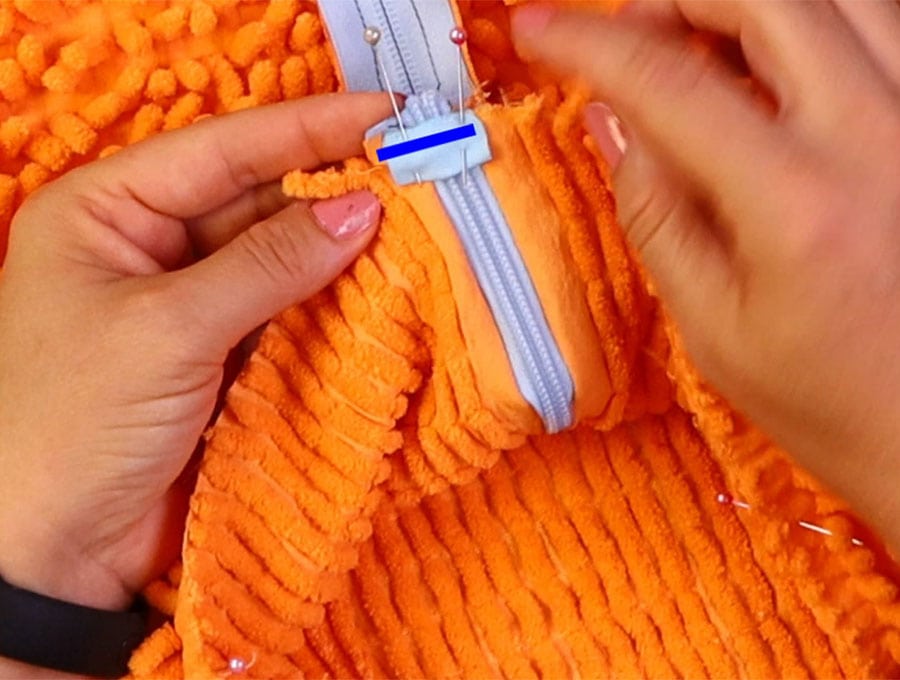
Stitch the elastic to the zipper on the sides, 1/8 of an inch (3 mm) from the edges.
STEP 4:
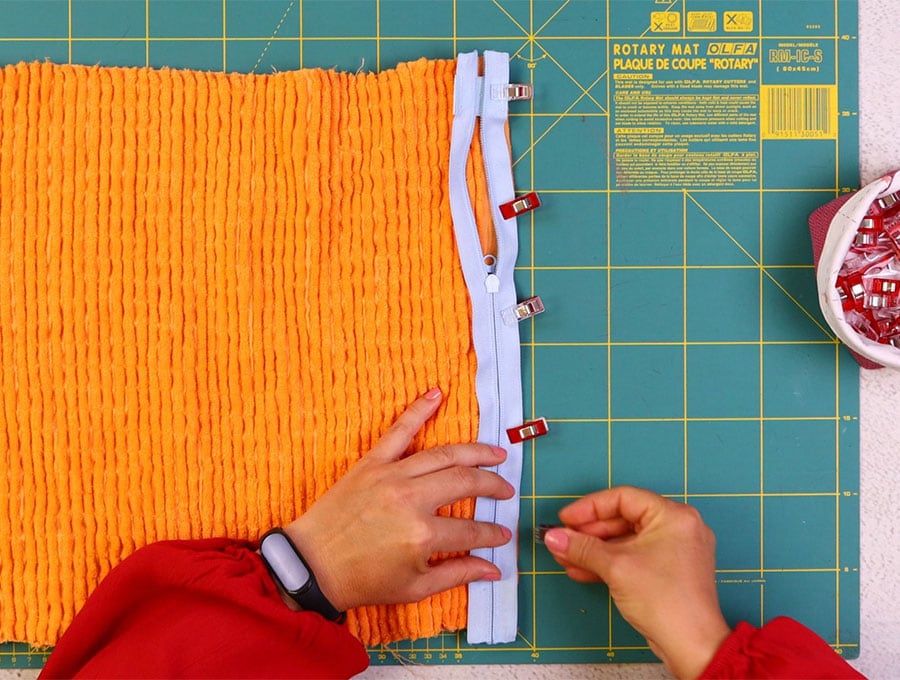
Place the chenille fabric wrong side up on your worktop and position the zipper, also wrong side up on the shorter -15 inches (38 cm) end of the fabric and clip in place along the length.
STEP 5:
Stitch in position using your zipper foot on the machine so you get close to the zipper teeth. Backtack at the start and finish.
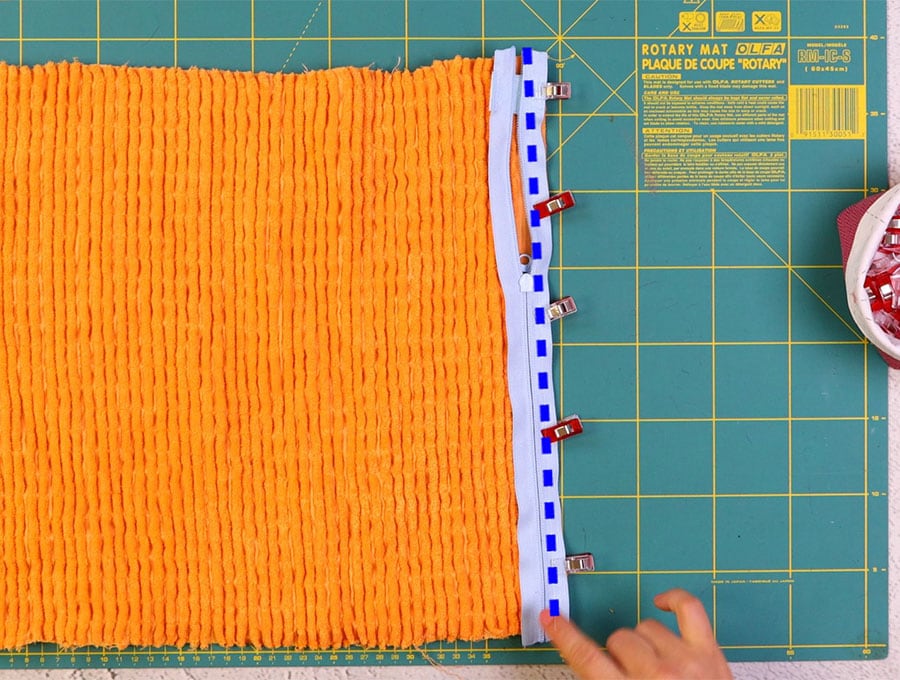
STEP 6:
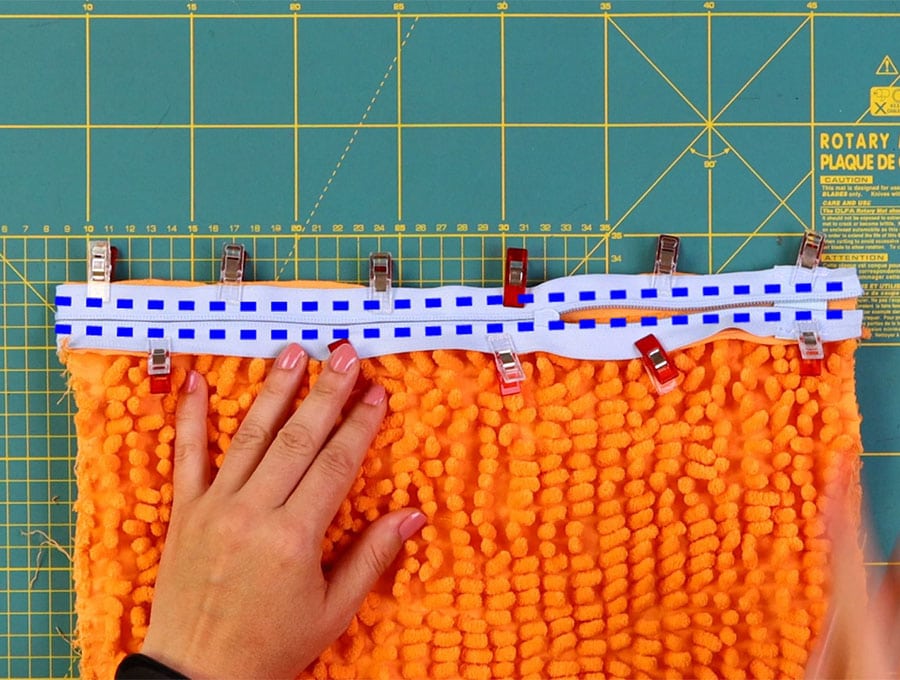
Fold so your right side of the fabric is on the outside and pin the other side of the zipper to the wrong side of the other short side.
STEP 7:
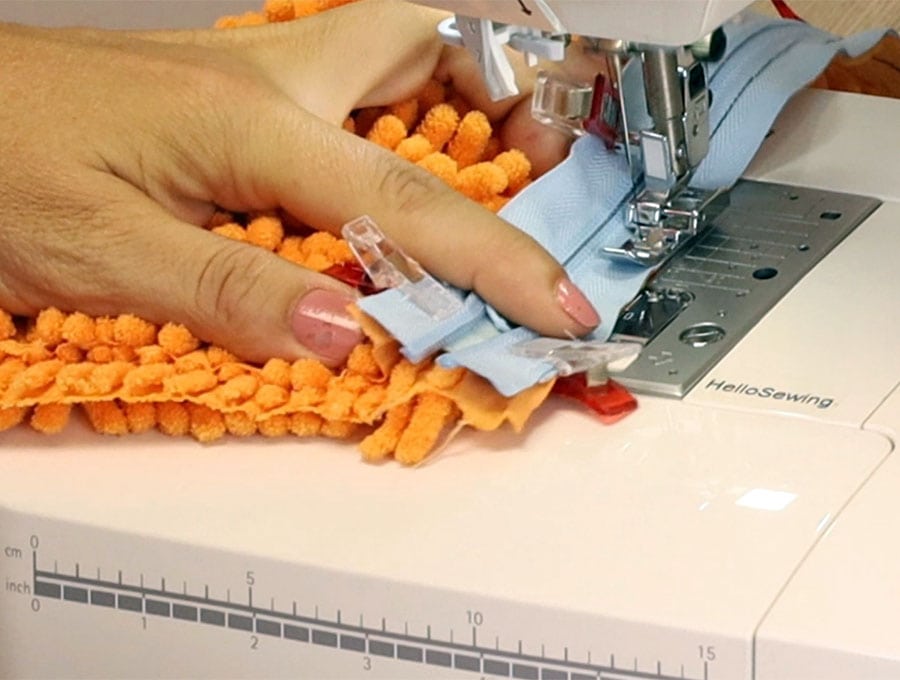
Stitch in position using your zipper foot on the machine so you get close to the zipper teeth. Backtack at the start and finish.
STEP 8:
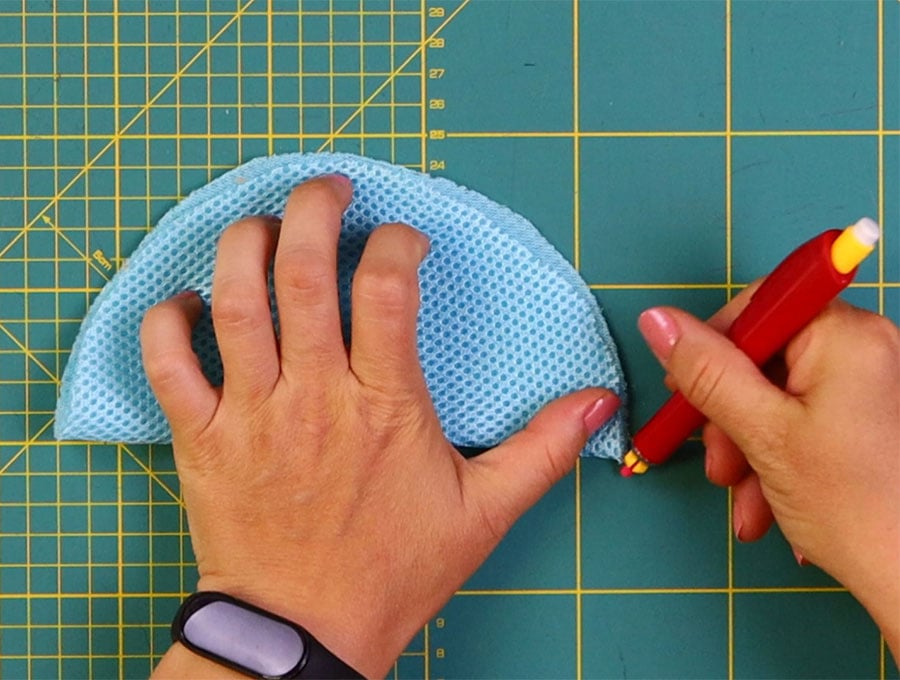
Divide the mesh circle into four equal part by folding in half and marking the edge of the fold, then fold again the other way and mark the edges of the fold.
 You now have the circle divided into 4 equal parts.
STEP 9:
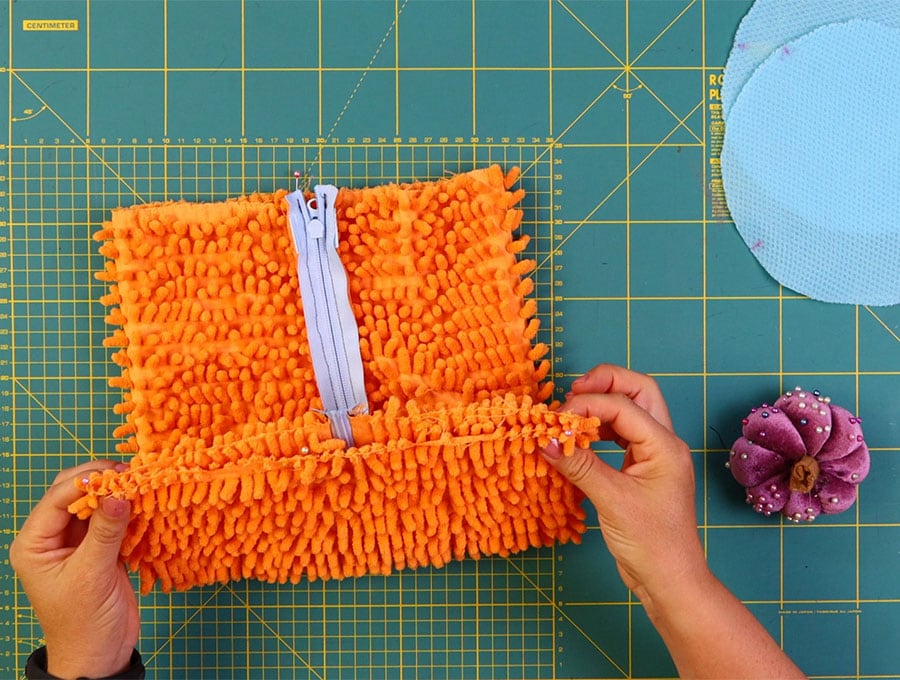
Take the tube of chenille fabric with the zipper and mark the fold line opposite the zipper with a pin, then line up the pin with the zipper and mark the two folds each side with a pin so you have four equal parts into which to fit the circle. Repeat with the other end of the tube.
STEP 10:
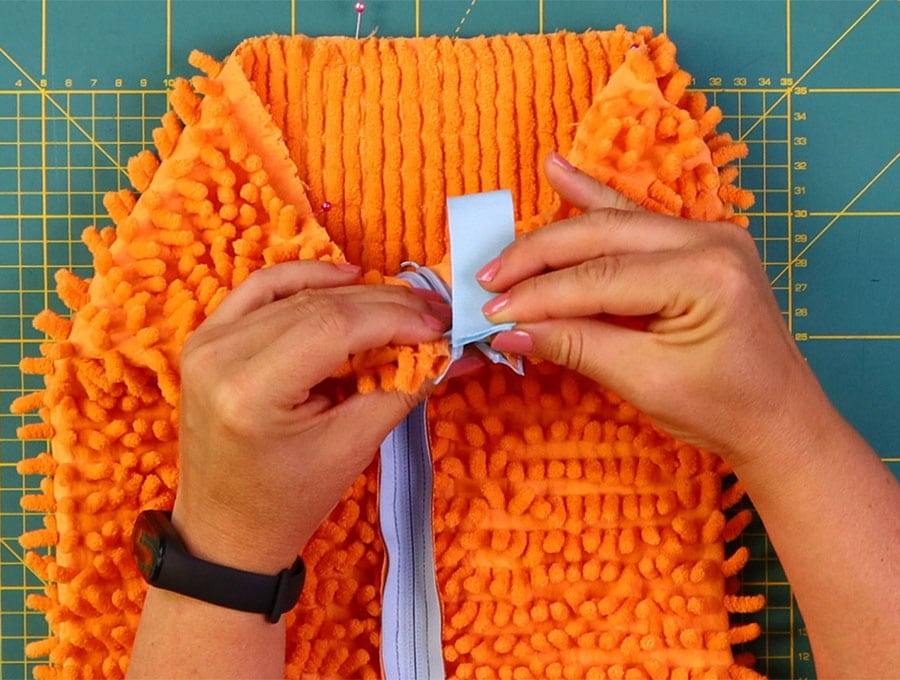
Fold the 6 inch (15 cm) piece of grosgrain ribbon in half and pin on the end of the zipper with the elastic, the fold facing into the body of the fabric and the raw edges lining up with the end of the zipper.
STEP 11:
Fold the smaller 1 ¼ inch (3 cm) piece of ribbon in half and pin to the other end of the zipper, raw edges of ribbon lining up with the end of the zipper, fold facing into the main body of the shoe bag.
STEP 12:
Stitch the ends of the pieces of ribbon to the zipper 1/8 of an inch (3 mm) from the edge, backtacking over the ribbon to ensure it is firmly attached.

Open the zipper to a third of the way open – this will enable you to turn the shoe bag the right way out after attaching the circles at the ends.
STEP 13:
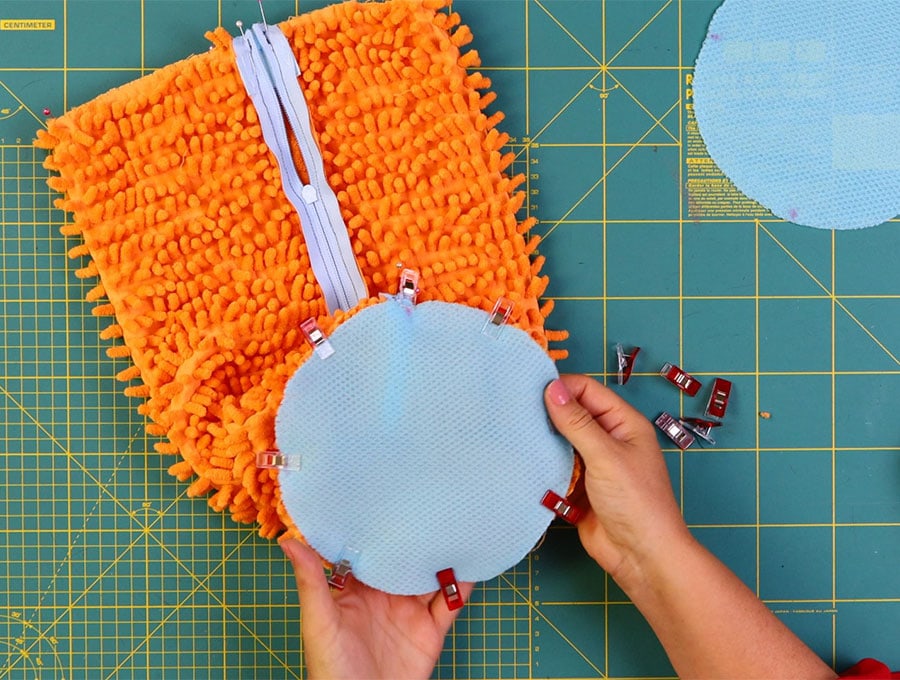
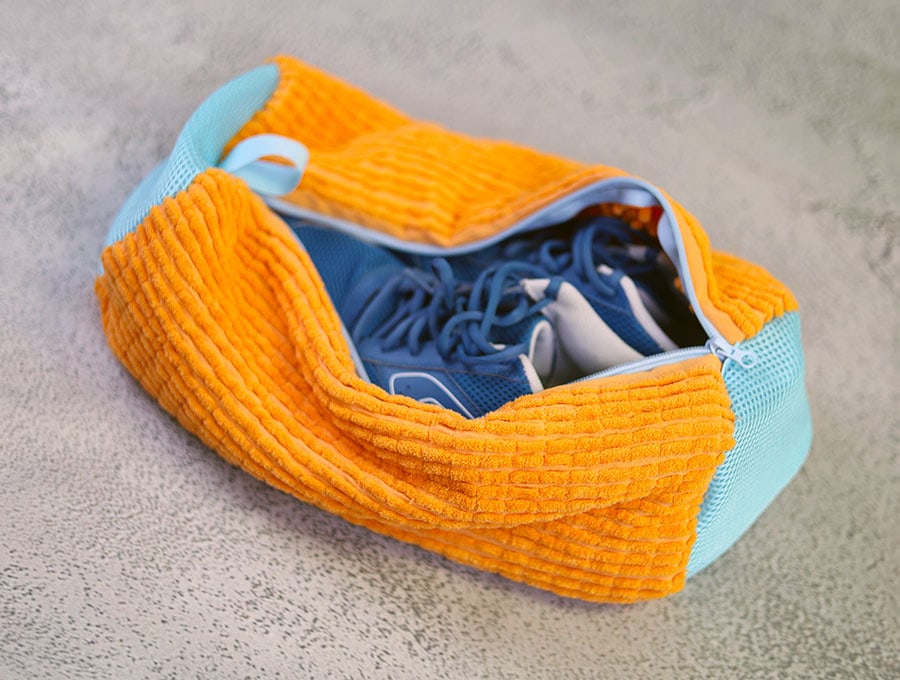
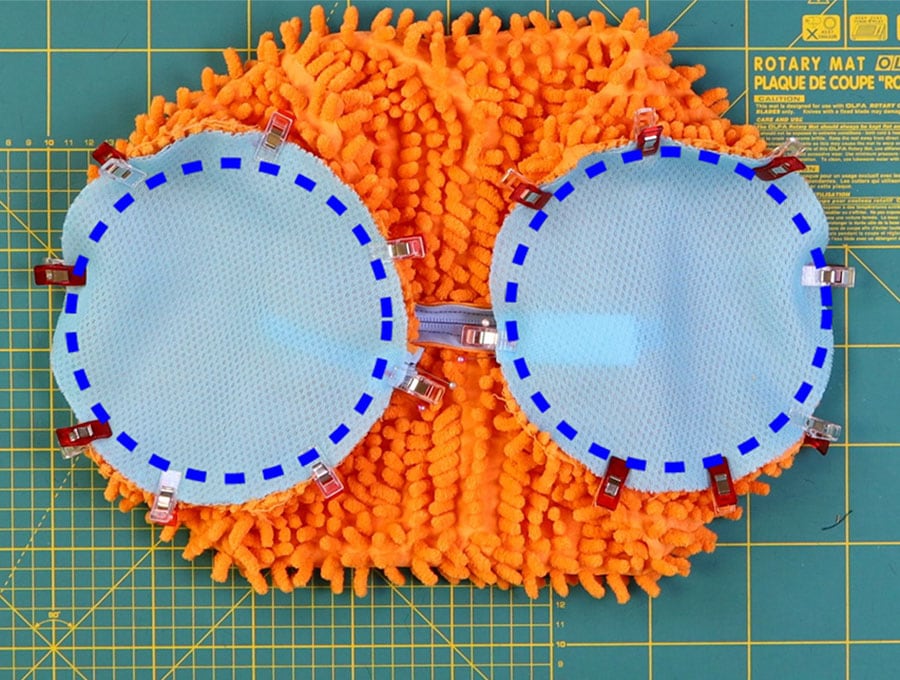
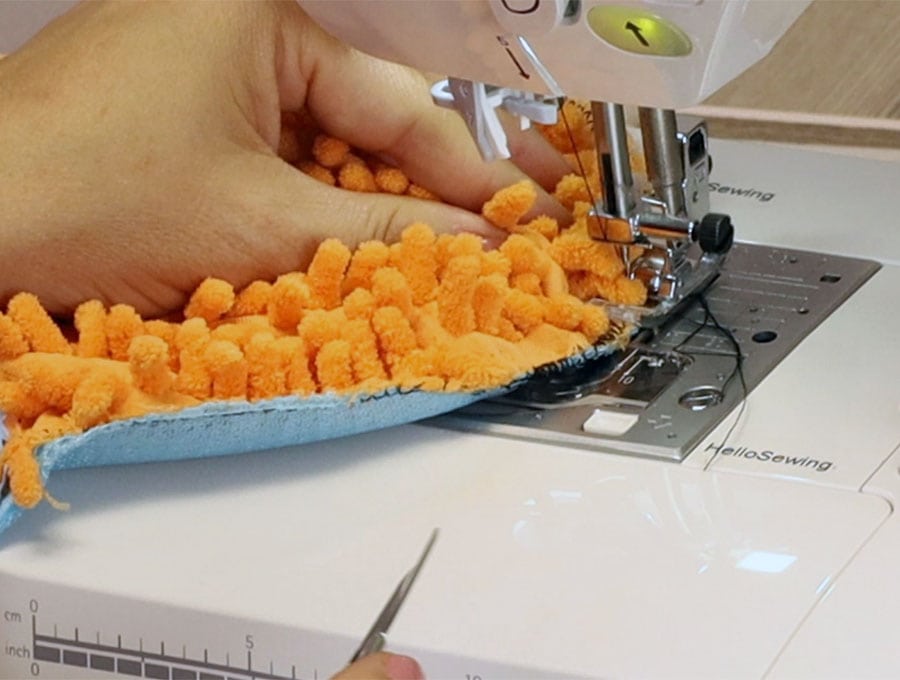
Clip a circle to each end of the tube, matching up the marks you made on the circles with the pins on the tube. Remember, you will be pinning on the right side of the chenille fabric because the right side is what will be inside the shoe bag to protect the shoes with the chenille’s soft pile while washing. Add some extra clips to ease in the fabric between the marks. Each circle should have 8 clips in place so it’s easy to sew later.
STEP 14:
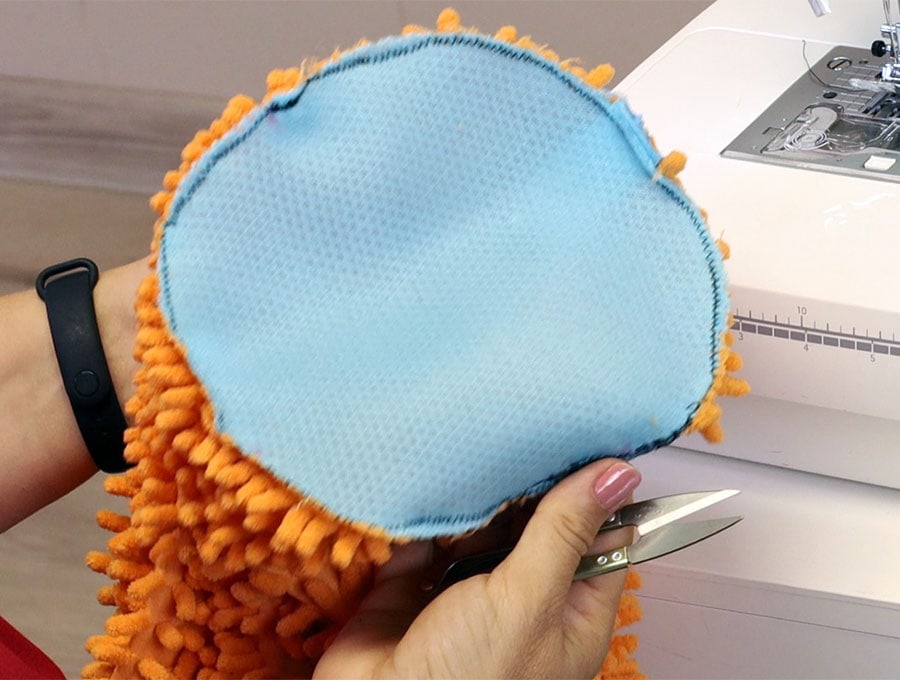
Stitch 1/4 of an inch (6 mm) from the edge around each circle.
You can then serge (overlock) or zigzag around the circles for a neat finish.
STEP 15:

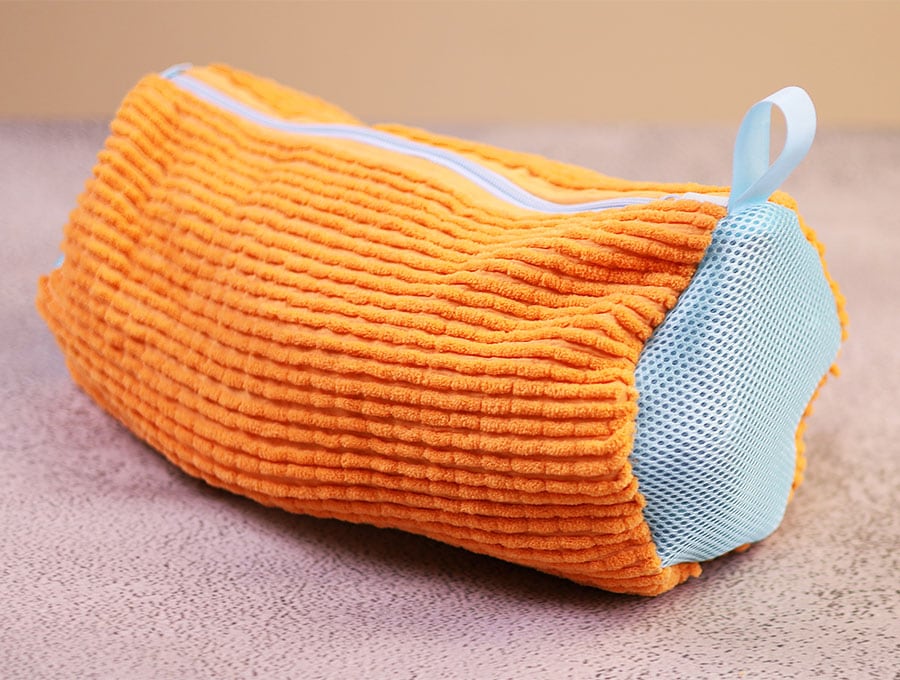
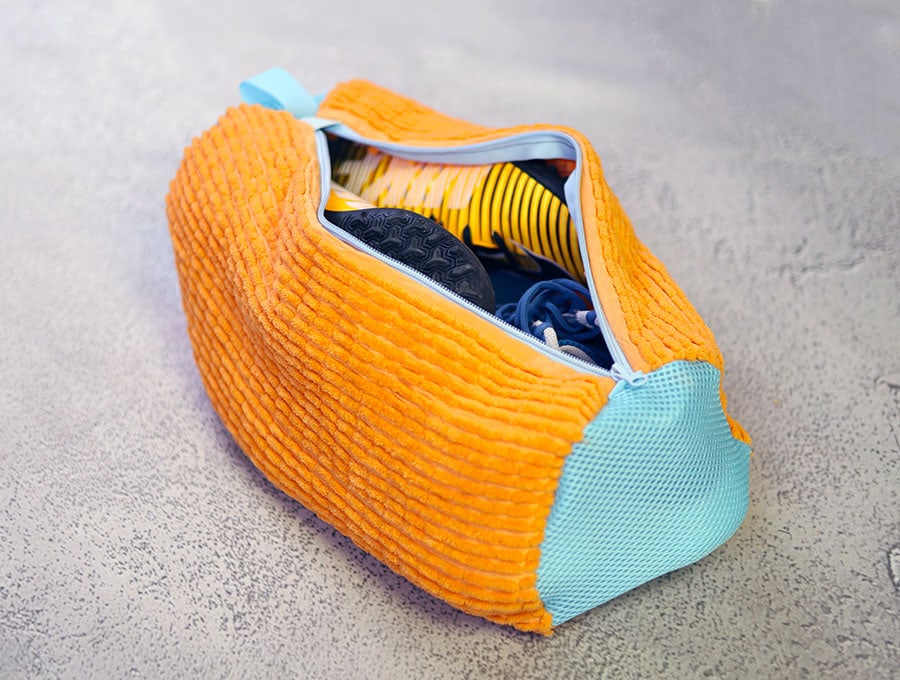
Turn the shoe bag the right way out and its ready to use.

Just remember to slide the zipper pull under the elastic to keep it from snagging other items in the wash when you use it.
Like and subscribe for more useful and fun projects delivered to your inbox as they are posted. Here at HelloSewing we specialize in quick, easy and practical projects, designed to save you time and a whole lot of money. We also like sustainable projects that use those smaller pieces of fabric in your fabric stash because we understand that buying fabric is such an irresistible urge. Our mission is to turn those pieces into great projects.
Do you like this? Pin for later:
Wanna be friends? Click HERE and follow me on Pinterest
RELATED: