
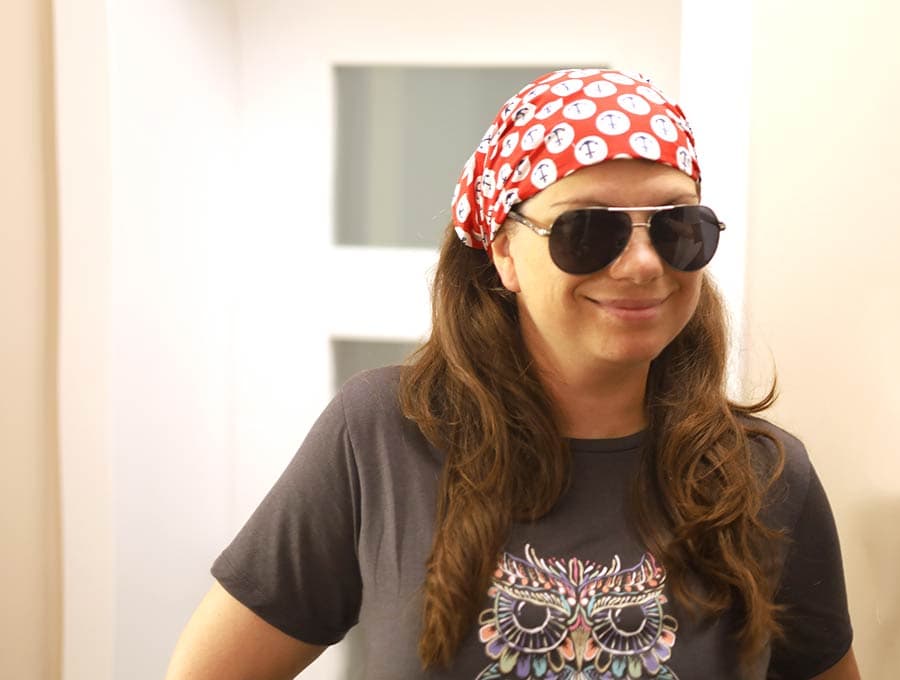
DIY Bandana Headband with Elastic for Girls or Guys
Here’s to a mom-and-daughter cycle outing wearing bandana headbands. This DIY bandana headband with elastic is so cute and just perfect for summer days when riding a bike or taking a walk. Use the stretchy bandana headband anytime you want to keep long hair from blowing into the face or when you want to add a bit of style to an outfit. You can make them for ladies too. They can also be made to accompany dresses for underprivileged children in Africa and Asia. Because they take up a small amount of fabric, you can probably use the offcuts from the dresses. These lovely DIY bandanna headbands with elastic take around 10 minutes to make when you follow our easy step-by-step tutorial.
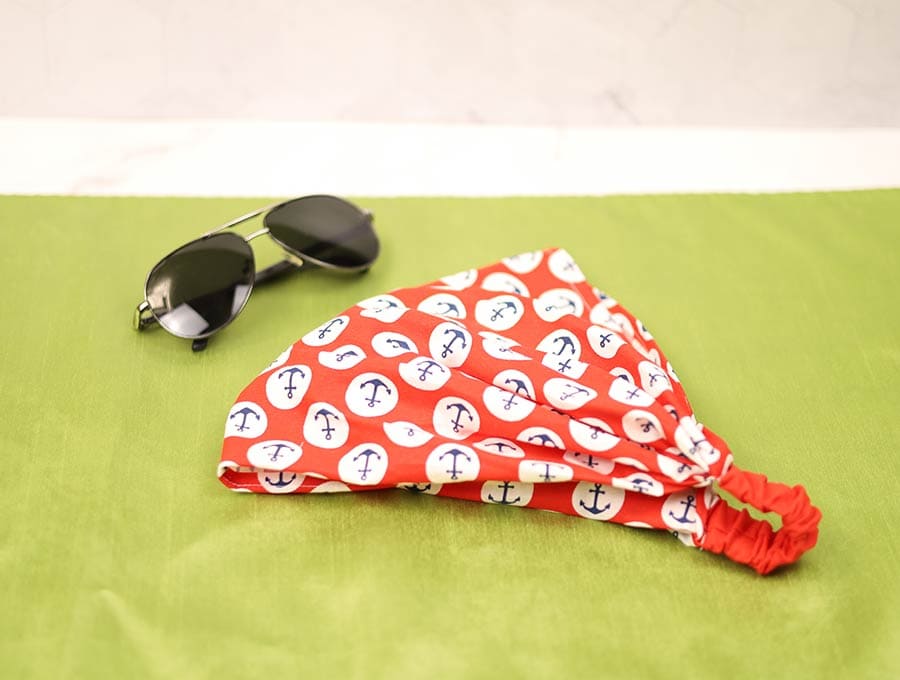
These little bandana headbands can be made in around 10 minutes – you’ll probably get it down to less if you bulk cut and sew. The bandana headbands with elastic use small pieces of fabric from your stash. They can be made in various pretty patterns and colors – a perfect accompaniment to summer days spent bike riding, fishing, and playing when girls don’t want their long hair whipping back into their face. The visuals make it easy to follow the instructions, and in no time, you’ll be making these in a flash.
Below you will find my step by step How to make a bandana headband written tutorial with VIDEO instructions for all the visual learners.
We occasionally link to goods offered by vendors to help the reader find relevant products. Some of the links may be affiliate meaning we earn a small commission if an item is purchased.
Table of Contents
How to make a bandana headband
DIY bandana headband Supplies and tools
- fabric – cotton fabric
- 1″ wide elastic – 4.5″ (11cm) long
- scissorsB00AQ7CVPO
- matching thread
- scissors (or rotary cutter and a cutting mat)
- ruler or measuring tape
- iron and ironing board
- sewing clips or pins
DOWNLOAD: bandana headband pattern (FREE template)
Follow us for free patterns & tutorials! [easy-profiles]
How to Sew a bandanna headband
Watch the diy bandanna headband with elastic video first and then follow the written step by step instructions below.
Please enjoy and don’t forget to Like and SUBSCRIBE over on YouTube to be kept up to date with new videos as they come out.
DIY bandana headband VIDEO TUTORIAL
INSTRUCTIONS:
Measuring the bandana headband length
To determine the length of fabric needed for the main piece of the bandana headband, use a tape measure to determine the head circumference (that’s the distance from behind the ear, over the top of the head, to behind other ear) and substract 4″ (10cm).
The width will vary from perhaps 8 to 10 inches (20 to 26 cm) for kids. You can even make these for an adult – the adult length will be around 11 to 12 inches (28 to 31 cm). Refer to the free template above for all sizes
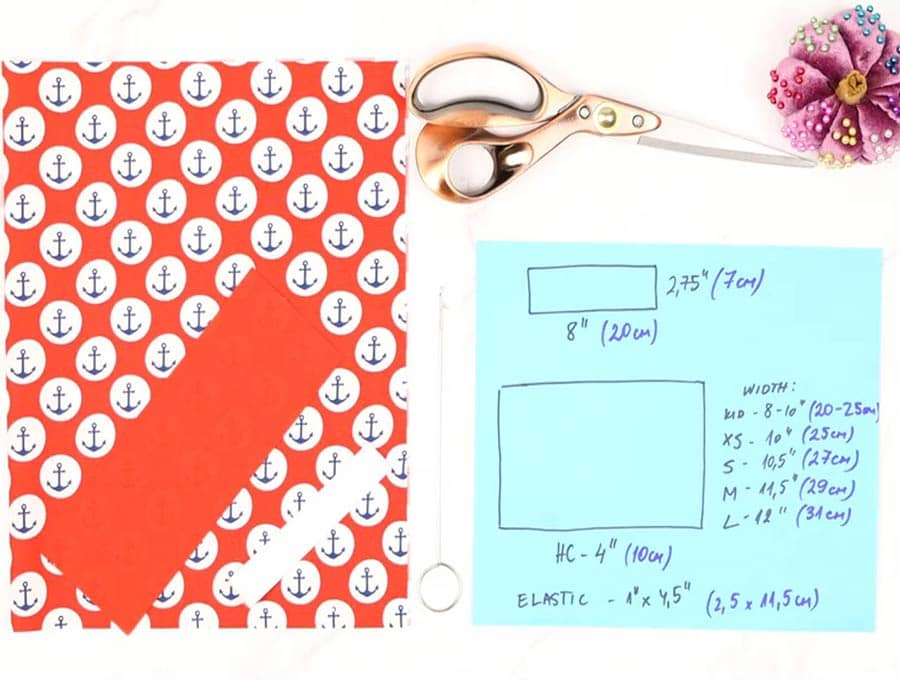
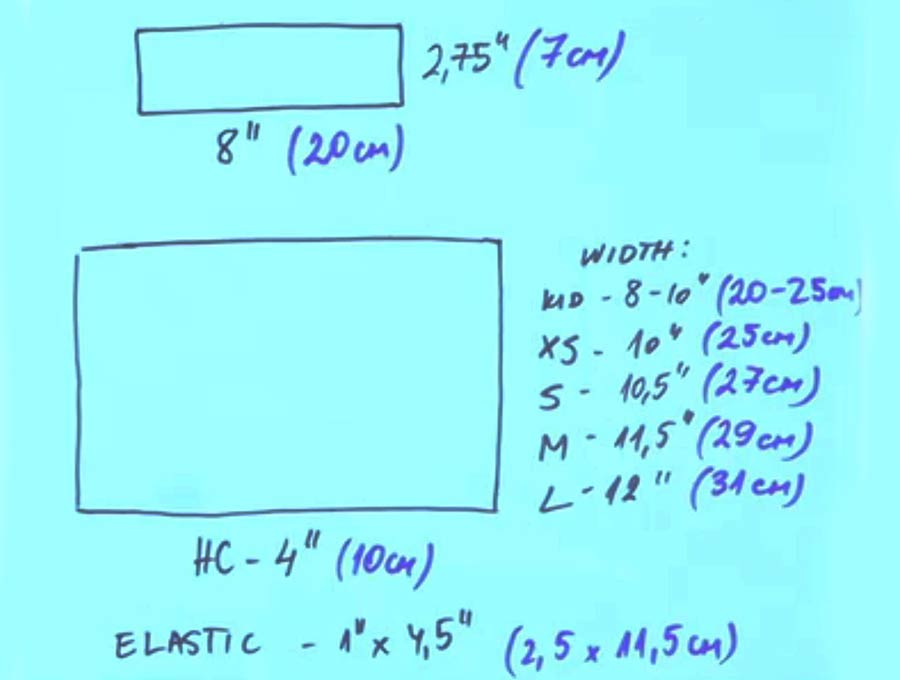
Fabric needed:
Bandana main piece fabric measurements:
- Length = Head circumference – 4″ (10cm)
- Width (kids) 8-10 inches (20 to 26 cm)
- Width (adults) – 12″ (31cm)
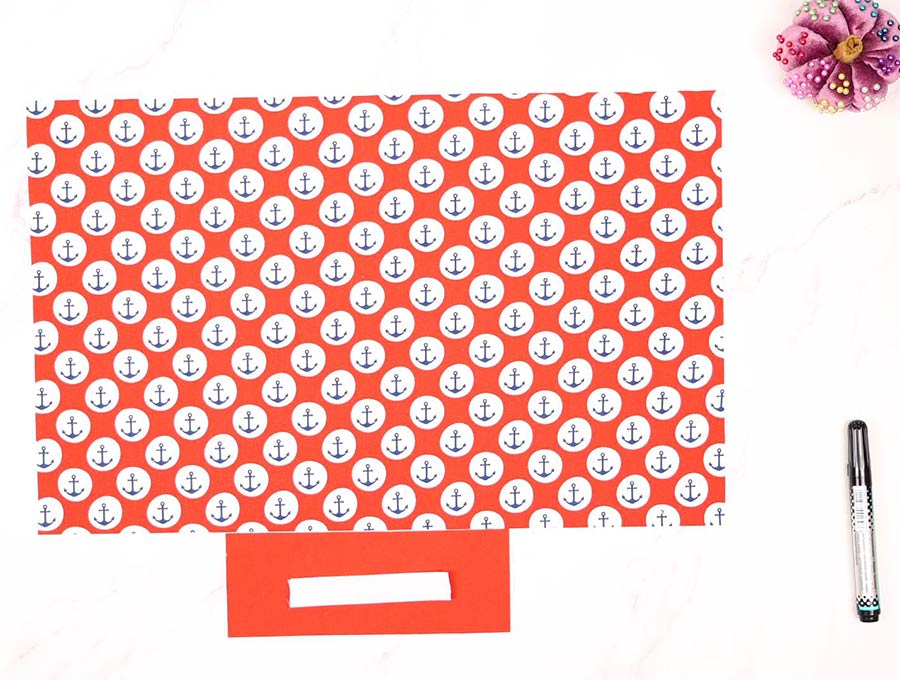
Fabric for the Elastic casing: 1 piece 8 x 3 inches (20 x 7 cm)
Elastic: 1 piece 1 x 4.5 inches (2.5 cm x 11.5cm)
STEP 1:
Take the smaller piece of fabric for the elastic casing and fold it in half along the length with the right sides facing each other, so you have a piece 8 x 1.5 inches (20 cm x 3.5cm). Line up the edges and pin them in place. Stitch along the length just under 1/4 inch (6mm) from the edge back, tacking at the start and finish.
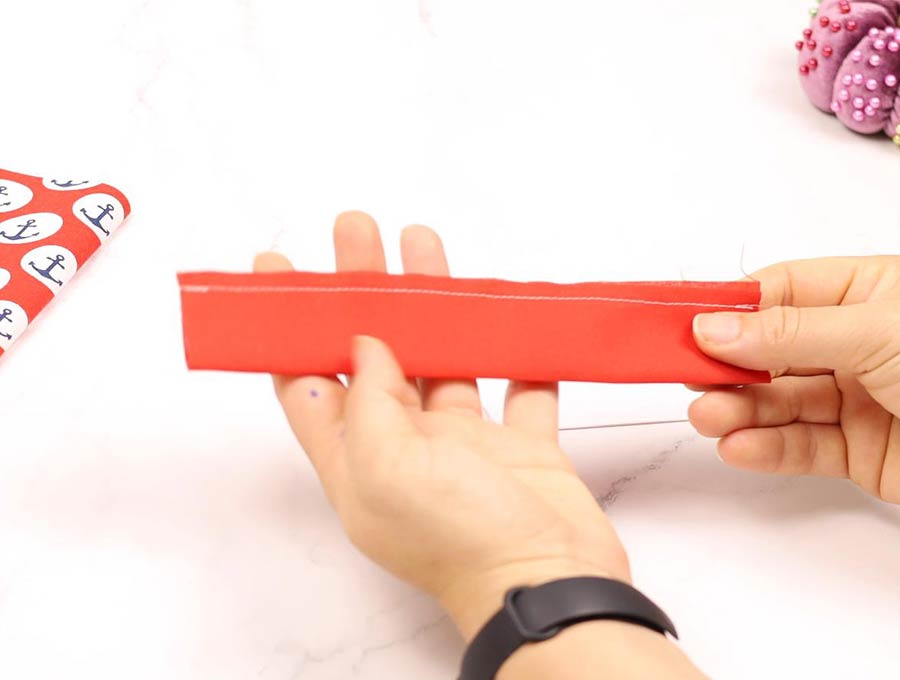
STEP 2:
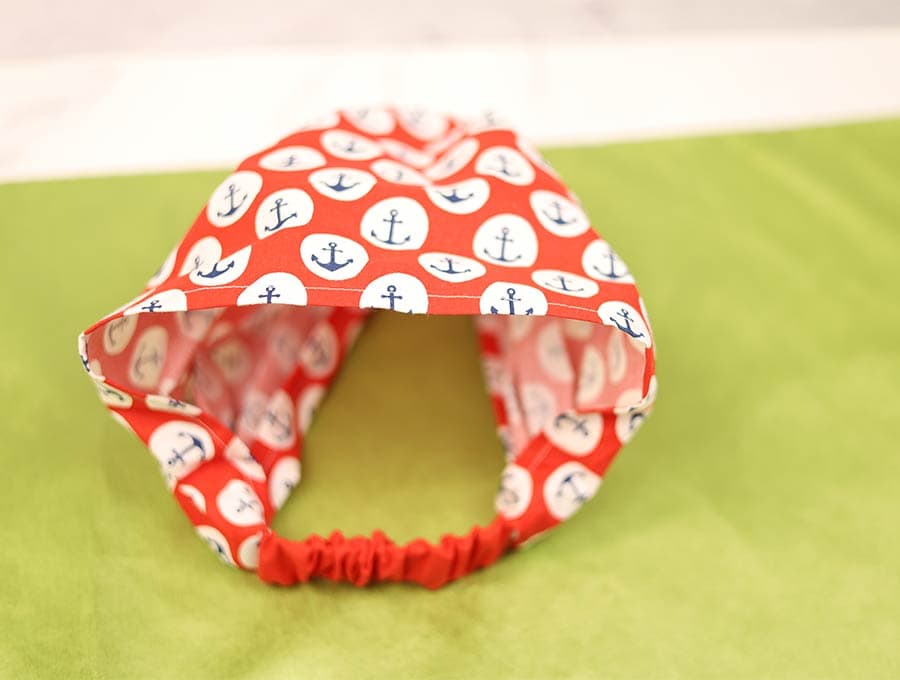
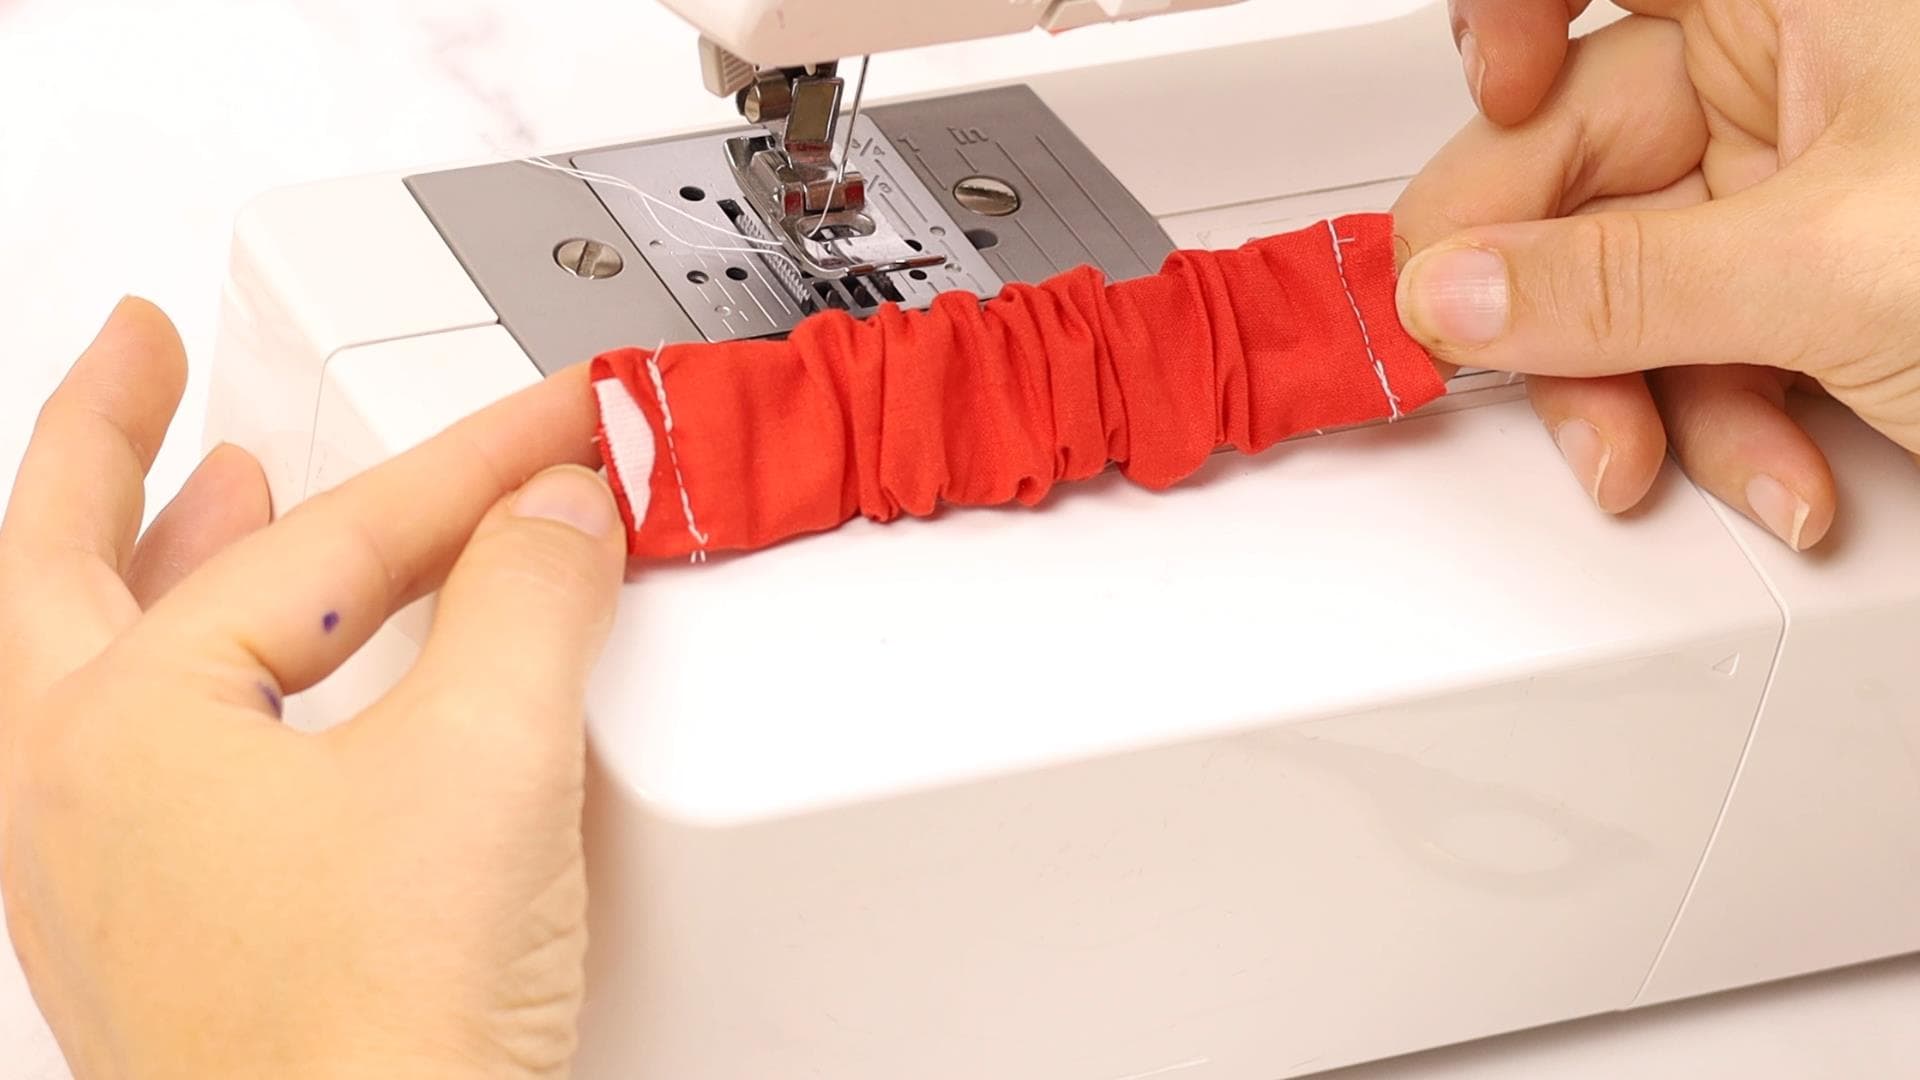
Turn the elastic casing the right way out and flatten along the seamed edge. Thread the piece of elastic through, making sure it lies flat within the casing. Clip the elastic in place at the edge of the casing on each end.
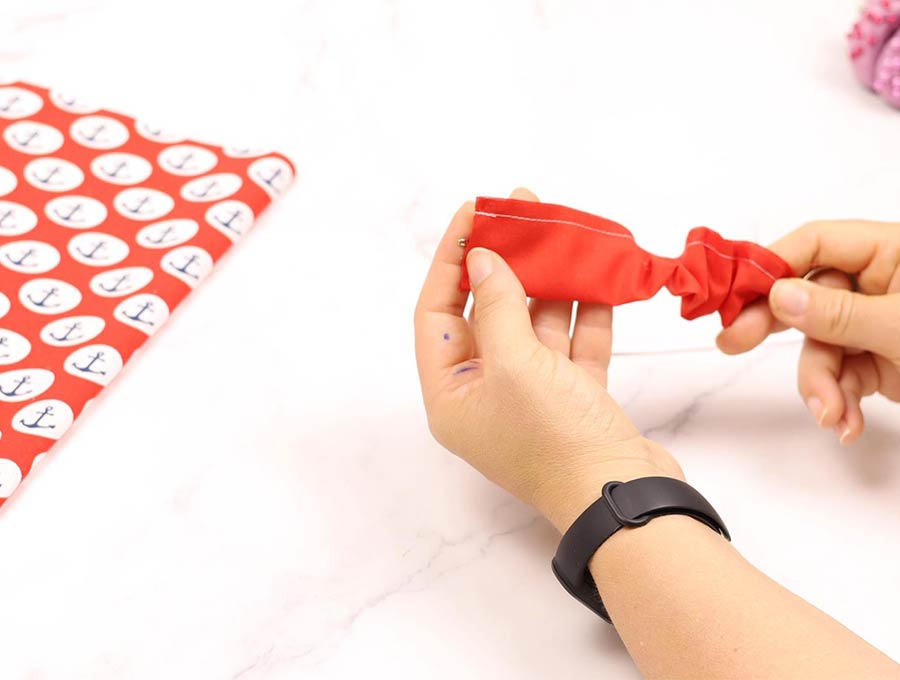
STEP 3:
Stitch the elastic to the casing, backstitching along the short end to make sure it is held firmly. Then stitch another row. This is to avoid the elastic pulling loose when under tension. The stitching will be ¼ inch (6 mm) from the edge.
Step 4:
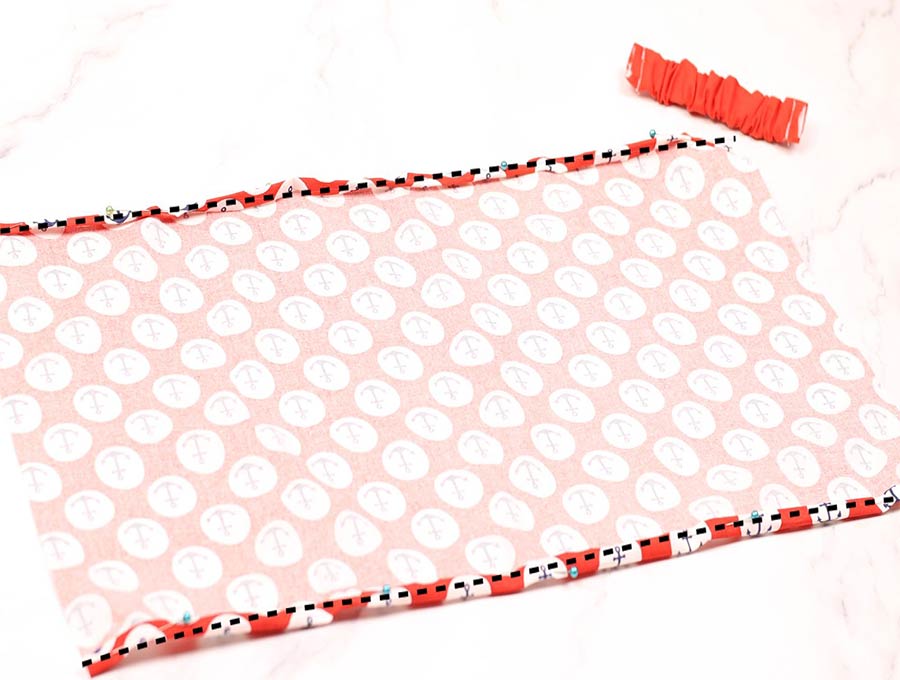
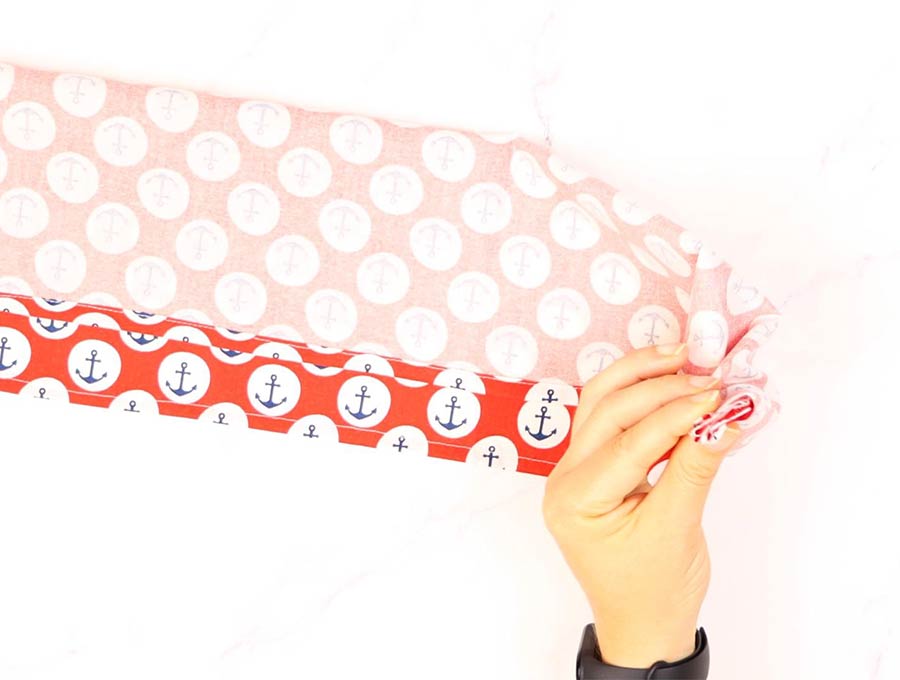
Take the main bandana piece, and turn over a seam of ¼ inch (6 mm, then again ¼ inch (6mm) on the long side. Stitch it down, back tacking at the start and finish. Repeat with the other long side. Set aside.
Step 5
Lay the main bandana headband piece right-side-up on the worktop, then place the elastic piece on the left-hand side 1 inches (2.5 cm) from the top.
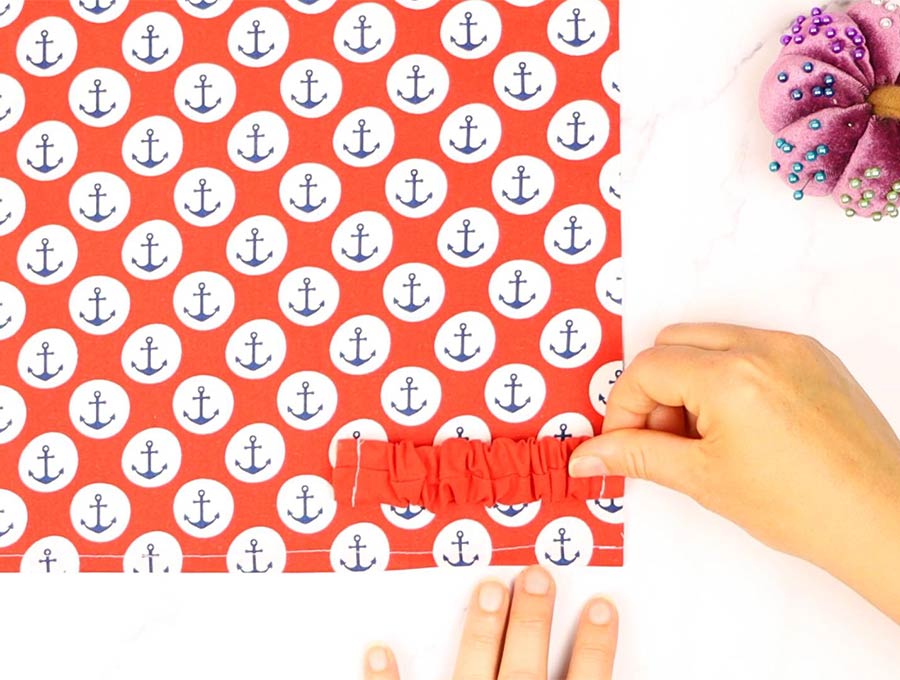
Fold down the bandana piece 1 inches (2.5 cm) to cover the elastic. Next, fold the edge of the bandana piece upwards from the bottom to cover the first fold. There will be a lot of excess fabric. Lift the material, hold the elastic and bandana carefully to avoid losing the position, and make several pleats over the elastic, so there is no excess fabric, and clip in place.
Bring the elastic over to the other side and repeat the pleats with the other end of the elastic and the other side of the bandana, then clip in place.
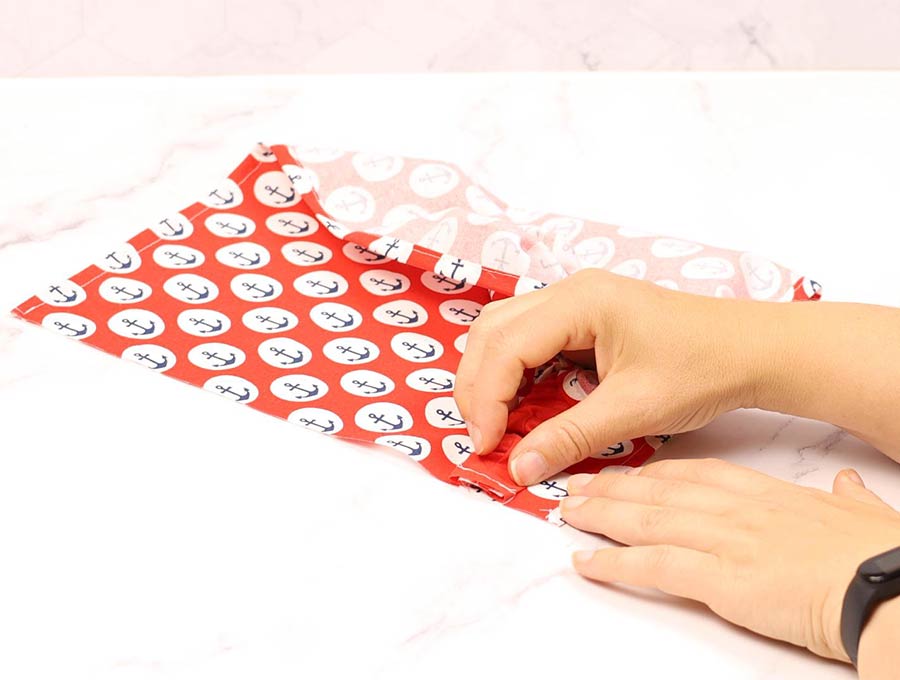
Make sure you follow the sequence of folds and pleats as you did for the first end; otherwise, there will be a twist in the pleats, which you want to avoid.
Step 6
Stitch the pleated ends 1/4 inch (6mm) from the edge, ensuring all the pleats and the elastic are caught securely. Back tack at start and finish.
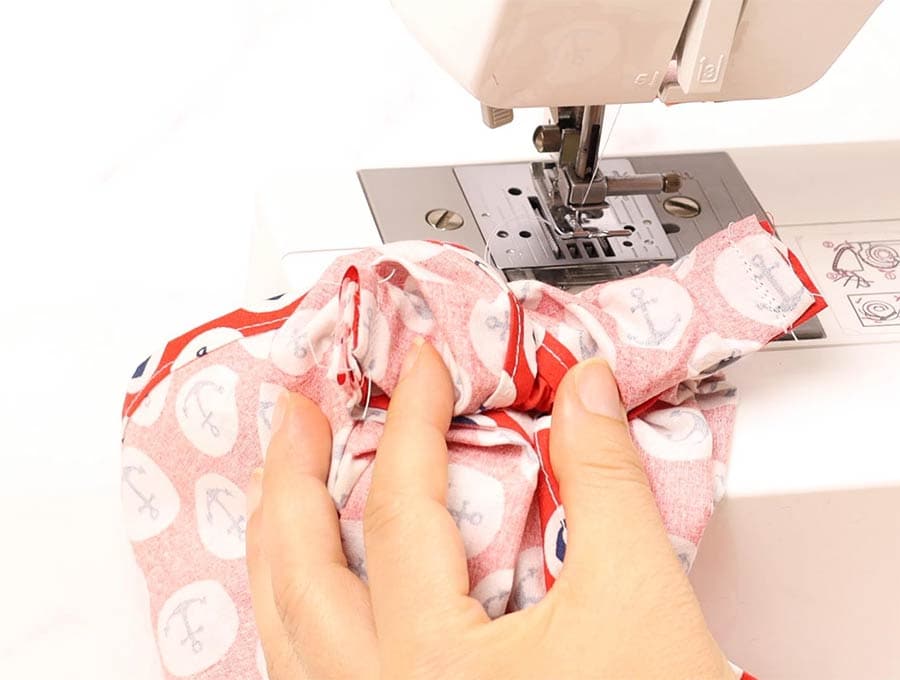
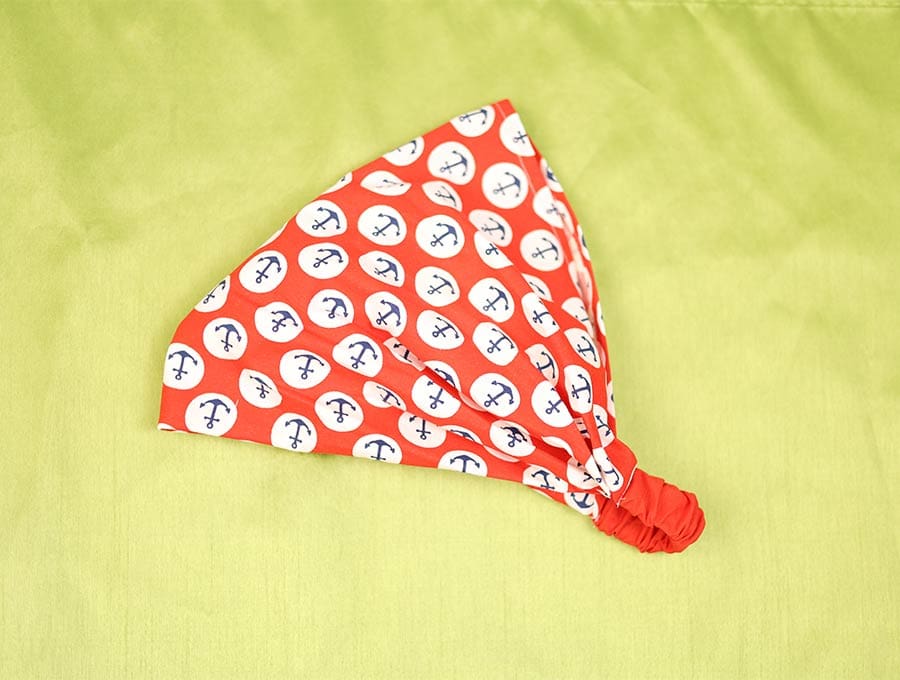
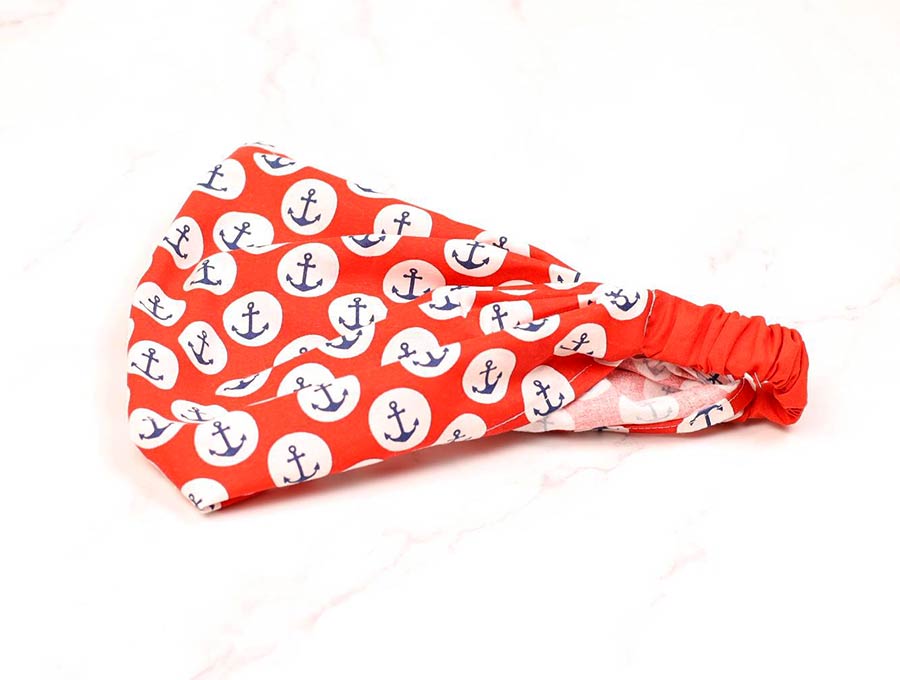
Suppose you have a serger (overlocker). In that case, you can overlock the ends before turning the bandana headband the right way out. Still, if you don’t, it doesn’t really matter the raw edges will be hidden under that first fold you made. And that’s it – all done.
These are such a fun and useful way to use up small pieces of fabric. If you are making little pillowcase dresses for Africa or charity dresses for underprivileged children, then a bandana headband made from the offcuts or a color that picks up one of the print colors would provide a great addition to the dress. If you are making for family and friends, they are cute to slip in with a birthday gift. If you enjoyed this easy tutorial, then please hit the subscribe button so we can deliver our new projects straight to your inbox.
Do you like this? Pin for later:
Wanna be friends? Click HERE and follow me on Pinterest
RELATED:
Vintage hair ties – fun accessory to make especially if you have some leftover fabric offcuts at home.
Oversized and mini scrunchies DIY