")
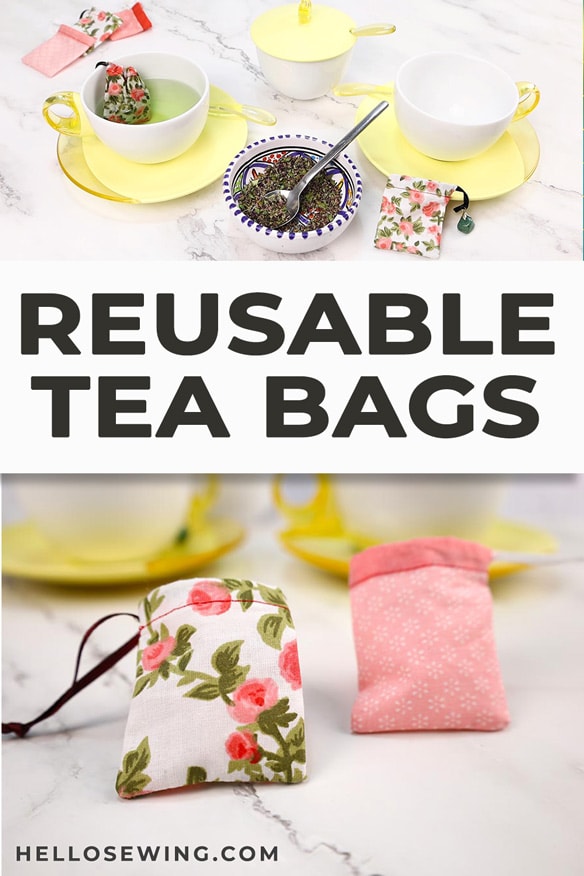
How to Make DIY Reusable Tea Bags (VIDEO)
Why make your own teabags? We’d like to believe that the tea industry has it all sorted with safe sterile tea bags for the billions of daily cups of tea consumed around the globe. Unfortunately, this is not so as a recent study conducted at McGill University in Montreal, Canada has indicated. Researchers found that when a plastic teabag was left in 95 degrees centigrade water to make one cup of tea up to 3.1 billion nanoplastic, and 11.6 billion microplastic particles were released. That’s why DIY reusable tea bags make sense. And if you’re thinking, “Oh I don’t really need to because the teabags I use are made from safe material”, don’t forget that many manufacturers still use a glue containing polypropylene (another plastic) to stop their teabags falling apart in your teacup.
We have a quick and easy pattern to make your own cloth teabags using a safe organic cotton fabric that is not bleached with chlorine. Yes, some teabag manufacturers will bleach their teabag material with chlorine, and traces of these toxic chlorine compounds remain embedded in the paper. Who wants to drink tea with a bit of toxicity?
People suffering from mold allergies are advised by health experts to rather buy loose leaf tea because certain teabags can, if not properly sterilized, cause an allergic reaction if mold forms on the teabag.
Now you have the health reasons for making your own homemade reusable teabags. Let’s see what you should be using to make your DIY teabags. A pure cotton is best, and the looser the weave the better the tea will steep. Cotton muslin is good and a pure cotton or baker’s twine for the drawstring is necessary. I prefer neutral colors because tea does stain, so the more natural looking the fabric is to start with, the better. You can even get natural fabrics printed with food-safe ink in pretty patterns.
Below you will find my step by step written tutorial with VIDEO instructions for all the visual learners.
We occasionally link to goods offered by vendors to help the reader find relevant products. Some of the links may be affiliate meaning we earn a small commission if an item is purchased.
Table of Contents
- 1 How to make your own teabag
- 2 Supplies and tools
- 3 How To Sew Reusable Tea Bags
- 3.1 DIY TEA BAG VIDEO TUTORIAL
- 3.2 DIY REUSABLE TEA BAGS INSTRUCTIONS:
- 3.3 STEP 1: Cut fabric
- 3.4 STEP 2: Make drawstring casing
- 3.5 STEP 3: Insert string and pin
- 3.6 STEP 4: Stitch the drawstring casing
- 3.7 STEP 5: Fold and pin the reusable teabag
- 3.8 STEP 6: Stitch
- 3.9 STEP 7: Snip the corners and turn around
- 3.10 STEP 8: Attach the Charm
- 3.11 STEP 9: Fill the fabric tea bag with loose tea and enjoy!
- 4 FAQs, Tips and Troubleshooting:
How to make your own teabag
Supplies and tools
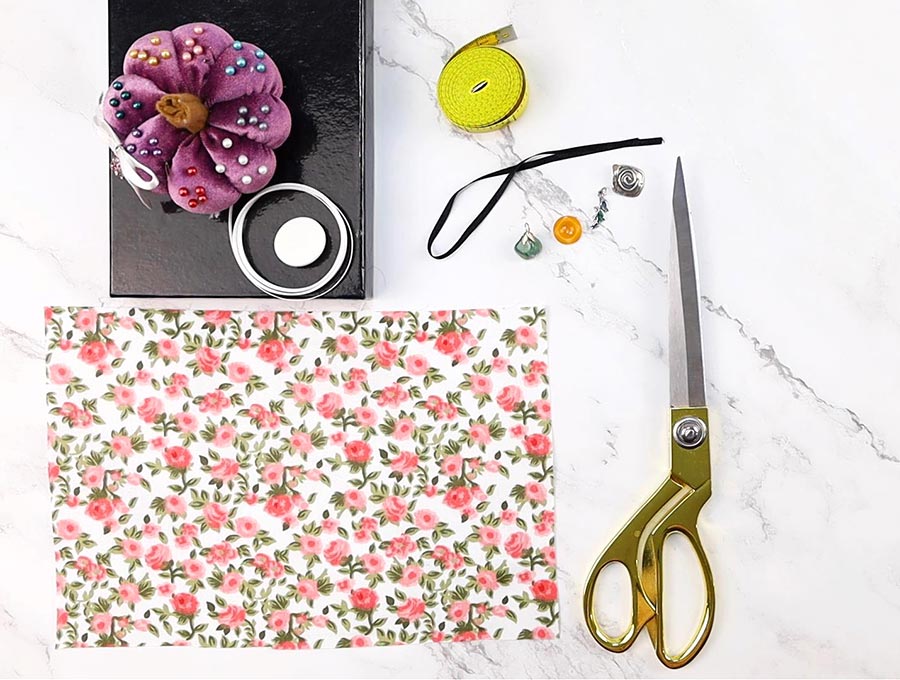
- fabric – cotton or muslin
- baker’s twine or thin ribbon
- charms (optional)
- matching thread
- scissors (or rotary cutter and a cutting mat)
- ruler or measuring tape
- iron and ironing board
- sewing clips or pins
- sewing machine (it’s an easy sew, you can even sew it by hand)
DOWNLOAD: reusable tea bag pattern (Free PDF file)
Follow us for free patterns & tutorials! [easy-profiles]
How To Sew Reusable Tea Bags
Watch the diy tea bag video first and then follow the written step by step instructions below.
Please enjoy and don’t forget to Like and SUBSCRIBE over on YouTube to be kept up to date with new videos as they come out.
DIY TEA BAG VIDEO TUTORIAL
DIY REUSABLE TEA BAGS INSTRUCTIONS:
STEP 1: Cut fabric
Cut your 3.5 x 4.5-inch fabric rectangles to use for the teabags, according to the pattern supplied. You can use scissors or a rotary cutter and mat. I would suggest cutting a few at a time to speed up the process.
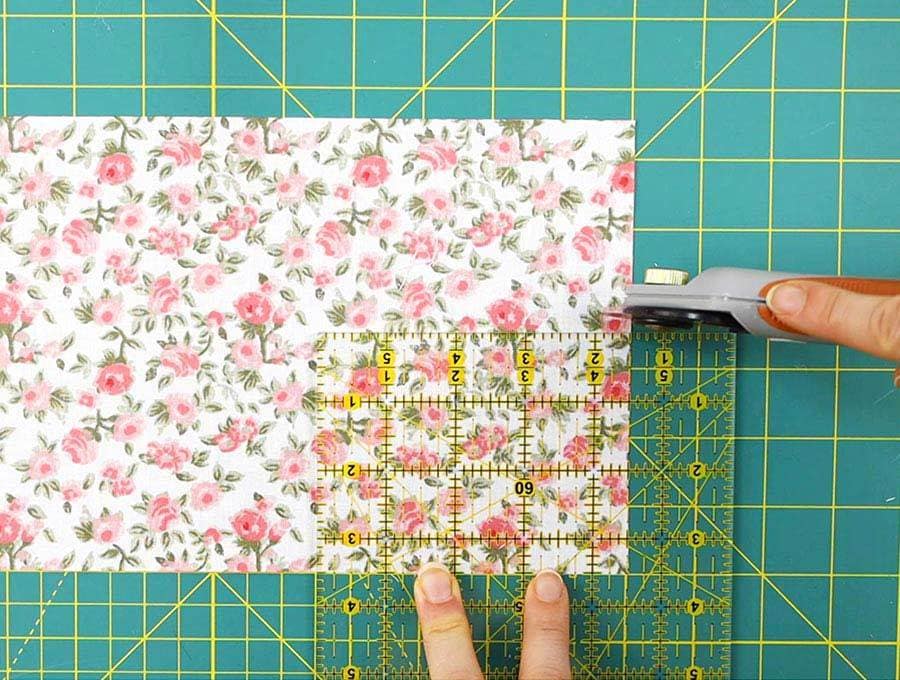
TIP: I highly recommend using plain white or off-white fabric/muslin as the tea will color the fabric. If you decide to go with colorful fabrics, make sure to wash and dry them on high to prevent color bleeding.
STEP 2: Make drawstring casing
Fold down one of the longer side just ¼ on an inch and fingerpress (or press with your iron).
Fold over again but ½ inch this time, to create a casing through which the drawstring will pass.
STEP 3: Insert string and pin
Cut a 9 inch length of string. If you are doing a few teabags at a time perhaps recut a number of these lengths.
Before stitching place the length of string inside the folded seam, tucking it up close to the fold, and pin in place.
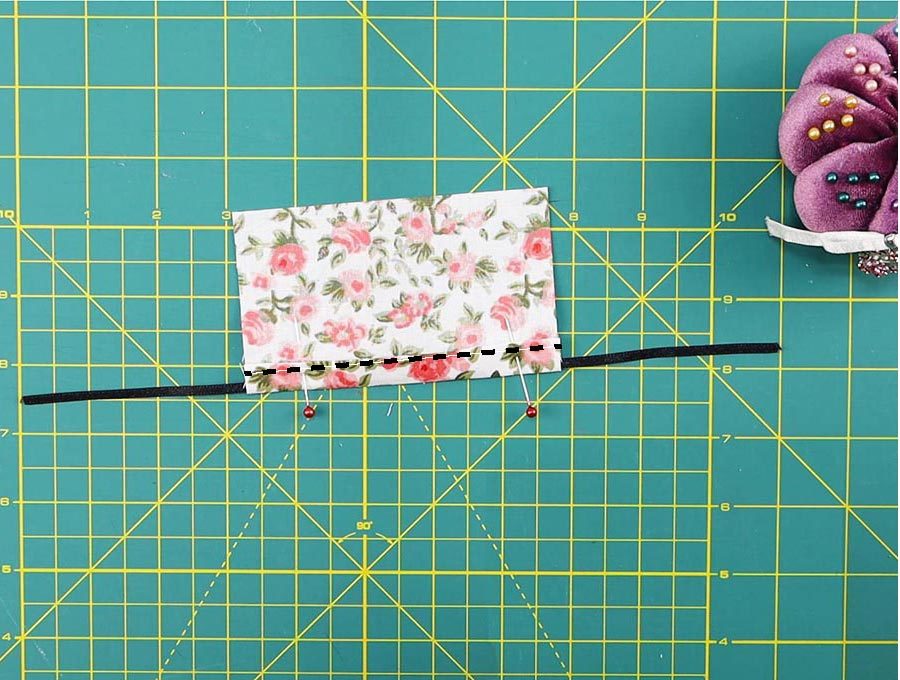
STEP 4: Stitch the drawstring casing
Stitch along the edge, making sure your sewing machine needle doesn’t catch the string – it will need to draw freely through the casing.
STEP 5: Fold and pin the reusable teabag
Fold the short side to the opposite short side, right to right side of the fabric so you have a rectangle with the seam containing the string at the top. Line up the edges and pin in place.

STEP 6: Stitch
Starting at the lower left side along the fold, doing a back stitch when you start to secure the corner, stitch a ¼ inch seam along the bottom, then turn and go up the side until you reach the drawstring seam where you will again end with a backstitch, so the teabag does not unravel.
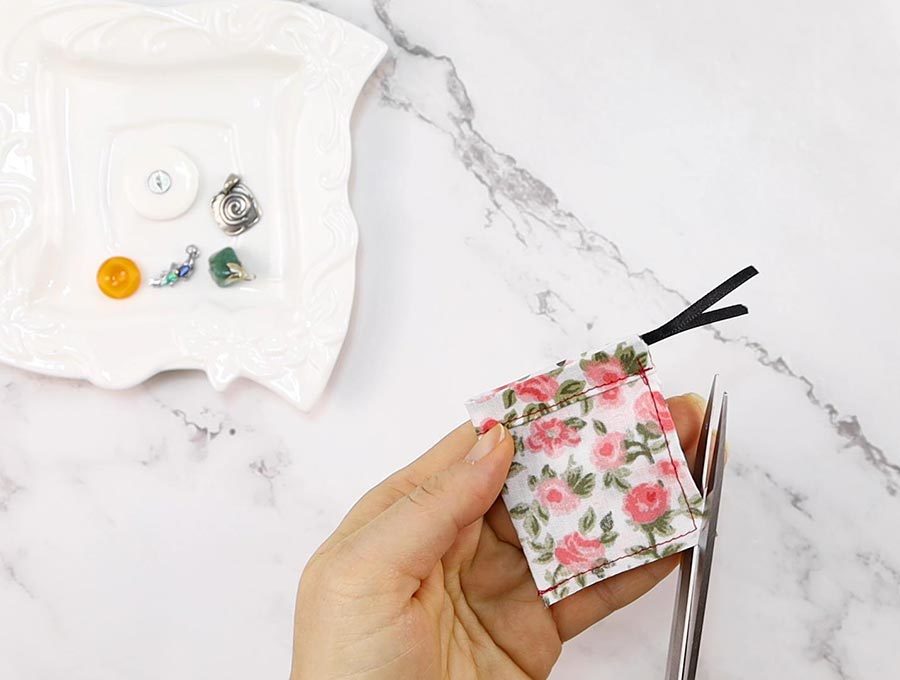
STEP 7: Snip the corners and turn around
Cut the lower two corners at an angle to reduce the amount of fabric when the teabag is turned right side out.
Turn the teabag right way out, using a chopstick or some other similar, non-sharp item to make sure the corners are turned out neatly.
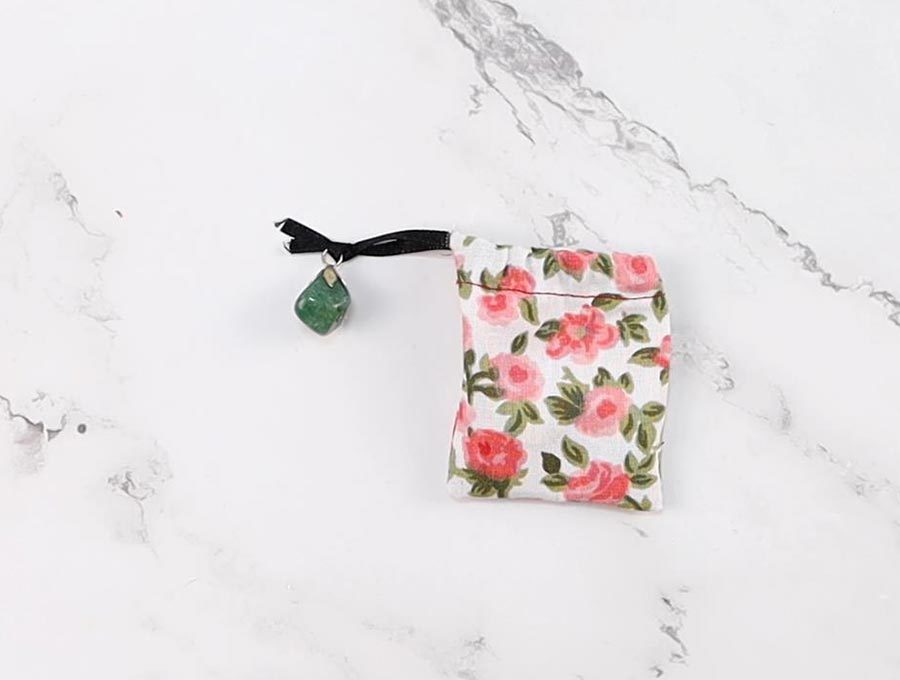
STEP 8: Attach the Charm
We are now ready to attach the charm. To do this pass the ends of the string through the holes in the charm. The charm gives some weight so the string does not easily fall back into the teacup or teapot.
Tie the ends of the string together at the back of the charm.
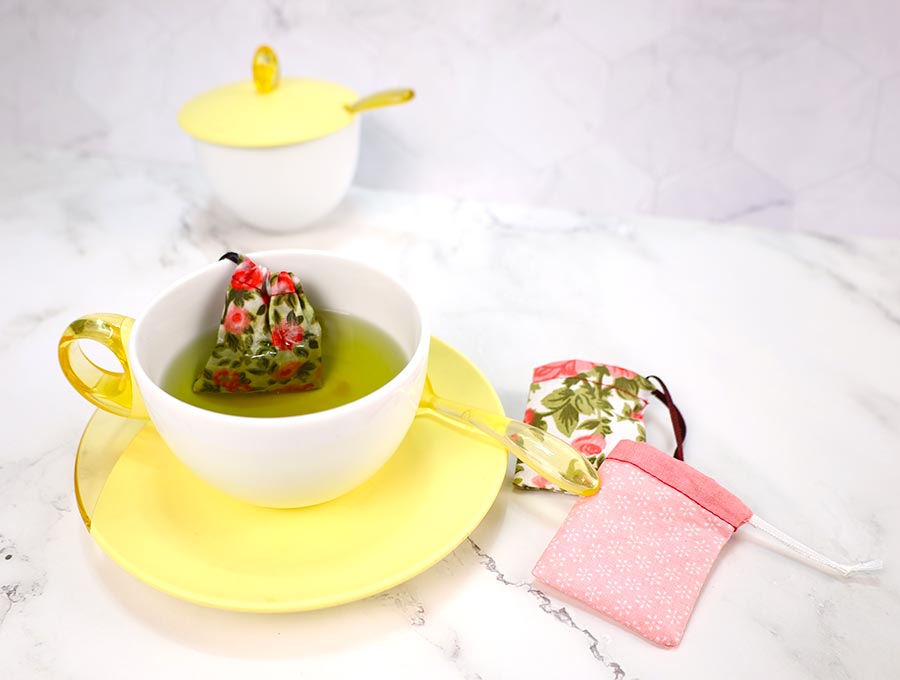
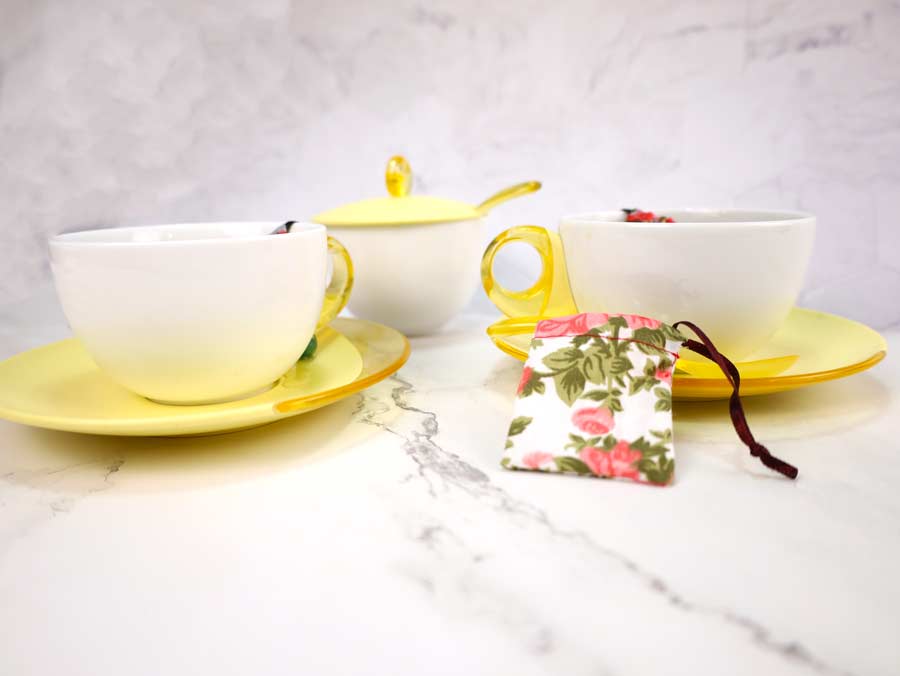
STEP 9: Fill the fabric tea bag with loose tea and enjoy!
You have completed an open ended teabag where you can spoon in the tea leaves needed for a cup or a pot of tea. Pull the drawstring to close the top of the teabag, place in the cup or pot and add hot water.

Enjoy your favorite cuppa knowing that these DIY reusable teabags are going to help stop landfills from being cluttered up with manufactured teabags that could be leaching plastic and toxic compounds into the soil. The actual tea leaves you empty out when finished drinking your tea are easily composted and are beneficial to your garden. Natural tea leaves will break down to increase the quality of the soil, and better soil attracts more earthworms, creating improved nutrients for your plants.
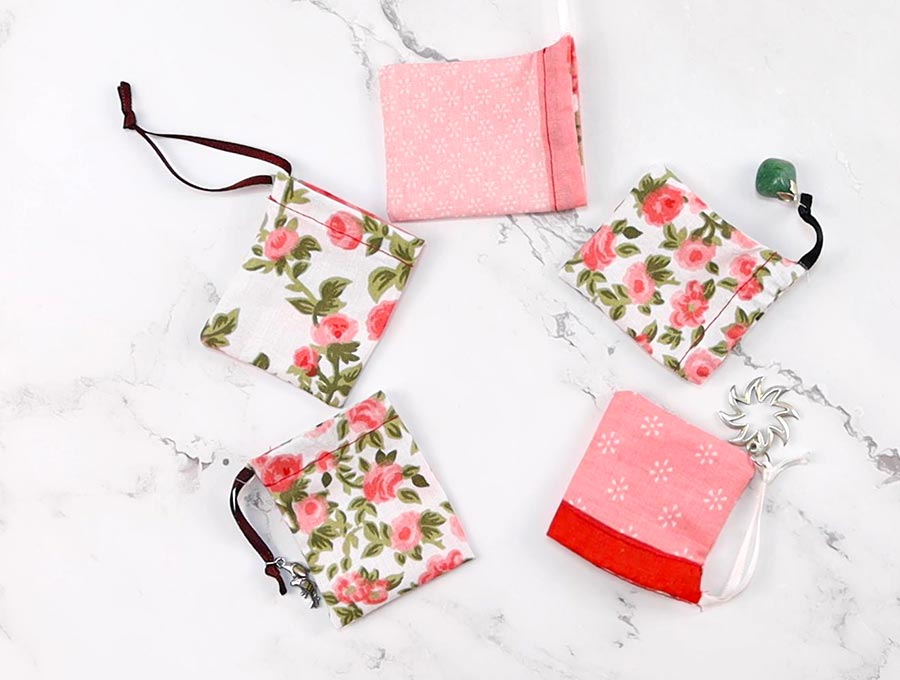
Now that you have your first teabag complete, you’ll want to start making lots more DIY reusable teabags, and getting creative with the charms you add. Five or ten bags make a great gift along with a quality loose leaf tea. Imagine giving an ocean lover tea bags with a whale or dolphin charm, a garden lover one with ladybird charms, and for kids ones with dinosaur charms?
Please let us know how your reusable fabric teabags turned out by getting in touch via email or sharing a photo on Pinterest or social media. We’d love to see how creative you can get.
FAQs, Tips and Troubleshooting:
- Q: How do I clean my reusable tea bags?
A: You can either wash them in a safe biodegradable dishwashing liquid, rinse through with clean water, and then hang them out to dry – natural sunlight is best.
- Q: How do I deep clean reusable tea bags?
A: Soak them in a solution of vinegar and water for a couple of hours – use white or apple cider vinegar, not dark vinegar. Rinse thoroughly and dry.
- Q: Can I put my reusable tea bags through the washing machine?
A: It is suggested you rather wash by hand as you don’t want detergent residue on them.
- Q: Can I tumble dry my reusable teabags?
A: Yes, as long as you don’t include dryer sheets – you don’t want to risk any chemical contamination.
- Q: Can I use cheesecloth to make reusable teabags?
A: Yes, you can. If the tea is very fine then you may have to use a double layer.
Do you like these DIY tea bags tutorial? Pin for later:
Wanna be friends? Click HERE and follow me on Pinterest
RELATED: