
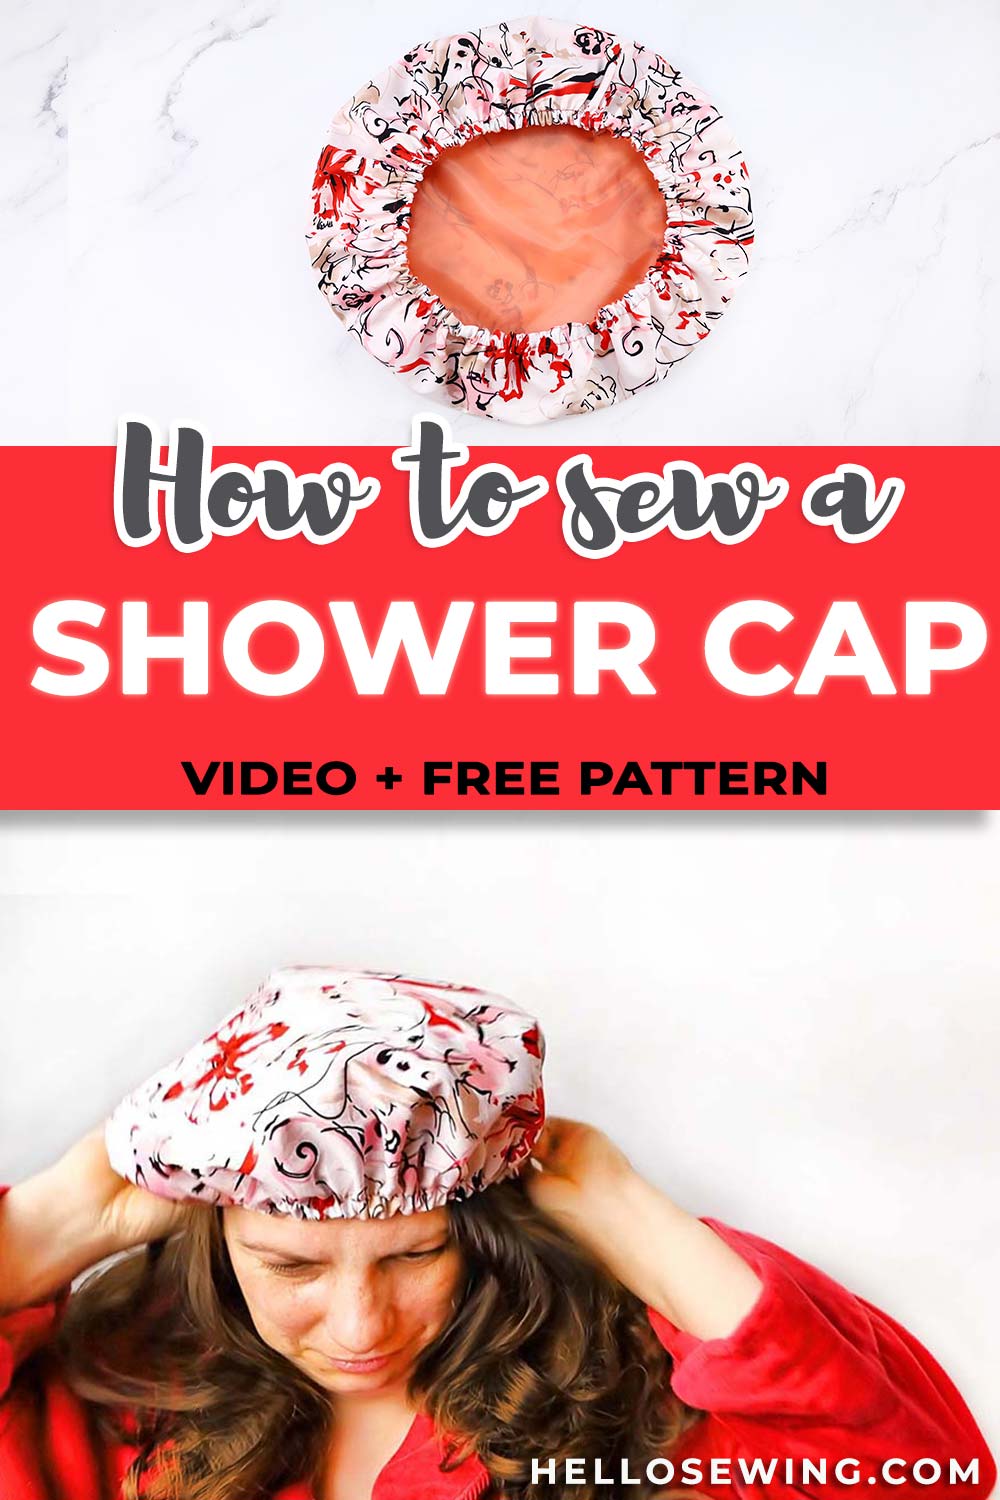
DIY Shower Cap – How to Sew a Shower Cap in 10 minutes
Making your own shower cap means you can customize the shower cap to the amount of hair you need to tuck up into it. Short haired girls will need a smaller shower cap while a person with long thick hair will need considerably more room in the shower cap to accommodate luxurious tresses. Ever been to a hotel where the dinky little plastic shower cap provided simply is too small to get your hair into it? Out DIY shower cap is lined with satin so your hair won’t get frizzy. All the materials you need to make your own DIY shower cap is two pieces of fabric, a piece of elastic, and iron on vinyl, or one of the pieces of fabric to be waterproof.
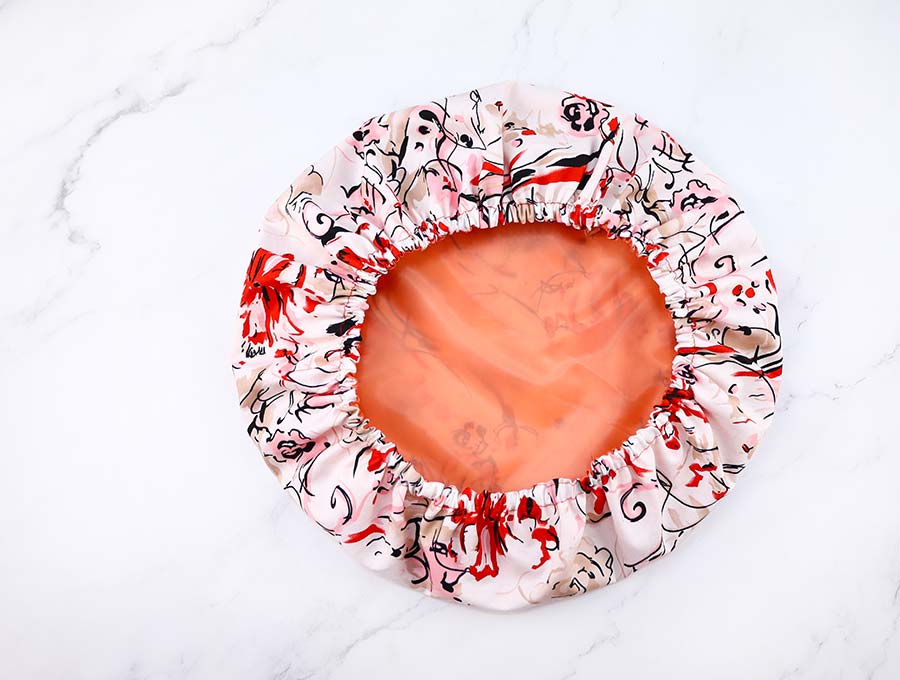
Now satin and silk are very popular as pillowcases as they don’t cause the hair cuticles to get roughed up, avoiding that bedhead look. The same goes for using a satin lining in a shower cap. After your shower, your satin-lined shower cap will save you time spent detangling hair, less chance of hair breaking, your style will last longer, and overall, you’ll have a smoother look to your hair. The whole point of a shower cap is to protect your hair from the heat and moisture and keep it looking good, and a thin piece of plastic just doesn’t quite cut it.

Below you will find my step by step DIY shower cap written tutorial with VIDEO instructions for all the visual learners.
We occasionally link to goods offered by vendors to help the reader find relevant products. Some of the links may be affiliate meaning we earn a small commission if an item is purchased.
Table of Contents
- 1 How to Make a Shower Cap
- 2 Supplies and tools
- 3 How to Sew a Shower Cap
- 3.1 DIY Shower Cap VIDEO TUTORIAL
- 3.2 SHOWER CAP INSTRUCTIONS:
- 3.3 STEP 1: Fold
- 3.4 STEP 2: Mark
- 3.5 STEP 3: Cut the outer fabric
- 3.6 STEP 4: Cut the lining fabric
- 3.7 STEP 5: (OPTIONAL) Laminate your fabric
- 3.8 STEP 6: Sew together
- 3.9 STEP 7: Turn around and press
- 3.10 STEP 8: Stitch around
- 3.11 STEP 9: Insert the elastic
- 3.12 STEP 10: Stitch the elastic
- 3.13 STEP 10: Stitch the gap closed
- 4 Shower Cap FAQs, Tips and Troubleshooting:
How to Make a Shower Cap
Supplies and tools
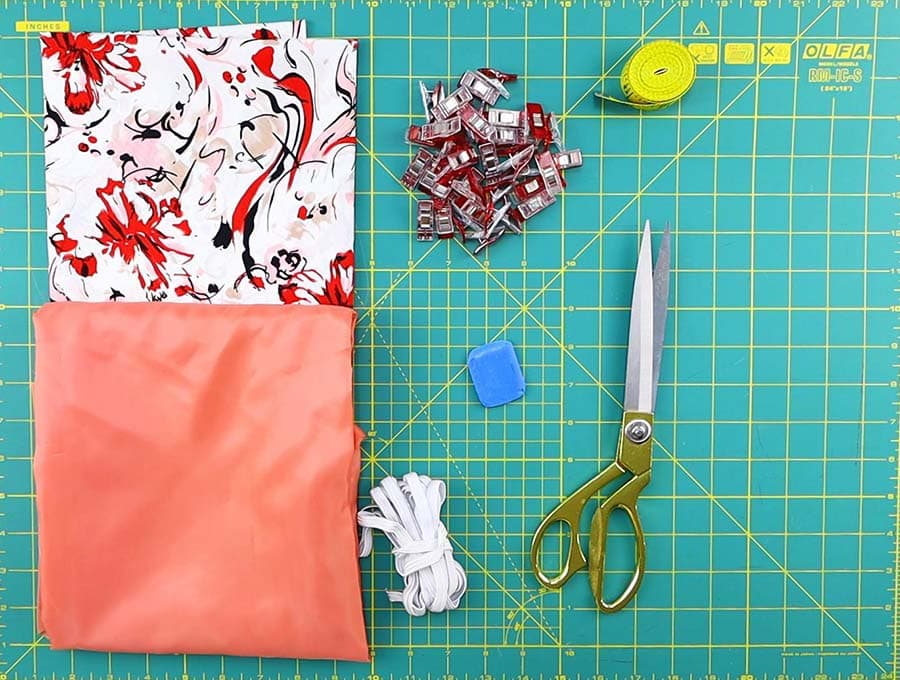
- outer fabric – 2/3 yard waterproof fabric, laminated cotton or oil cloth
- lining fabric – 2/3 yard satin (you can also use silk or polyester satin)
- 1/4″ flat elastic – 21-23″ long
- matching thread
- scissors (or rotary cutter and a cutting mat)
- ruler or measuring tape
- iron and ironing board
- sewing clips or pins
- sewing machine
Follow us for free patterns & tutorials! [easy-profiles]
How to Sew a Shower Cap
Watch the diy shower hat video first and then follow the written step by step instructions below.
Please enjoy and don’t forget to Like and SUBSCRIBE over on YouTube to be kept up to date with new videos as they come out.
DIY Shower Cap VIDEO TUTORIAL
SHOWER CAP INSTRUCTIONS:
What you will need are two pieces of fabric 21 inches by 21 inches. If you have very long thick hair you may want to go for a slightly larger piece – up to 24 inches by 24 inches.
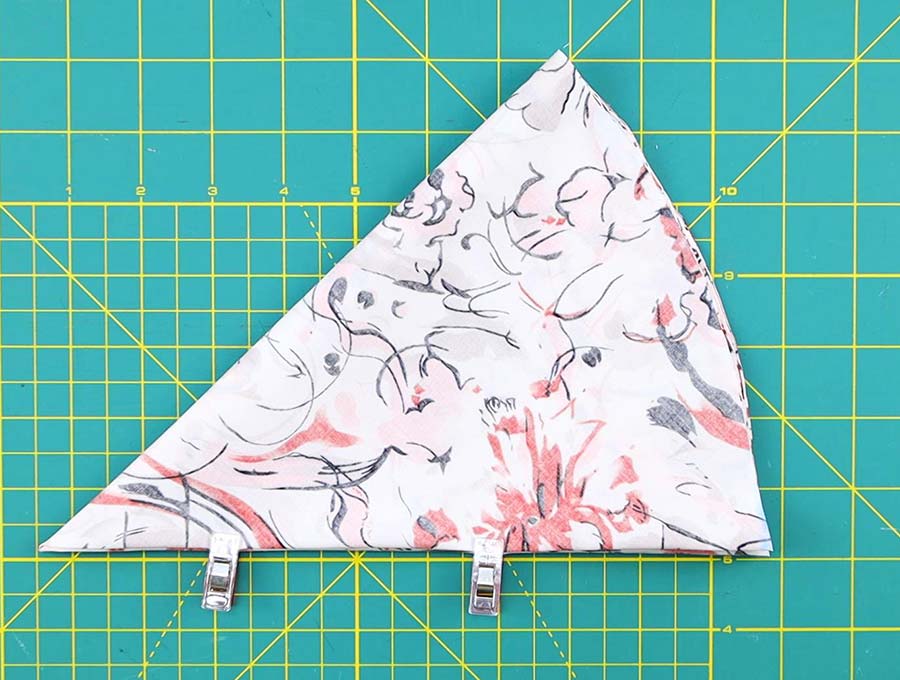
STEP 1: Fold
There are two ways to fold your fabric, I’m showing you method #1 in the video, and method #2 is described below.
Take the piece of fabric you plan to use as your outer layer and fold it in half from the left over to the right so that the edges line up neatly, with the right sides facing each other. Fold in half a second time from top to bottom. So, if you started with a 21-inch square you will now have a 10 ½ inch square. If you choose a bigger shower cap size then your square will be half your original square – 22 x 22 or 23 x 23 or even 24 x 24 to accommodate really long hair.
STEP 2: Mark
Take a ruler and mark 10 inches (25.5cm) along the side, pivoting your way around from the upper left corner of the square, marking off at intervals to create a curved line where you need to cut your circle.
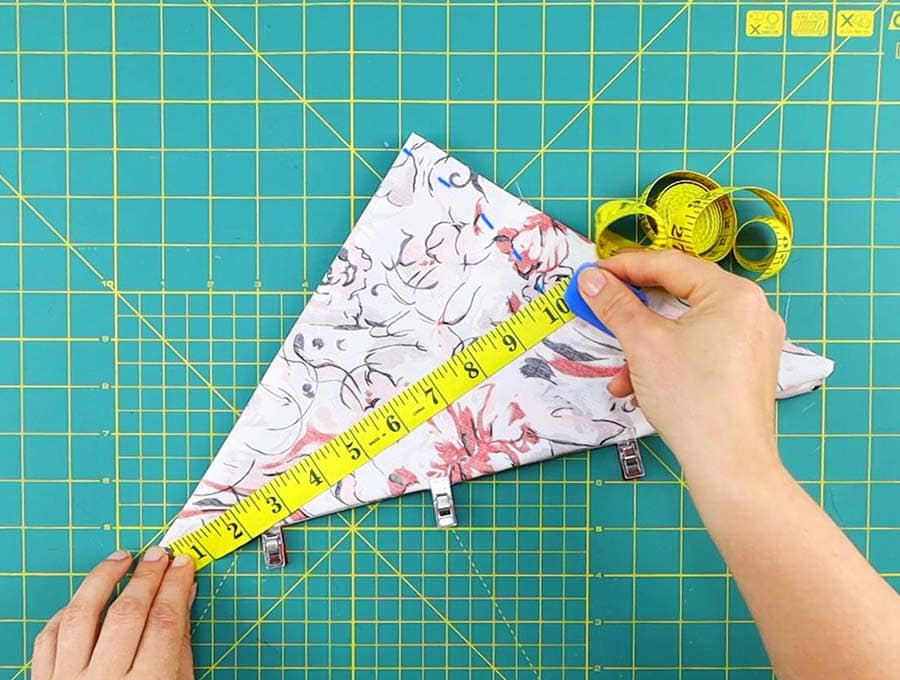
Connect the dots
If this method isn’t appealing, you can use a kid’s school compass with an erasable fabric pen inserted instead of the usual pencil to mark off the 10-inch distance. No compass? No problem, just take a piece of string and fasten it to your erasable fabric marker and mark off 10 inches from the from the upper left corner.
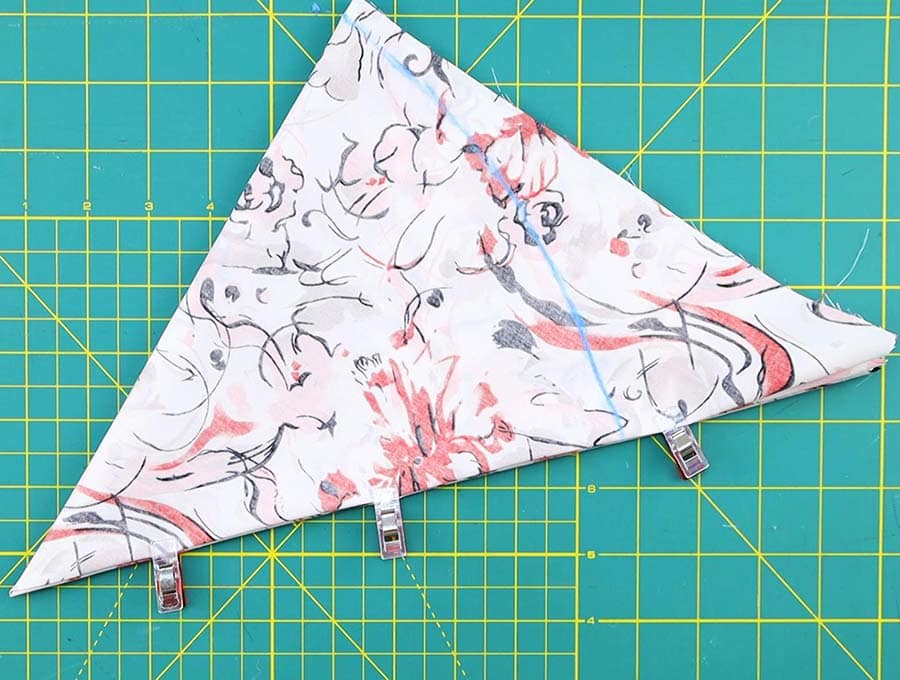
STEP 3: Cut the outer fabric
Cut along the curved line you have marked, through all four layers of fabric, and open out to see the circle you have created.
Voila! Your shower cap pattern is ready.
STEP 4: Cut the lining fabric
Place this outer shower cap circle right side to the right side of the satin lining and cut around to get two circles.
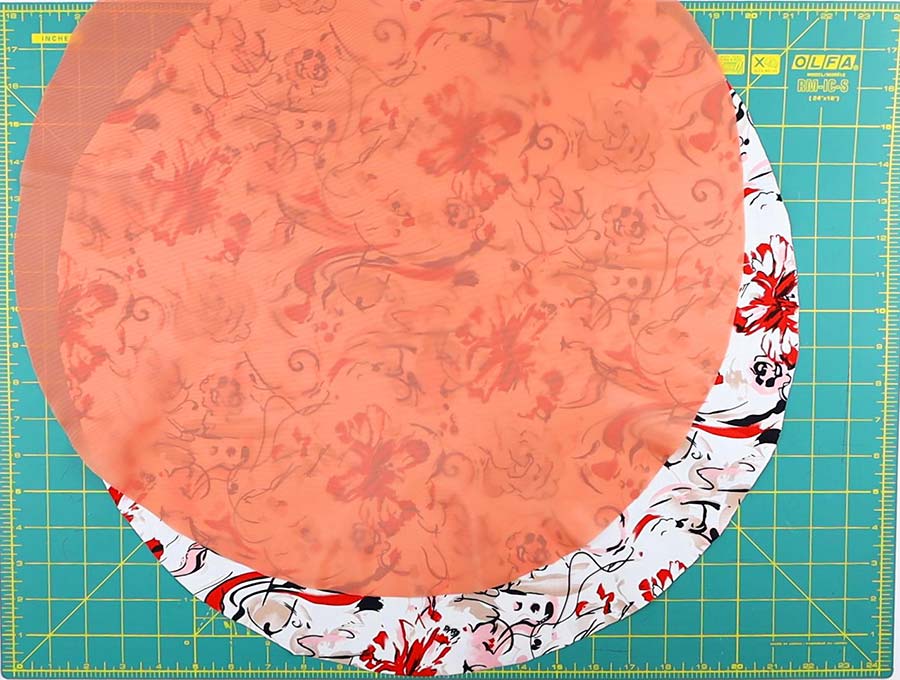
STEP 5: (OPTIONAL) Laminate your fabric
If you are not using laminated cotton or oil cloth or other waterproof fabric now is the time to apply the iron on vinyl according to the manufacturer’s instructions. Once it is applied trim the edges of any excess vinyl.
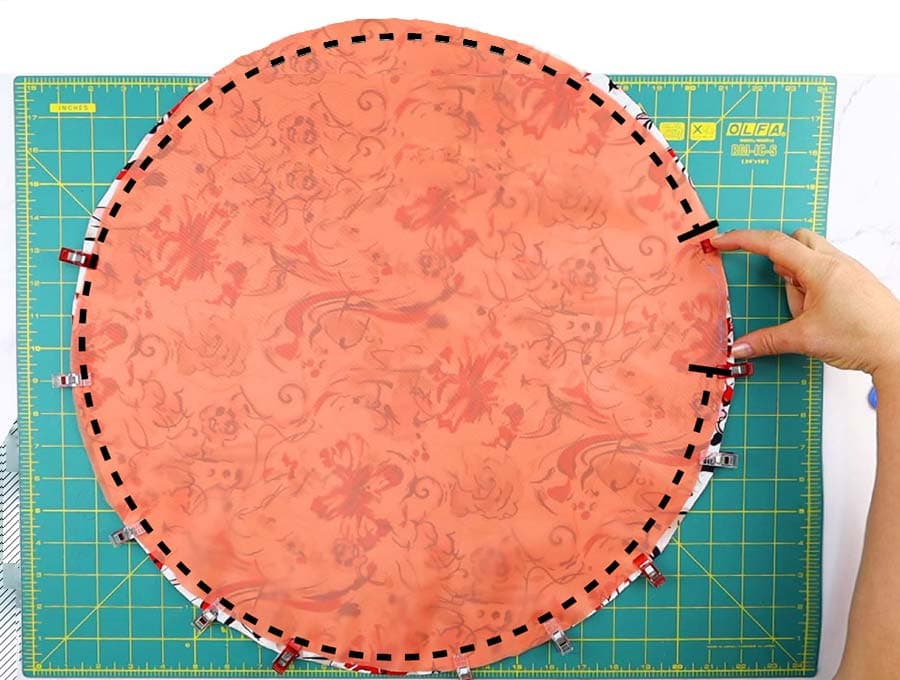
STEP 6: Sew together
With right sides of outer layer and lining facing each other, clip together using clips, or you can pin in place, so the two circles are perfectly lined up. Stitch 1/4 inch (6mm) from the edge leaving a gap of 1 ½ inches (3.5cm) through which you will pull the fabric to turn the right way out.
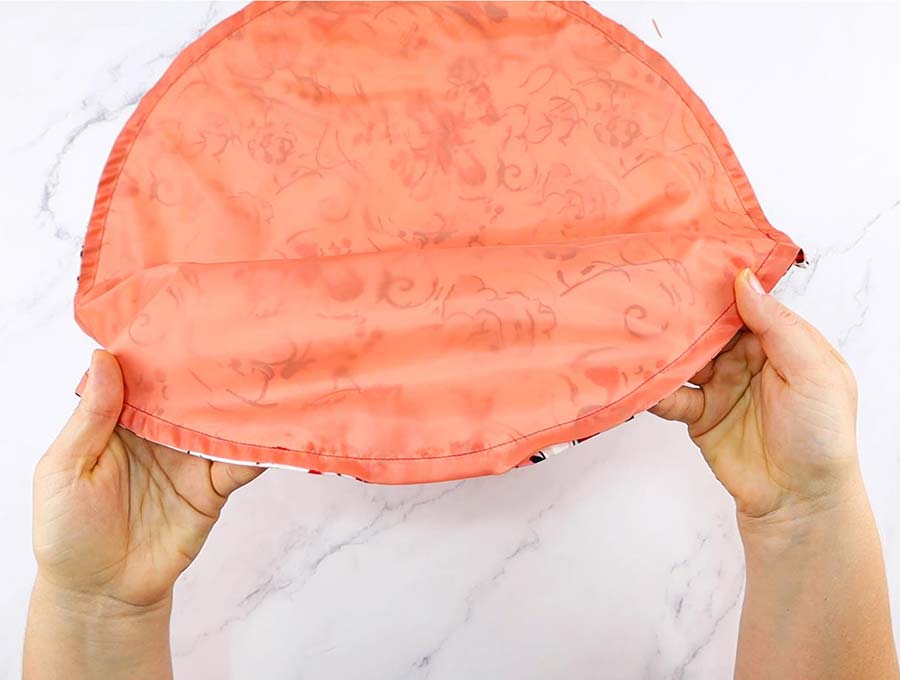
STEP 7: Turn around and press
Pull the fabric through and smooth out so the two right sides of outer and lining are now showing.
Press with an iron to smooth the edges.
STEP 8: Stitch around
Stitch right around the circumference of the DIY shower cap about 3/8 inch (1cm) from the edges – make sure as you sew that the edges are lined up and lie flat, so the lining does not show on the outside. You will stitch right past the gap for turning, as this line of stitching is creating the casing for the elastic to be threaded through.
STEP 9: Insert the elastic
Take your elastic and put a safety pin in either end. I learnt this through the sheer frustration of pulling the end into the fabric on projects then having to start again – with a pin on both end if you pull the end into the casing by mistake you can use the safety pin to ‘get out of trouble’.
Some people pin the end of the elastic to the fabric itself. Anyway, thread the elastic through and once you have met the other safety pin fasten the two safety pins to each other to ensure the elastic doesn’t ‘escape’. Now using your fingers smooth the elastic so it lies flat inside the casing and is not twisted.
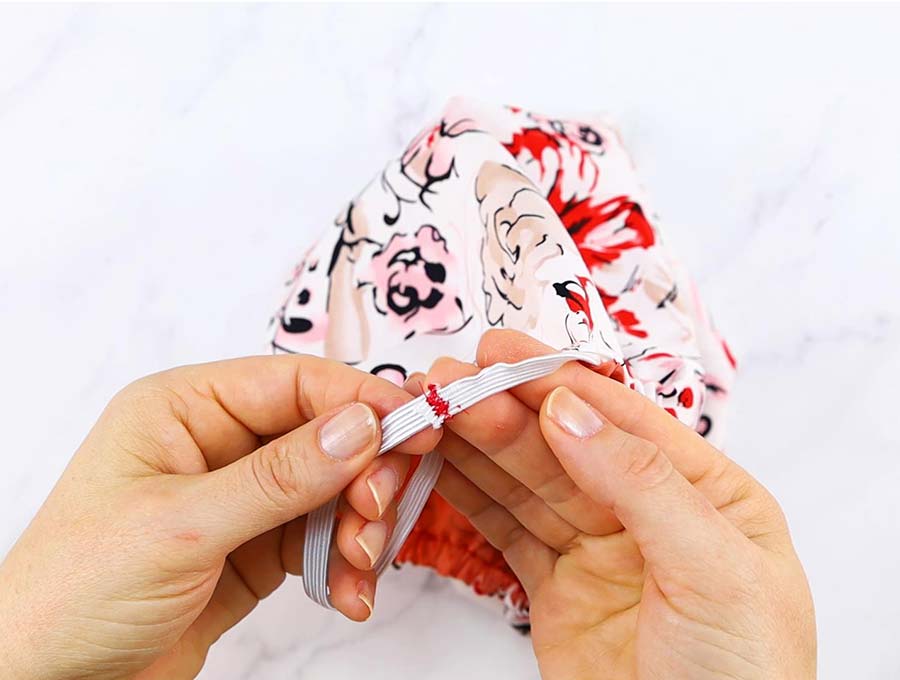
STEP 10: Stitch the elastic
Now pull up the elastic a bit to give you enough room to work, and remove the safety pins. Overlap one end of the elastic over the other by about ½ an inch (1cm), and sew a zigzag stitch or a couple of straight rows, making sure to back tack so the join is firm.
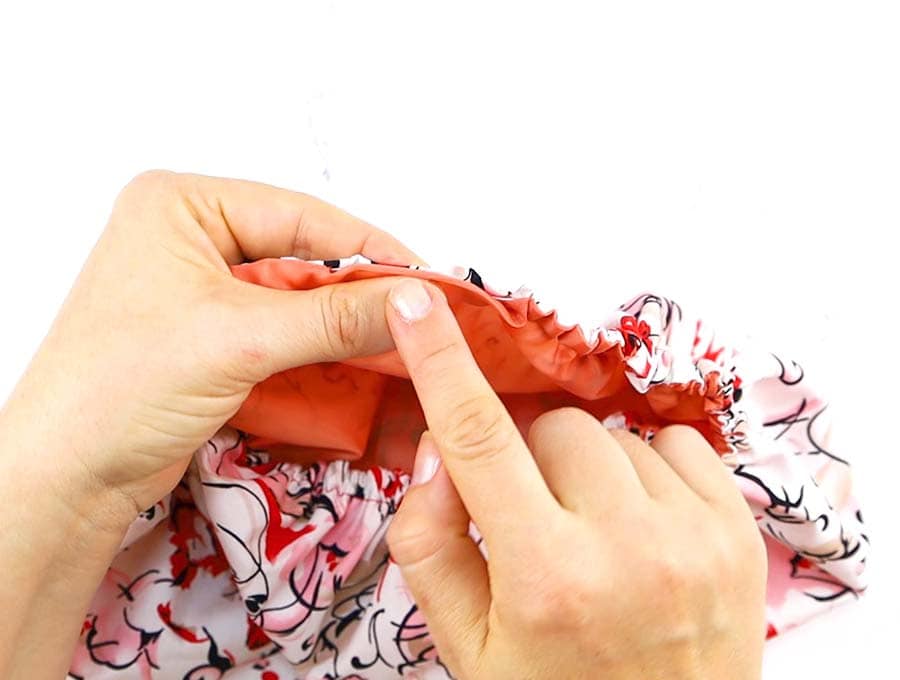
STEP 10: Stitch the gap closed
Now fold in the raw edges surrounding that 1 ½ inch gap neatly and pin into place, then use your machine to stitch a neat line as close to the edge as possible, to close the casing. If you are not comfortable using your machine for this – either because you don’t want a visible line of stitching across the gap or find it awkward, you can close the gap by hand using an invisible stitch.
You shower cap is ready to use! Once you have made your first one you may want to make some more for friends and relatives, customizing them to the prints and colors they like.
That’s it your DIY shower cap is ready!

Shower Cap FAQs, Tips and Troubleshooting:
Q: Can I use plastic sheeting for the outer layer of the shower cap?
A: Yes, you can, just adjust your stitch length to be a bit longer on your machine to avoid the plastic tearing. Otherwise, the method will be the same.
Q: Can I use a cotton lining instead of the satin?
A: It is fine to use cotton lining – just be aware you won’t have the hair smoothing benefits of satin. If you find proper satin expensive, there are polyester satins that will work just as well and are less expensive.
Once you have made our DIY shower cap you may want to go ahead and make a couple for yourself – it is always good to have one packed and ready to go with your travel kit, and one spare for when one shower cap is in the wash. We advise a quick hand wash and drying outside in the sun. If you liked this DIY shower cap project, please post a photo of how it turned out, and subscribe for loads more exciting sewing projects.
Do you like this? Pin for later:
Wanna be friends? Click HERE and follow me on Pinterest
RELATED BATHROOM SEWING PROJECTS:
OTHER PROJECTS:
- Reusable bowl covers using PUL fabric