
DIY Reusable Bowl Covers with Elastic – Easy Sewing Project
I love to cook and I dare say I’m pretty good at it, but I just can’t cook small meals. So almost everything I cook lasts us at least two days. I used to store the leftovers in plastic containers or bowls covered with plastic wraps.
But a while back, I switched over to a healthier, more economical, and more environmentally friendly option. Reusable fabric bowl covers!
UPDATE: Scroll down to the end of this post to find my new video (6/15/2024) with 3 more ideas for bowl covers
These reusable bowl covers are easy and fun to make, they do the job just as well as plastic wraps, and they don’t leave that funky taste behind that plastic sometimes does. Plus, they are perfect for barbecue parties, outdoor lunches, or picnics because they’ll keep your food protected from those hungry insects that want a bite of your snacks!
To get your new set of bowl covers, keep on reading and you’ll learn how to make these DIY bowl covers in minutes!
Below you will find my step by step written tutorial with VIDEO instructions for all the visual learners.
We occasionally link to goods offered by vendors to help the reader find relevant products. Some of the links may be affiliate meaning we earn a small commission if an item is purchased.
Table of Contents
- 1 How to make cloth bowl covers
- 2 Reusable Bowl Covers Supplies and tools
- 3 How to Sew a Bowl Cover with elastic
- 3.1 DIY BOWL COVERS VIDEO TUTORIAL
- 3.2 FABRIC BOWL COVER INSTRUCTIONS:
- 3.3 STEP 1: Trace the bowl cover
- 3.4 STEP 2: Draw a larger circle to allow overlap
- 3.5 STEP 3: Cut the fabric and prepare the materials
- 3.6 STEP 2: (optional) Make your own bias tape
- 3.7 STEP 3: Attach the bias tape
- 3.8 STEP 4: Sew the bias tape to the reusable bowl covers DIY
- 3.9 STEP 5: Insert the elastic
- 3.10 STEP 5: Sew the elastic and finish the bowl cover
How to make cloth bowl covers
I came up with 3 more ideas. Here’s my latest video:
Reusable Bowl Covers Supplies and tools
- fabric – PUL (Polyurethane Laminate) or other waterproof fabric
- 1/4″ flat elastic
- matching thread
- scissors (or rotary cutter and a cutting mat)
- ruler or measuring tape
- safety pin or a bodkin
- iron and ironing board
- sewing clips or pins
- sewing machine
Follow us for free patterns & tutorials! [easy-profiles]
How to Sew a Bowl Cover with elastic
Watch the diy bowl covers video first and then follow the written step by step instructions below.
Please enjoy and don’t forget to Like and SUBSCRIBE over on YouTube to be kept up to date with new videos as they come out.
DIY BOWL COVERS VIDEO TUTORIAL
FABRIC BOWL COVER INSTRUCTIONS:
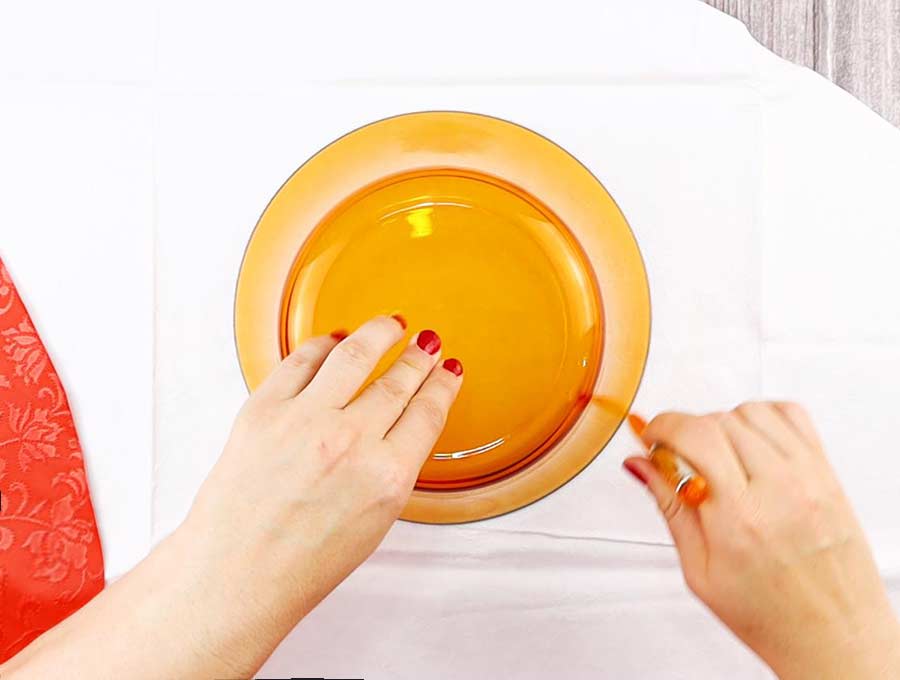
STEP 1: Trace the bowl cover
The best fabric to use for these fabric bowl covers is PUL. It’s grateful for this kind of project because it’s waterproof and durable.
Place the bowl you want the cloth bowl covers for, onto the fabric with its opening down and use an erasable pen or sewist chalk to draw a circle around the bowl.
STEP 2: Draw a larger circle to allow overlap
Make a second circle around the first one, about two inches bigger so that it can drape over the sides.
To make a second circle you can either freehand the larger circle as the bowl cover scrunches and it does not have to be perfect. OR if you are OCD like me, use a seam gauge or your tape measure to mark dots all around the circle
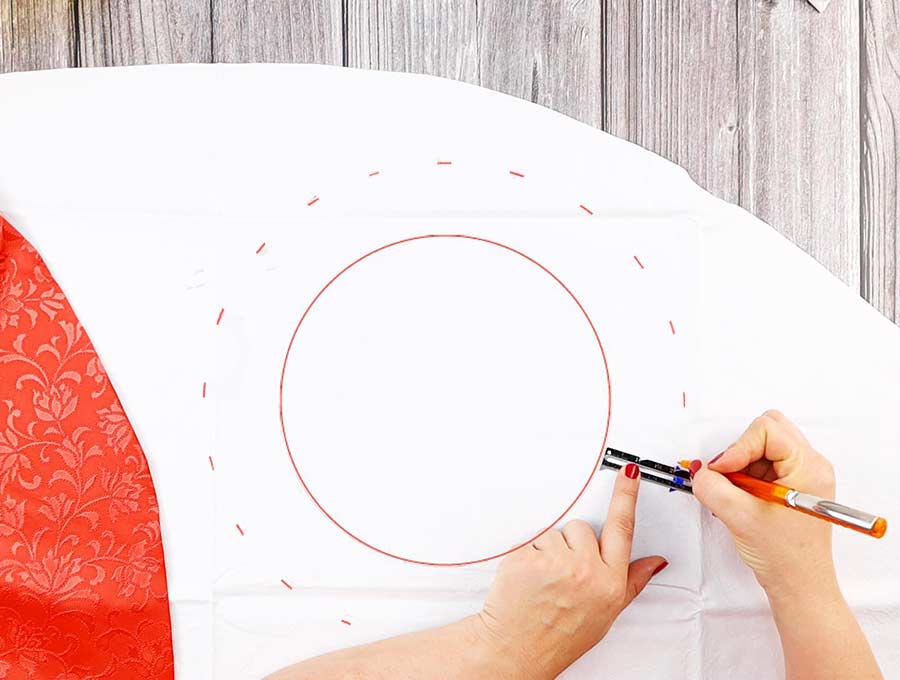
Then connect the dots to make the circle that is 2 inches larger than the original one.

STEP 3: Cut the fabric and prepare the materials
Cut out the larger circle you drew.
Prepare a strip of bias tape slightly longer than the circumference of the fabric piece you just cut.
The last thing you’ll need will be a piece of elastic. It should be four or five inches shorter than the circumference of the bowl.
STEP 2: (optional) Make your own bias tape
If you don’t have bias tape, you can make it yourself, it’s not hard at all. Here’s the easiest way to make your own bias tape (without any tools).
- Cut out a strip of fabric four times wider than the final width you desire for the bias tape. We’ll be using 1/2 inch wide bias tape here, so cut your fabric 2 inches wide.
- Fold the fabric strip in half along its length. Use your iron to press the fabric flat.
- Unfold the strip and you’ll notice a crease along the middle. Fold each side of the strip to that crease and press the whole thing flat again.
- Now just fold the entire strip in half along its length one more time and press it.
There’s your DIY bis tape!
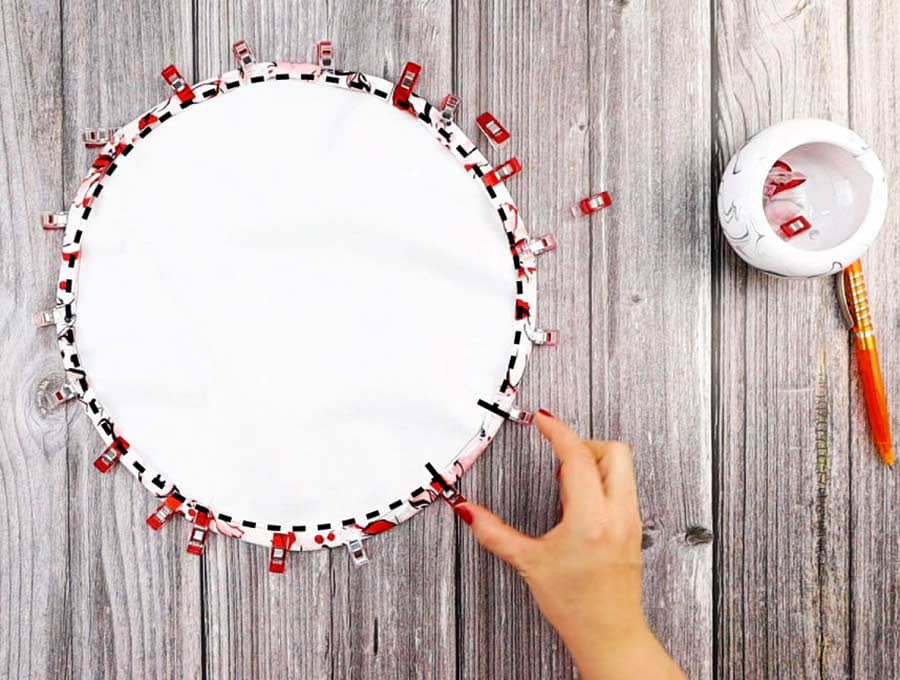
STEP 3: Attach the bias tape
If you are using a pre-made bias tape and you’ll notice that it has one side that’s a bit narrower than the other. Unfold that side.
Place the bias tape along the curve of the fabric all around. It should protrude away from the edge just a tiny bit. Keep the right side of the tape facing down and make sure the folded section goes towards the inside of the fabric, while the unfolded section goes towards the outside of the fabric.
The binding tape must not sit loosely on your bowl covers edge. Secure it with pins or clips at about two inches apart all around. I suggest you use clips if you have them so that you don’t pierce the PUL fabric.
When the ends of the tape meet, overlap them. But before that, fold the bottom layer of the tape about an inch or two away from its opposite end. Then set the other end over that fold and secure it with clips or pins.

STEP 4: Sew the bias tape to the reusable bowl covers DIY
Sew along the top-most crease of the bias tape all around to join the tape to the fabric.

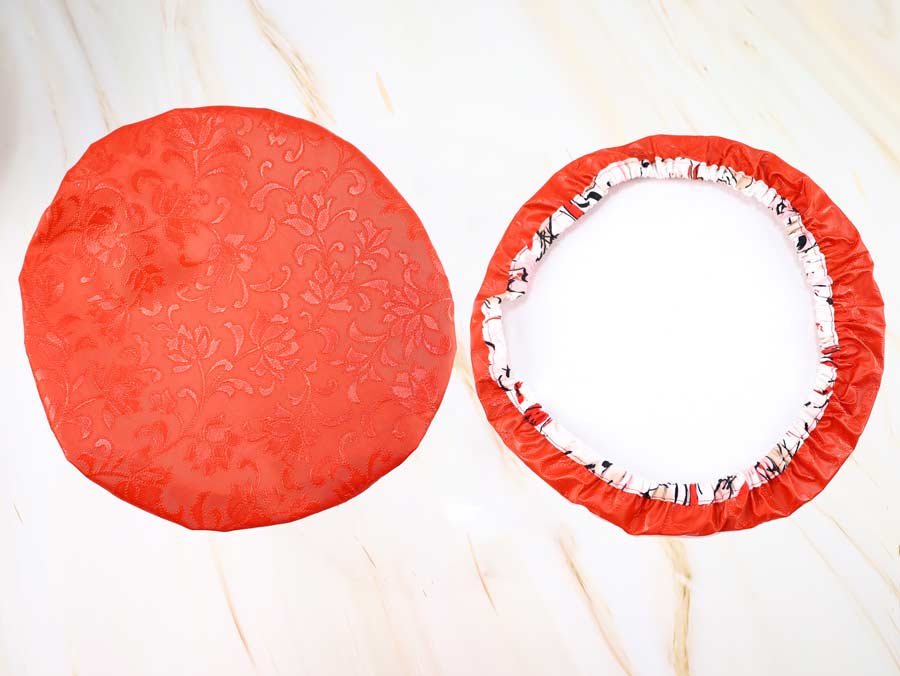
Next, fold the wider side of the bias tape to the backside all around. Fold it in as well in the process. If you did everything right, the bias tape will be as wide as it was when you took it out of the packaging, double-folded.
Press the bias tape flat but don’t use a hot iron. Use your fingers or a cold iron to do that. Secure the fold with pins or clips.
Sew all around the tape, going as close to the inner edge as possible. Leave a two-inch gap unstitched.
STEP 5: Insert the elastic
Since these are bowl covers with elastic, we have to put the elastic in. The opening you left unstitched in the previous step is just for that.
Attach a small safety pin to one end of the elastic. Insert that end into the opening on the bowl cover rim. Gently push the safety pin through the bias tape tube until it reaches the opening from the opposite side.
Be careful not to let the other end of the elastic get inside the tube because you’ll have a hard time finding and grabbing in if that happens. I suggest you hold it in place by hand or with a binding clip.
STEP 5: Sew the elastic and finish the bowl cover
When the elastic ends meet, overlap them by half an inch and pin them together. Sew them together with a zig-zag stitch.

Insert the elastic completely inside the edge tube and sew the opening shut with a topstitch.
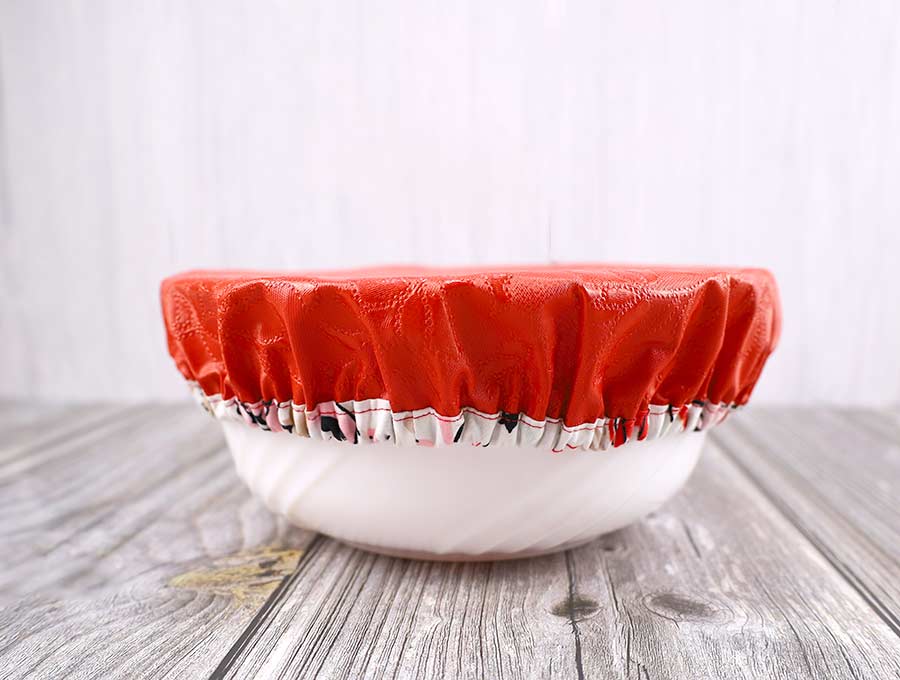
All that is left is to adjust the gathers so that they are spread evenly around the cover.
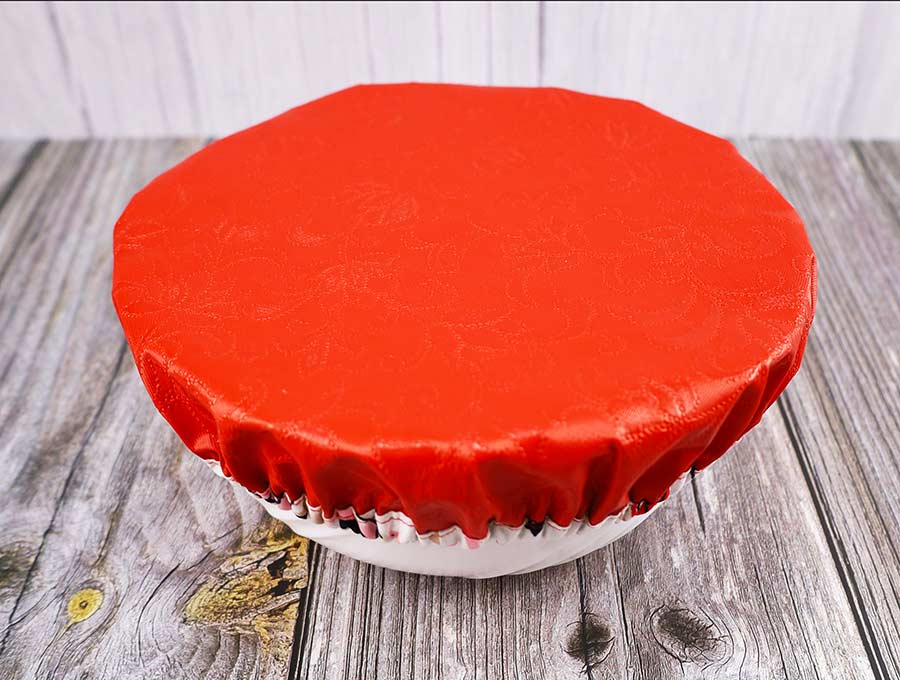
That’s all folks! Now you know how to make a bowl cover!
I hope you enjoyed reading this fabric bowl cover tutorial. When you make your new fabric bowl cover, come back here and let us know how it turned out! We appreciate your feedback and love reading the comment section. Remember to subscribe to our mailing list and stay up-to-date with new projects and tutorials we publish regularly.
Do you like this? Pin for later:
Wanna be friends? Click HERE and follow me on Pinterest
RELATED:
- Homemade shower cap with satin lining – If you have some leftover pull you can whip up this quickly and easily
- Homemade lunch bag
- DIY reusable snack bags
- Free sewing pattern for microwave bowl holder