
How to Make a Hooded Towel – Tutorial for ALL ages
Adorable, soft and cozy hooded towels for kids are hard to come by. The cheap versions I could find simply won’t cut it, so I decided that is time to stitch another special handmade item. This DIY hooded towel is perfect for drying both kids and toddlers after taking a bath, or you can even take it to the pool.
I will show you how to make a hooded towel that is super easy to customize if you wish. Follow my basic hooded towel tutorial and I will also show you a little twist how to personalize the handmade bath towel quickly and easily. This hooded towel pattern is super simple and sews up very quickly. All it asks for is few straight seams. In just 15 minutes you can make a big hooded towel for your kid that will last for years and years.
If you don’t want to sew the ribbon trim, you can just use an iron on, applique or embroider a design, or leave it out altogether. It’s up to you!
Below you will find my step by step written tutorial with VIDEO instructions for all the visual learners.
We occasionally link to goods offered by vendors to help the reader find relevant products. Some of the links may be affiliate meaning we earn a small commission if an item is purchased.
Table of Contents
- 1 How to make a Hooded Towel
- 2 Supplies and tools
- 3 How To Sew a Hooded Towel for Kids
- 3.1 HANDMADE HOODED TOWELS VIDEO TUTORIAL
- 3.2 INSTRUCTIONS:
- 3.3 STEP 1: Cut the short edges of the hand towel
- 3.4 STEP 2: Zig zag the edges to keep them from fraying
- 3.5 STEP 3: Fold, fold again and pin
- 3.6 STEP 4: Sew
- 3.7 STEP 5: (OPTIONAL) Add ribbon trim to customize the hood
- 3.8 STEP 6: Attaching hood to the bath towel
- 3.9 STEP 7: Sew
- 3.10 STEP 8: Finish the hooded towel
- 4 HOODED TOWEL CUSTOMIZATION OPTIONS:
How to make a Hooded Towel
Supplies and tools
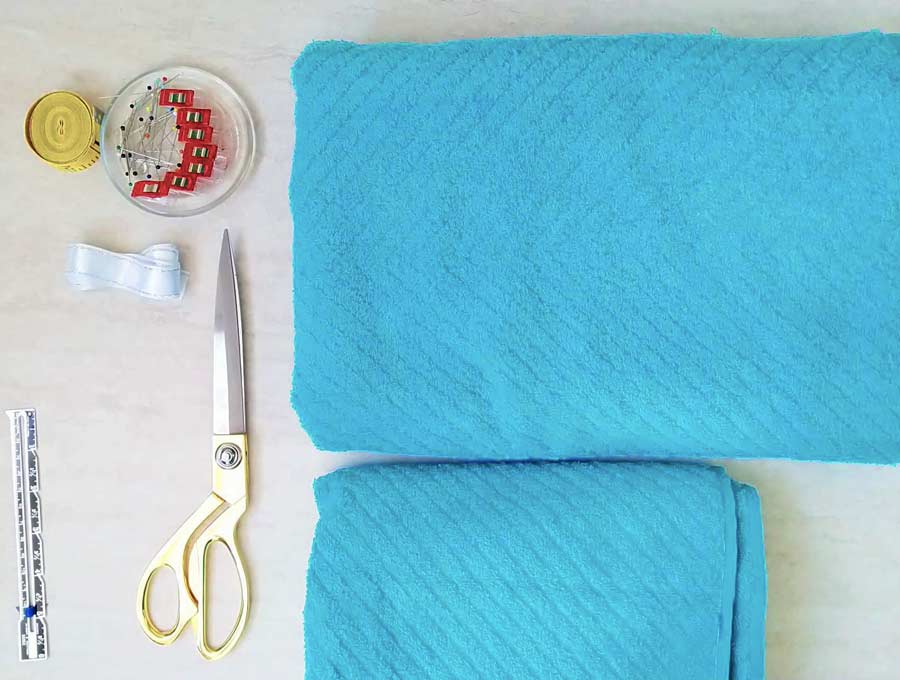
- 1 bath towel
- 1 hand towel
- grosgrain ribbon – 25″ (optional)
- matching thread
- scissors (or rotary cutter and a cutting mat)
- ruler or measuring tape
- iron and ironing board
- sewing clips or pins
- sewing machine (a walking foot will make your job easier)
NO hooded towel pattern is necessary
Follow us for free patterns & tutorials! [easy-profiles]
How To Sew a Hooded Towel for Kids
Watch the diy hooded towel video first and then follow the written step by step instructions below.
Please enjoy and don’t forget to Like and SUBSCRIBE over on YouTube to be kept up to date with new videos as they come out.
HANDMADE HOODED TOWELS VIDEO TUTORIAL
INSTRUCTIONS:
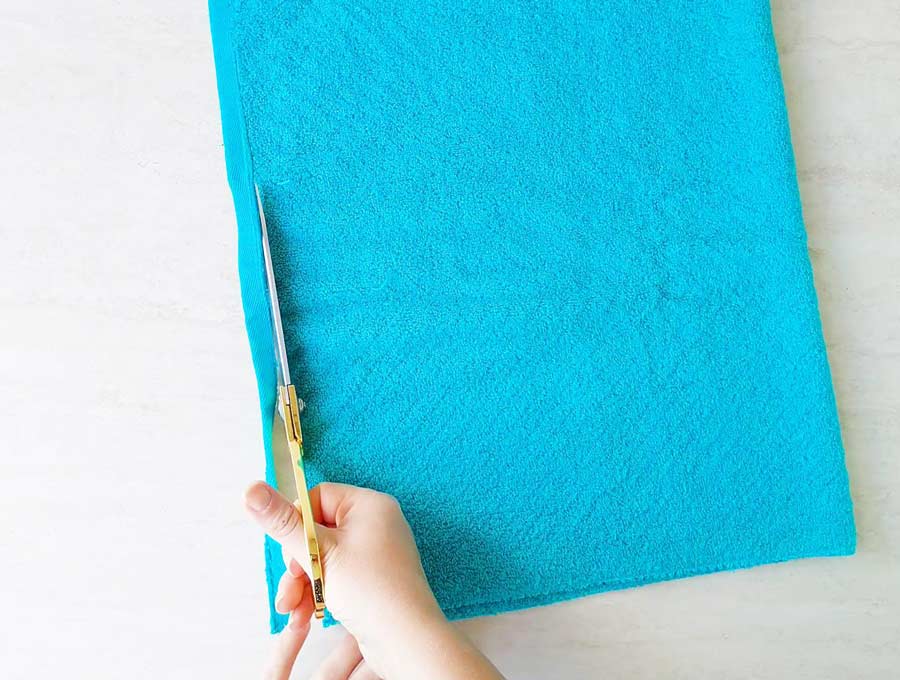
STEP 1: Cut the short edges of the hand towel
If your hand towel is larger than 24 x 20 inches, cut it down to that size. That size of hood will fit children 3 to 9 years of age. If you are making it for a toddler, trim 2 inches more from the long side for a smaller, shallower hood.
If it’s not, fold the it in two and meet the short edges. Cut out the large bindings of the short edges as it will make sewing the hood to the bath towel much easier.
TIP: I prewash and dry all fabrics I work with to make sure they won’t shrink, bleed or fading after washing.
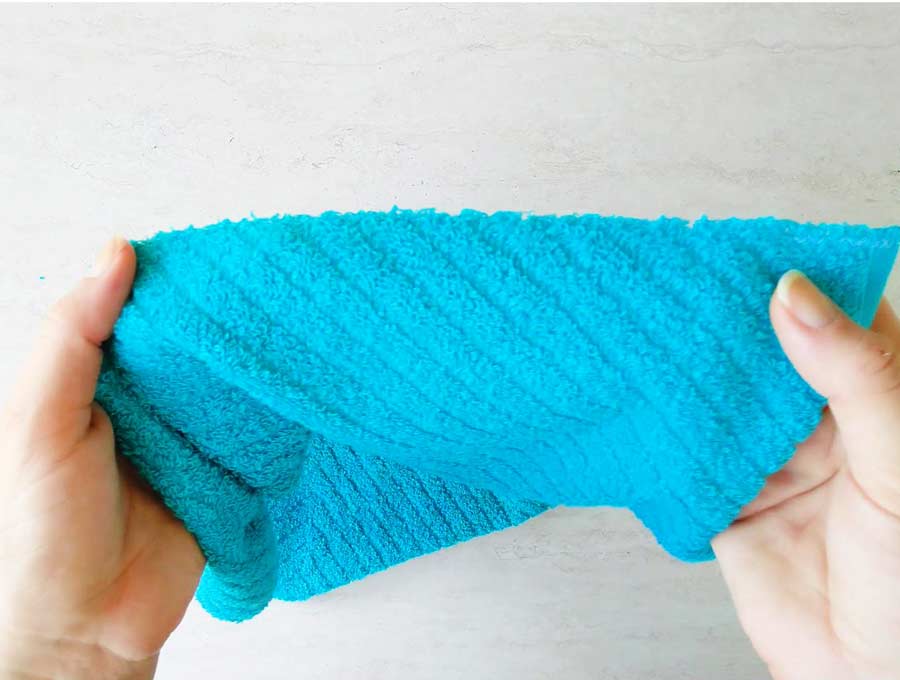
STEP 2: Zig zag the edges to keep them from fraying
Most towel fray, and some fray really bad, so serge or zig zag to finish all raw edges. I use medium zig zag stitch and backstich the beginning and the end of each seam.
TIP: Use a walking foot when sewing towels, it will make your job much easier and you won’t have to fight the towel fabric to get it through the sewing machine.
STEP 3: Fold, fold again and pin
Fold the long edge of the hand towel 2 inches towards the wrong side and pin. This will create a large, soft edge of the finished hood.
Fold the towel in half and pin the bottom edges (at the other side of the towel)

STEP 4: Sew
Sew the pinned parts of the hood. Sewing towels with a regular foot may cause problems, so if you have a walking foot, now it is the time to use it
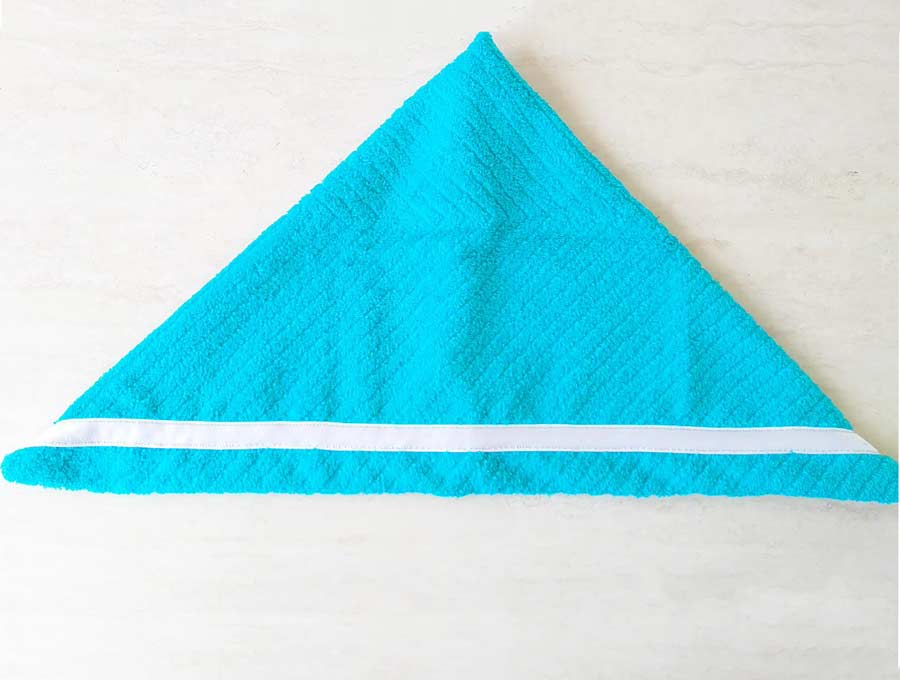
Here’s how the hooded towel looks after stitching. Turn the hood right side out and open it up.

STEP 5: (OPTIONAL) Add ribbon trim to customize the hood
Pin the ribbon to the right side of the hood. I centered my ribbon at the stitching line of the folded edge. Pin at the very edge, as pins tend to leave marks on the ribbon.
Sew the ribbon in place on both sides of the ribbon. Stitch as close to the edge of the ribbon as possible.
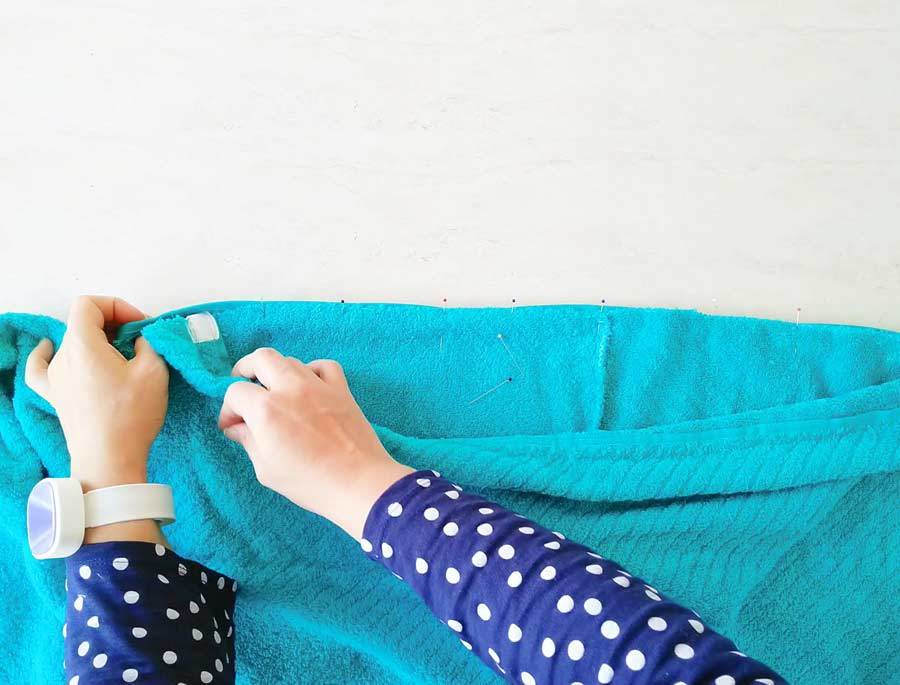
STEP 6: Attaching hood to the bath towel
Fold the bath towel in half crosswise to meet the short edges. Mark the middle with a pin and unfold the towel. Place it on a flat surface and layer the hood on top with right sides together. The inside of the hood should be facing you. Match the center neck seam of the hood with the top edge of the batch towel. Pin
STEP 7: Sew
Stitch the hood to the bath towel
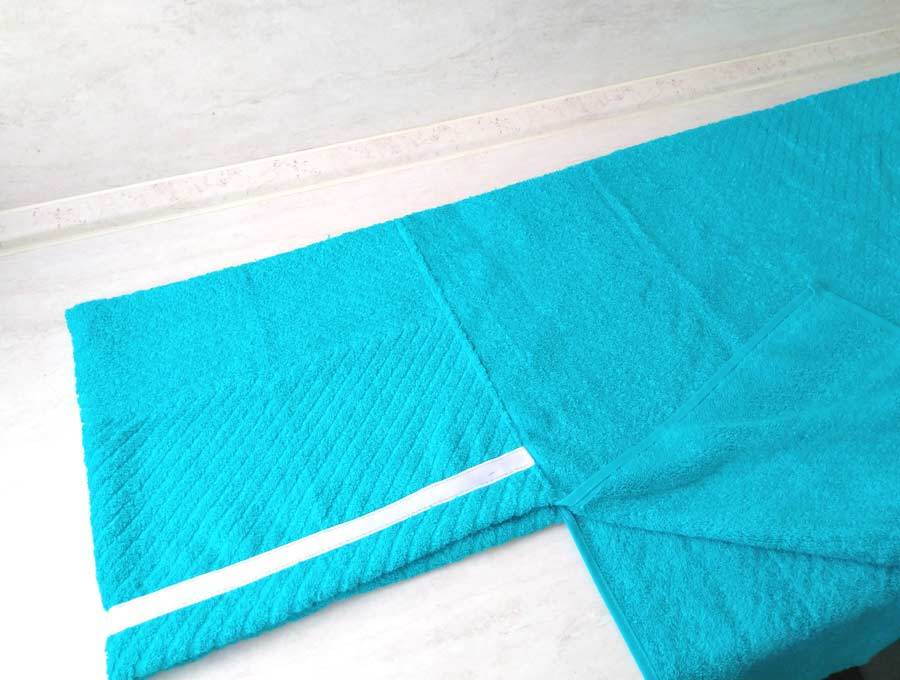
STEP 8: Finish the hooded towel
To hide the raw edges and give the towel a more professional finish, do the following. Flip the whole towel over so that you are seeing the inside of the towel. Open up the hood. Push the seam you’ve just sew towards the hood and pin it down. Make sure the back of your hooded towel looks good and stitch one last time.

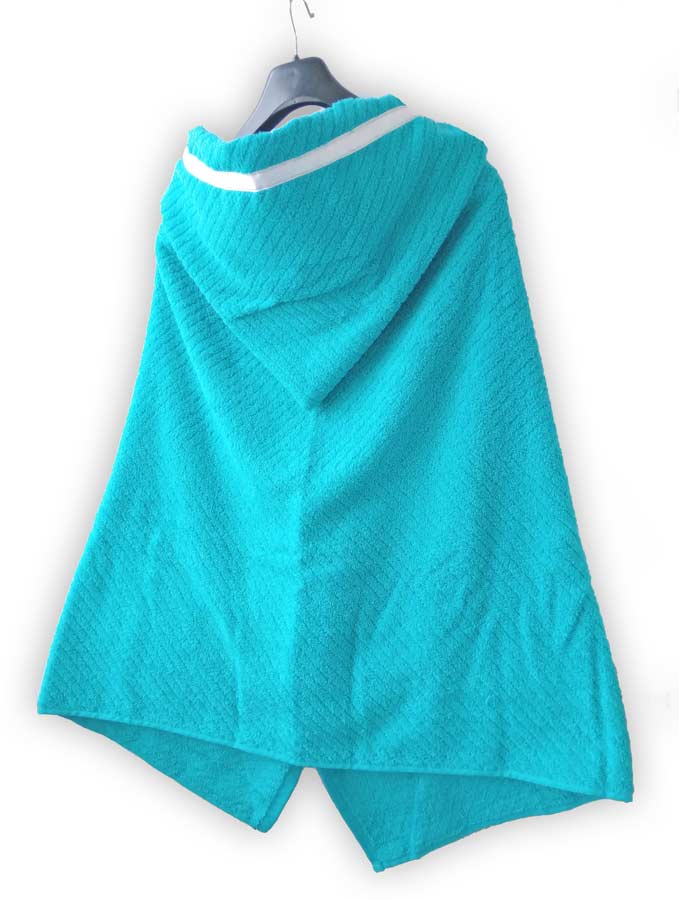
Voila! The handmade hooded towel is ready for action.
HOODED TOWEL CUSTOMIZATION OPTIONS:
- Use a hand towel in a contrasting color
- Stitch a grossgrain ribbon on top of hood
- Add pockets (you’ll need a small wash towel for this or you’ll need to buy a larger hand towel)
- Iron on cute designs
- Applique an animal’s face on the hood
- Embroider a monogram
Making a kids’ hooded towel is the perfect project to sew up for your nieces and nephews, and an adorable solution to tell your kids towels apart. It’s such an easy sewing project that is perfect even for the beginner seamstress. If your kids are not tiny anymore you can also enlist their help with choosing the towels, pinning or even stitching. This will make your handmade hooded towel even more special for them and they will treasure it for the years to come!
Hope you liked the step by step DIY hooded towels tutorial. I was considering making a hooded towel pattern for a hoodie like hood that is curved and stays closer to the head, instead of the standard pointy one. Should I make it? What do you think?
Let me know how your hooded towels for kids and toddlers turned out in the comments below
Do you have any questions on how to make a hooded towel? Suggestion for improvements? Just drop a comment!
Do you like this? Pin for later:
Wanna be friends? Click HERE and follow me on Pinterest
MORE TOWELS TUTORIALS:
- DIY hanging Kitchen towels
- How to make unpaper towels
- Reusable Swiffer wet pads
- Wash Cloth soap holder
- Travel kit out of washcloth
- How to make a bathmat – a soft – toe hugging towel mat
Want more fun hooded projects to make the kids happy? Try this sewing this hooded cloak pattern – it makes a great costume for princes and princesses, for witches and wizards or for the next costume party