 Towels with a Twist")
Reversible DIY Bath Mat out of (Old) Towels with a Twist
The DIY bath mat is so easy to make using our quick step-by-step instructions. Honestly, explaining how to do it takes longer than actually making the towel bath mat! The best part is you can recycle towels that are too good to throw out. Pick colors to coordinate with your bathroom, or go for a bright contrast. If you have an all-white bathroom – try a coral bath mat or one in navy blue. Of course, you can go all white, or try black as a contrast, or even have a pretty patterned bath mat. These are brilliant presents for larger families as there is always a hunt for a dry bath mat. A little luxury at your toe tips never went amiss after a shower.
This homemade bath mat has to be one of the most practical ideas we have worked on. I love that you can recycle towels to make the bath mat or use brand new toweling fabric – especially if you are making these as gifts. No one is going to toss a gift like this aside. Everyone needs bath mats, and if you have a large family, they need to be cycled through the wash regularly. It is such a luxury to wiggle your super clean toes into a soft bath mat that is fluffy and dry. Our step-by-step instructions show you how easy this is to make – so get cutting and sewing. Within around 30 minutes or less, you’ll have a brand new DIY bath mat that you’re going to love using.
Below you will find my step by step written tutorial with VIDEO instructions for all the visual learners.
We occasionally link to goods offered by vendors to help the reader find relevant products. Some of the links may be affiliate meaning we earn a small commission if an item is purchased.
Table of Contents
- 1 How to make a bath mat
- 2 Supplies and tools
- 3 How to Sew a bath mat
- 3.1 Silk Dyed Easter Eggs VIDEO TUTORIAL
- 3.2 INSTRUCTIONS:
- 3.3 STEP 1:
- 3.4 Step 2:
- 3.5 Step 3:
- 3.6 Step 4:
- 3.7 Step 5:
- 3.8 Step 6:
- 3.9 Step 7:
- 3.10 Step 8:
- 3.11 Step 9:
- 3.12 Step 10:
- 3.13 Step 11: Pin binding
- 3.14 Step 12: Stitch binding to the towels
- 3.15 Step 13: Make the corners
- 3.16 Step 14: Topstitch the bath mat
- 3.17 Step 15: Press
How to make a bath mat
Supplies and tools
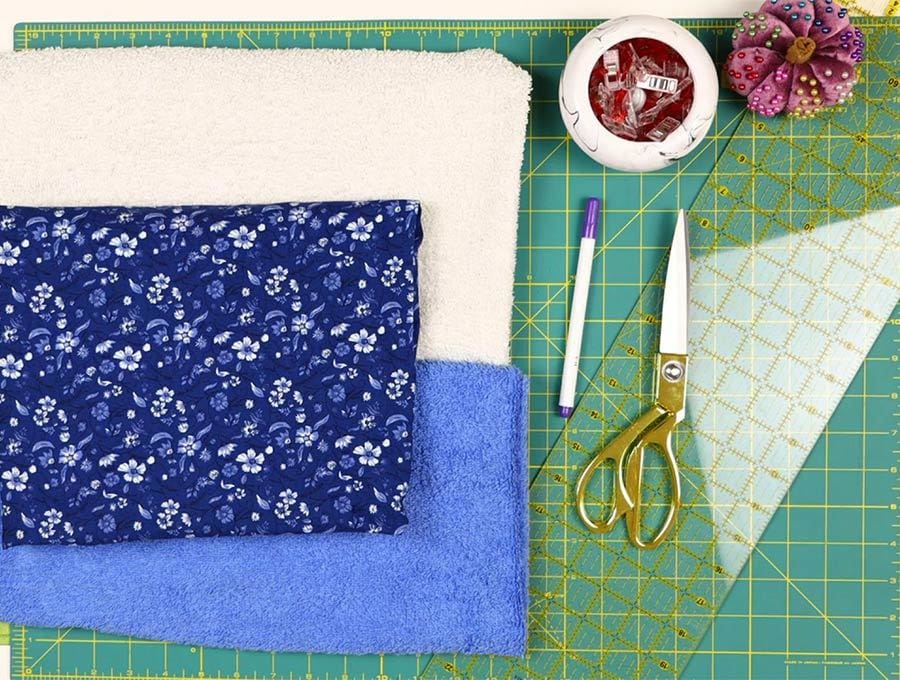
- fabric – 2 pieces of towelling (or old bath towels)
- fabric – cotton fabric for the binding
- matching thread
- scissors (or rotary cutter and a cutting mat)
- ruler or measuring tape
- iron and ironing board
- sewing clips or pins
Follow us for free patterns & tutorials! [easy-profiles]
How to Sew a bath mat
Watch the diy bath mat video first and then follow the written step by step instructions below.
Please enjoy and don’t forget to Like and SUBSCRIBE over on YouTube to be kept up to date with new videos as they come out.
Silk Dyed Easter Eggs VIDEO TUTORIAL
INSTRUCTIONS:
For the bath mat, you will need:
Bath mat center:
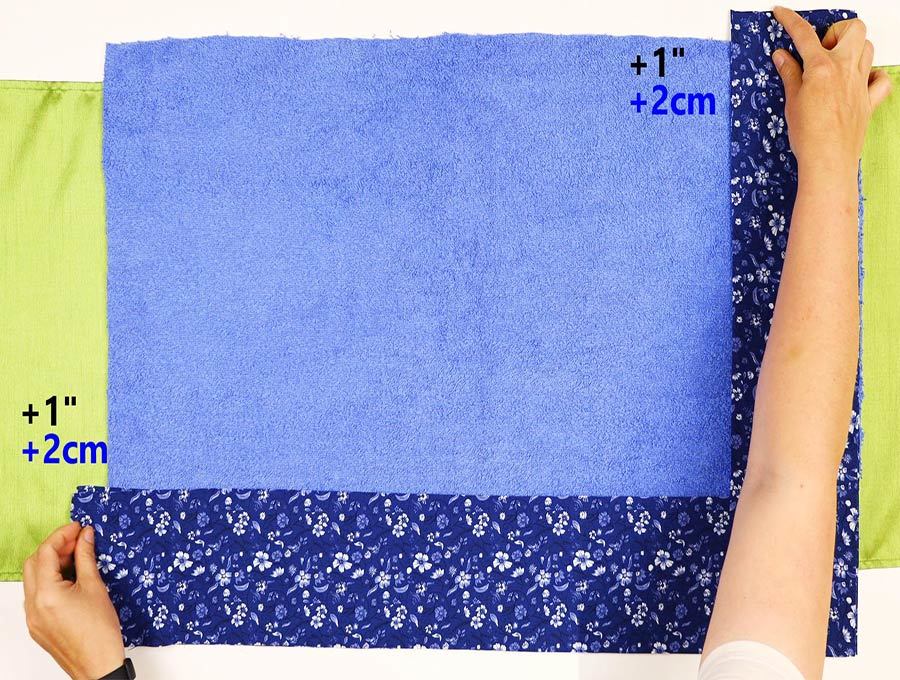
Two pieces from toweling (reuse bath towels) or from toweling fabric 30 x 20 inches (80 x 50 cm)
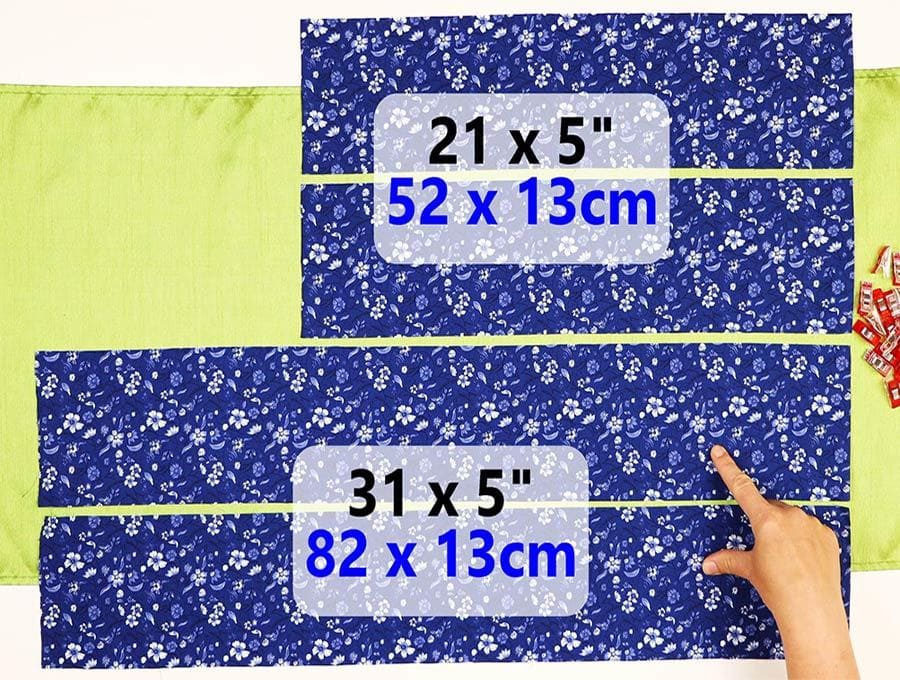
For the binding on the mat, use a strong cotton fabric
2 strips 31 x 5 inches ( 82 x 13 cm) for the long sides
2 strips 21 x 5 inches (52 x 13 cm) for the short sides
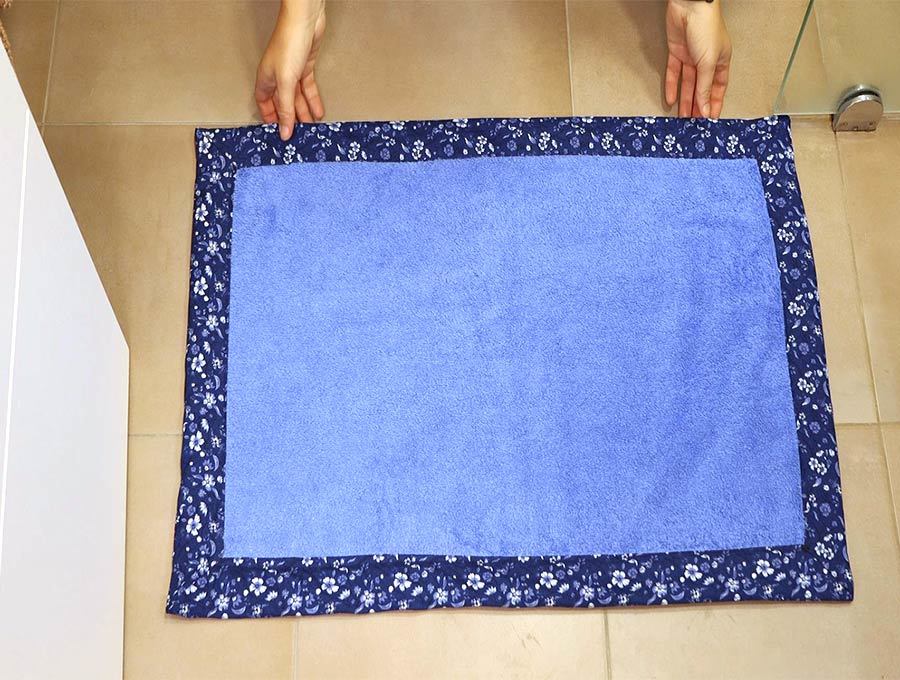
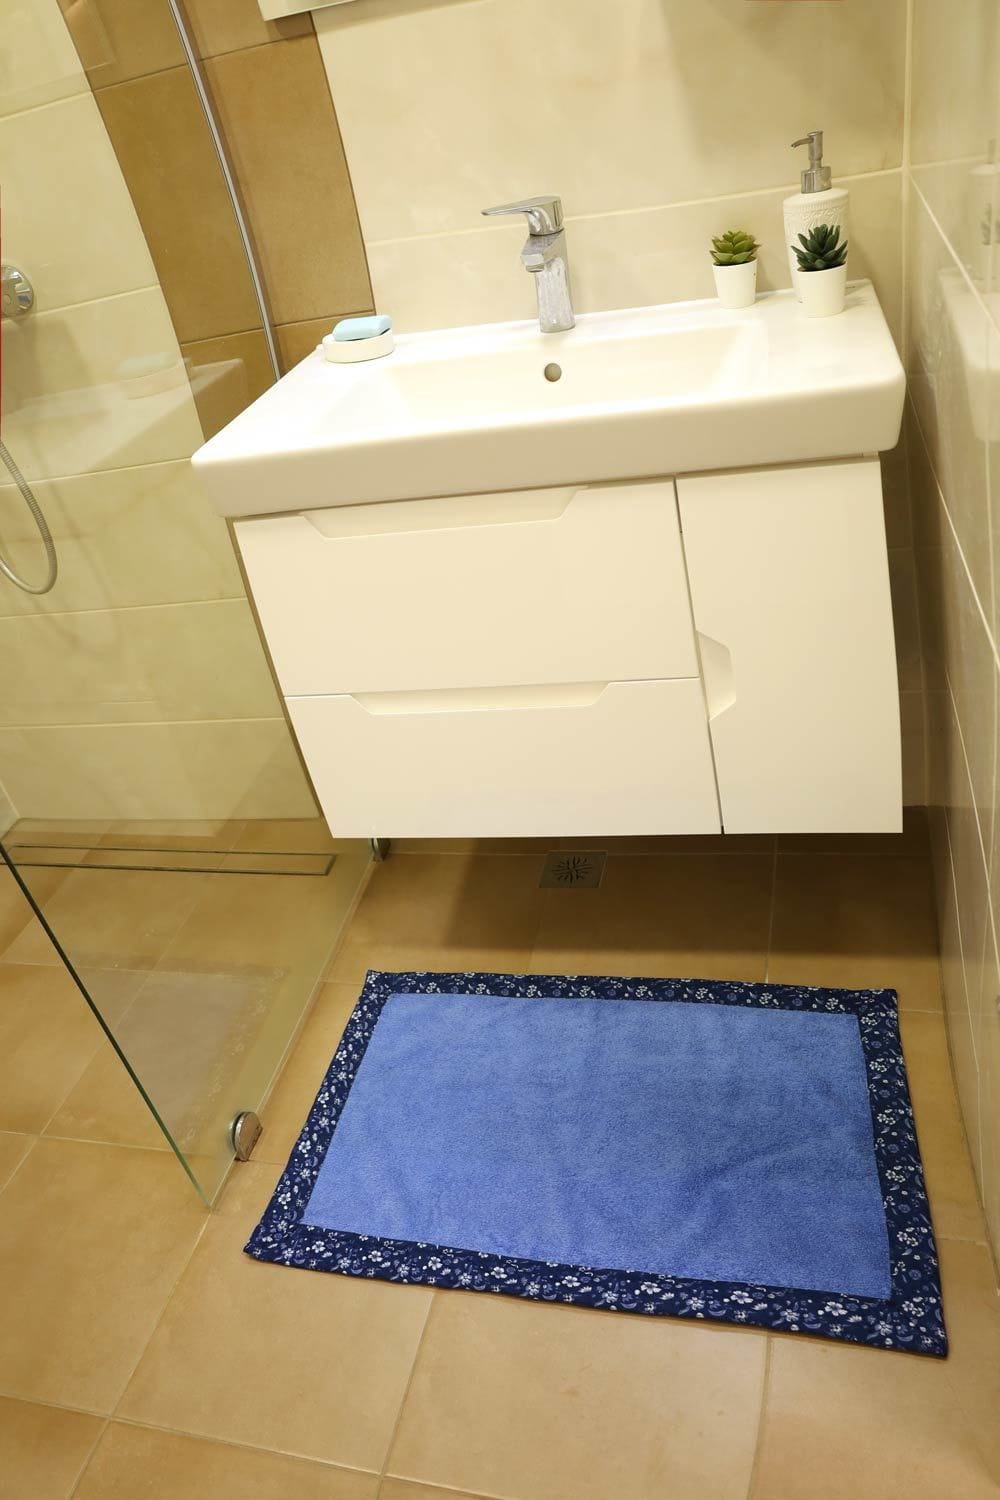
Finished bath mat size: 30 x 20 inches (80 x 50 cm)
You can make it any other size, just see instructions below
If you want to make a bath mat in a different size, adjust accordingly, making sure the binding is 1″ (2cm) longer than the towels
Please note that the measurements below are given both in inches and in cm but are rounded so it’s easier for everyone. It’s not straight up conversion from inches to cm, but as I tested both, the result will be great no matter whether you are working with imperial or with metric measurements
STEP 1:
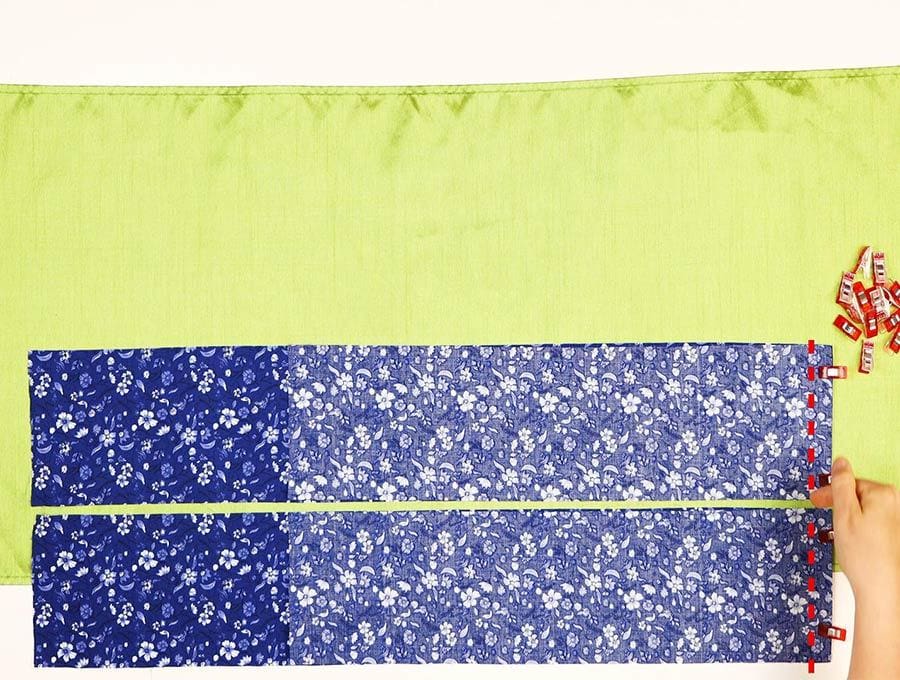
Place one short side strip over one long side strip with the right sides facing each other and pin along the 5-inch (13cm) edge on the left.
Do the same with the other short and long strips.
Step 2:
Sew ½ inch (1 cm) in from the edge, back tacking at the start and finish for both strips.
Step 3:
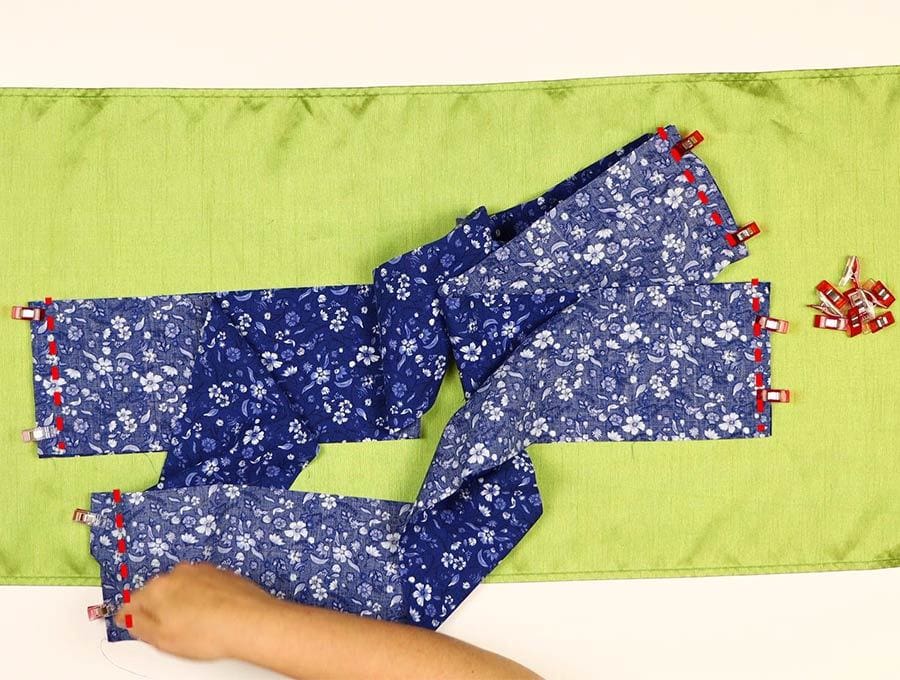
Open the strips out and place one down on the worktop, right side up. Then place the other piece on top, so the right sides face each other. It is essential that the short and long sides alternate – so that when they are all sewn together, you don’t have two long sides or two short sides next to each other. Pin the ends in place.
Step 4:
Stitch down both ends ½ inch (1cm) from the edge to create a fabric loop.
Step 5:
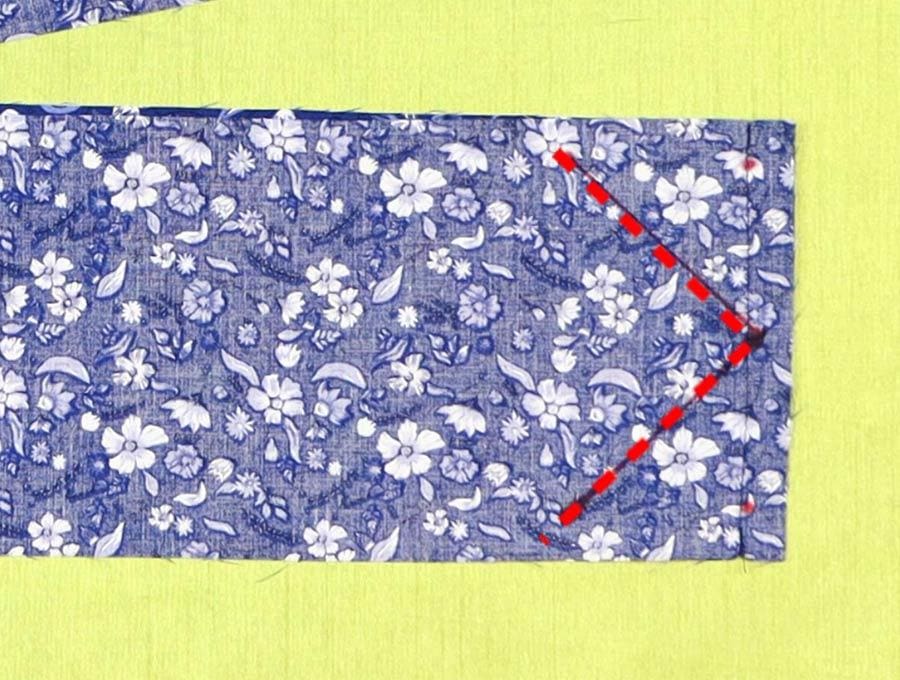
Lay the joined fabric flat and measure 2 ½ inches (6.5cm) up from the edge – this should be the mid-point of the 5-inch (13cm) border. Measure 1/8″ (3mm) up from this point, inside the seam (point A). Then measure 2 inches (5cm) from the midpoint along the seam of the fabric on either side, then mark 2 inches (5cm) from these marks along to the length of the fabric – these will be points B and C. Join A and B, then join A and C. Mark these diagonal lines with an erasable fabric marker.
Repeat for all four point where the fabric is joined.
Step 6:
Stitch along the diagonal lines, making sure not to go right to the edge – leave that ½ inch (1cm) free for creating the seam allowance. Back tack at start and finish at the widest part of the point. To get the point neat, lift the presser foot and swing the fabric with the needle still in the material to get a sharp point, then depress the foot and carry on sewing.
Repeat for all four points.
Step 7:
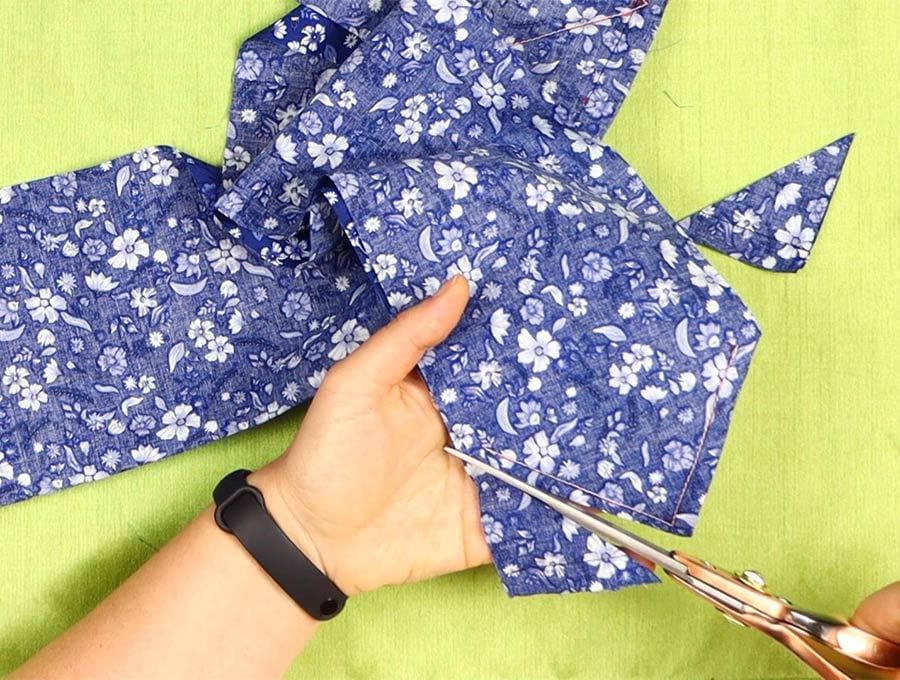
Trim off the extra fabric from the point, cutting ¼ inch (5mm) from the stitch line on all four corners.
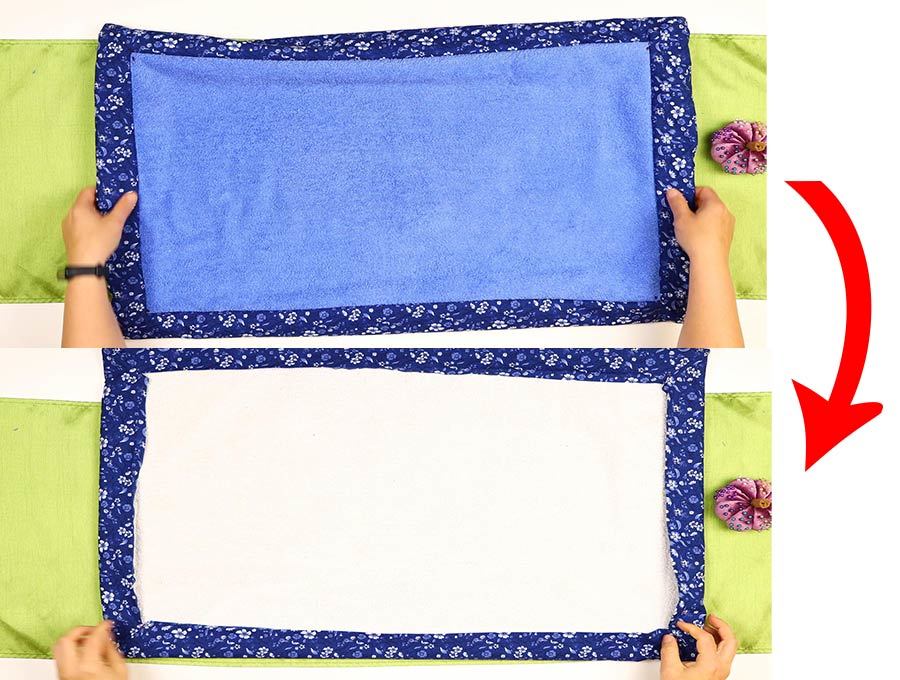
Step 8:
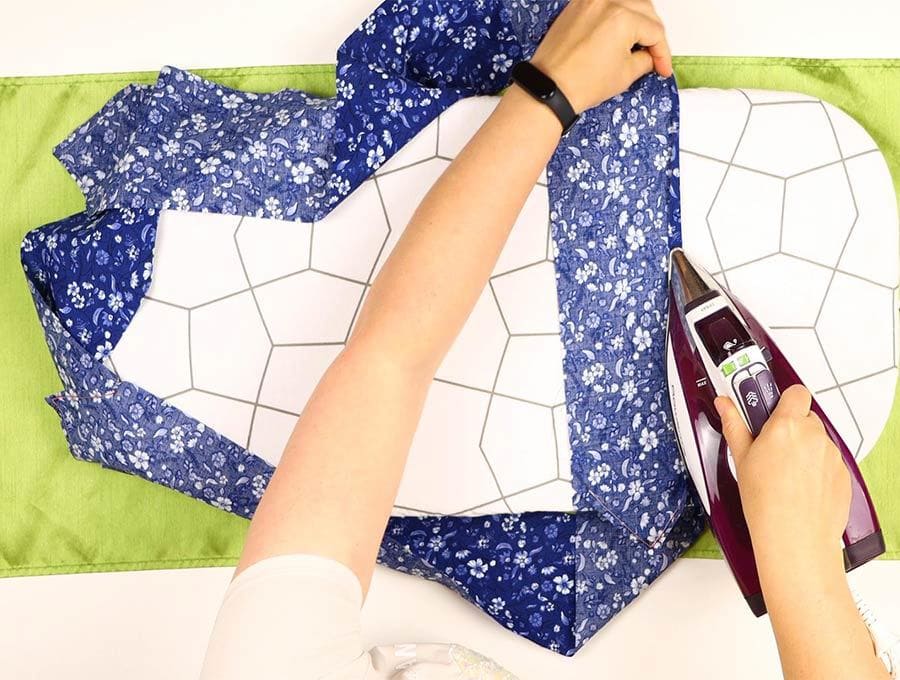
Press the seam allowance on all four sides ½ inch (1cm) in from the edge, on the wrong side of the fabric, folding over the edges, so the right side is uppermost on the ½ inch seam allowance. Do this on one side of the material only because the other side is going to be stitched in place.
Step 9:
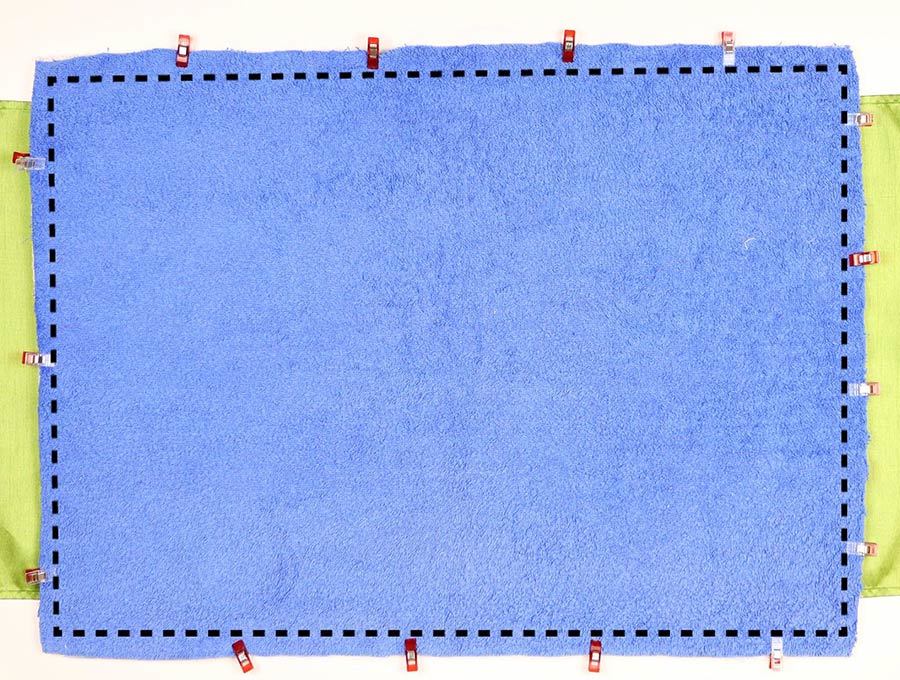
Pin the two towel pieces together with the right sides outwards, and stitch ½ an inch (1cm) in from the edge all around the two pieces. Lift the presser foot at the corners, swinging the fabric with the needle still in the material, then depress the foot to carry on sewing. This will give you four neat 90-degree corners.
Step 10:
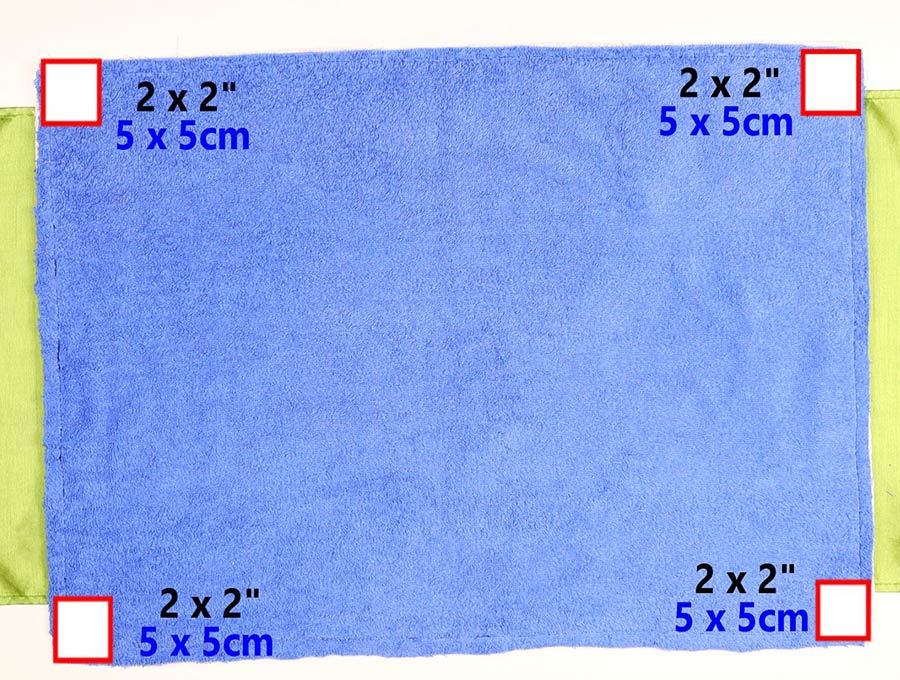
Measure 2 inches (5 cm) towards the center from each corner and make a mark using an erasable fabric pen. An easy way to mark accurately is to use a long ruler from corner to diagonal corner, mark off the 2 inches (5cm) from each corner, and then do the same on the other diagonal.
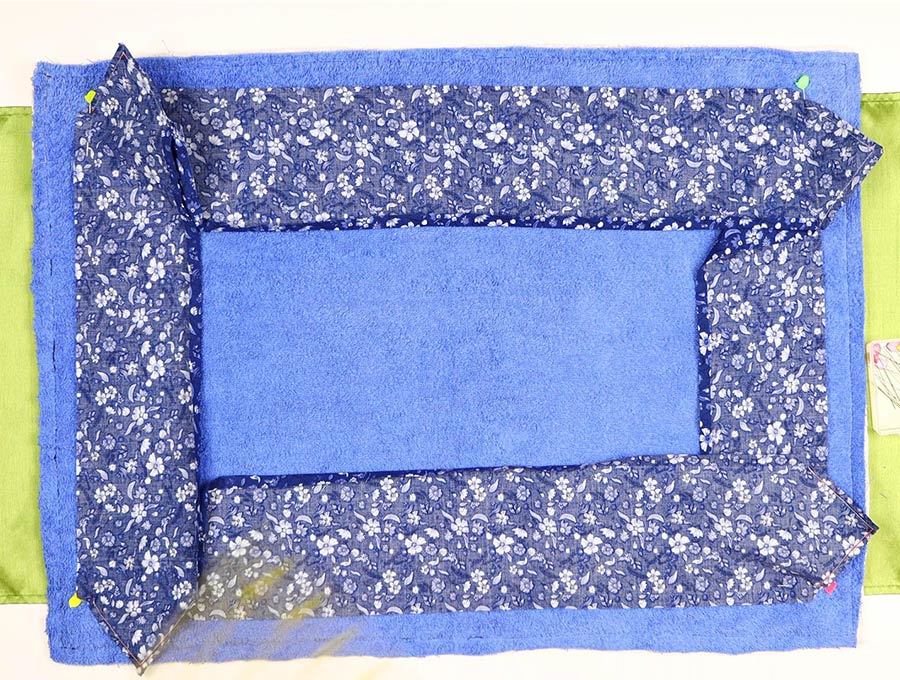
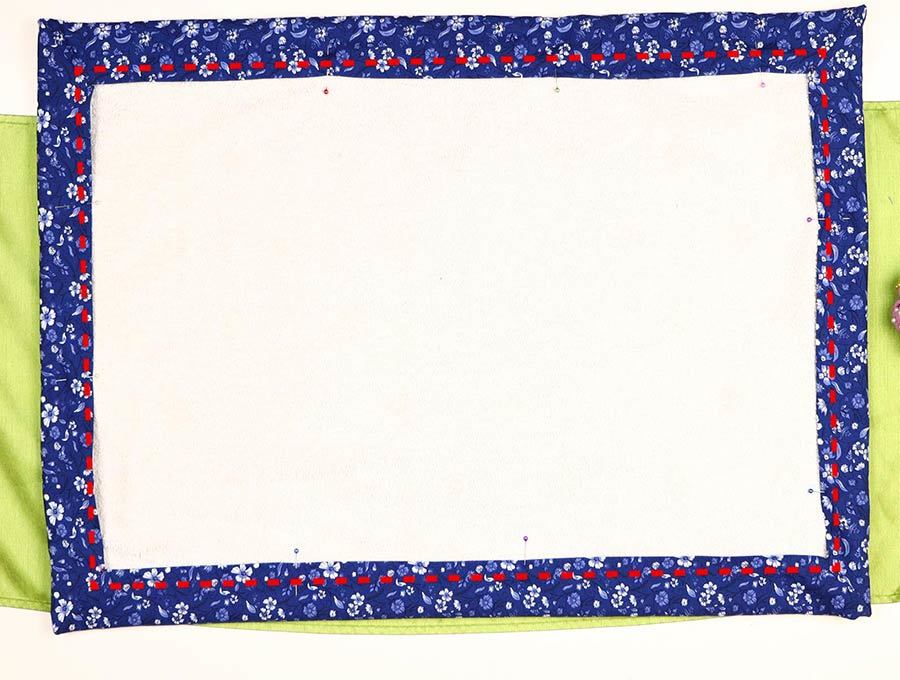
Step 11: Pin binding
Pin the side that doesn’t have the seam allowance pressed down to the towel. Work from the long sides first and ease in the fabric to pin it around all four sides of the towel, about 1.5 inches (4m) in from the edge. It is placed in a bit from the border to give a better thickness to the edging.
Step 12: Stitch binding to the towels
Stitch around all four sides, but not over the pointed pieces, back tacking at the start and finish, one side at a time.
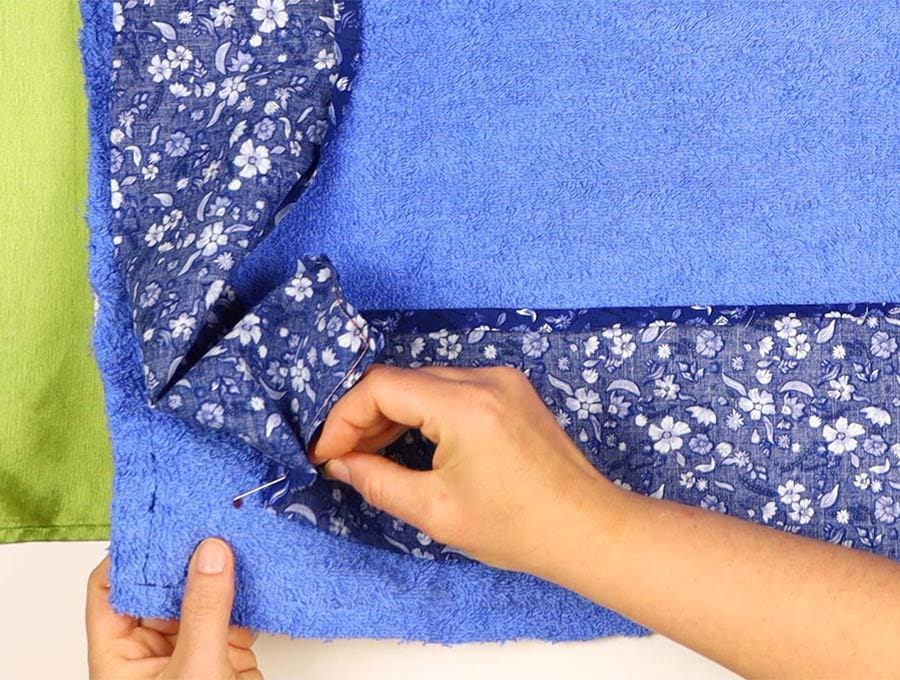
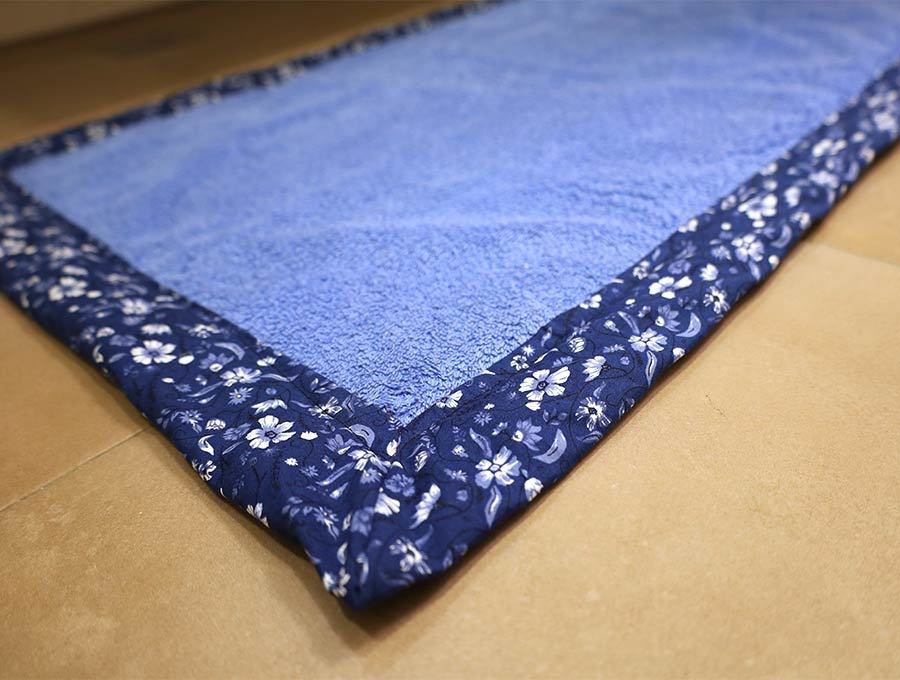
Step 13: Make the corners
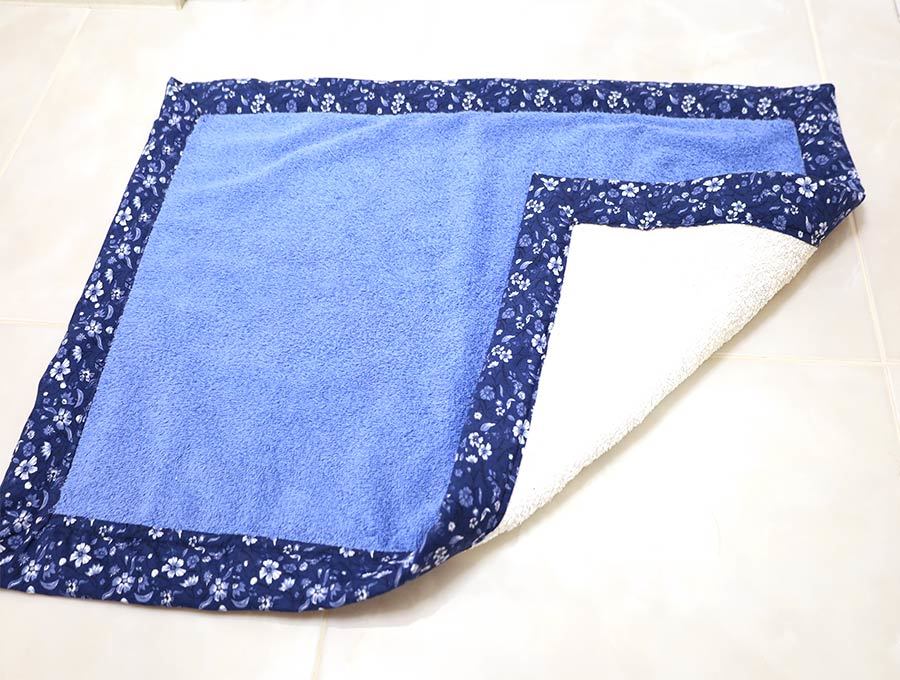
Flip out the corners and tuck them over the corners of the bathmat. Use a knitting needle to poke out the corners, so they lie flat. Flip out the homemade bath mat
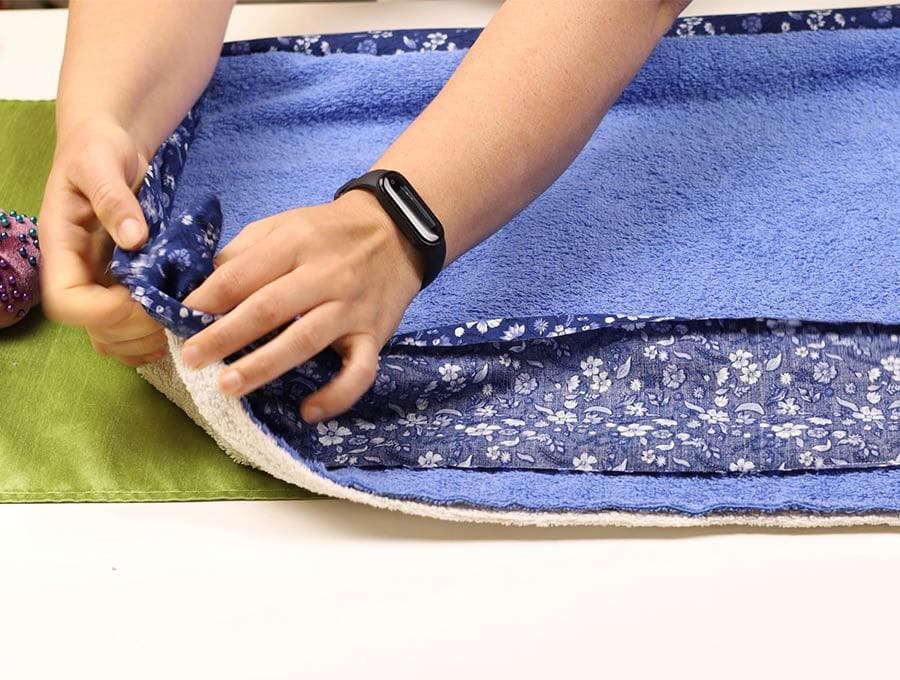
Step 14: Topstitch the bath mat
Pin all around the edge, ensuring that the pressed edge lies flat and that the border fabric is the same width around the edge. Finish with a top-stitch ¼ inch (5mm) from the edge all around the bathmat. Lift the presser foot at the corners with the needle left in the fabric, swing the material 90 degrees and then depress the foot and carry on sewing to ensure neat corners.
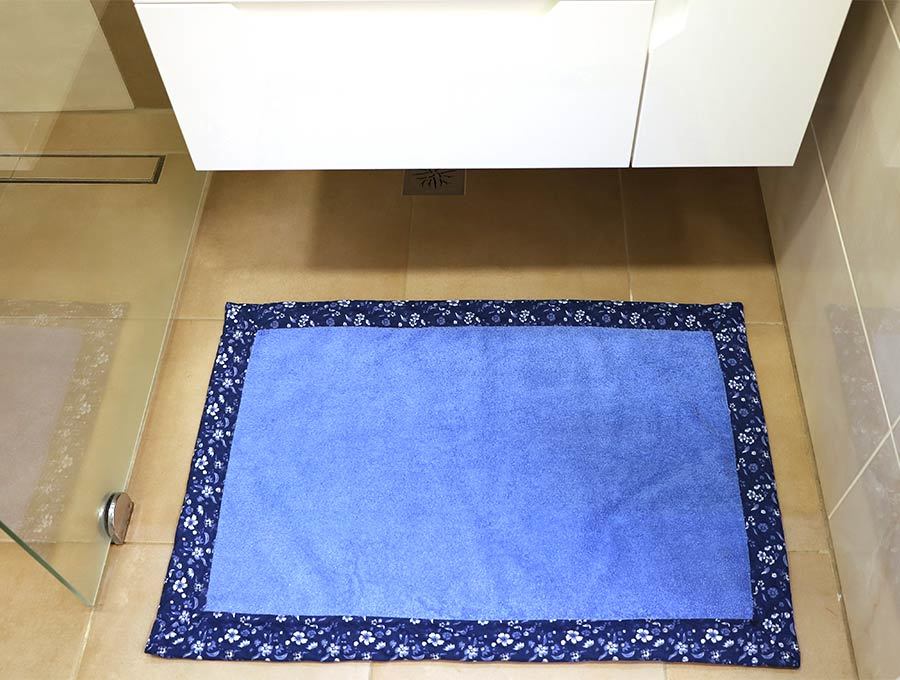
Step 15: Press
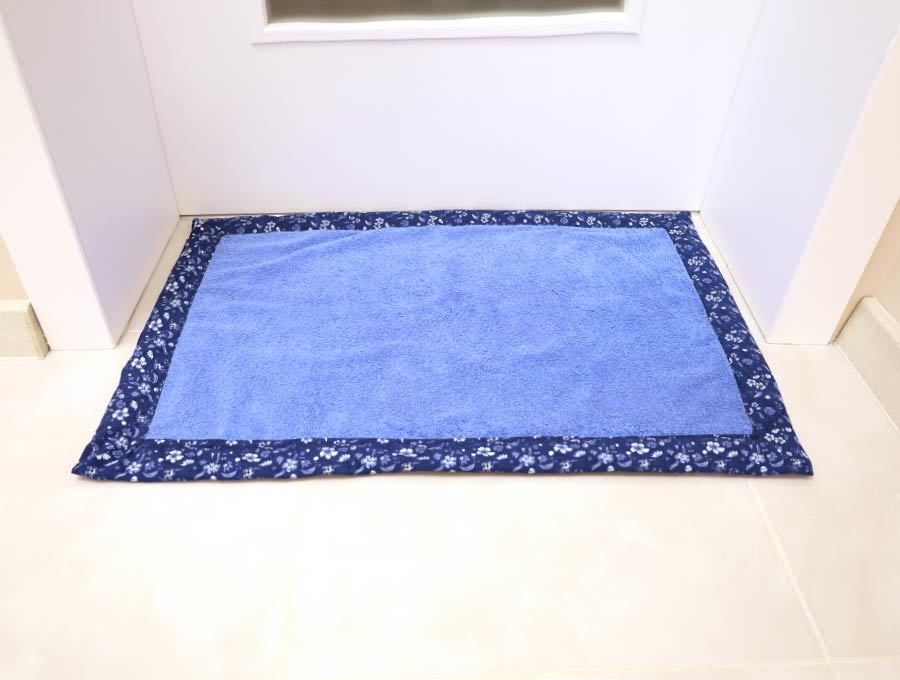
Give the bathmat a final press around the fabric binding. Don’t press the towel fabric as you don’t want to flatten the pile, then you are ready to put it to use in the bathroom.
Having a few of these easy-to-make towel bath mats is worthwhile if you have a big family, so no one has to get out of the shower or bath onto a soggy bath mat. They are light enough to toss in the washer, unlike some commercial bath mats that seem to take up a lot of washer space and take ages to dry. If you enjoyed this tutorial, then please share it with friends so they can also experience the soft toe-wiggling luxury of a DIY bath mat. For more clever DIY sewing projects, please hit the subscribe button to have the best ideas delivered straight to your inbox.
Do you like this? Pin for later:
Wanna be friends? Click HERE and follow me on Pinterest
RELATED:
Other uses of towels:
Kids Bath towel with hood – kids just love it
Tie it up and dry it up – hair towel wrap
Super practical Soap saver pouch
Stay put kitchen towels
Reusable mop pad – ditch those single use plastic pads
Reusable unpaper towels sooo much more absorbent than the paper ones