
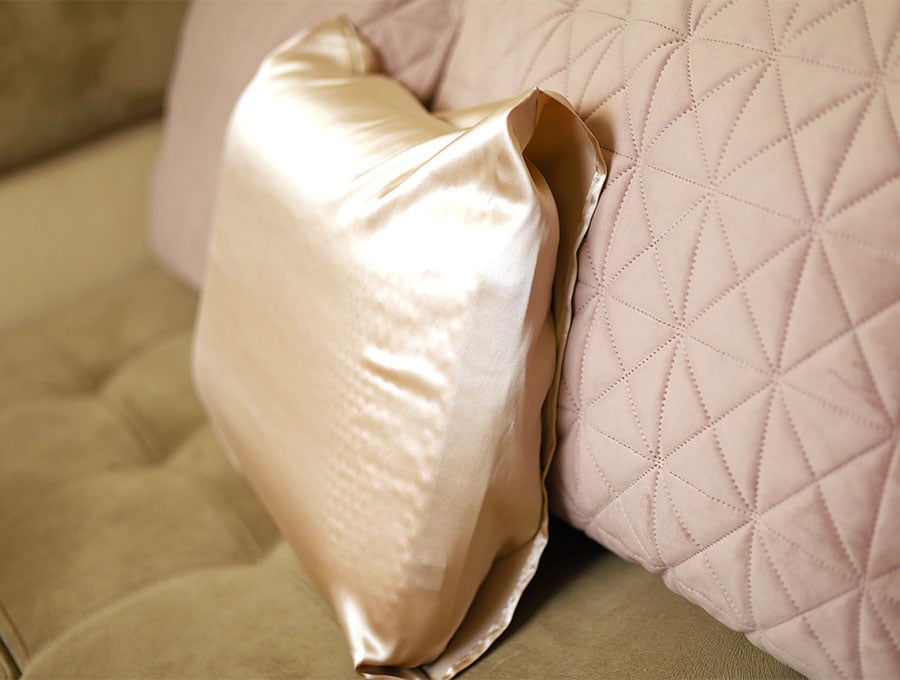
DIY Satin or Silk Pillowcase with a Flap / How to Make a Real Silk Pillowcase
Make a pure silk or satin pillowcase that’s so smooth your hair won’t tangle when you sleep. Silk is also good for your skin as the fabric doesn’t sap moisture like cotton does and you’ll wake up with smoother skin. You can use either pure mulberry silk fabric for this project or a quality satin, for a luxurious pillowcase that will help avoid sleep creases. Dermatologists recommended silk or quality satin pillowcases and top models and celebrities use them for a better night’s sleep and improved complexion. It is important not to use a synthetic silk or satin, which will not have the benefits of a natural fabric.
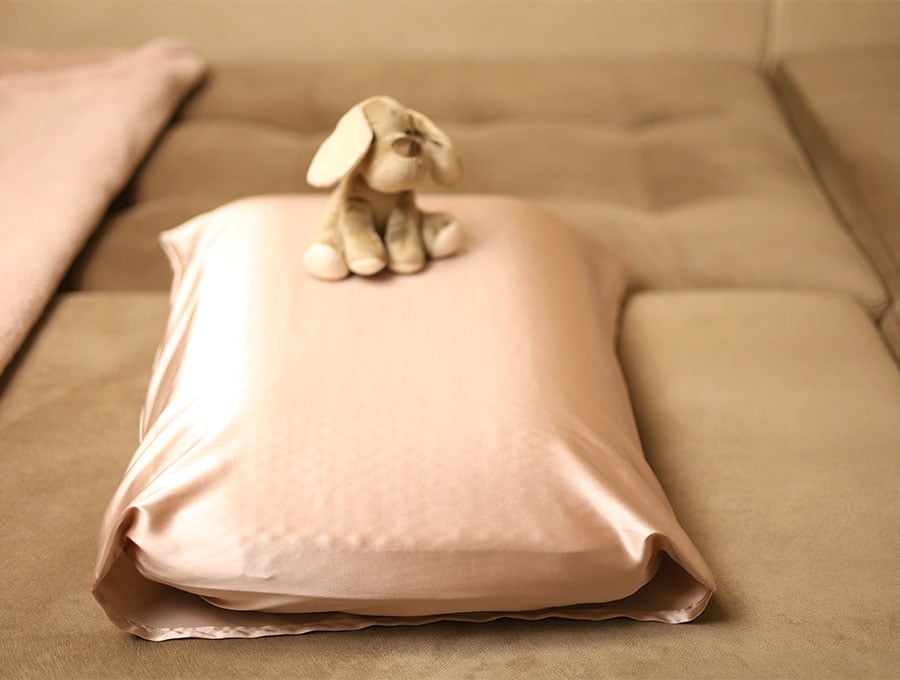
This pillow is made envelope style, meaning that the flap over inside allows for the pillow to be tucked in neatly and you don’t risk the pillow sliding out of the pillowcase while you are sleeping. The flap over can be anywhere from 6 inches (15 cm) to 7 inches (18 cm) for a deeper flap.
By using a French seam it means there are no edges to fray as they are wrapped into the seam allowance and you don’t need a serger (overlocker) to gain a professional looking finish.
Below you will find my step by step written tutorial with VIDEO instructions for all the visual learners.
We occasionally link to goods offered by vendors to help the reader find relevant products. Some of the links may be affiliate meaning we earn a small commission if an item is purchased.
Table of Contents
How to make a satin or real silk pillowcase with inner flap
Supplies and tools
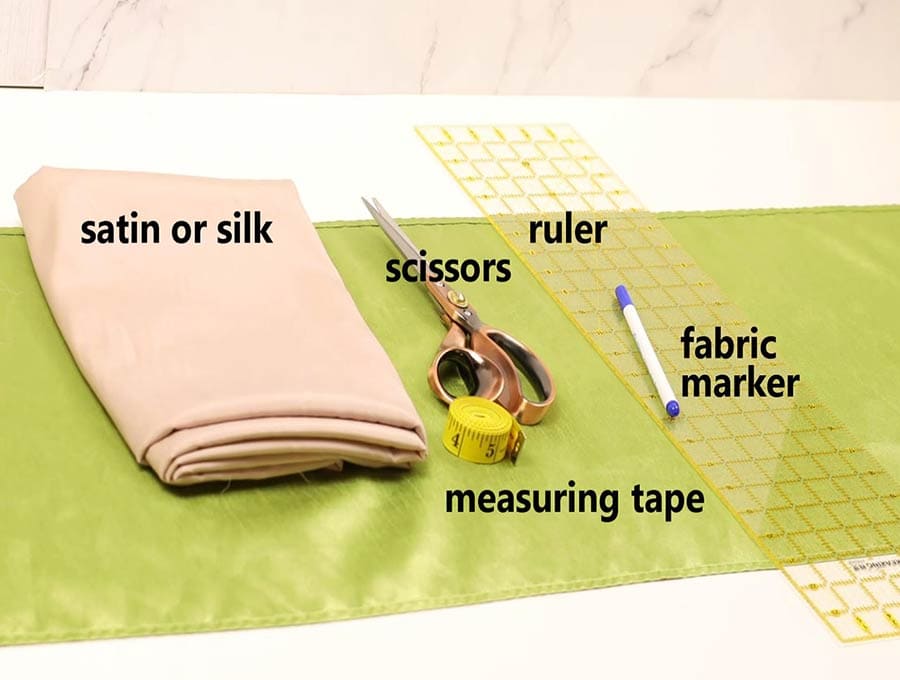
- fabric – 100% silk or satin
- pillow insert
- matching thread
- scissors (or rotary cutter and a cutting mat)
- ruler or measuring tape
- iron and ironing board
- sewing clips or pins – I highly recommend using clips when working with silk as pins tend to leave holes in the fabric
DOWNLOAD: [Free pdf file]
Follow us for free patterns & tutorials! [easy-profiles]
How to Sew a satin or silk pillowcase
Watch the diy satin or silk pillowcase video first and then follow the written step by step instructions below.
Please enjoy and don’t forget to Like and SUBSCRIBE over on YouTube to be kept up to date with new videos as they come out.
DIY silk pillowcase VIDEO TUTORIAL
INSTRUCTIONS:
These are the common pillow sizes and the method to make them is exactly the same as the one illustrated in our video tutorial and our step-by-step instructions for the standard pillow – the only difference is in the amount of fabric used.
Fabric you will need:
- Standard Pillow: 1 yard (91.4 cm)
- Queen Pillow: 1 1/4 yards (114.3cm)
- King Pillow: 1 1/2 yards (137.2 cm)
- Body Pillow: 2 yards (183 cm)
Pillows standard sizes:
- Standard Pillow: 20 x 26″ (51 x 56 cm)
- Queen Pillow: 20″ x 30″ (51 x 76 cm)
- King Pillow: 20″ x 36″ (51 x 92 cm)
- Body Pillow: 20 x 54 inches (51 x 137 cm)
You should add fabric for seam allowance and flap, as given below.
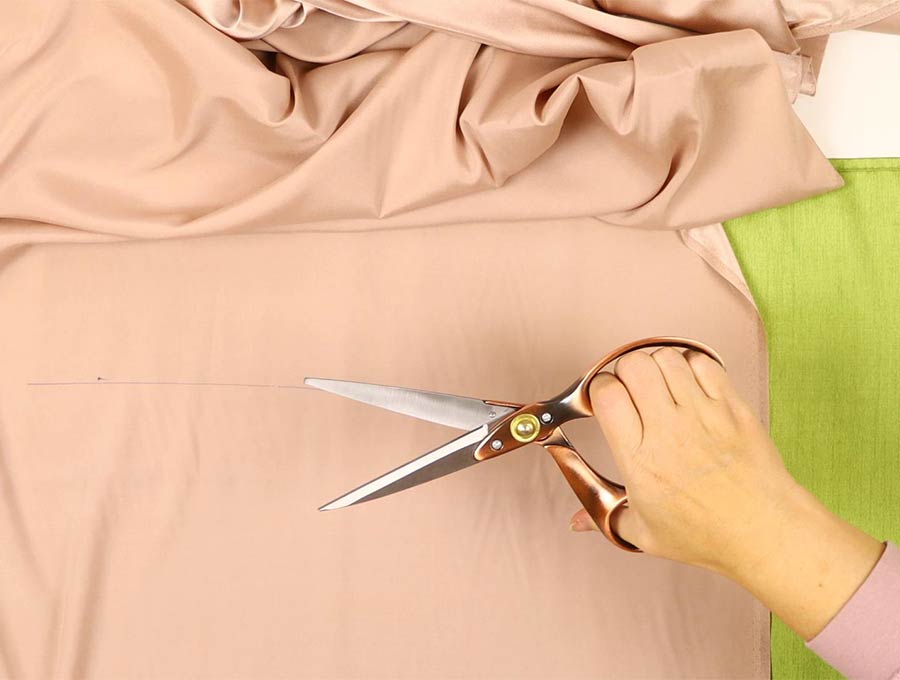
CUT FABRIC:
If you already have a pillowcase that fits your pillows, it’s best to measure it, and add fabric for seam allowance and flap.
If using one piece of fabric:
- FABRIC WIDTH = existing pillowcase width + 2″ (5cm) for seam allowances
- FABRIC LENGTH = 2 x existing pillowcase length + 8″ (20 cm) for flap and seam allowance
So for a standard pillow 20 x 26″ you will need 22 x 60″ (56 x 152cm) piece of fabric
If using two pieces of fabric:
piece 1:
- FABRIC WIDTH = existing pillowcase width + 2″ (5cm) for seam allowances
- FABRIC LENGTH = existing pillowcase length + 2″ (5cm) for flap and seam allowances
piece 2:
- FABRIC WIDTH = existing pillowcase width + 2″ (5cm) for seam allowances
- FABRIC LENGTH = existing pillowcase length + 8″ (20cm) for flap and seam allowances
So for a a standard pillow 20 x 26″ you will need two pieces of fabric – 22 x 28″ (56 x 71cm) and 22 x 34″ (56 x 86cm)
STEP 1:
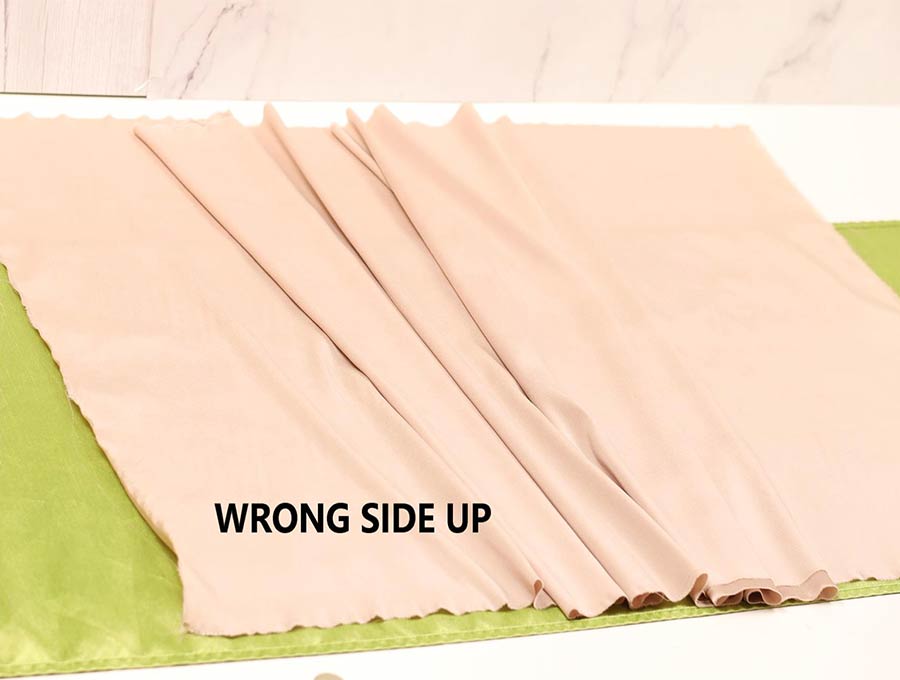
To cut your pillowcase lay out the fabric in a single layer WRONG SIDE up on your work top.
Measure and cut out the fabric you will need as explained above
STEP 2:
On the short end fold over 3/8 inch (1 cm) then again another 3/8 inch (1 cm) towards the wrong side of the fabric to make a seam. Stitch along the edge of the double folded seam, back tacking at the start and finish.
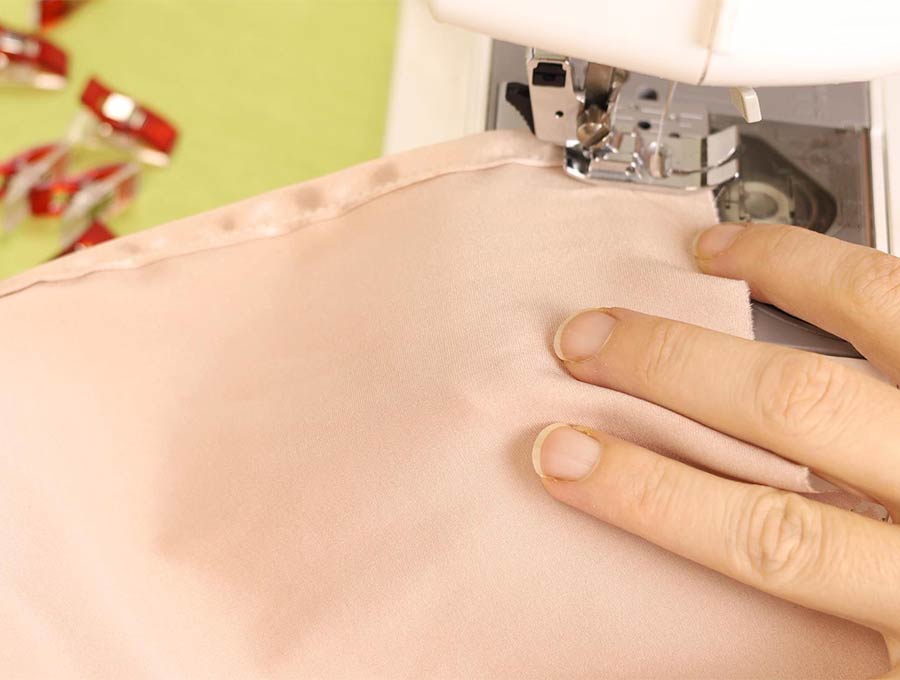
Repeat with the other short end of the fabric.
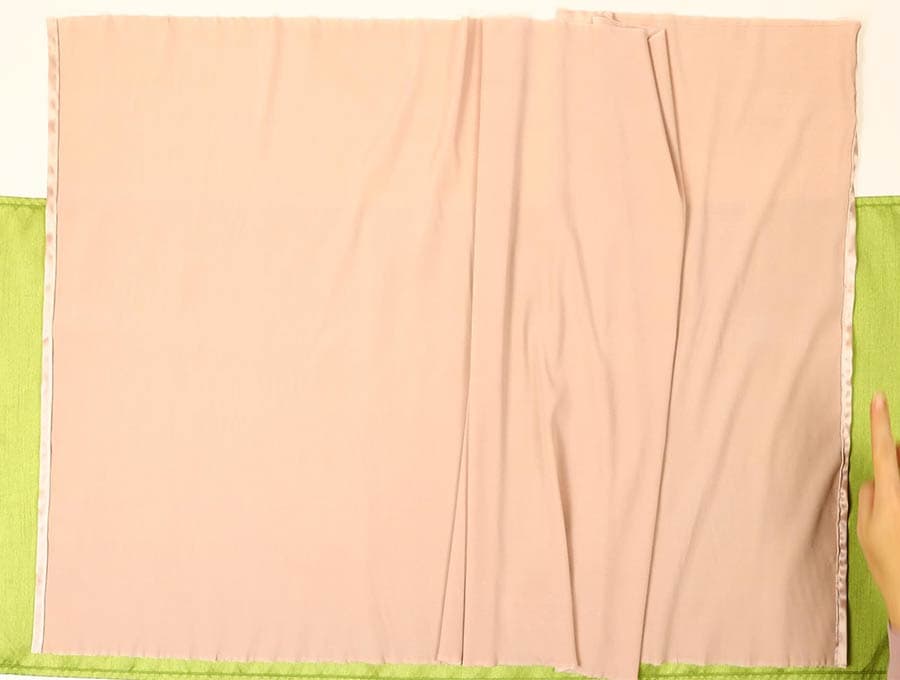
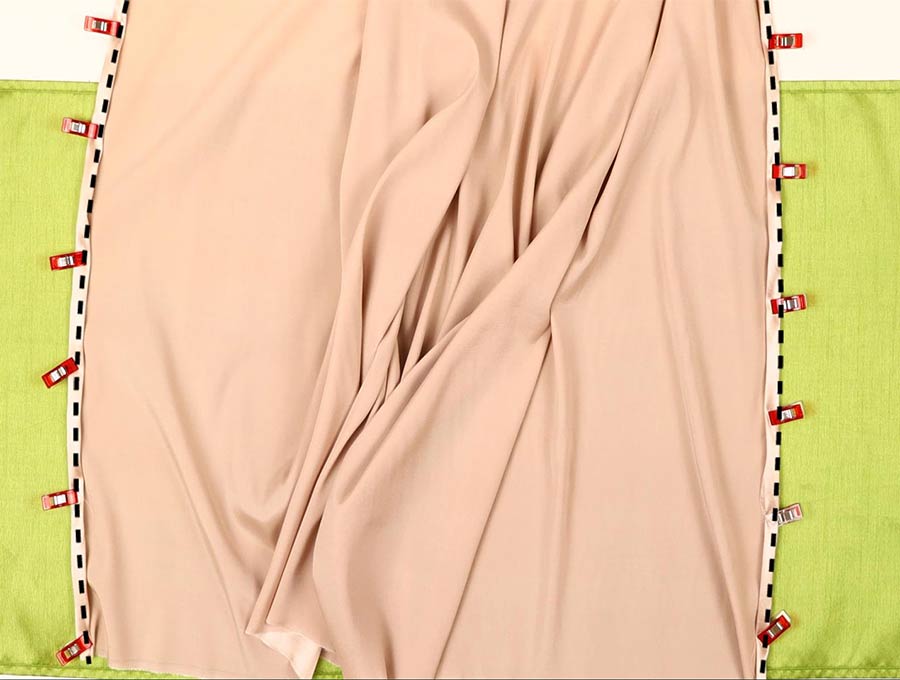
STEP 3:
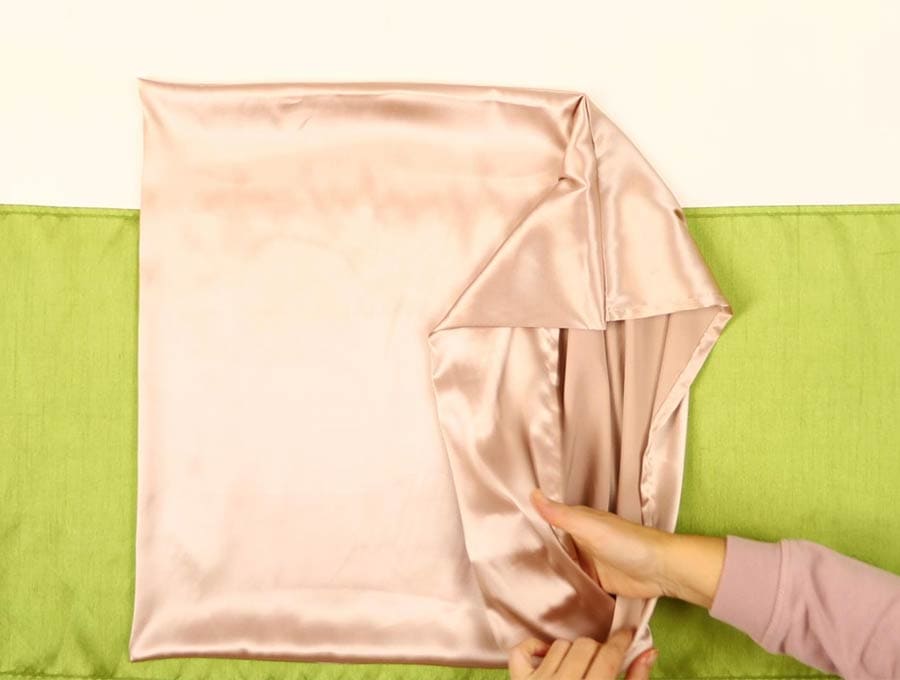
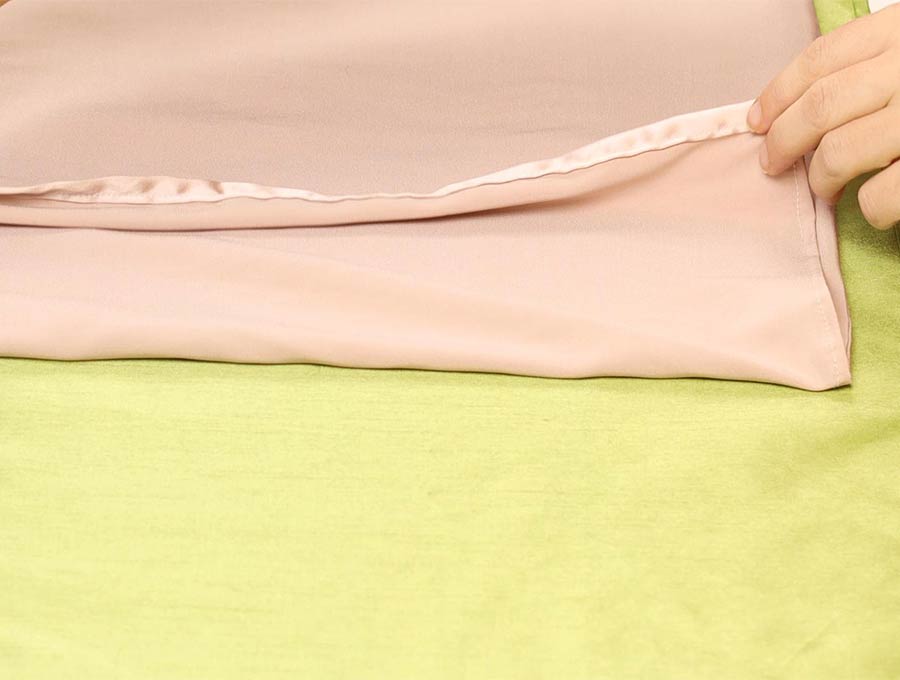
With the ends of the pillowcase seamed you are now ready to fold the fabric over and create the French seam.
Measure 6.5″ on both top and bottom one side and mark.
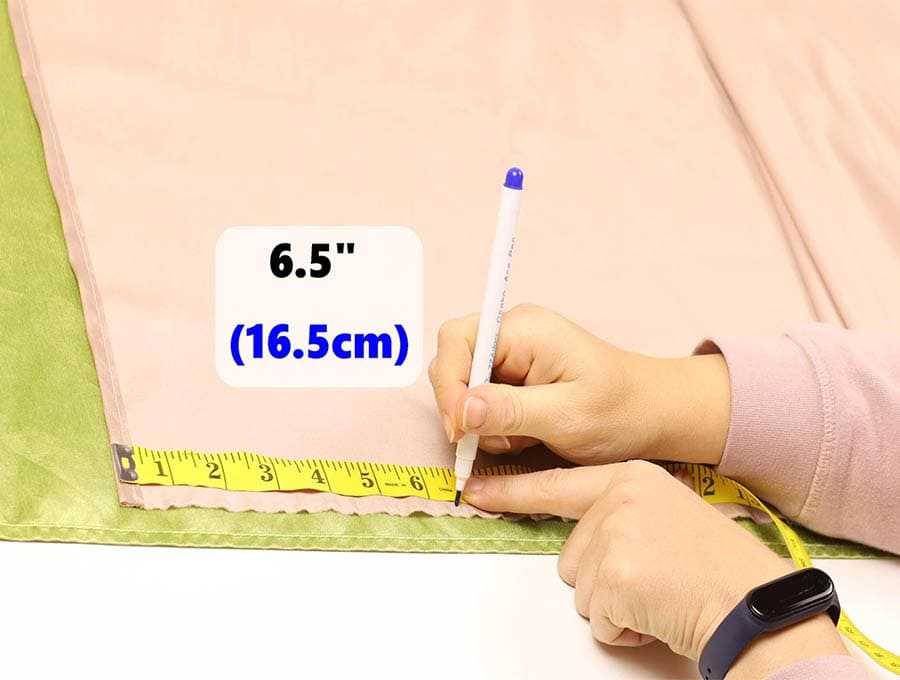
Fold the fabric with the wrong sides facing inward to meet the marks.
STEP 4:
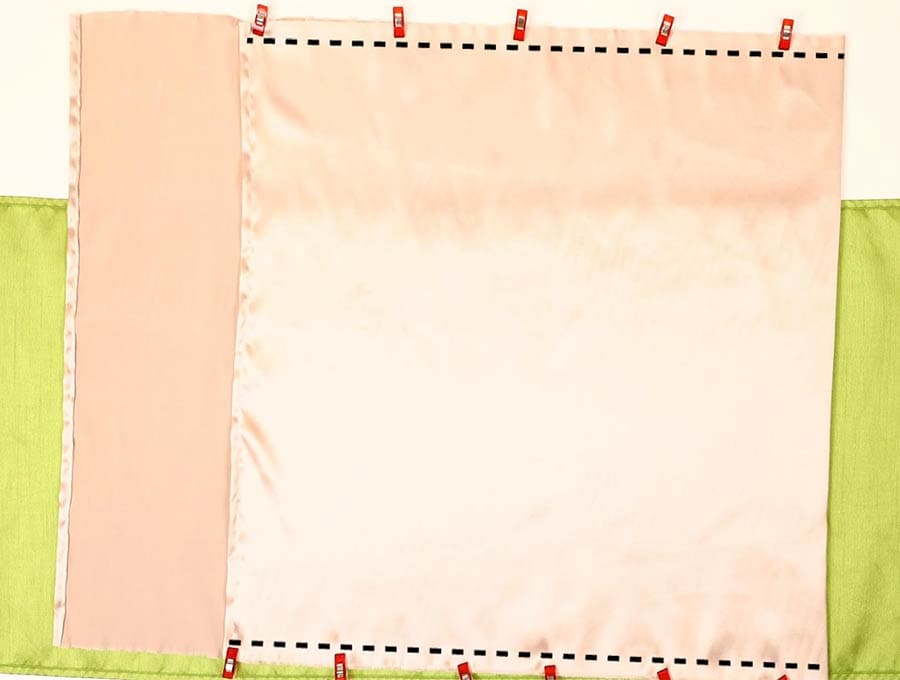
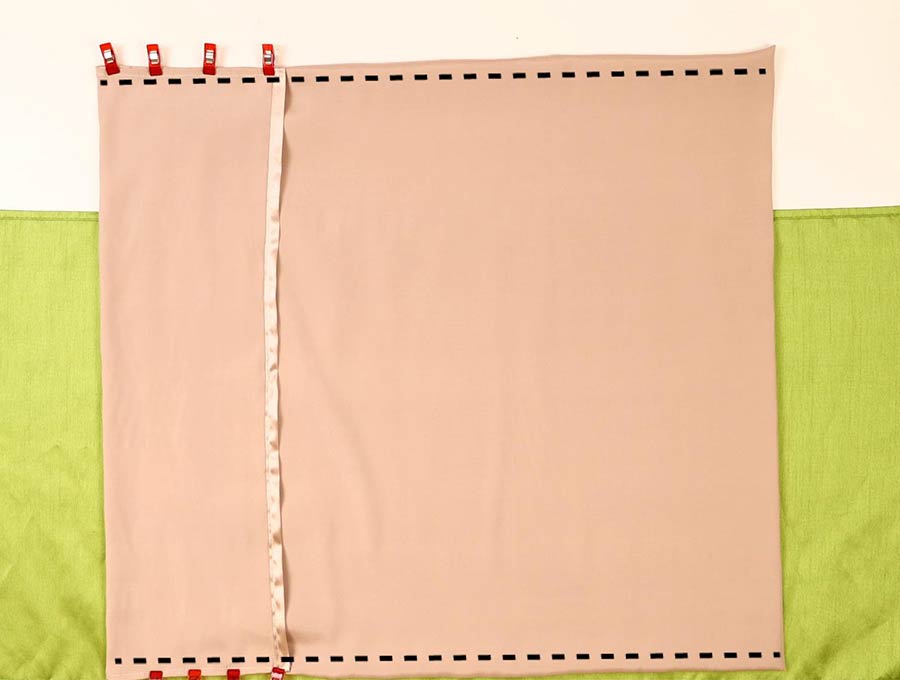
Pin or clip along the two (or three) edges. Leave the flap hanging loose for the moment and stitch around the pillowcase on the right side of the fabric with a 3/8 inch (1 cm) seam allowance back tacking at the start and finish.
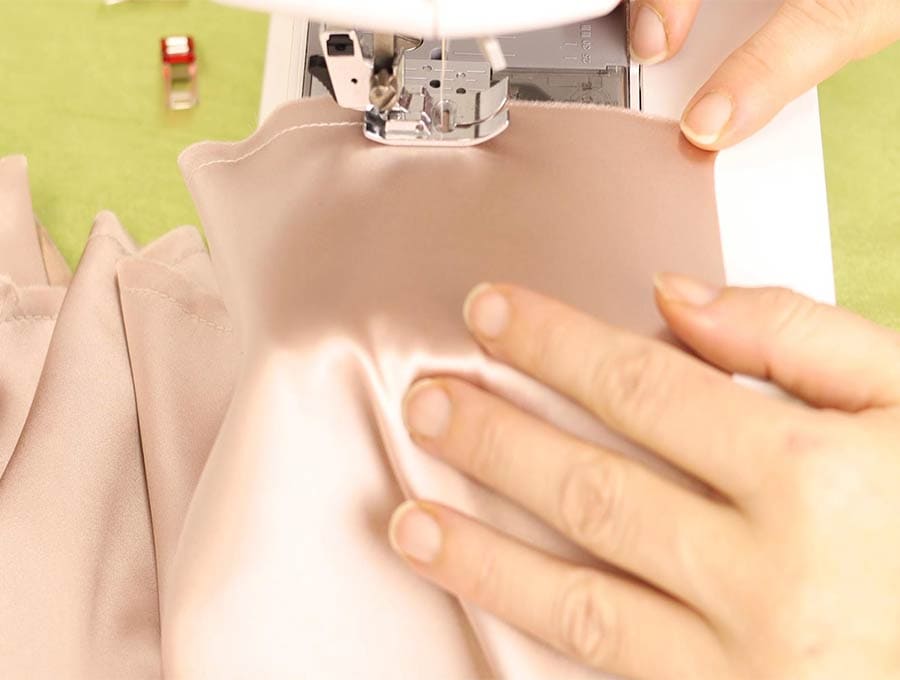
If you are hemming 3 of the sides (using 2 pieces of fabric), lift the presser foot when you come to the corners, leaving the needle in the fabric before swinging the fabric round, depressing the presser foot and continuing, for a neat 90-degree corner.
STEP 5:
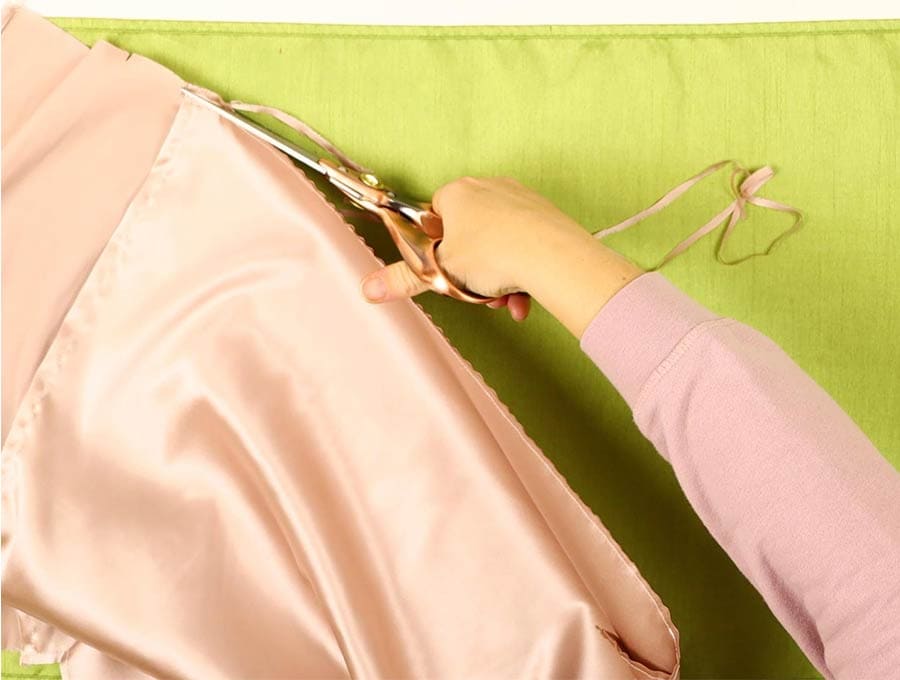
Clip off the extra fabric across the two corners, trim the seam allowance in half along the seams,
STEP 6:
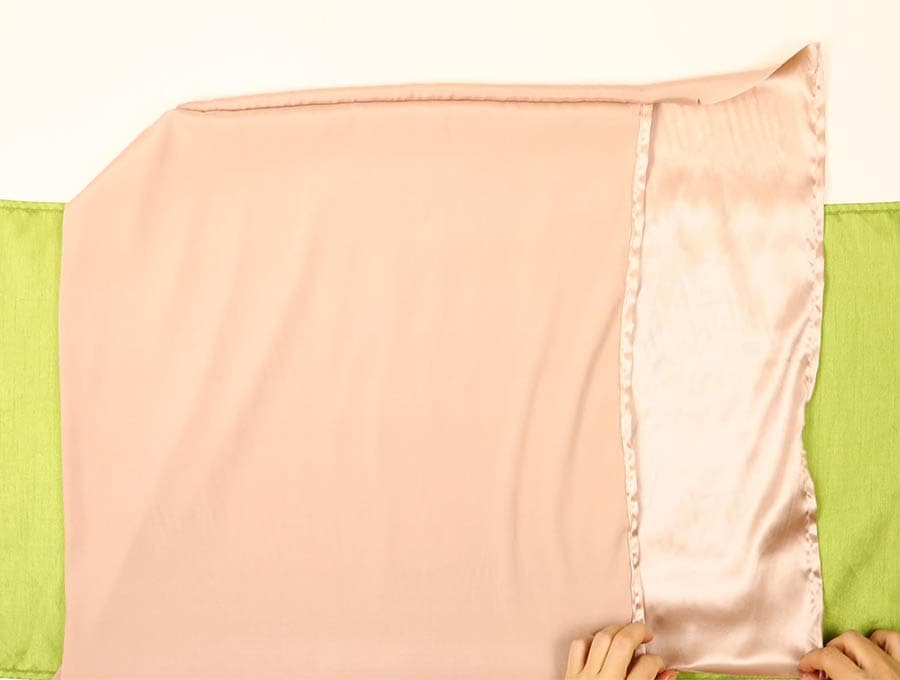
Turn the pillowcase so the wrong side is outwards, pressing out the corners and pressing the seams flat.

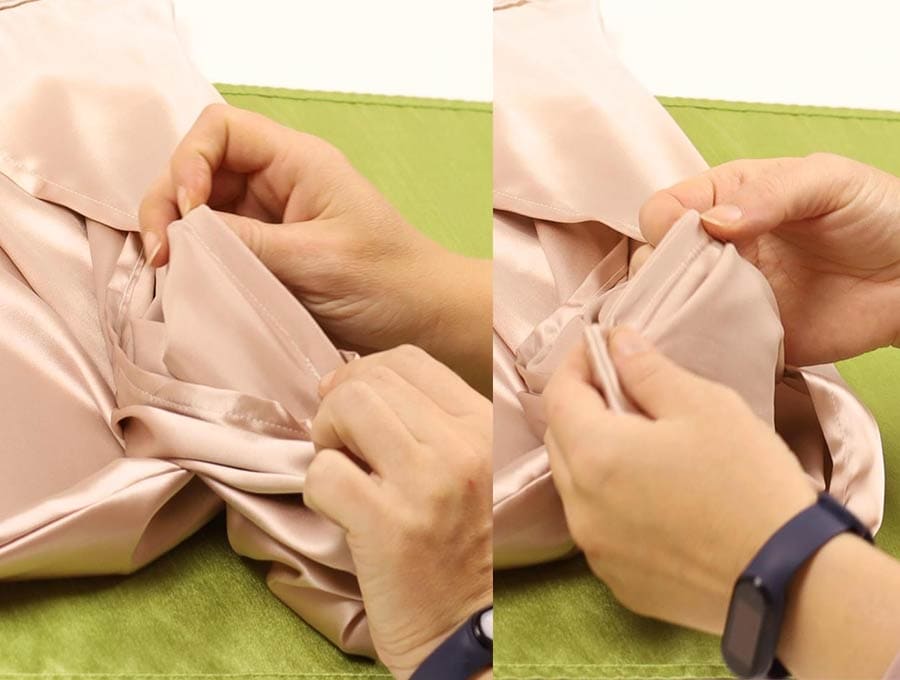
STEP 7:
On the sides of the flap there will be raw edges – turn these in twice and press. The folded seam will be towards the wrong side of the fabric. stitch in place
STEP 8:
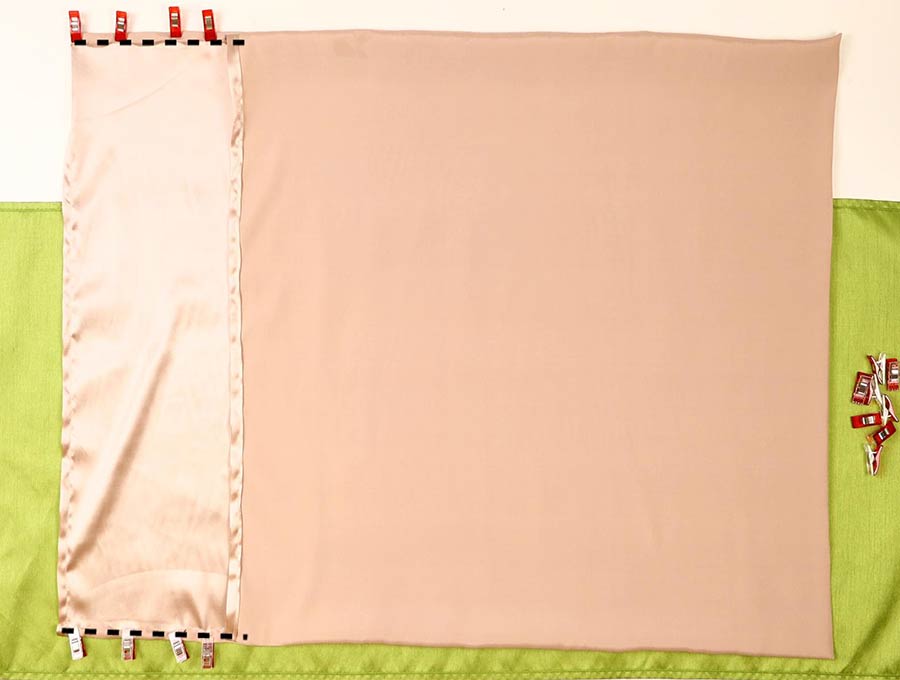
Fold the flap back in line with the edge of the pillowcase, with flap right side outwards, lying on top of the wrong side of the pillowcase, and clip in place.
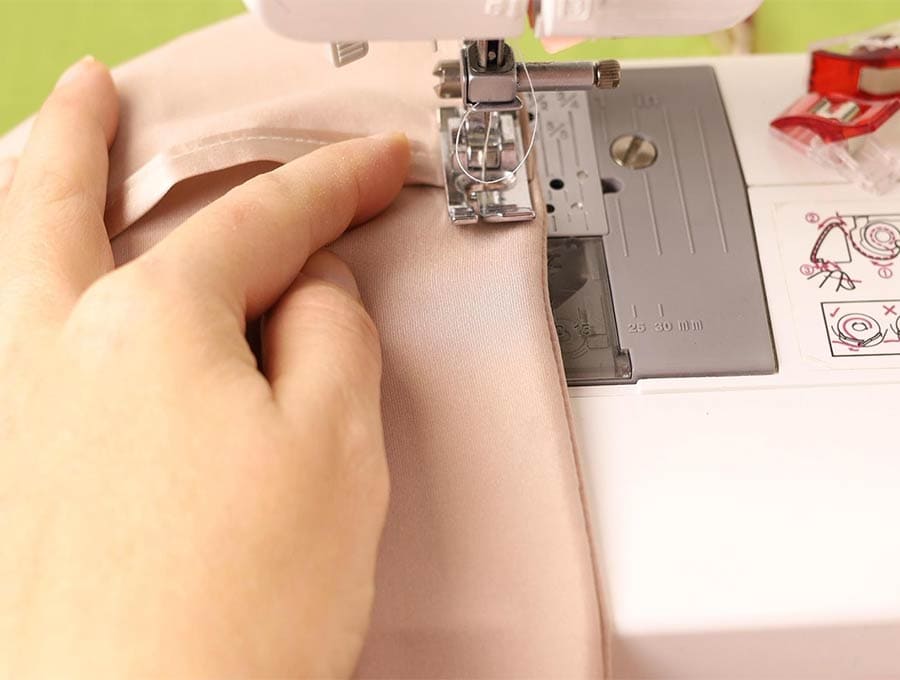
STEP 9:
Stitch right around the two (or three) edges of the pillowcase, 3/8 inch (1 cm) back tacking at the start and finish. This will enclose the raw edges within the French seam.
STEP 10:
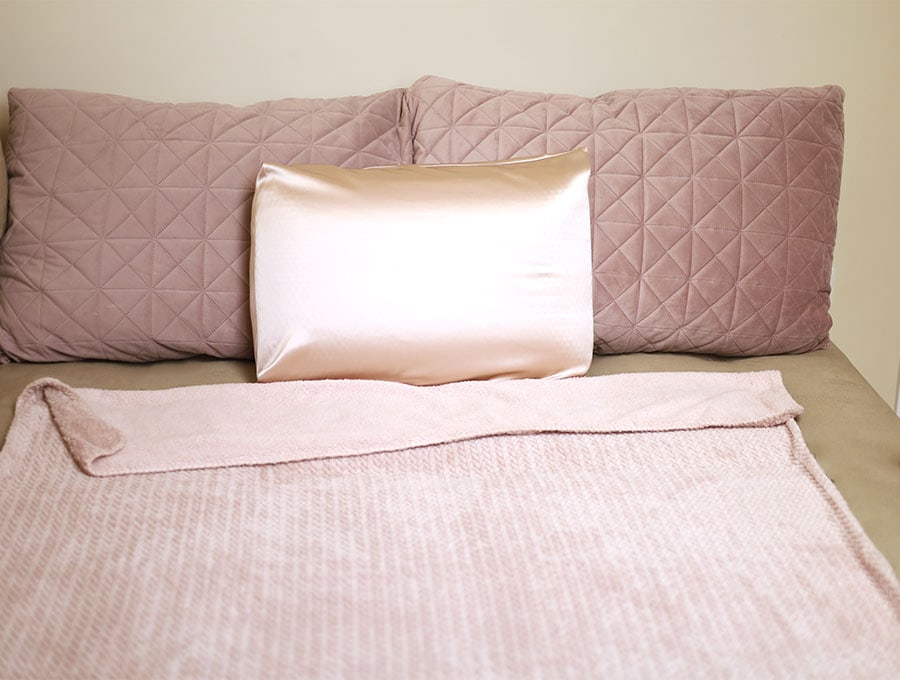
When you have finished, turn the pillowcase the right way out and trim off any excess threads, then place your pillow inside, tucking the end of the pillow into the flap, so it does not slide out of the pillowcase.
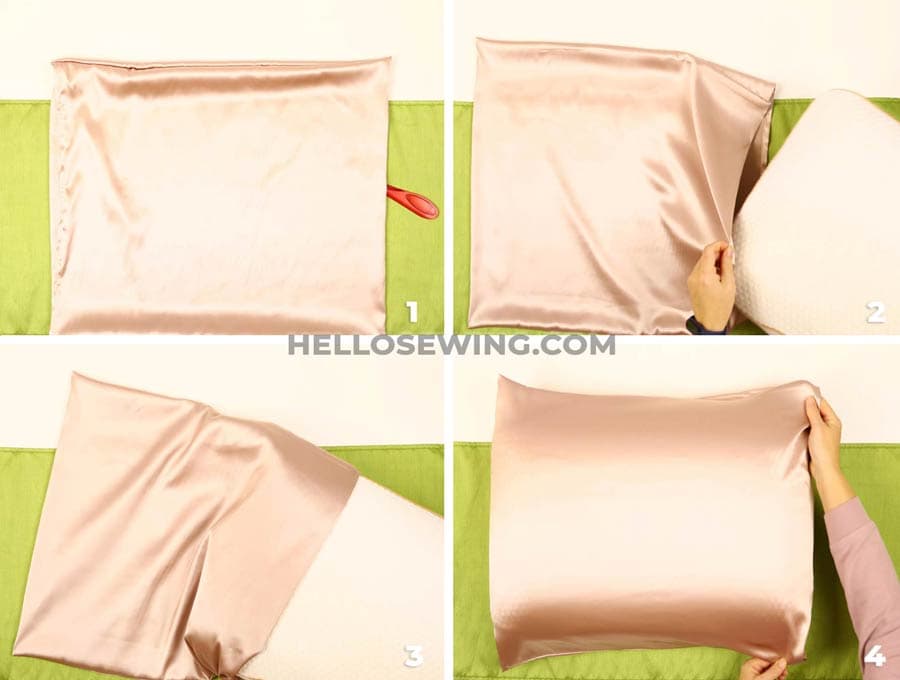
There you have it – your satin or silk pillowcase is ready to offer you a good night’s sleep. You will awaken with a softer skin and hair that isn’t tangled. These pillowcases make wonderful gifts that you can make for a fraction of the cost you buy. Make one today and test it out.
Silk or satin pillow case FAQs and tips:
Q: Can I make the pillowcase without the French Seam?
A: You certainly can but you would need a serger (overlocker) in order to get a neat finish.
Follow steps 1 to 4 to create the pillowcase. Then clip along three edges with the right side facing inwards. Fold the extra flap back with the right side outwards lying on top of the wrong side of the main pillowcase and stitch around the pillowcase with a 1/2 inch (1.25 cm) seam allowance back tacking at the start and finish. Lift the presser foot when you come to the corners, leaving the needle in the fabric before swinging the fabric round, depressing the presser foot and continuing, for a neat 90-degree corner.
After this use the serger (overlocker) for the edges of the seams to neaten them, clip any loose threads and turn the pillowcase right way out and it’s ready to use.
Q: Can I make the pillowcase by folding over a wider piece of fabric?
A: You certainly can. The minimum width of the fabric you need is 44 inches (112 cm), because you fold it over along the length of the pillowcase for the most efficient use of fabric. I will go back and add a step by step tutorial how to do this soon.
The real silk or satin pillowcase is a winner. Besides having a luxurious smoothness that makes you feel like a movie star these pillowcases also have beauty benefits in that they do not sap moisture from your skin when you sleep, your hair is not tangled when you wake, and you tend to have a better night’s sleep. Our step-by-step tutorial is super quick to follow either through the visuals or text. You can make the pillowcase in various sizes to suit the bed – from standard to queen and king. There’s even a 2-yard body pillow. These silk or satin pillowcases make a luxury gift for discerning friends.
Do you like this? Pin for later:
Wanna be friends? Click HERE and follow me on Pinterest
RELATED:
If you want to make a luxury gift set – add a scrunchie and a sleep mask
How to make a scrunchie – 6 different ways
Robe patterns for everyone in the family