
DIY Tool Roll – How to Make a Tool Roll Quickly
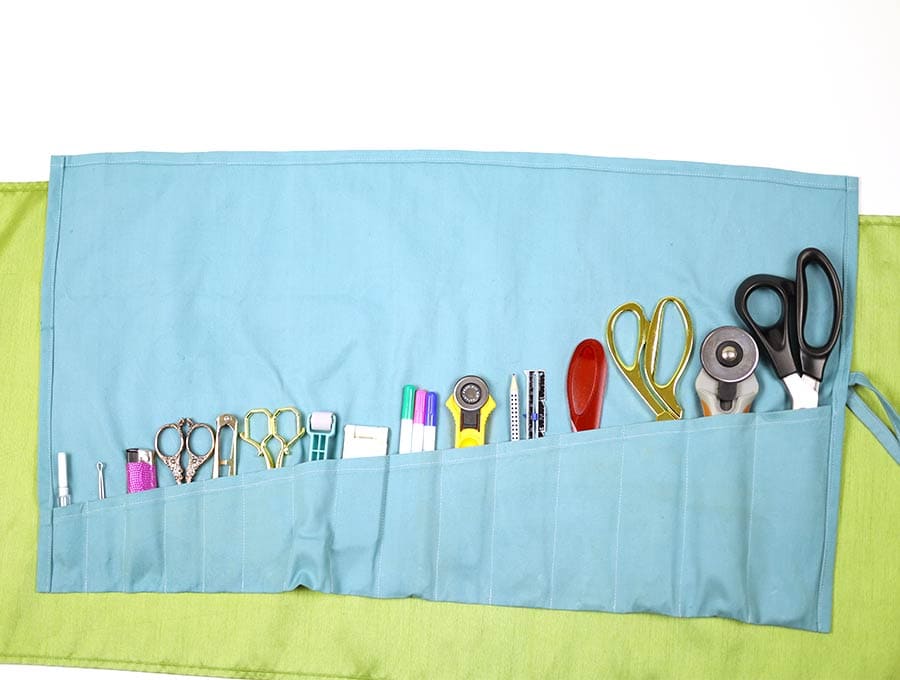
The tool roll we’ll be making today has around sixteen compartments and a protective fold down flap to protect items from bumping into each other while being transported or stored. Once you have learned to make this DIY tool roll which is specifically designed for chisels and woodworking tools, you’ll want to adapt it to other uses. You can make a DIY tool roll for an artist’s brushes, or one for someone who needs make-up brushes, lip and eye pencils and mascara wands kept neatly. For make-up materials a lighter cotton or a luxurious velvet can be used, instead of canvas and is ideal when travelling as you simply unroll and you have everything at hand instead of digging around in a cosmetic purse. You can even make one for your sewing supplies. I’ve been able to fit all these in my husband’s wrench tool roll 🙂
Below you will find my step by step written tutorial how to make a tool roll with VIDEO instructions for all the visual learners.
We occasionally link to goods offered by vendors to help the reader find relevant products. Some of the links may be affiliate meaning we earn a small commission if an item is purchased.
How to make a tool roll
Choosing material
For a tool bag you’ll need to use canvas, waxed canvas or leather. Now, leather requires that you fit a heavy-duty leather needle to your sewing machine. If using canvas, it is wise to use a heavier needle. To learn how to wax your own canvas see the FAQ section, or you can order pre-waxed canvas.
Supplies and tools
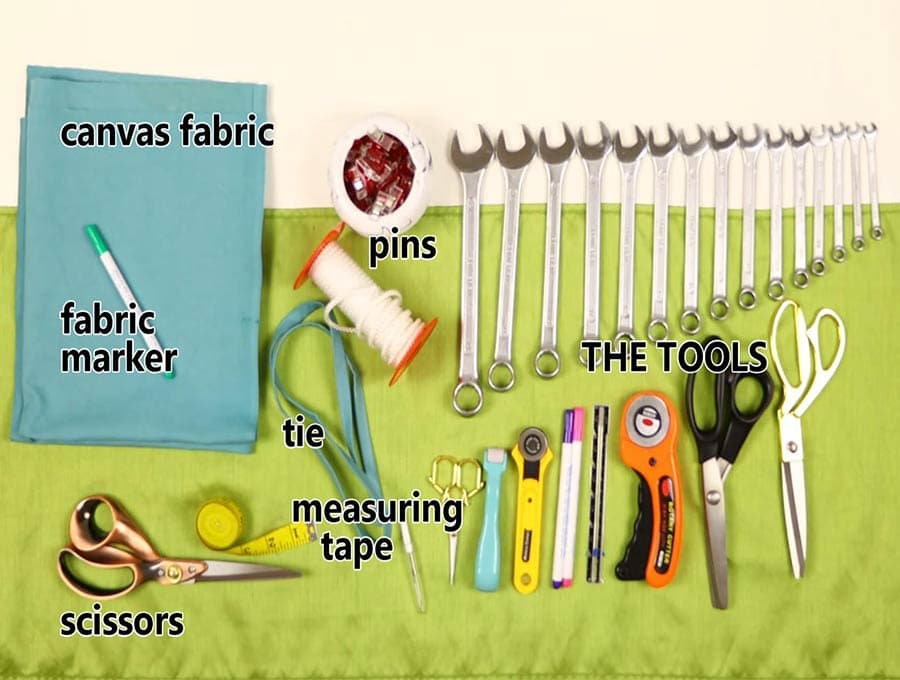
- fabric – canvas, waxed canvas or leather
- tying strap – 36″ (you can make your own out of bias tape or use thin webbing or paracord)
- matching thread
- scissors (or rotary cutter and a cutting mat)
- ruler or measuring tape
- iron and ironing board
- sewing clips or pins
Follow us for free patterns & tutorials! [easy-profiles]
How to Sew a Tool Roll
Watch the diy tool roll video first and then follow the written step by step instructions below.
Please enjoy and don’t forget to Like and SUBSCRIBE over on YouTube to be kept up to date with new videos as they come out.
Tool Roll VIDEO TUTORIAL
DIY Tool Roll INSTRUCTIONS:
STEP 1:
If you are making a square tool roll just measure your canvas fabric and mark it carefully so it measures 36 inches x 24 inches.
STEP 2:
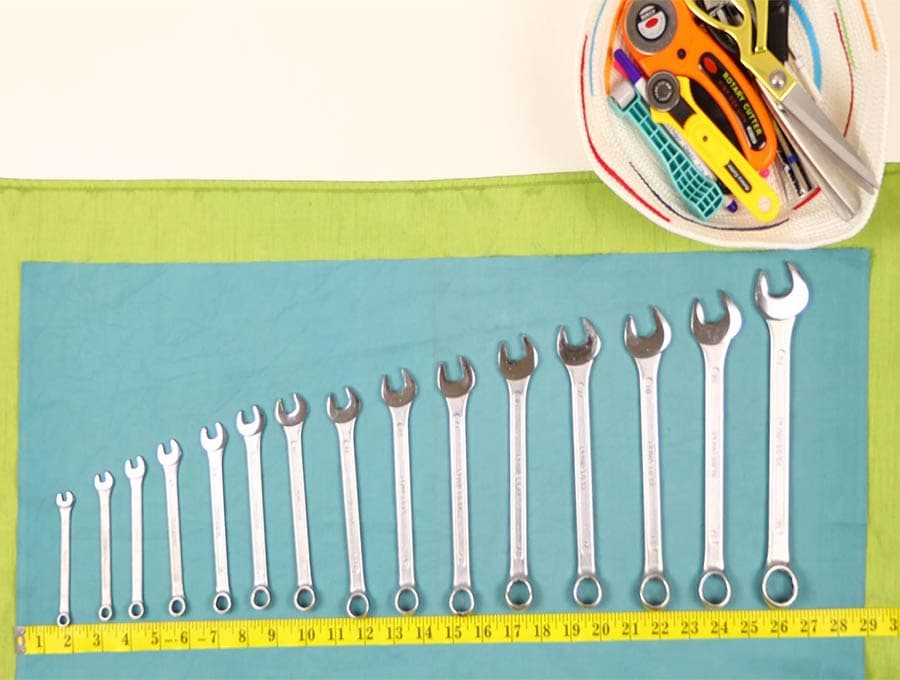
Arrange the tools on the top of the fabric leaving 1.5″ (4cm) space on each of the short sides
WIDTH OF FABRIC = arranged tools + 3″ (8cm)
LENGTH OF FABRIC = Length of largest tool + 9″ (23cm)
- If you want a pocket at an angle proceed with step 3.
- If you don’t want slanted pocket proceed with step 4
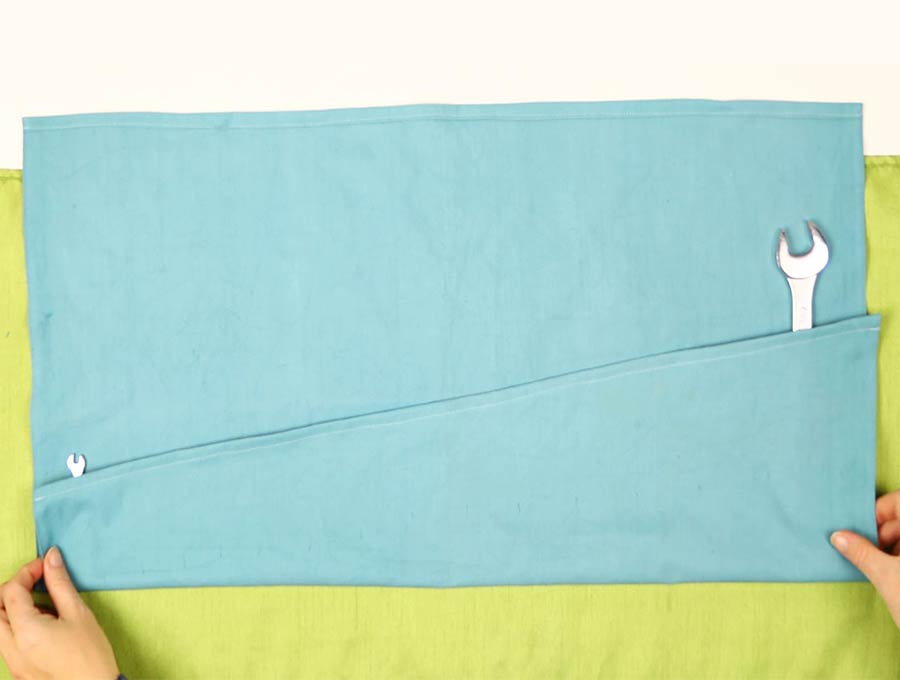
STEP 3: (optional) If you want a slanted pocket
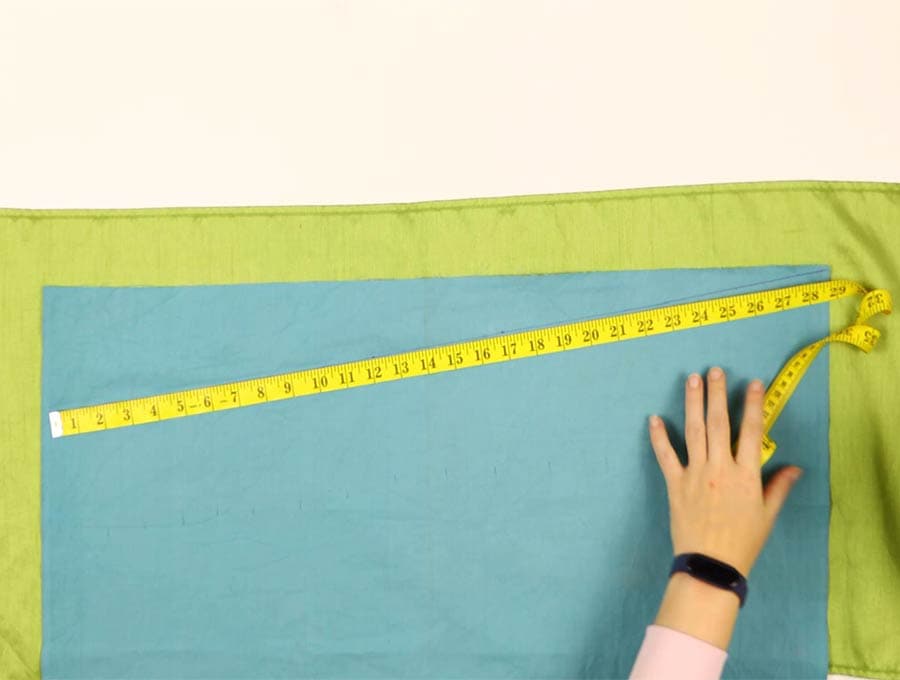
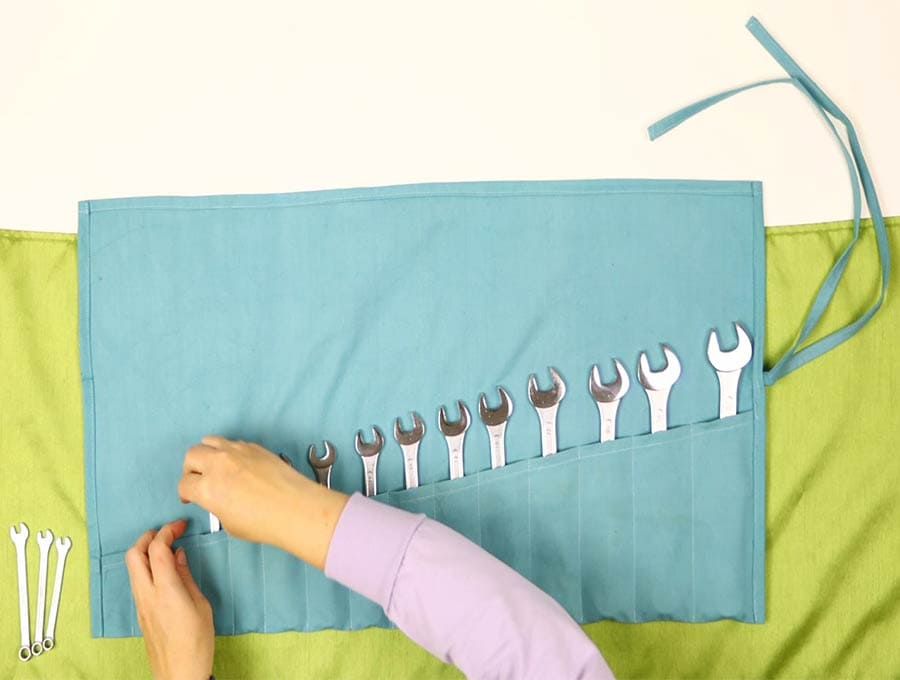
Decide how much you want the tools to protrude from the pocket. To see the numbers on the wrenches, measure the distance between numbers of the largest and the smallest tool. Mine is 4″(10cm)
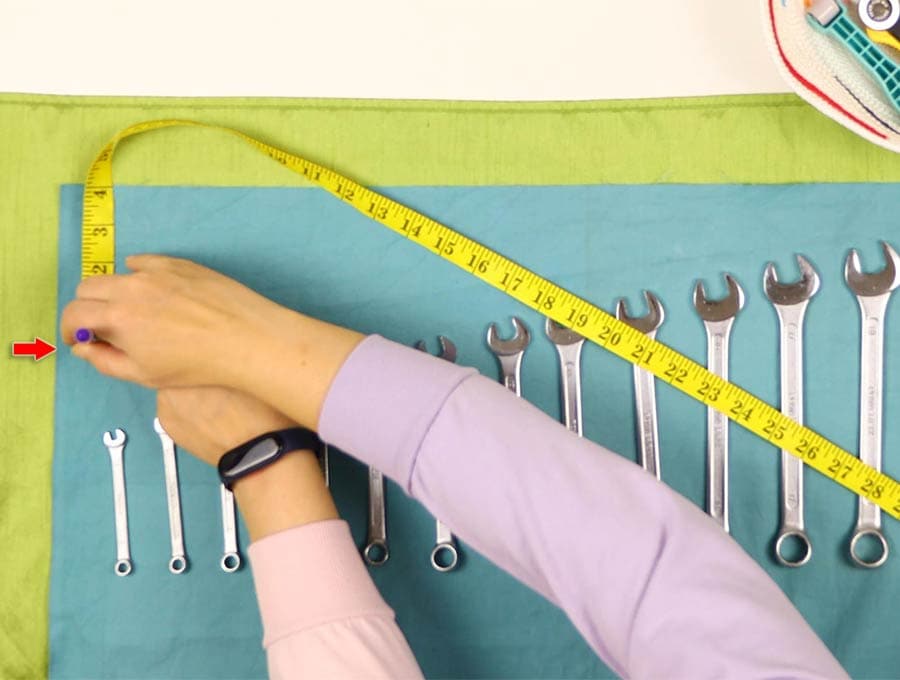
Mark the 4″ (10cm) from the bottom of fabric

Fold the fabric diagonally from the mark to 0 on the other end and make a crease.
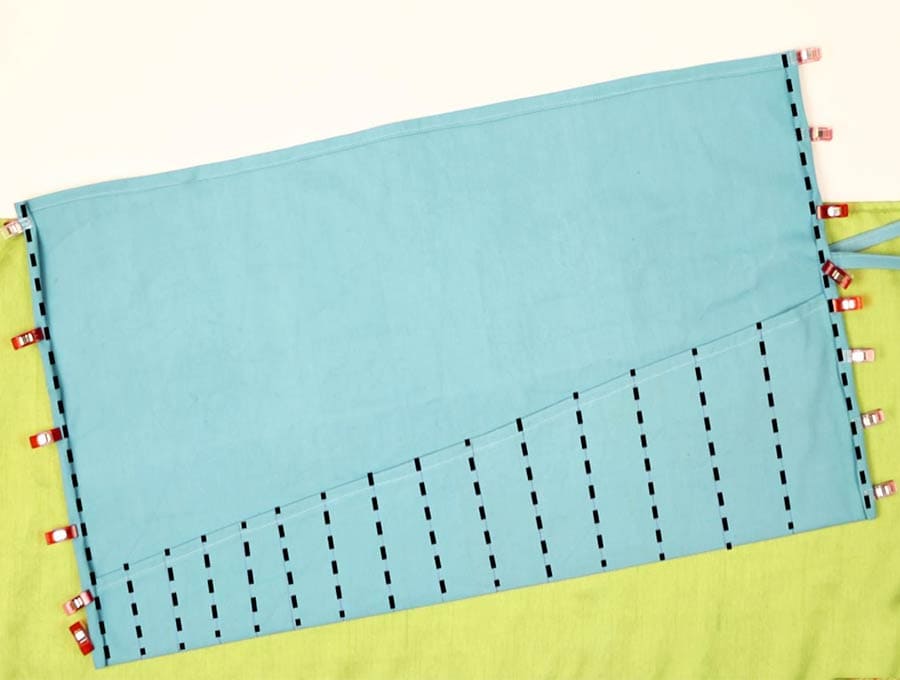
Draw a line along the diagonal crease
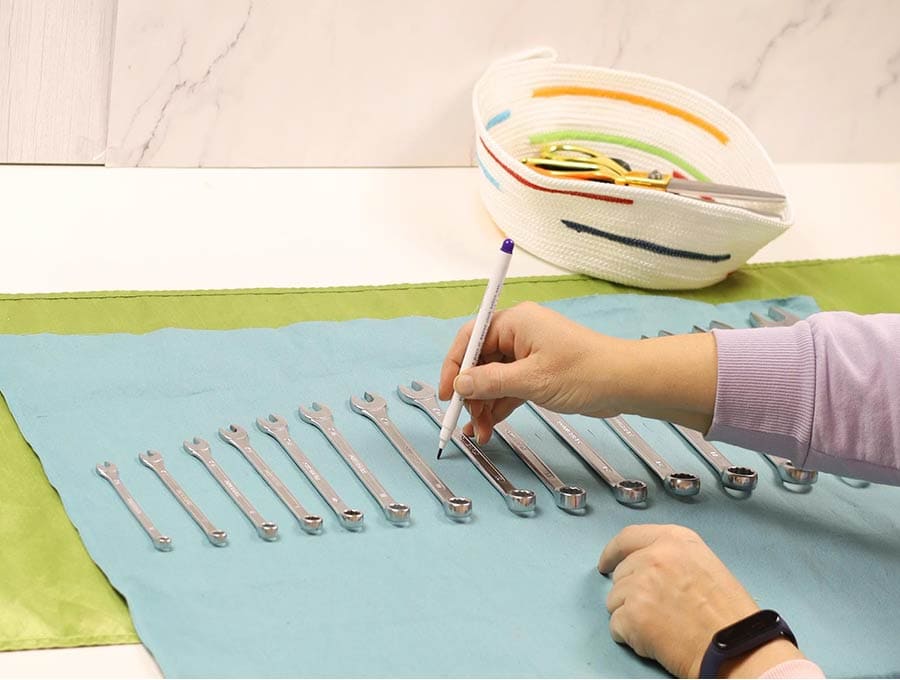
Mark the stitching line between the tools
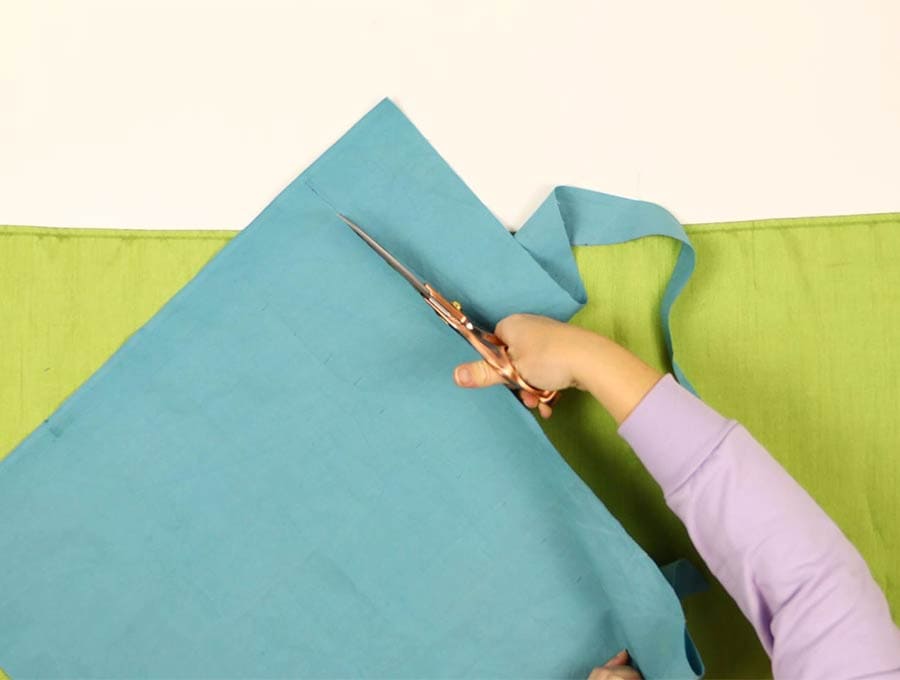
Cut the excess fabric
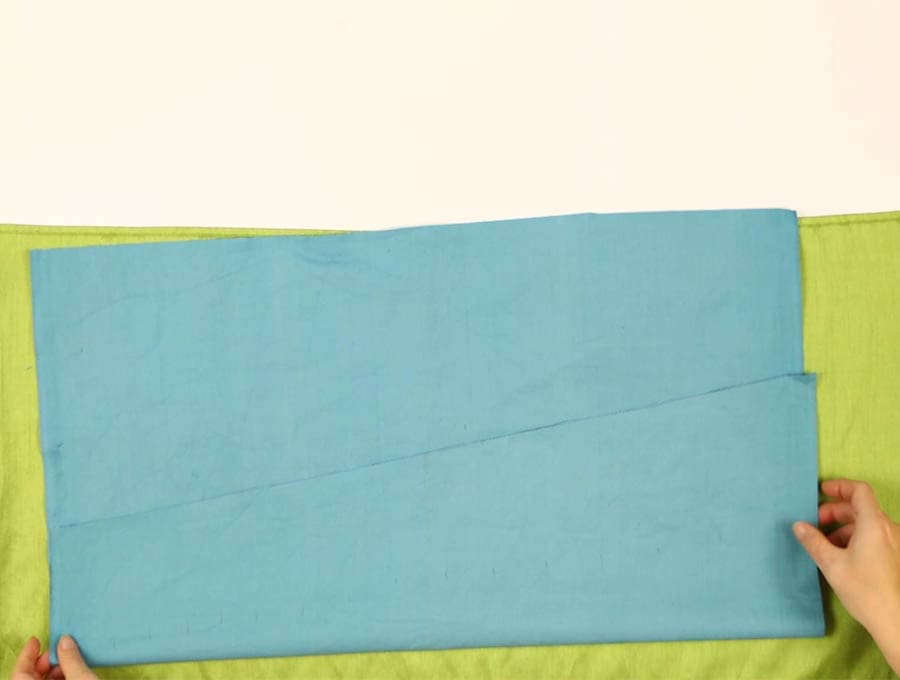
Fold the fabric with the pocket on top
Step 4:
Place the fabric wrong side up at the work table. Along the long edge on both sides turn over a 3/8 inch (1 cm) fold, then another 3/8 inch (1 cm) to create a seam at the top and bottom of your DIY tool roll. If using waxed fabric as you fold the fabric will stay in place. If using unwaxed fabric you can press the folds in with an iron and then clip the seams in place.
Step 5:
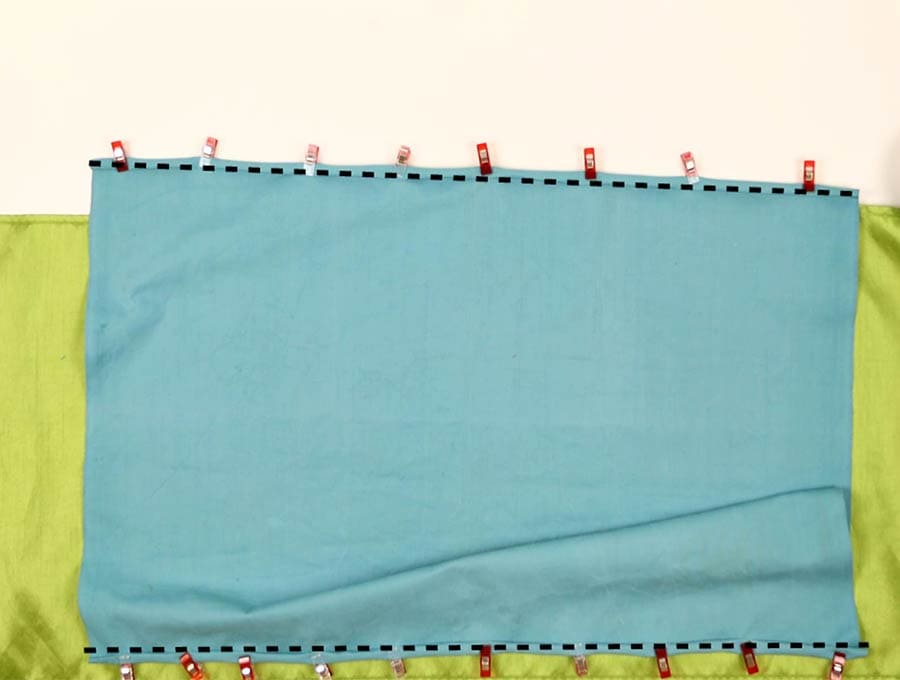
Stitch your seams along the top and bottom 1/8 inch (3mm) from the edge of the fold, backtacking at the start and finish.
Step 6:
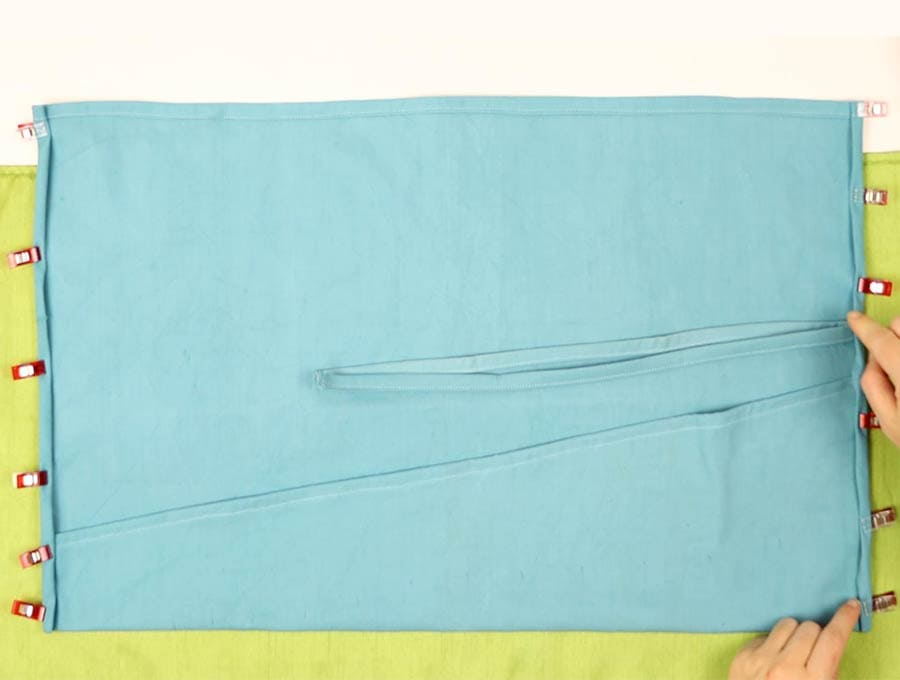
Place fabric right side down on the table top. Fold up one of the long edges by 6 inches (or by whatever size you measured earlier) and clip in place on either side of the fabric. This will form the pocket to hold the tools. If using unwaxed fabric iron in the fold, if the fabric is waxed use your fingers to create the fold line.
Step 7:
To create the side hems for the DIY tool roll, fold over the short edges 3/8 inch (1 cm) twice and clip in place.
Step 8:
Grab you tie piece to secure the tool roll and if it is a long 36-inch (91 cm) piece fold in half and slip it either at the back of the tool roll or under the right-hand side seam, making sure it is securely tucked in about 1 inch (2.5 cm), from the top of the pocket, then clip. If you are using two shorter pieces place the ends side-by-side under the seam and proceed as above. You don’t want the tie right at the top as there will be too many layers to sew through, and you need space for the top to fold down over the pocket to protect the tools.
Step 9:
Stitch the side seams carefully. You may have to hand-turn the machine through the thicker parts of the seams to avoid breaking a needle. Remember to backtack at the start and finish. Also go over the area where you inserted the tie end twice to ensure they are firmly in place
Step 10:
It is now time to create the pockets for each tool to fit in. Lay out your tools and mark between them. A 2-inch (5 cm) pocket is average but some may be narrower or wider, so you’ll need to adjust so they slide in comfortably. Measure equal distance along the top of the pocket and the bottom, making marks and ensuring the lines you draw with an erasable fabric marker are straight.
Step 11:
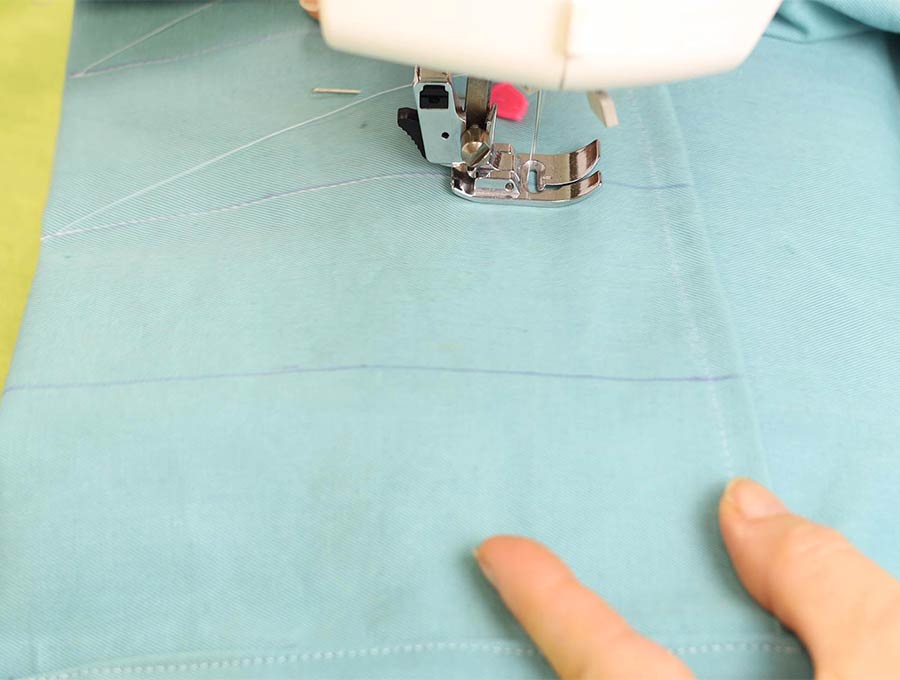
Once the lines are marked stitch, starting from the bottom fold, backtacking at the start and finish and remembering to go just a stitch or two over the top seam of the pocket to ensure each tool compartment is firmly secured.
Step 12:
All that remains to do now, after clipping off the loose threads, is to fold down the top flap so it meets the pocket. When the DIY tool roll has the tools placed in it, each blade will then be protected when you roll it up and secure with the tie piece.
Hit the like and subscribe buttons if you enjoyed this tutorial and would like to have more delivered to your inbox. Don’t miss out on any of our projects, and do feel free to share this project with your crafty friends. This DIY tool roll makes the perfect gift for a craftsman, or someone who enjoys woodcarving, ceramics or lino-printing as a hobby. To hold makeup items, it can be created in a luxurious velvet fabric, or cotton for an artist’s brushes but you will need to make the tool roll with a deeper pocket to hold the brushes securely and the compartments will be narrower.
DIY tool Roll FAQs and tips:
Q: How do I wax canvas?
A: To do this you will need paraffin wax, scrap fabric or cardboard you will throw away to protect your worktop, an inexpensive paintbrush you can toss afterwards , a double boiler or a can to melt the wax in and a stove or candle wax warmer. A hairdryer.
- Put a piece of cardboard or scrap cloth on your worktop.
- Iron your canvas if it has creases in it.
- Place the canvas over the cardboard or scrap fabric
- Melt the wax in a double boiler on the stove – make sure it doesn’t get too hot.
- Use your paintbrush to paint the melted wax onto the canvas.
- Use the hairdryer on the fabric if parts dry before the wax has fully penetrated the fabric, so it spreads evenly through the fabric.
Our DIY Tool Roll tutorial with easy to follow visuals and step-by-step instructions will leave you with a feeling of achievement one you have finished sewing the item. What I love about this item is that it is so versatile. It can be made in a waxed canvas to repel dust, or a plain canvas for a craftsman’s chisels. It can also make a great holder for different size spanners for a car enthusiastic. The DIY tool roll can also be made in a luxury fabric and used as a make-up holder, in canvas for an artist’s brushes, or in a bright cotton print for picnic cutlery. It makes a perfect gift because you can adapt it to the interests of the recipient.
Do you like this? Pin for later:
Wanna be friends? Click HERE and follow me on Pinterest
RELATED:
Thoughtful and useful gifts for men
DIY laptop sleeve in ANY size
Remote control caddy for an armchair or sofa