
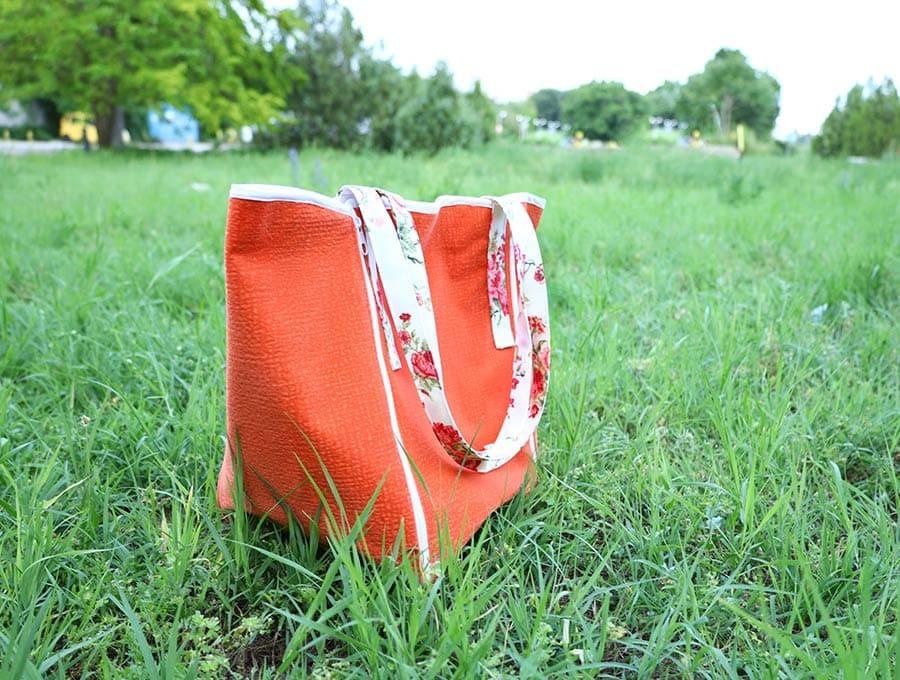
2-in-1 Bag Transformable into a Tablecloth – Great for Picnic or Beach
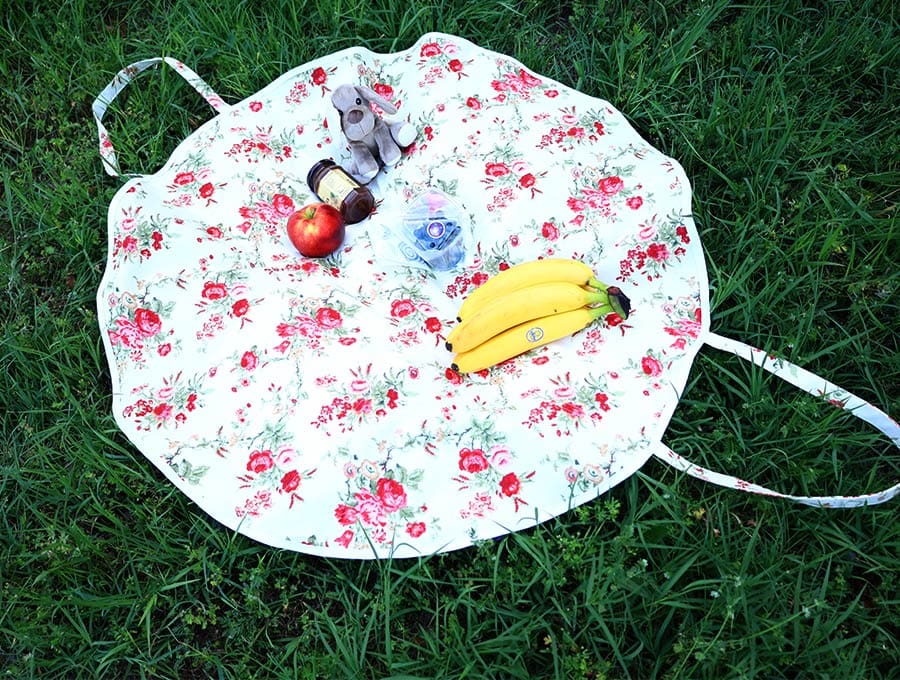
The tablecloth bag is so chic, plus it cuts down on packing extra items. When you go on a picnic all you do is open the zips and the bag instantly converts to a circular tablecloth. How easy. Display your picnic goodies and you’re set for some fun times. The visuals and step-by-step instructions make this bag so simple – even the method for inserting the zips is a breeze. Choose contrasting colors in plains or prints for the bag and the tablecloth. I can see this in a bright red and white check, a floral print or bold geometric prints for the cloth with a plain outer bag – or maybe you want to go pattered for the bag and plain for the tablecloth. The combinations are endless.
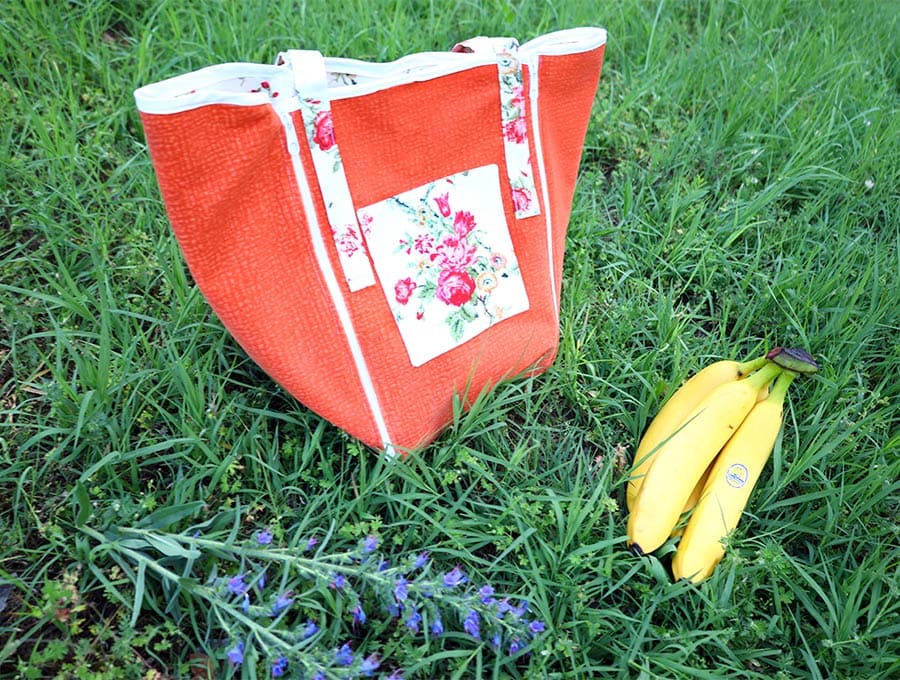
Having something that has a double function is just perfect. This bag unzips to form a tablecloth for picnics or impromptu sundowner snacks. Put down the bag, unzip the sides and you are ready! Once you get into making these they may become hot seller because everyone needs an easy picnic tablecloth bag that folds away to nothing and can be washed, rather than a picnic basket that needs all those grooves dusted and wiped and takes up storage space. The sewing instructions and visuals show just how easy it is to insert the zips using the flat sew method.
Below you will find my step by step written tutorial with VIDEO instructions for all the visual learners.
We occasionally link to goods offered by vendors to help the reader find relevant products. Some of the links may be affiliate meaning we earn a small commission if an item is purchased.
Table of Contents
- 1 How to make a Transformable Picnic Bag
- 2 Supplies and tools
- 3 How to Sew a Picnic Tablecloth Bag
- 3.1 Picnic Tablecloth bag VIDEO TUTORIAL
- 3.2 INSTRUCTIONS:
- 3.3 STEP 1: Cut the fabrics
- 3.4 Step 2: Prepare the pocket piece
- 3.5 Step 3: Stitch the pocket piece
- 3.6 Step 4: Trim the corners
- 3.7 Step 5: Turn around and topstitch
- 3.8 Step 6: Pin pocket to the side
- 3.9 Step 7: Topstitch the pocket to the side of the bag
- 3.10 Step 8: Press the side pieces
- 3.11 Step 9: attach the side to the base
- 3.12 Step 10: Attach the second side
- 3.13 Step 11: Open out
- 3.14 Step 12: Attach the other two sides
- 3.15 Step 13: Sew the sides to the base
- 3.16 Step 14: Press the seams
- 3.17 Step 15: Make the L shape
- 3.18 Step 16: Prepare the square tablecloth piece
- 3.19 Step 17: Pin L shape to the fabric square
- 3.20 Step 18: Measure and mark the circular tablecloth piece
- 3.21 Step 19: Cut the tablecloth piece
- 3.22 Step 20: Layer
- 3.23 Step 21: Pin the zippers
- 3.24 Step 22: Sew the zippers
- 3.25 Step 23. Attach the bias binding
- 3.26 Step 24: Prepare the handles
- 3.27 Step 25: Fold and press the handles
- 3.28 Step 26: Topstitch the handles
- 3.29 Step 27: Attach one of the handles to the bag
- 3.30 Step 28: Attach the second handle to the bag
- 3.31 Step 29: Final stitching
How to make a Transformable Picnic Bag
Supplies and tools
- outer fabric – cotton canvas – 1/2 yard
- lining fabric (patterned) – cotton canvas 1 1/2 yards
- 3.5 yards of double fold bias tape (make your own bias binding 1/2” wide or use store bought)
- 4 zippers – 16″ / 40 cm long
- scissors
- matching thread
- scissors (or rotary cutter and a cutting mat)
- ruler or measuring tape
- iron and ironing board
- sewing clips or pins
Follow us for free patterns & tutorials! [easy-profiles]
How to Sew a Picnic Tablecloth Bag
Watch the diy transformable picnic tablecloth bag video first and then follow the written step by step instructions below.
Please enjoy and don’t forget to Like and SUBSCRIBE over on YouTube to be kept up to date with new videos as they come out.
Picnic Tablecloth bag VIDEO TUTORIAL
INSTRUCTIONS:
STEP 1: Cut the fabrics
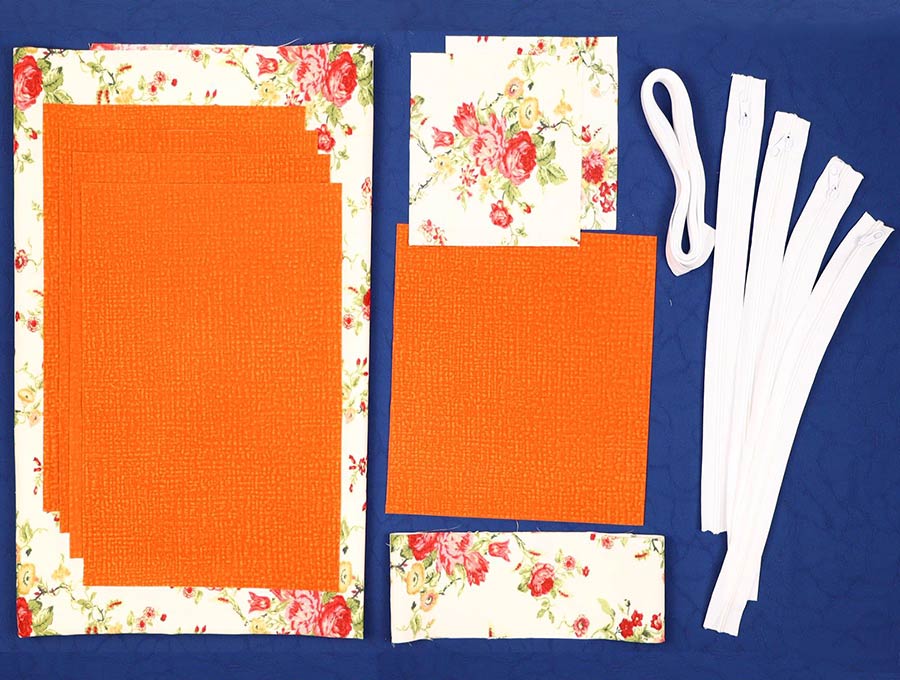
From the outer fabric cut:
(4) rectangles 14 x 10″ (35 x 25cm) – these will be the sides of the bag
(1) rectangle 10 x 10″ (25 x 25cm) for the bottom of the bag
From the lining fabric cut:
(1) square 40 x 40″ (1 m x 1m) for the circular tablecloth piece
(2) rectangles 38 x 4″ (96 x 10 cm) for the straps
(2) rectangles 6 x 6″ (15 x 15cm) for the pocket
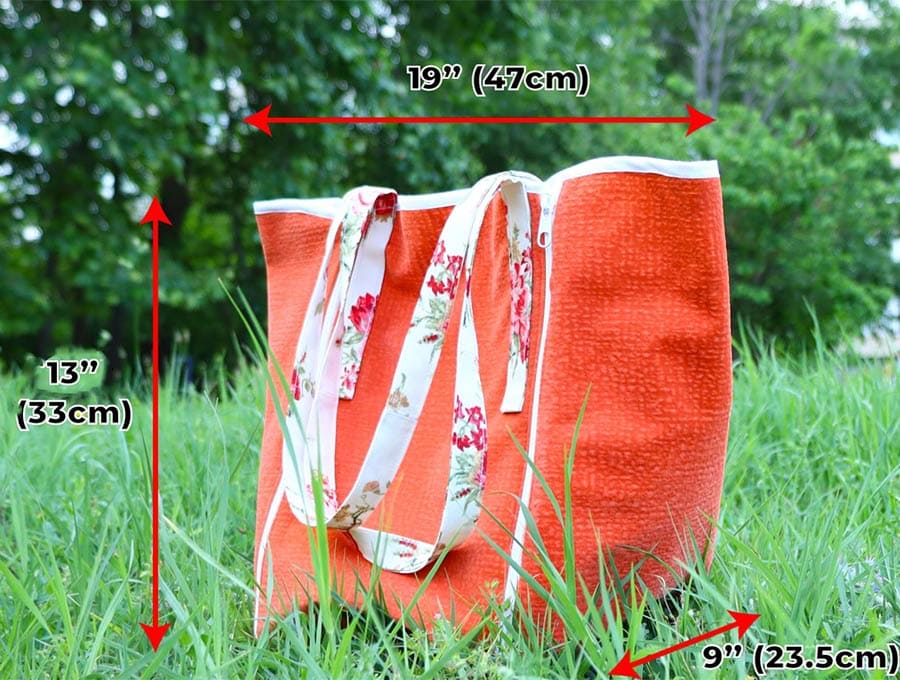
The finished dimensions of the transformable bag are
W x H x D: 19″ x 13″ x 9″ (47 x 33 x 23.5cm)
Step 2: Prepare the pocket piece
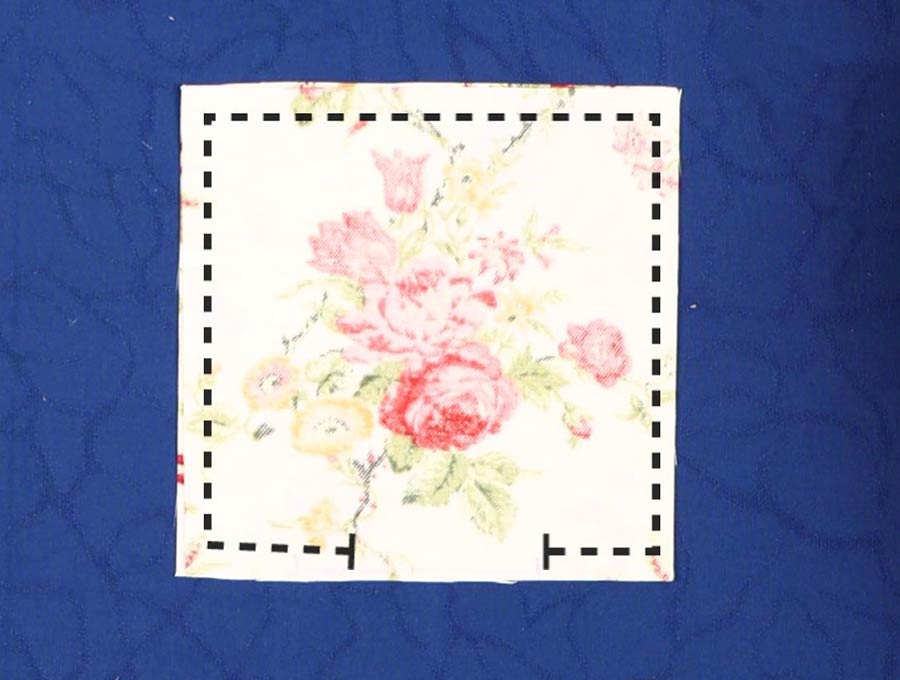
Take the 2 small 6 inch (15 cm) squares – these form the lined pocket on the bag and should be in the same material as the circular tablecloth piece. Place right side to right side, line up the squares and pin together.
Step 3: Stitch the pocket piece
Stitch around the edge ¼ inch (0.6 cm) from the edge, leaving a gap on one side that is 2 inches (5 cm). Back tack at the start and finish.
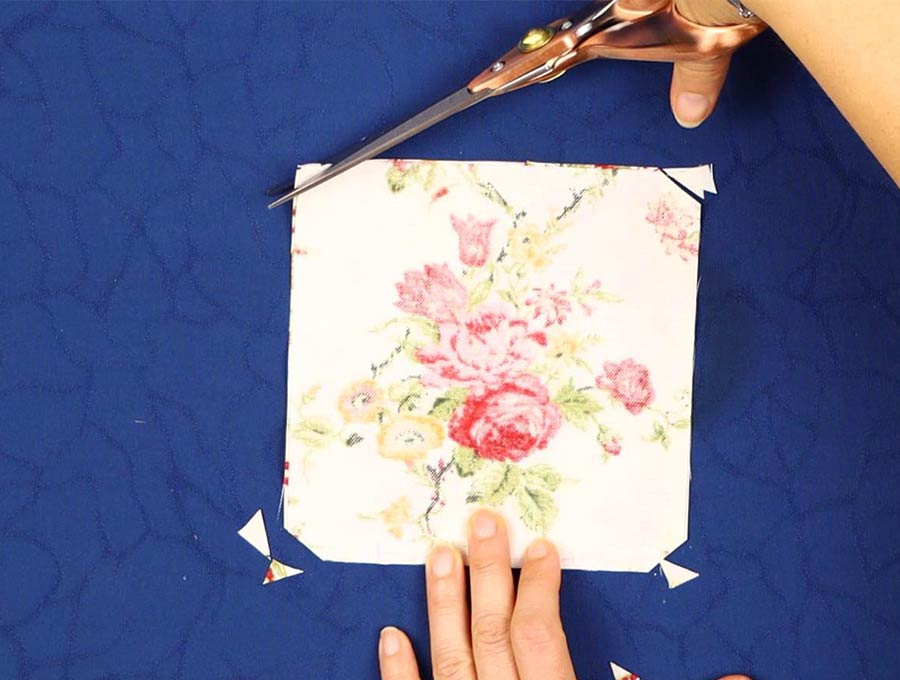
Step 4: Trim the corners
Cut off the corners, but not too close to the stitch line, to reduce bulk when you turn the square right way out.
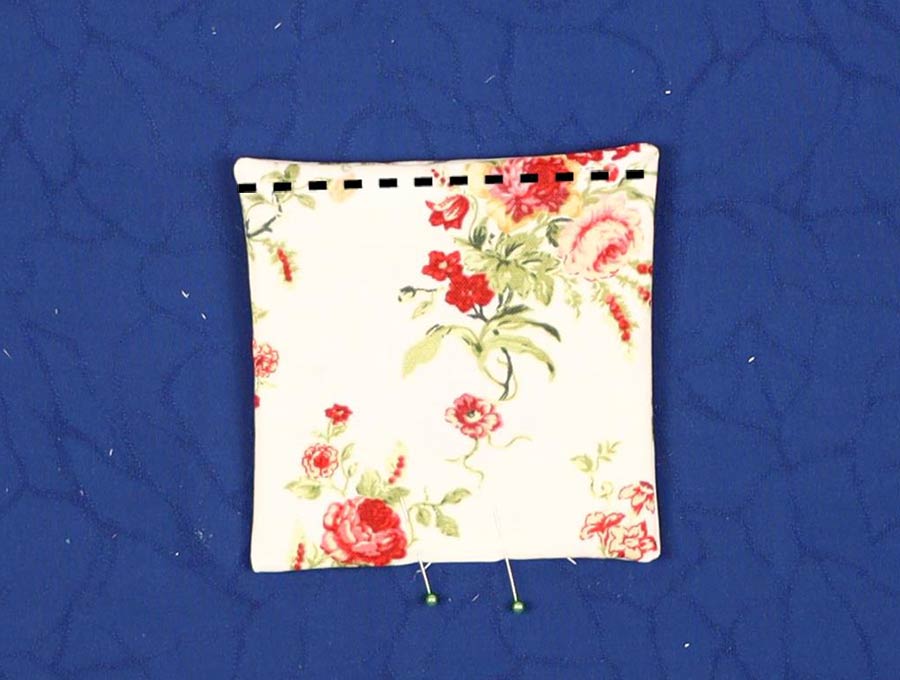
Step 5: Turn around and topstitch
Turn the pocket square the right way out, poking out the corners with a knitting needle or chop stick so they lie flat. Turn in the raw edges of the gap, in line with the rest of the fabric and press so you have a neat square. Topstitch the top of the pocket opposite of the gap.
You will sew the edges of the gap closed when you place the pocket on the side of the bag.
Step 6: Pin pocket to the side
Take one piece of the outer rectangular fabric for the sides, lay it right side up on your worktop and place the pocket piece 4″( 10 cm) down from the top on the long side, with the unstitched side where the gap is, at the bottom. Make sure the pocket is equidistant from the sides. Adjust if necessary, so the pocket is centrally placed between the sides. It’s the easiest to fold the pocket piece in half and do the same with the outer fabric and make a crease, then line up the creases. Pin in place.
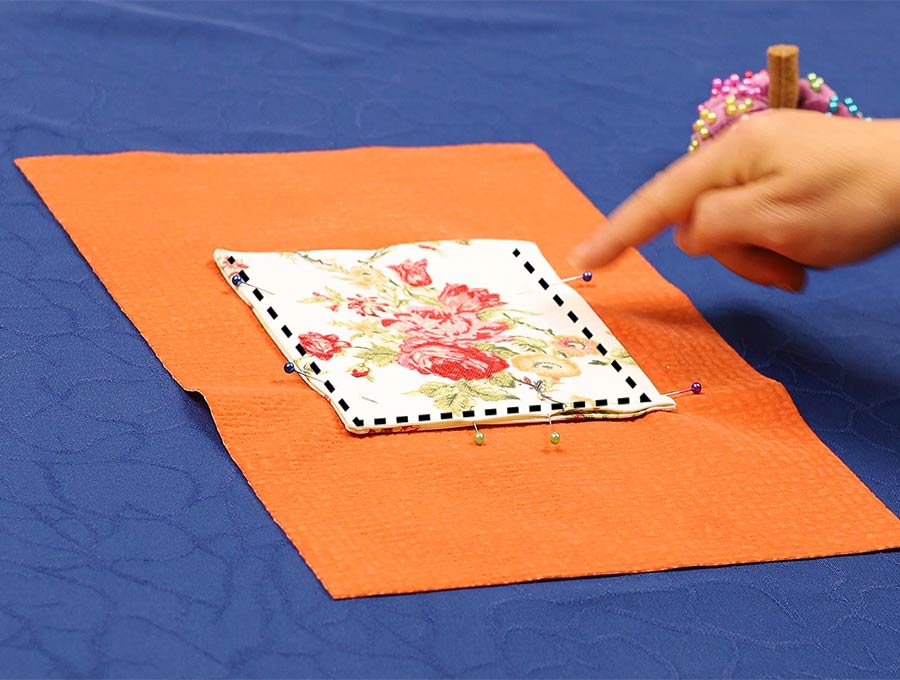
Step 7: Topstitch the pocket to the side of the bag
Stitch the pocket to the rectangular piece, starting at the top left-hand pocket corner, back tacking at the start and finish. Stitch as close to the edge as possible around 0.2 inches (0.5 cm).
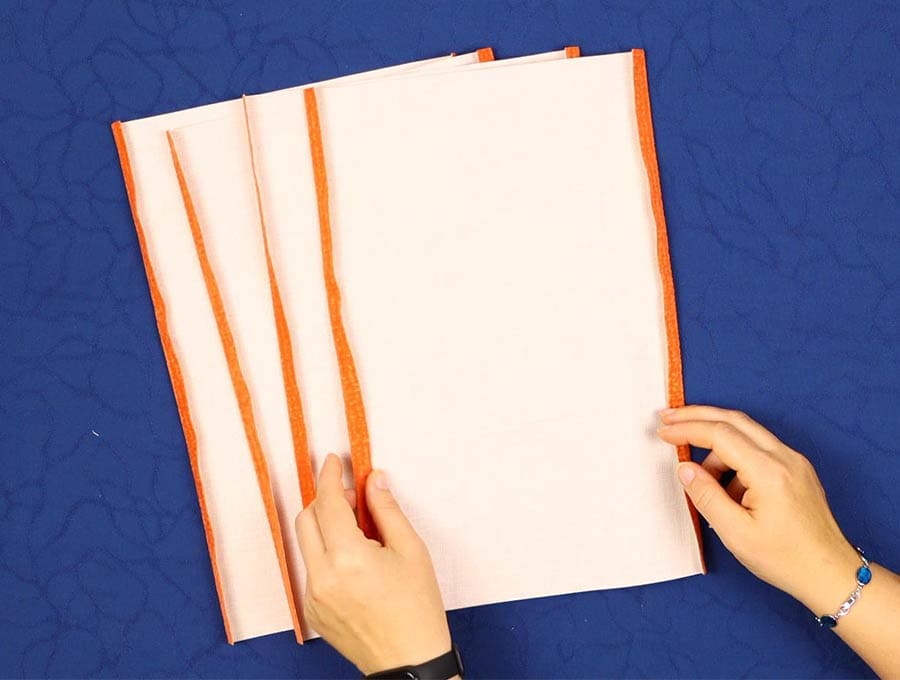
Step 8: Press the side pieces
Fold the raw edges of the long sides of the side pieces towards the wrong side about 3/8″ (1 cm) and press. Do this for all four side pieces and place aside.
Step 9: attach the side to the base
Now lay out the 10-inch (25 cm) square, which will be the base of the bag, right side up on your worktop. Over it place the base of the side with the pocket, right side to right side. Pin the base and one side of the square together and stitch, starting and finishing at the fold 3/8 inch (1cm) in from the edge.
These extra bits not stitched will be folded over for later when the zips go in.
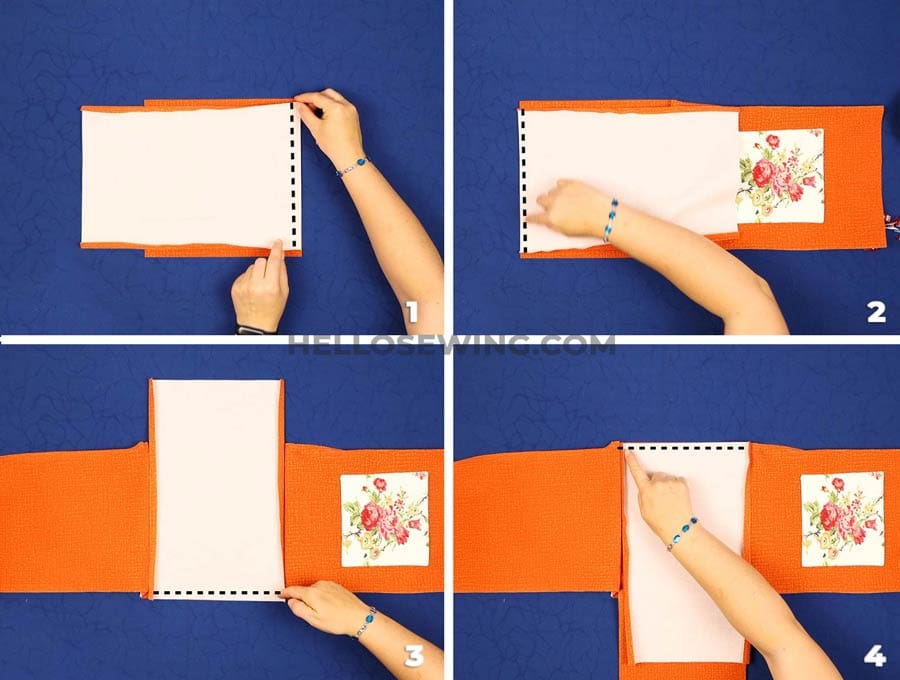
Step 10: Attach the second side
On the opposite side to where you added the pocket side to the base now add another rectangular side matching up the 10-inch (25 cm) sides, pinning and stitching in place, and leaving 3/8 inch (1cm) unstitched at each end. Remember to back tack at the start and finish of all seams.
Step 11: Open out
Open out the long rectangular piece and place right side up on your worktop after pressing the two seams open.
Step 12: Attach the other two sides
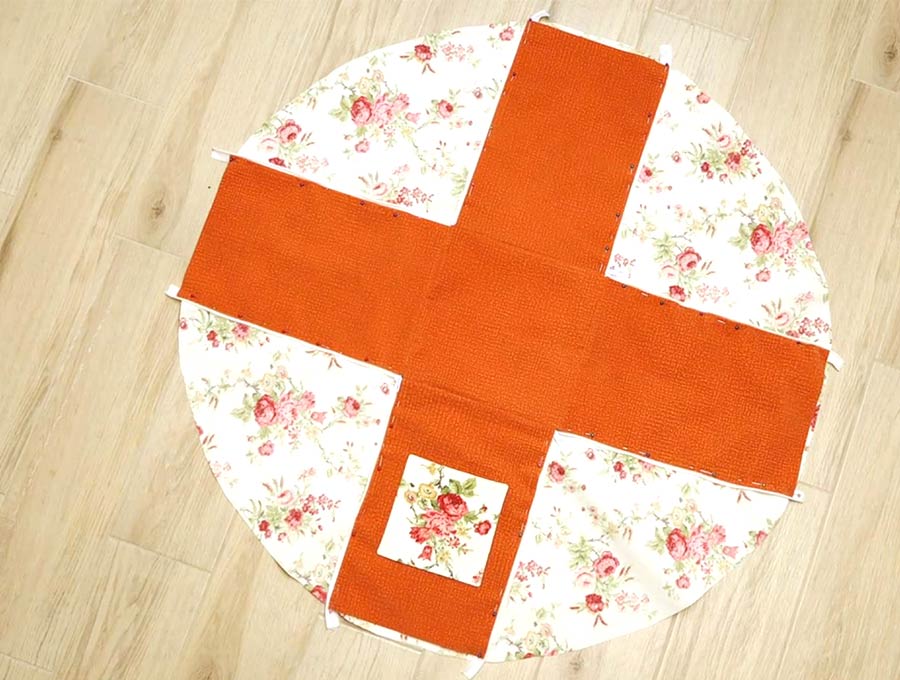
Take the next two rectangular pieces for the bag and place them on either side of the base sides that have nothing stitched to them, right side up, so you have a cross shape. Flip over the rectangles so the right sides face the right side of the stitched piece, line up the 10-inch (25 cm) edges at the base and pin in place.

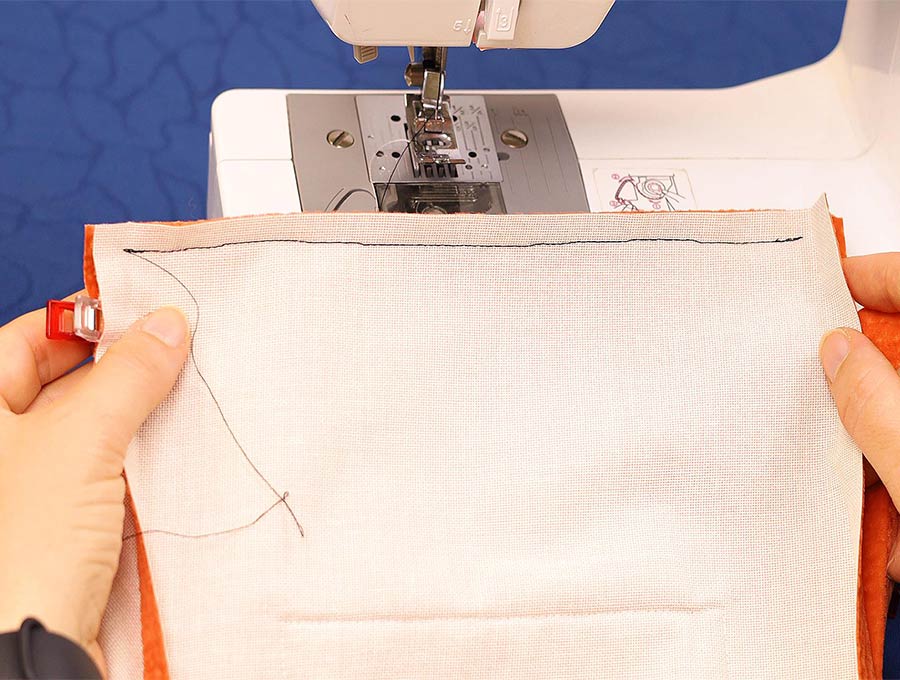
Step 13: Sew the sides to the base
Stitch the pieces to the bag base starting and finishing at the fold which is 3/8 inch (1 cm) in from the edge.
Step 14: Press the seams
When you have the cross shape of the bag stitched then open out the piece, place it wrong side up on your ironing board and press open the seams you stitched in step 13. Also press again each 3/8 inch (1cm) section back on itself on all four sides of the bag.
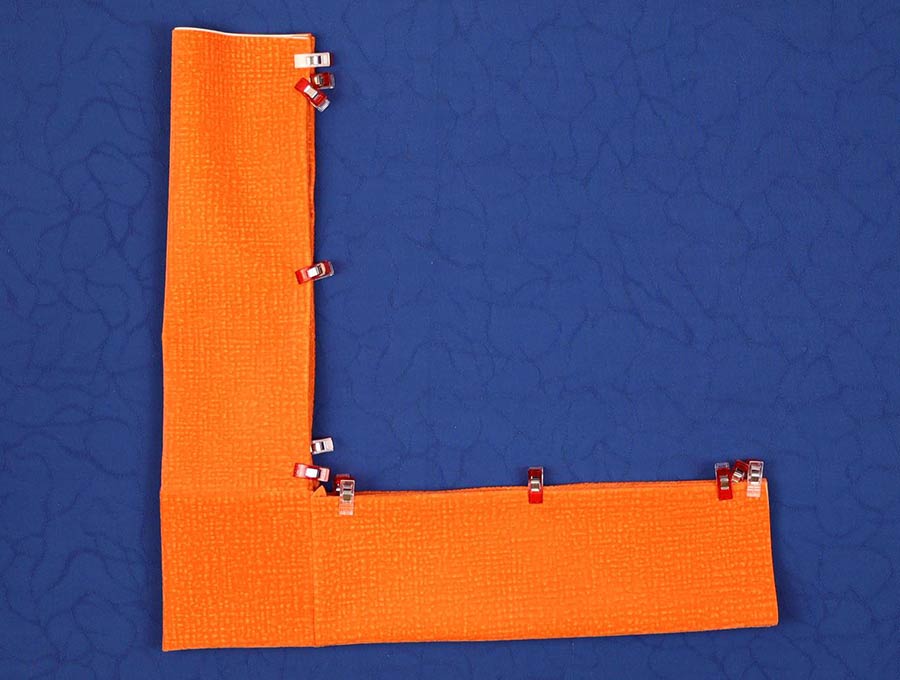
Step 15: Make the L shape
Fold over the cross shape so the material is in half along the length, then fold again so you end up with an L shape. Pin in place
Step 16: Prepare the square tablecloth piece
Place your lining fabric square 40 x 40 inches (1m x 1m) – the same type as the pocket piece – on the worktop and fold over in half, top to bottom, then in half again left to right.
Step 17: Pin L shape to the fabric square
Place the L shape over the folded edges of the fabric square and make sure the arms of the L line up with the two folded edges. Clip in place while you measure further.
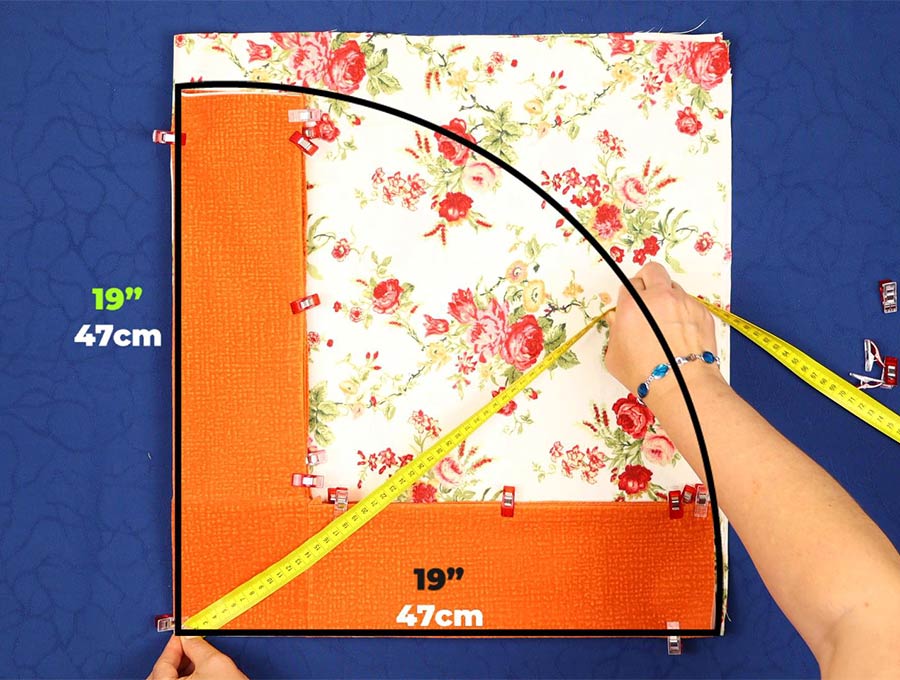
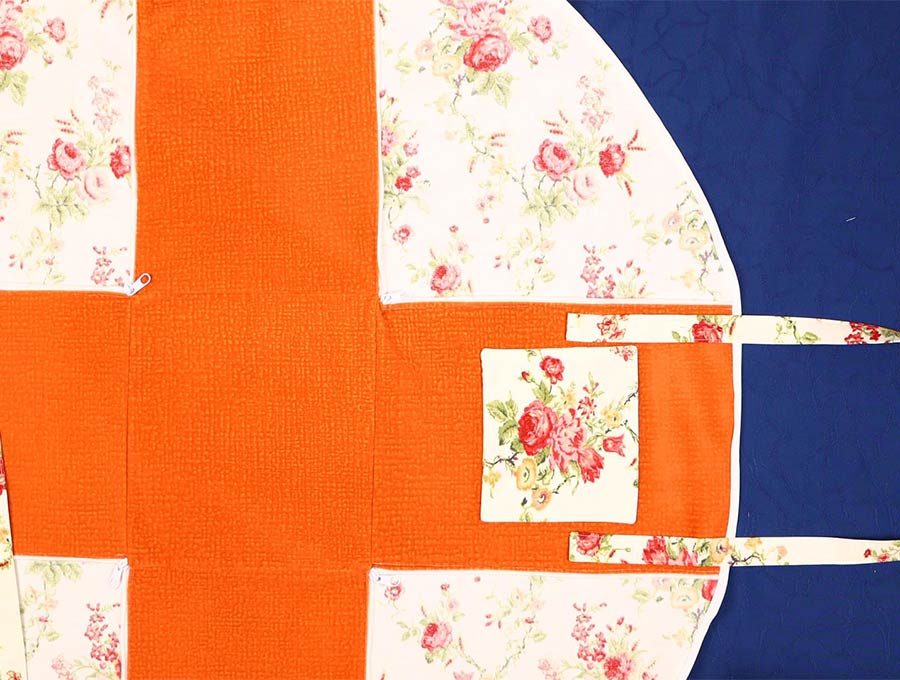
Step 18: Measure and mark the circular tablecloth piece
Measure 18.5 inches (47 cm) from the corner point when the arms of the L meet down the one side of the fabric. The mark should be just in line with the end of the arms of the L shape, then pivot the tape measure around with the end fixed at the corner point, marking off at 4-inch (approximately 10 cm) intervals around the edge in an arc and pinning the 4 layers together as you measure, until you meet up with the other arm of the L. Join the points in a nice smooth arc with your fabric pen as this curve will create the circular table cloth shape.
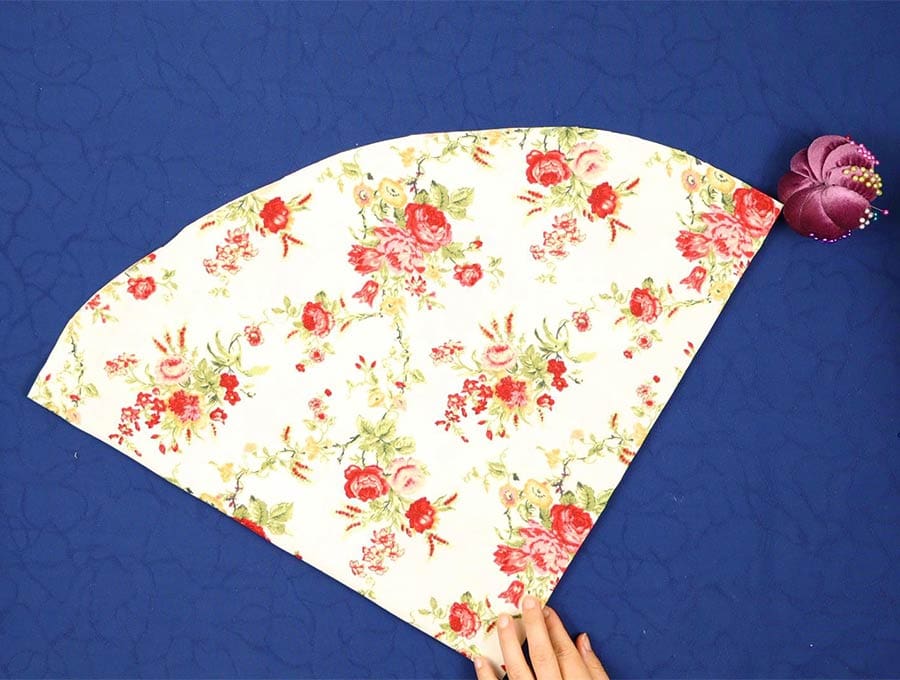
Step 19: Cut the tablecloth piece
Trim the excess fabric outside the line of the curve, remove the pins on the edges and the clips holding the folded L shaped bag piece. Flip open the circular piece and place right side down on the worktop.
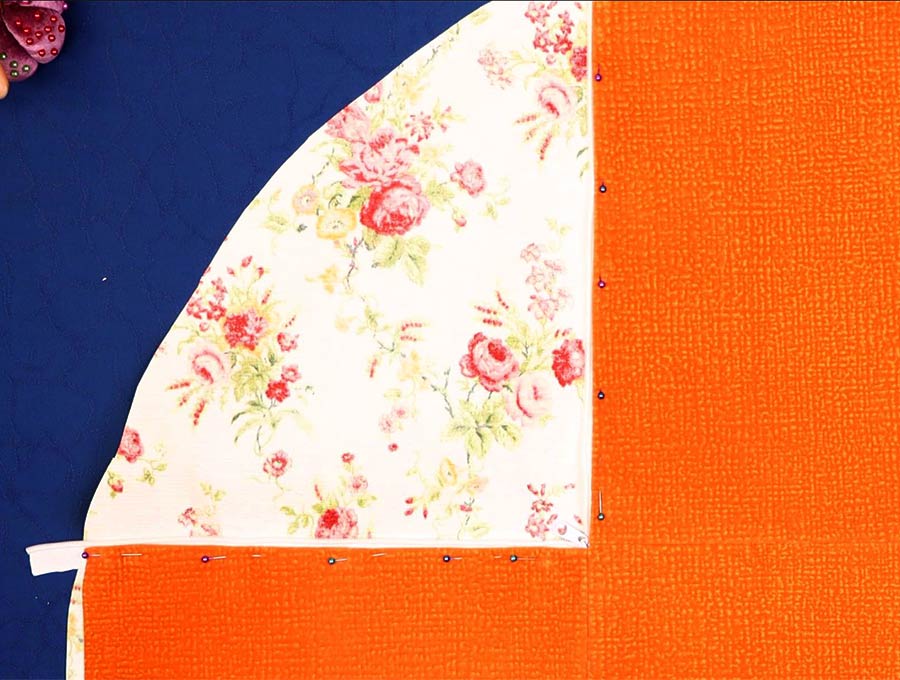
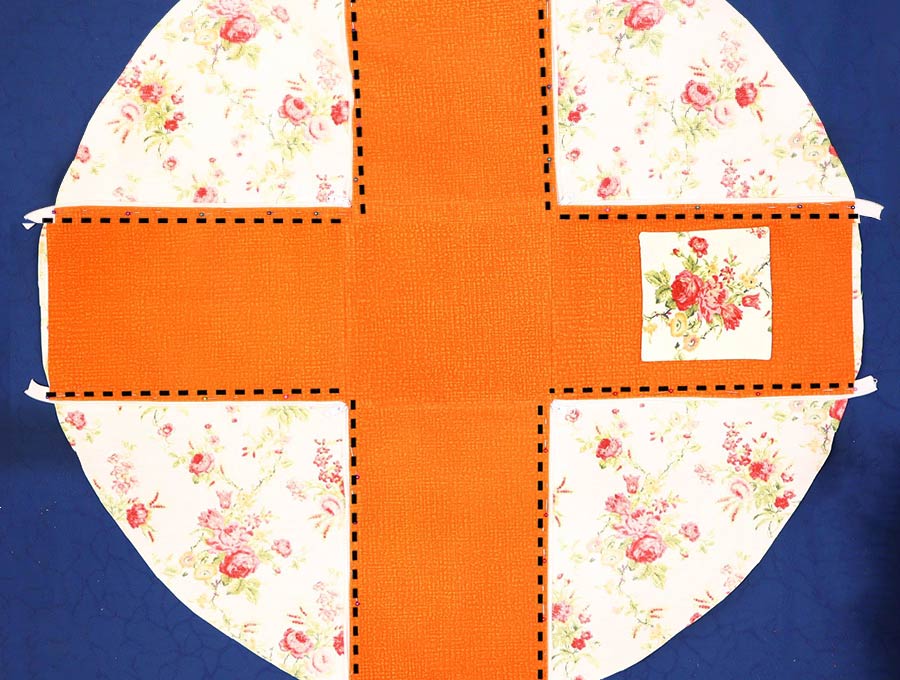
Step 20: Layer
Take the outer bag piece you stitched and open it out then place with the right-side up on the circular piece, ensuring the ends of the arms of the cross shape are lined up neatly with the edges of the cloth.
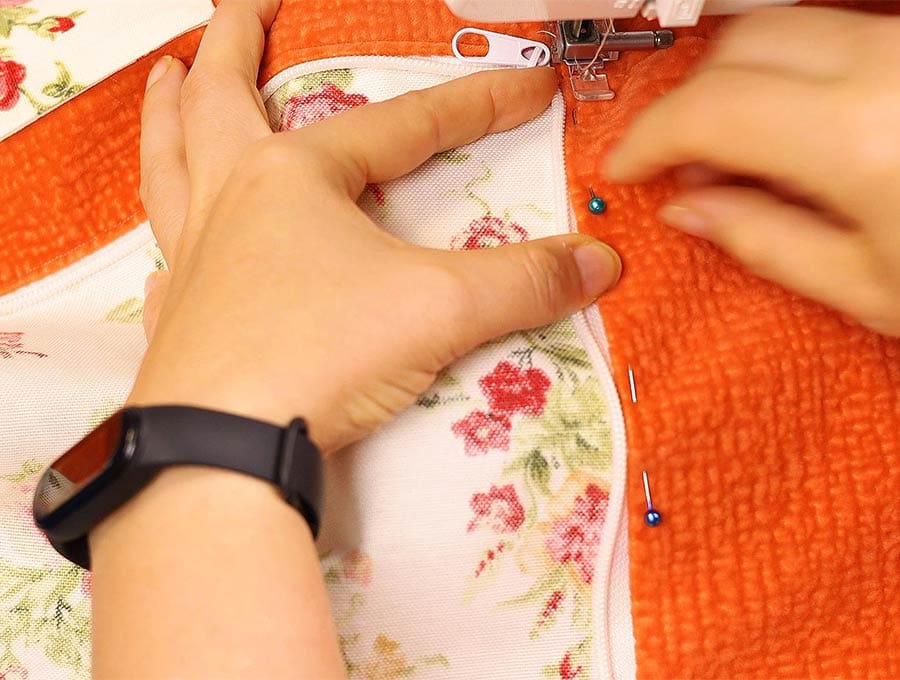
Step 21: Pin the zippers
Pin the ends of the four arms of the cross in place. Now take the first zip and open it up, then slip the bottom end of the zip ¾ inch (2cm) under the corner where two arms extend and pin along the edge you already turned and pressed under 3/8 inch (1 cm), making sure the teeth of the zip extend just beyond the edge of the material. Repeat with the other side of the zip.
Repeat the process with the other three zips so you have 4 zips pinned in place along the arms of the cross.
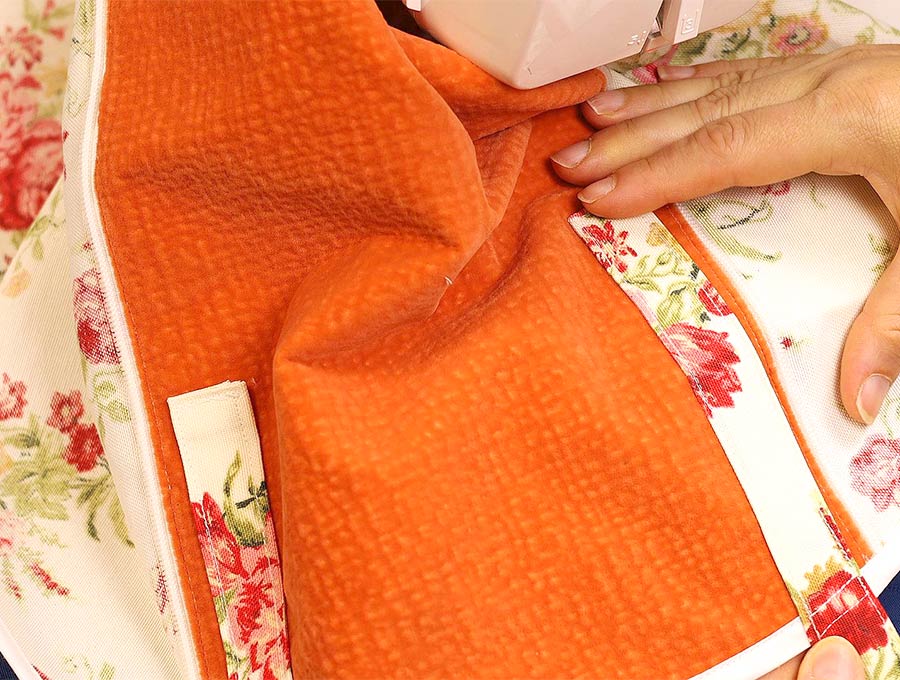
Step 22: Sew the zippers
Stitch the zippers in place, starting at the open ends, working down the length of the zip, and back tacking at start and finish.
Then work down the next side of the same zip. Do not try and turn at the base of the zip.
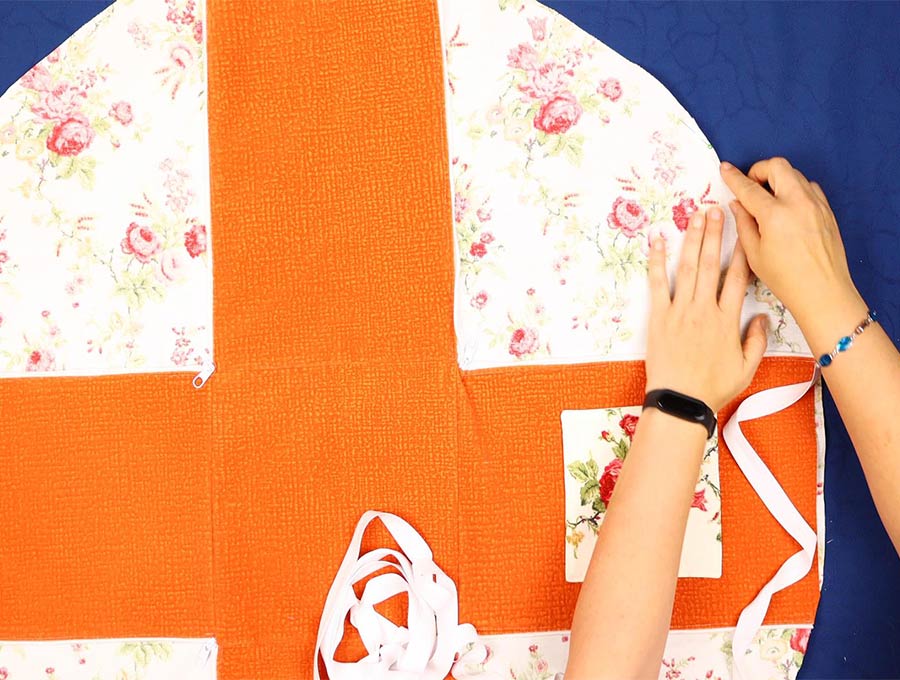
Step 23. Attach the bias binding
Once all the zippers are sewn in place you stitch the bias binding along the edge.
Fold the bias tape in half and slip it over the edge. You may want to pin it in place ahead of where you stitch, but don’t try pin the whole cloth as the bias will ease over the curved area – so rather jut insert a pin or two ahead of where you are going to sew. To finish off the bias cut 1 inch (2.5 cm) beyond the raw edge where the bias started. Fold over 3/8 inch (1 cm) and carefully line up the folded edge with the raw edge where the bias tape started. This will cover the raw bias start point. Back tack to finish.
Step 24: Prepare the handles
It is now time to create the handles. You need two pieces of the contrasting fabric that the tablecloth part was made from, which will be 38 x 4 inches (96 x 10 cm). The first step in this process is to fold over the short ends of both pieces of fabric and press in a 3/8 inch (1cm) fold.
Step 25: Fold and press the handles
Fold the handles along the whole length, lining up the edges and press. Open out the central fold and then fold the sides in towards the central point pressing as you go. You will end up with a handle that is 1 inch (2.5 cm) wide.
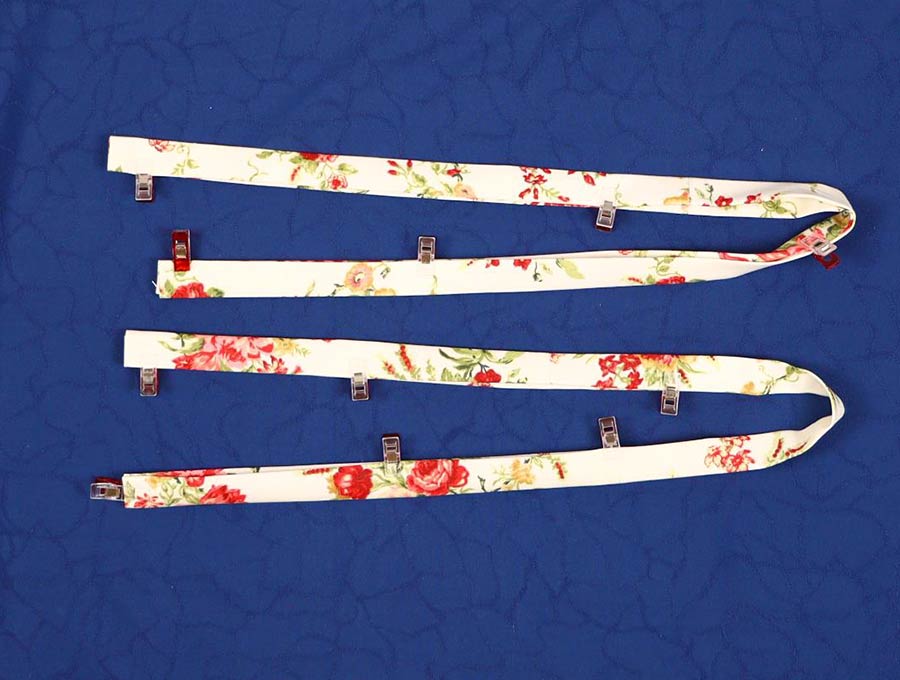
Step 26: Topstitch the handles
Stitch all along the long and short edges of the handles 0.1 inches (0.3cm) from the edge.
Step 27: Attach one of the handles to the bag
Place the first handle end next to the pocket and in line with the middle of the pocket and snug against the sides of the pocket, pinning to the top edge of the bag, then place the other end of the handle on the other side of the pocket and pin. Make sure the handle is not twisted.
Step 28: Attach the second handle to the bag
To place the other handle on the side that doesn’t have the pocket measure how far your handles were from each side of the edge where the zip is on the pocket side you have just pinned. The distance should be 0.6 inches (1.5 cm) in from each side. Place the ends of the handles 6.5 inches (16 cm) down from the top edge. Pin in place.
Step 29: Final stitching
Stitch both the handles in place 0.1 inches (0.3cm) from the edges, sewing in a rectangle to make sure the ends and sides of the handles are secure.
All that remains is to zip up the sides and turn your tablecloth into a bag.
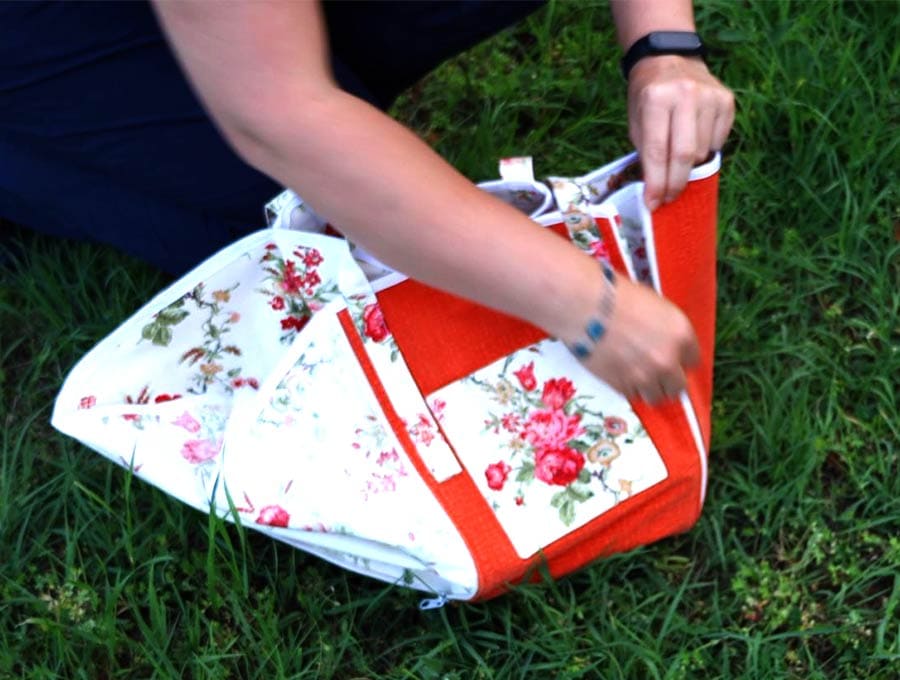
Pack it with your favorite picnic items and head off for a carefree adventure outdoors. This tablecloth bag makes a perfect summer gift. Packed with some delicious baguettes, cheese, charcuterie and a bottle of wine you’re ready for the sweet life. If you would like more easy projects delivered to your inbox then please subscribe, so you’ll never miss out on our fun and easy step-by-step tutorials, with visuals, that make sewing projects a breeze.
Do you like this? Pin for later:
Wanna be friends? Click HERE and follow me on Pinterest
RELATED:
Fabric Can Koozie – for Ice-cold Beer or Soda
Patterns for summer dresses (23+ to choose from!)