
How to Sew a Zipper Pouch Tutorial – DIY Any SIZE You Want
Zippered pouches are so versatile and useful, we can never get enough of them. Well, at least I can never get enough of them.
But they are usually ridiculously pricey or hard to find in normal sizes or fancy colors. And the ones you do find within that criteria, aren’t of high quality and tend to not last long. Which is why I stopped buying finished ones and started making them on my own. They are super easy to make actually! Even a sewing beginner could make them in a very short amount of time.
If you want to learn how to sew a zipper pouch, check out this lined zippered pouch tutorial. Follow the steps and you’ll make a DIY zippered pouch before you know it!

Below you will find my step by step written tutorial with VIDEO instructions for all the visual learners.
We occasionally link to goods offered by vendors to help the reader find relevant products. Some of the links may be affiliate meaning we earn a small commission if an item is purchased.
Table of Contents
- 1 How to Make a Zippered Pouch
- 2 Lined Zip Pouch Supplies and tools
- 3 How to Sew a Zipper Pouch
- 3.1 DIY Zipper Pouch VIDEO TUTORIAL
- 3.2 INSTRUCTIONS:
- 3.3 STEP 1: Prepare the fabrics
- 3.4 STEP 2: Align the fabrics
- 3.5 STEP 3: Sew the zipper
- 3.6 STEP 4: Align the fabrics one more time
- 3.7 STEP 5: Repeat the sewing process
- 3.8 STEP 6:Press the seams
- 3.9 STEP 7: Topstitch along the zipper
- 3.10 STEP 8: Prepare the pouch for the final sewing
- 3.11 STEP 9: Sew around the zipper pouch
- 3.12 STEP 10: Trim and turn
- 3.13 STEP 11: Sew the opening shut
How to Make a Zippered Pouch
Lined Zip Pouch Supplies and tools
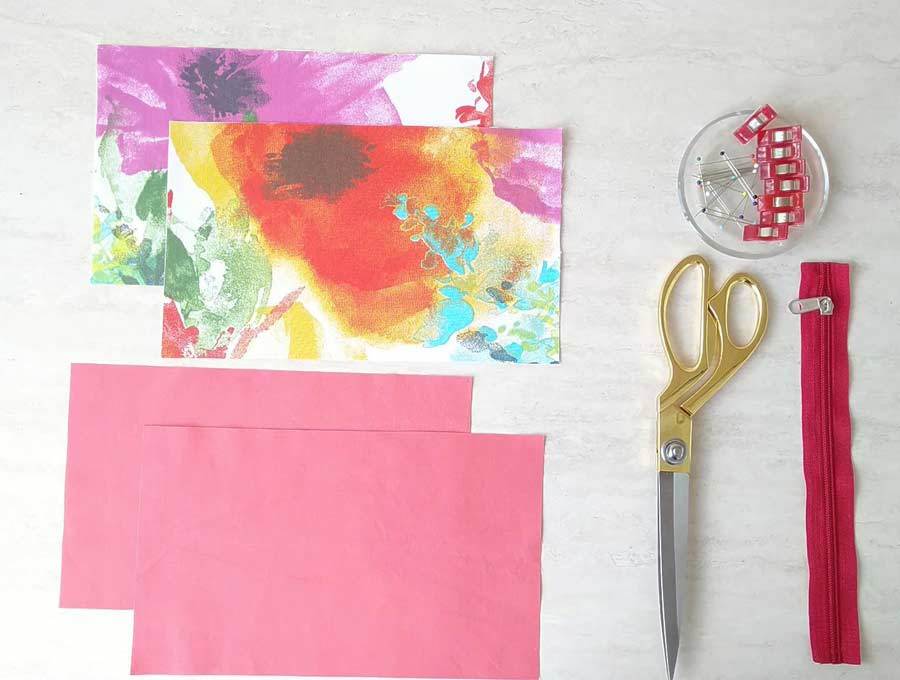
This is a pretty simple project, and as such, it doesn’t require a lot of materials. You don’t even need any zipper pouch patterns. Here’s what you’ll need:
- main fabric – 2 pieces 6″ x 10″ of 100% tightly woven cotton or any sturdy fabric you like*
- lining fabric – 2 pieces 6″ x 10″ of 100% tightly woven cotton
- zipper in matching or contrasting color
- matching thread thread
- scissors (or rotary cutter and a cutting mat)
- ruler or measuring tape
- iron and ironing board
- sewing clips or pins
- good sewing machine
With all that ready, you can proceed onto the next step and start to sew zipper pouch.
Follow us for free patterns & tutorials! [easy-profiles]
How to Sew a Zipper Pouch
Watch the diy zipper pouch video first and then follow the written step by step instructions below.
Please enjoy and don’t forget to Like and SUBSCRIBE over on YouTube to be kept up to date with new videos as they come out.
DIY Zipper Pouch VIDEO TUTORIAL
INSTRUCTIONS:
STEP 1: Prepare the fabrics
As always I recommend washing and drying your fabric. Iron it well and cut out the desired dimensions. You can make the pouch any size you want or simply according to your zipper length.
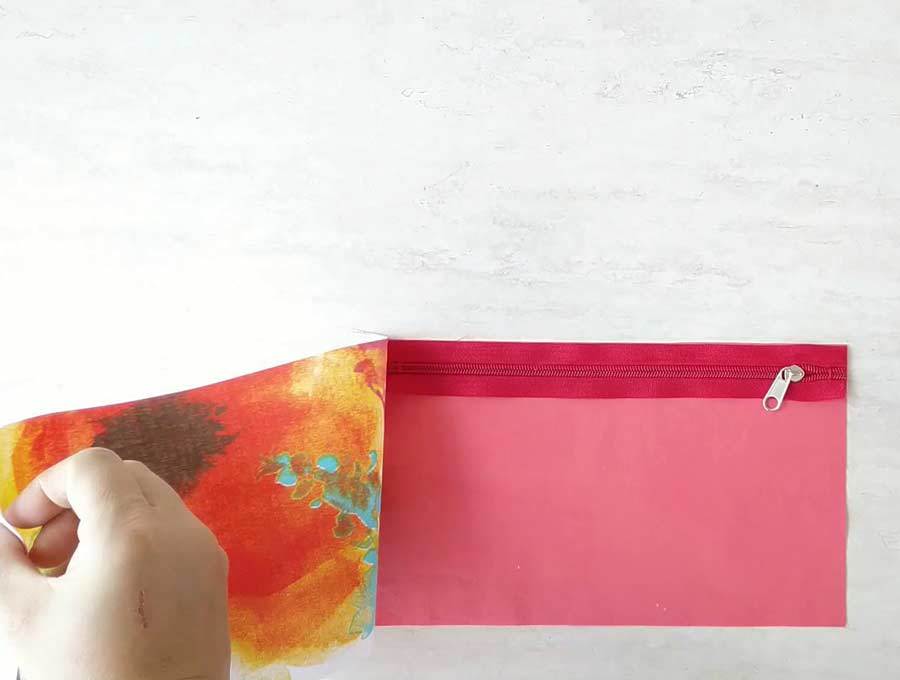
STEP 2: Align the fabrics
Set one piece of lining fabric on your workspace, with its face up. Then put the zipper on it, also face up. Align the top long edge of the zipper with the top long edge of the lining fabric.
Now take one main fabric piece and put it on top of these two, with its face down. Align the edges. Secure the layers together with clips or pins.
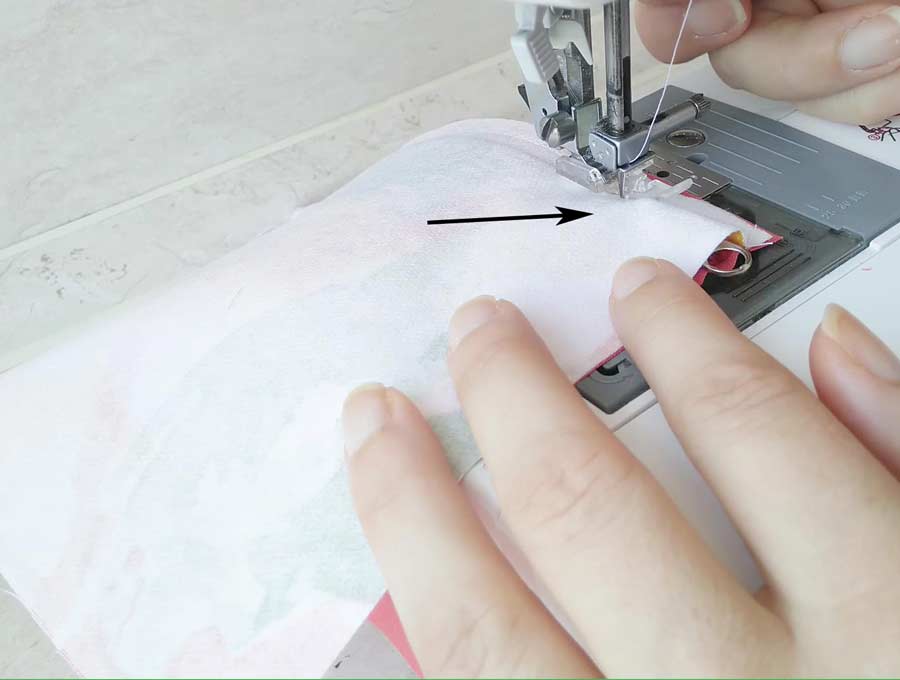
STEP 3: Sew the zipper
Put your zipper presser foot on your sewing machine and start sewing along the edge where the zipper is. Go as close as possible to the zipper and make sure to sew in a straight line to get that professional look on your zip pouch.
As you reach the zipper pull, stop. If you keep sewing, your stitch will become wobbly. So just lift up the presser foot with the needle down, open up the layers, pull the zipper a bit down pass the needle and finish the final section.
Reinforce the stitches with a bit of backstitching.
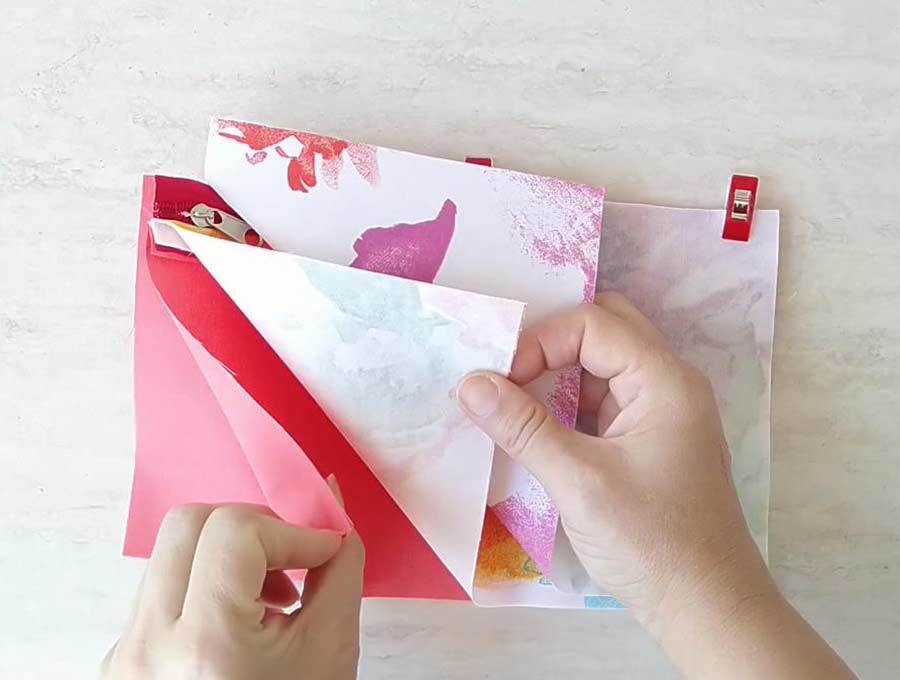
STEP 4: Align the fabrics one more time
Put your other lining fabric piece on your workspace with its face up.
Grab your fabric sandwich with the zipper and open it up so that the main fabric and the zipper are facing up while the lining is facing down. Place it on top of the second lining piece, aligning the zipper edge with the top edge of the lining.
You will notice that the zipper head is on the right now.
Now put the last fabric piece on top of everything, with its face down. Align the edges and secure everything with pins or clips.
STEP 5: Repeat the sewing process
Sew the zipper one more time just like you did in the second step of this zip pouch tutorial. Don’t forget to stop before you reach the zipper pull then just open everything up, pull the zipper, and go back to finishing the stitch.
Sew slowly and precisely.
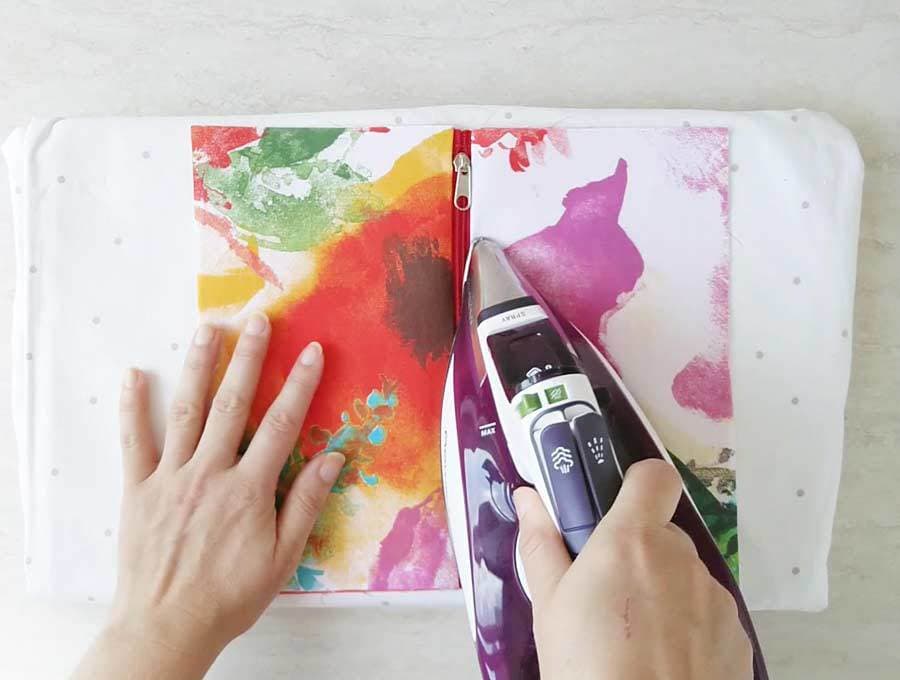
STEP 6:Press the seams
Open up the layers so that the zipper is in the middle. Flip the whole thing over so that the main fabric is facing up.
Take your iron and press as close to the zipper as possible. Pull the iron away from the zipper as you press.
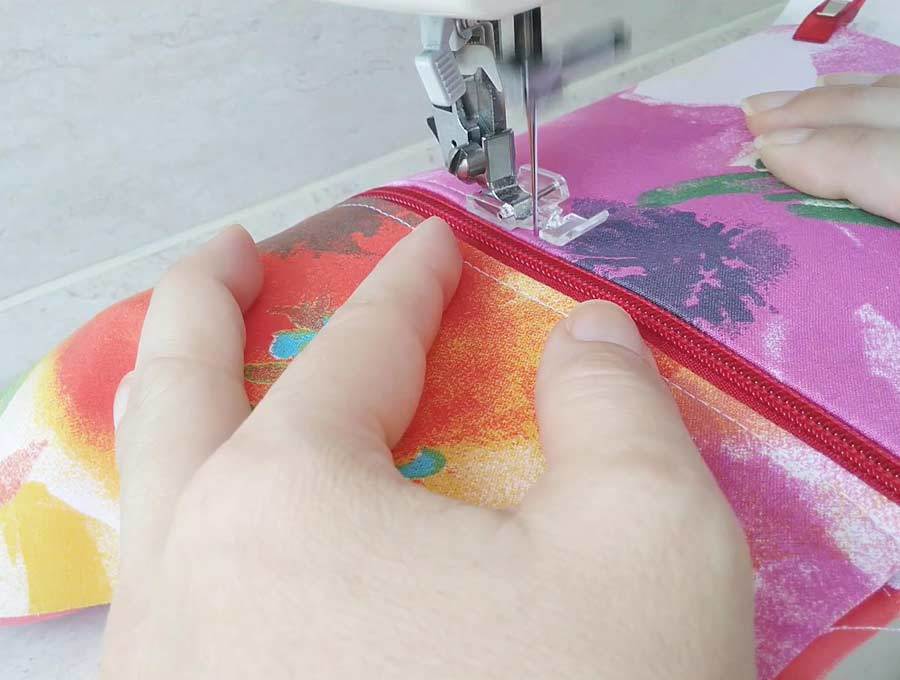
STEP 7: Topstitch along the zipper
Make a stitch along the edge of the zipper on both the left and the right side of the zipper. Use a longer stitch setting. You can also use a contrasting thread to add a bit of flair to the pouch.
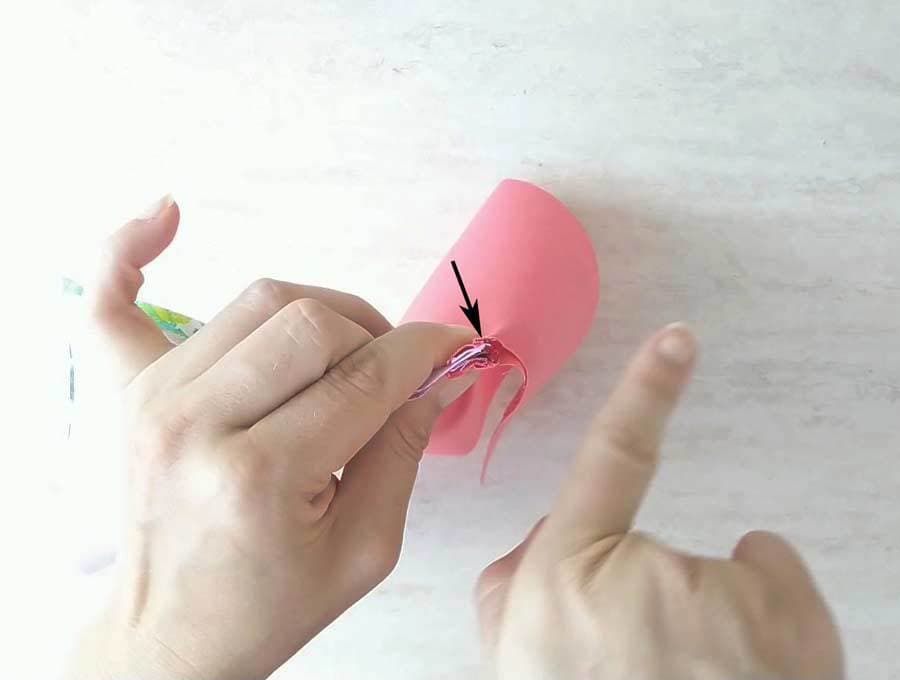
STEP 8: Prepare the pouch for the final sewing
Pull the zipper about 3/4 of the way down. This is very important or you won’ be able to turn the pouch inside out later!
Now unfold the layers so that the lining pieces are right sides together and the main pieces are right sides together. The zipper stays in the middle.
Fold the zipper teeth toward the lining! Pin or clip the zipper to secure it in that position.
Pin or clip the two lining pieces together. Do the same with the main pieces.
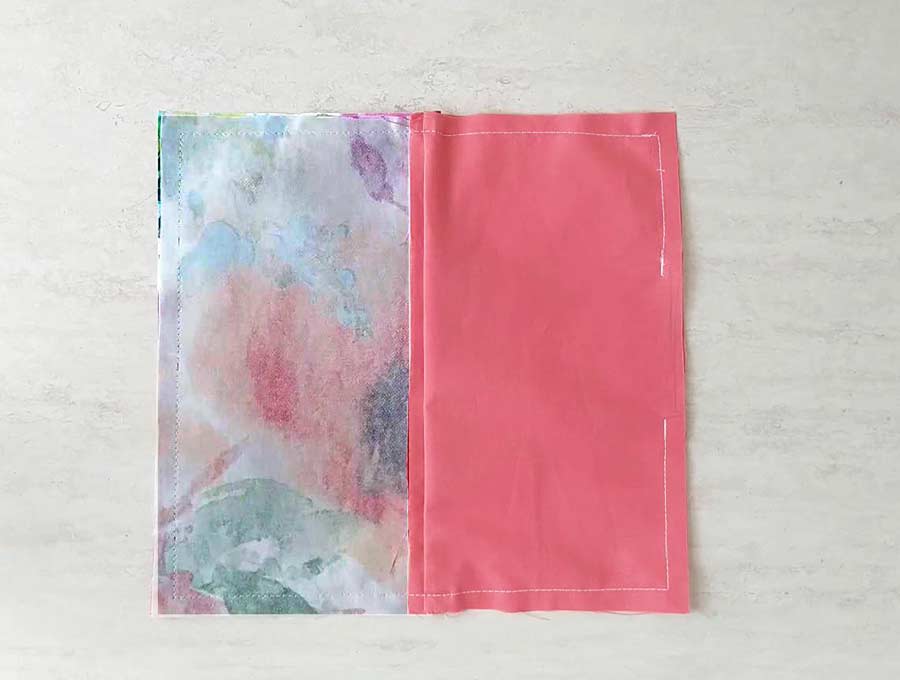
STEP 9: Sew around the zipper pouch
Sew all around the pouch, from the lining over the main fabric and back to the lining. As you reach the corners, just stop, pivot, and then keep stitching. Go slowly over the zipper.
Leave an opening of about 2 inches unstitched in the middle of the lining section. You need it to turn the pouch inside-out.
Don’t use a seam allowance bigger than half-inch.
STEP 10: Trim and turn
Snip the corners and the ends of the zipper. Then turn the whole pouch inside-out through the opening you left. Push the corners out with your fingers, the scissors or chopsticks.
STEP 11: Sew the opening shut
Fold the edges on the opening inwards a bit and sew over them, shutting the opening closed.
Tuck the lining into the pouch. Make sure to put the corners into their place on the inside.
Done! Enjoy and make some to give as gifts!

Did you like this zipper pouch tutorial? Try sewing one and let us know how it turned out in the comment section below. Your feedback is appreciated! Enjoy your new zipper pouch!
Do you like our How to make a zippered pouch tutorial? Pin for later:

Wanna be friends? Click HERE and follow me on Pinterest
RELATED:
- How to make tassels with embroidery thread – add a beautiful tassel to the zipper pull
- Drawstring bag pattern – another great back to school project
-
Triangle coin purse