
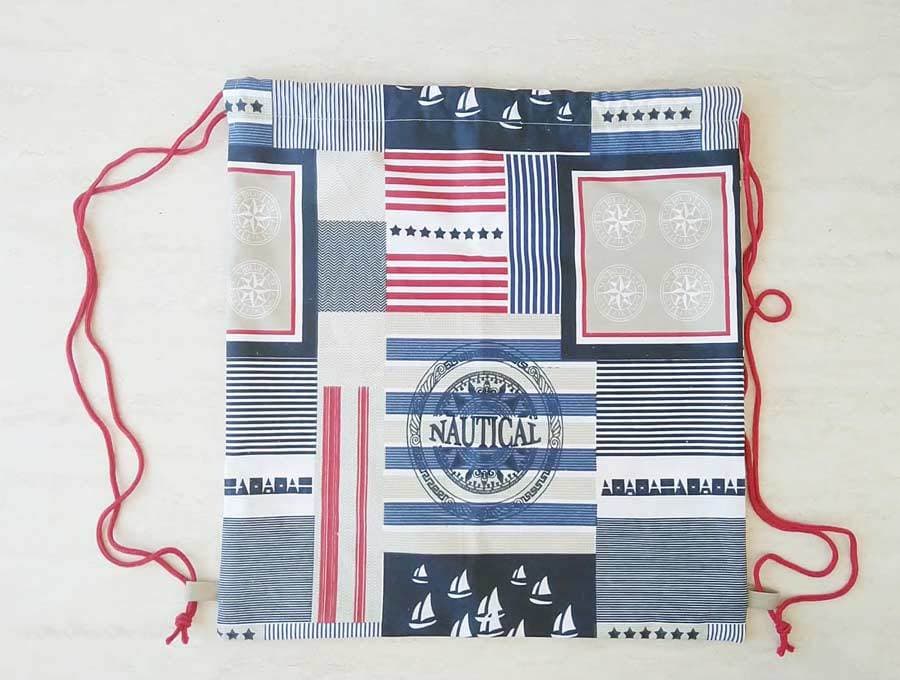
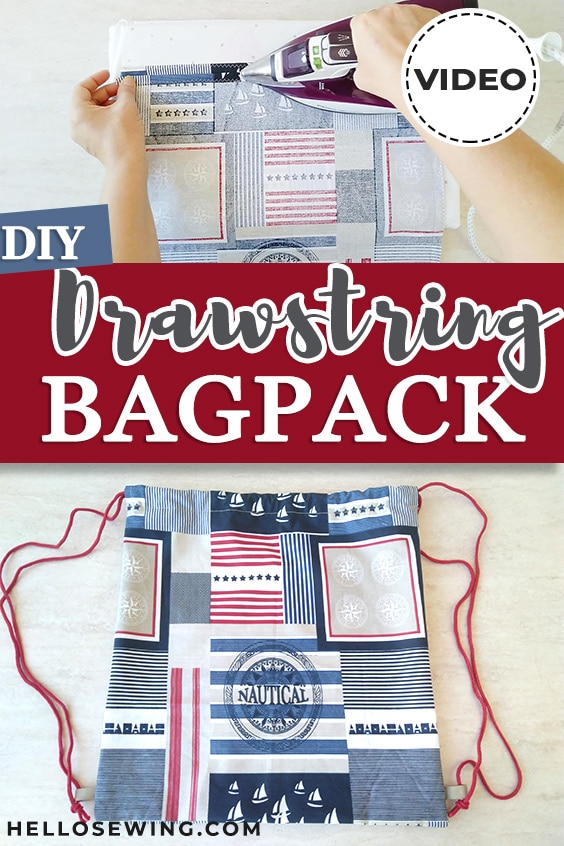
DIY Drawstring Backpack [FREE Pattern and VIDEO tutorial]
When you need a casual bag that can hold quite a few things, your best choice would be to use a drawstring backpack. Not the ones you can buy in shops, but a proper sewn DIY drawstring backpack.
It’s great for trips to the beach, pool, picnics, and any other occasion that requires light baggage. You can even use it for the trips to the store or the local market!
Making a drawstring bag might seem like it’s tricky, but it isn’t. It’s a fun and beginner-friendly sewing project. You can make it yourself in a short amount of time if you have the right instructions.
This tutorial is here to help you with that. Follow the steps and you’ll learn how to make a drawstring backpack with speed and ease!
We occasionally link to goods offered by vendors to help the reader find relevant products. Some of the links may be affiliate meaning we earn a small commission if an item is purchased.
Table of Contents
- 1 How to make a drawstring backpack
- 2 Supplies and tools
- 3 How To Sew drawstring backpack
- 3.1 DIY Drawstring backpack VIDEO TUTORIAL
- 3.2 INSTRUCTIONS:
- 3.3 STEP 1: Prepare the pattern for use
- 3.4 STEP 2: Cut out the fabric
- 3.5 STEP 3: Prepare the cord tabs
- 3.6 STEP 4: Finish the raw edges
- 3.7 STEP 5: Measure out the opening for the cord
- 3.8 STEP 6: Insert the cord tabs
- 3.9 STEP 7: Start sewing the drawstring bag
- 3.10 STEP 8: Clip the corners
- 3.11 STEP 9: Make the drawstring casing
- 3.12 STEP 10: Turn the drawstring backpack around
- 3.13 STEP 11: Thread the cords
- 3.14 STEP 12: (Optional) Sew the hanging loop
How to make a drawstring backpack
Supplies and tools
Before you can start working on this drawstring backpack tutorial, you will need to prepare the following supplies:
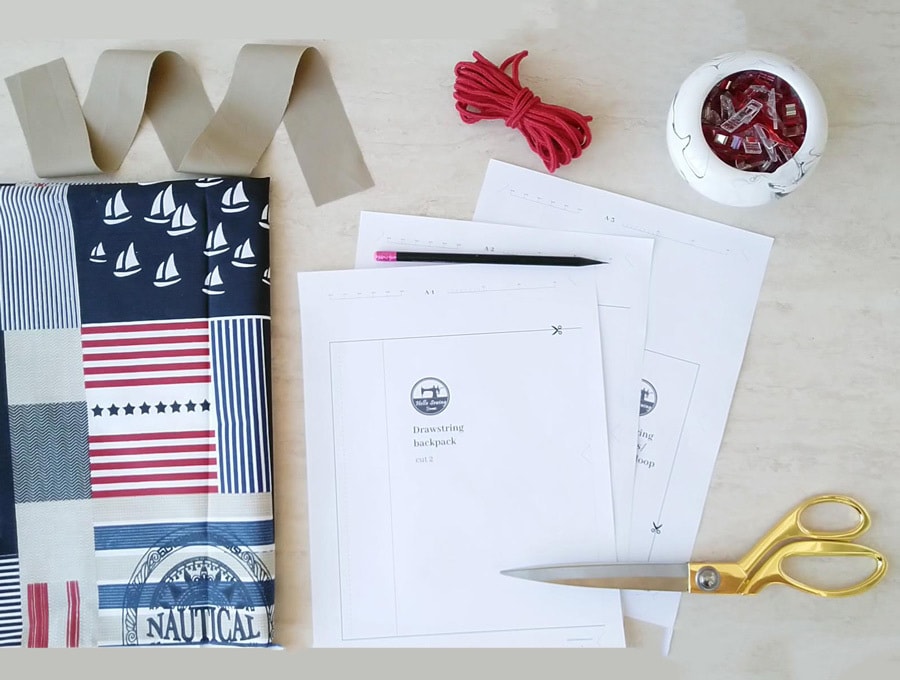
- fabric – 1/3 yard cotton or polyester
- cording – 4 yards
- matching thread thread
- our downloadable drawstring backpack pattern /link below/
- scissors (or rotary cutter and a cutting mat)
- ruler or measuring tape
- iron and ironing board
- sewing clips or pins
- sewing machine (standard one or heavy duty one if you are making it out of very thick fabric)
- bodkin or a safety pin
DOWNLOAD: drawstring backpack pattern (Free PDF file)
Follow us for free patterns & tutorials! [easy-profiles]
How To Sew drawstring backpack
Watch the diy drawstring backpack video first and then follow the written step by step instructions below.
Please enjoy and don’t forget to Like and SUBSCRIBE over on YouTube to be kept up to date with new videos as they come out.
DIY Drawstring backpack VIDEO TUTORIAL
INSTRUCTIONS:
STEP 1: Prepare the pattern for use
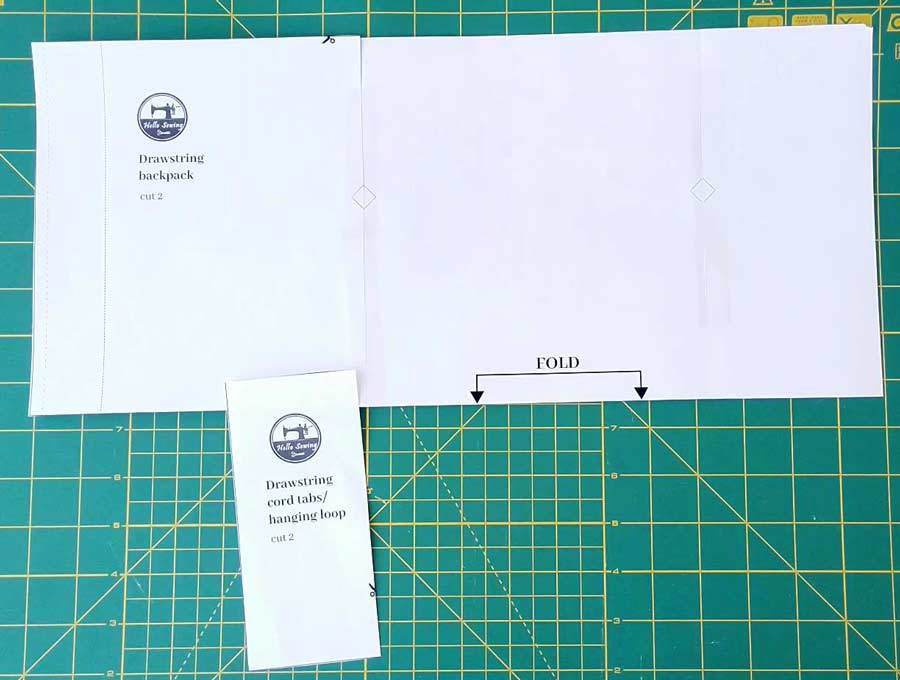
Download the pattern and print it out in full size (print at 100%, no scaling on a US letter paper). Tape the three sheets together, cut it out accordingly and remove the excess paper.
You will get two pattern pieces. One for the bag and one for the cord tabs.
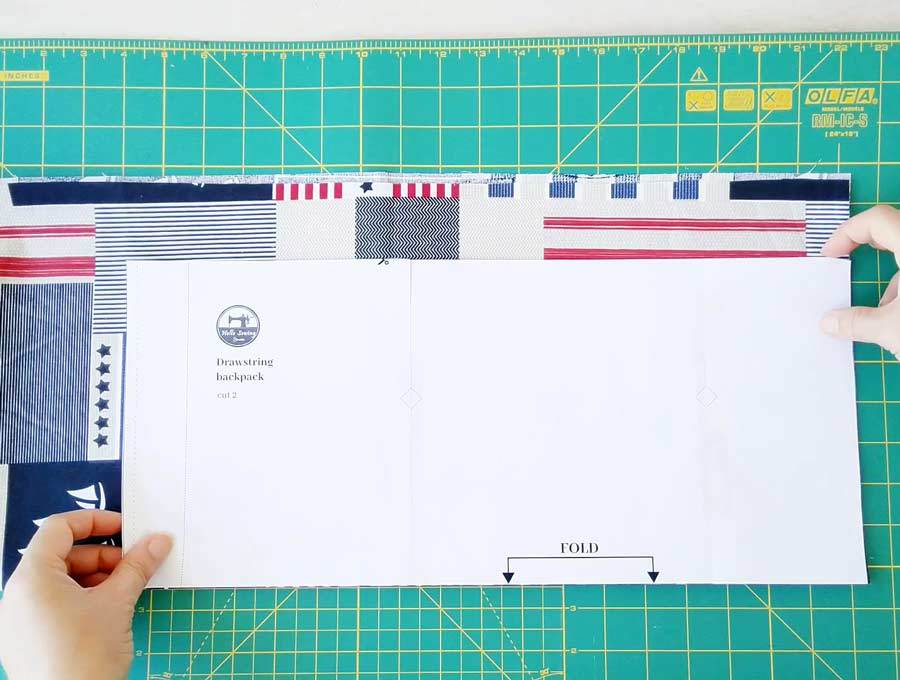
STEP 2: Cut out the fabric
Fold the main fabric in half so that the right sides are together, place the pattern on the fold and cut the fabric according to the pattern. Repeat one more time for the second piece. Cut one piece of fabric according to the smaller pattern piece for cord tabs.
You will get three pieces of fabric, two large and one small piece.
TIP: Wash and dry the fabric thoroughly and press it well with an iron before sewing. This will prevent the bag from deforming or shrinking after its first wash.
STEP 3: Prepare the cord tabs
Take the small fabric piece and fold it in half lengthwise, wrong sides together. Press flat on the ironing board.
Open up the fabric piece. Then fold lengthwise both from the top and the bottom to the crease in the middle. Take it to the ironing board and press.
Fold lengthwise one more time and press well with your iron.
You will get a thin strap of fabric with four layers. Pin it and stitch along the folds as close to the edge as possible. Cut it in half to get two tabs.
OPTIONAL: Repeat this step one more time if you are making a hanging loop.
BONUS TIP: You can make the drawstrings out of fabric if you don’t have cording. Use my paper bias ties maker template (pictured above) to speed up the process .
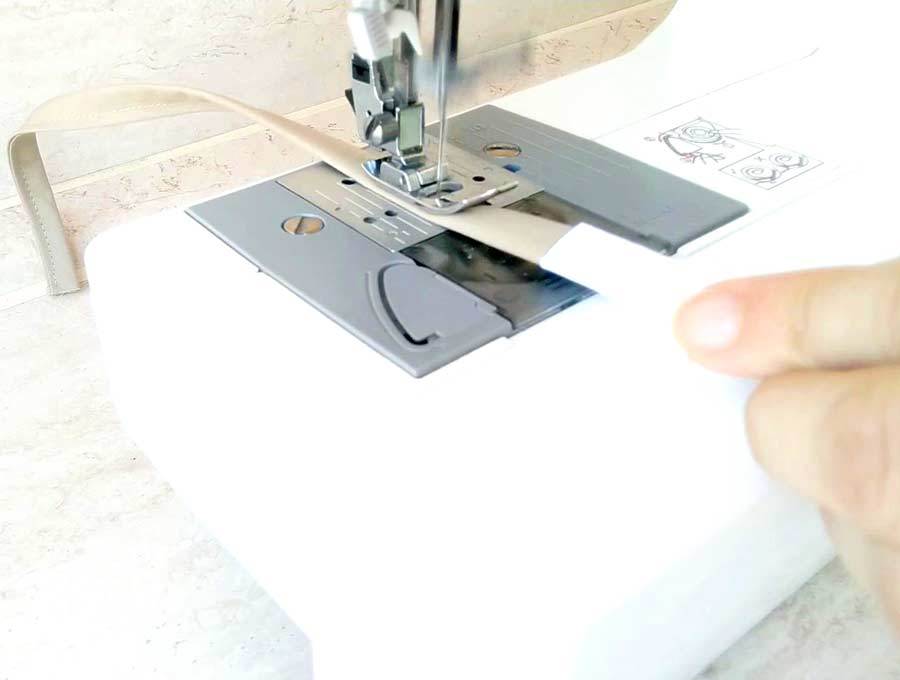
STEP 4: Finish the raw edges
Finish the raw edges of the main fabric pieces so that they won’t fray. Serge them if you have a serger or use medium zig zag stitch on your sewing machine.
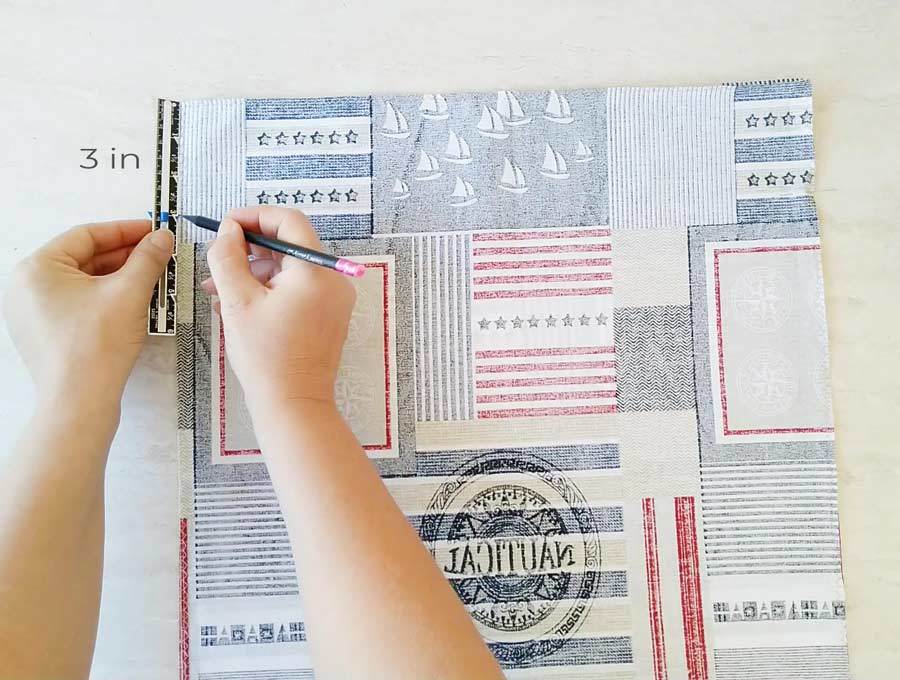
STEP 5: Measure out the opening for the cord
Now you need to make the markings where the opening for the drawstrings will be.
Measure out three inches from the top on both sides. Mark this points with pins
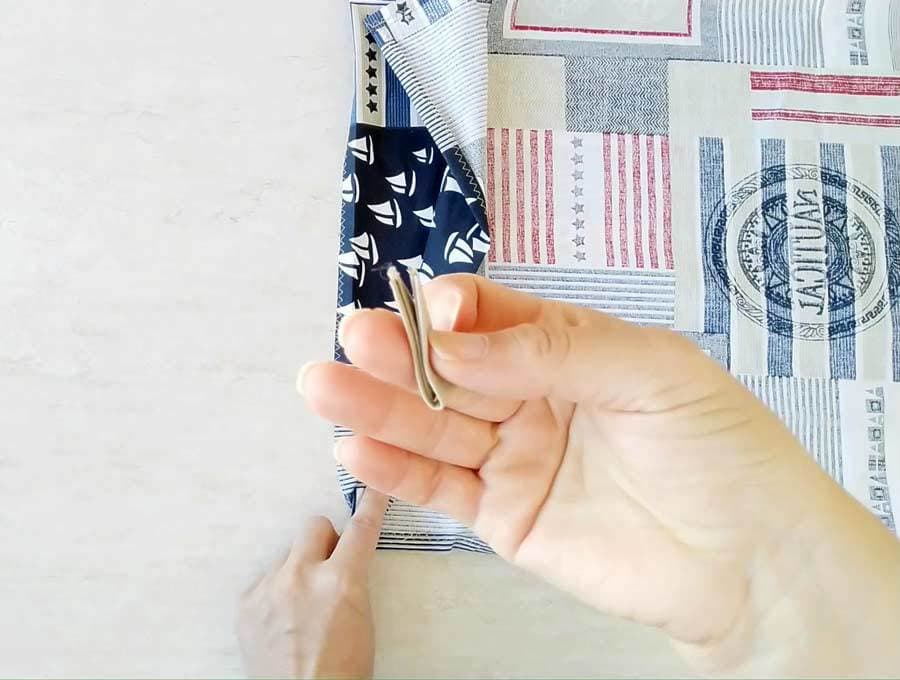
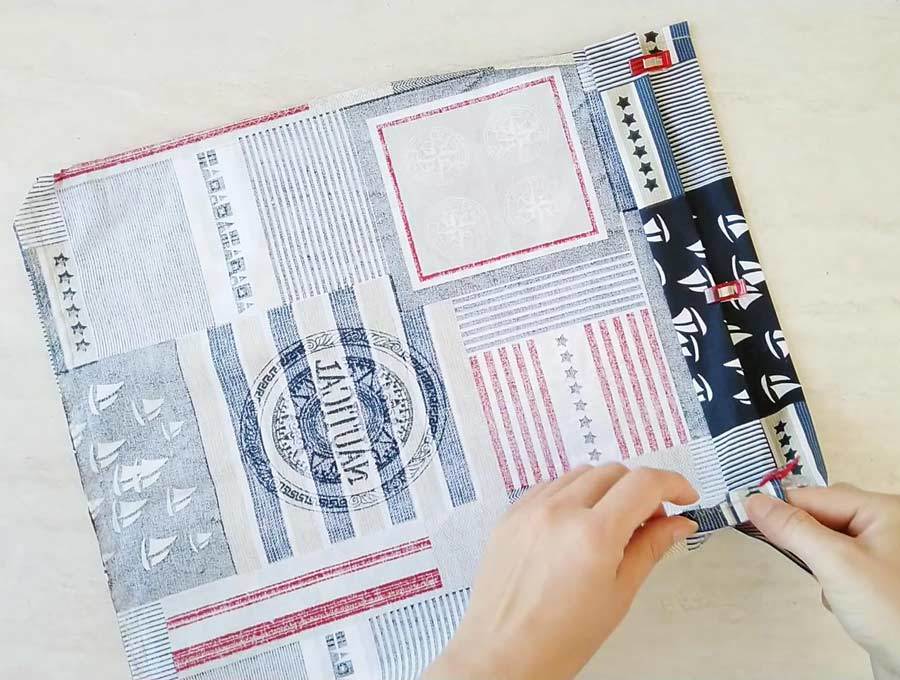
STEP 6: Insert the cord tabs
Fold the cord tabs in half and insert them between the layers, about 1 inch from the bottom of the bag, matching the raw edges of the tabs with the raw edges of the bag. Pin in place.
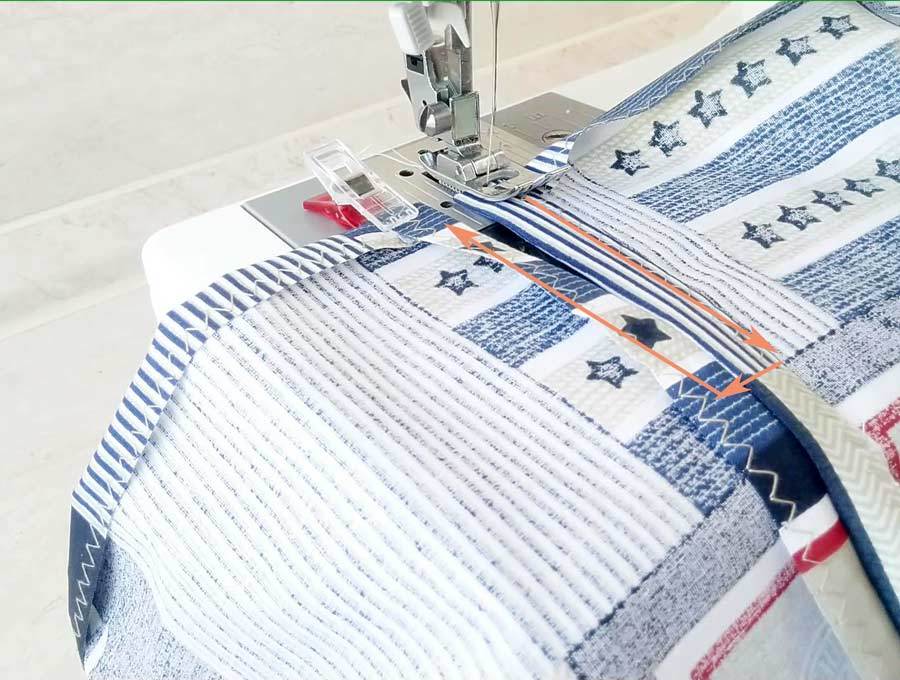
STEP 7: Start sewing the drawstring bag
Sew around the drawstring bagpack, staring from one of the pins, along the side edge, all the way around the bottom, along the other side up to the other pin. Use a 3/8 inch seam allowance while sewing. Backstitch at the beginning and the end of the seams.
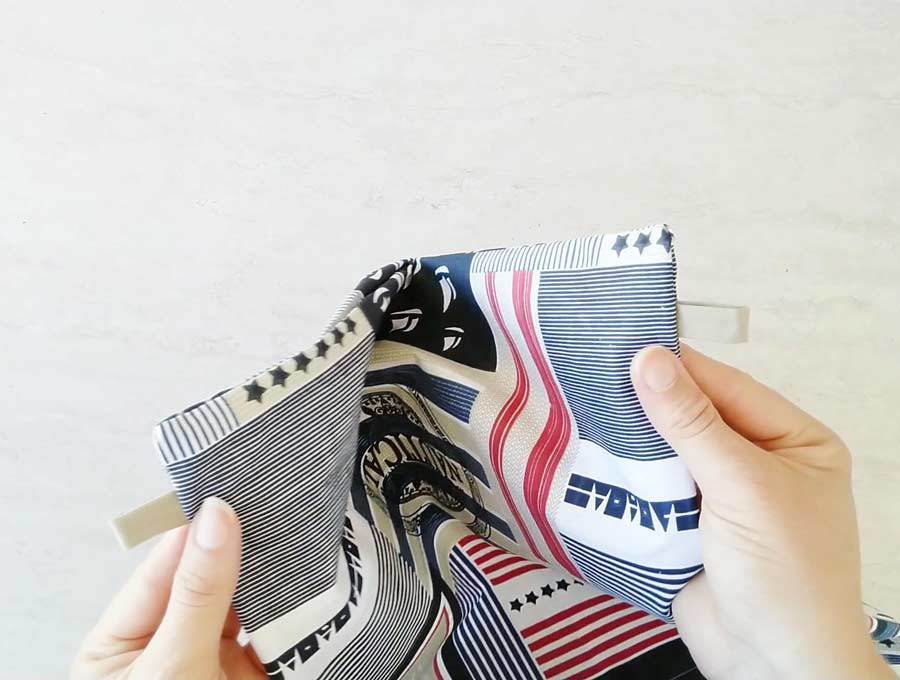
STEP 8: Clip the corners
Clip the bottom corners so that they stay sharp when you turn the bag around.
STEP 9: Make the drawstring casing
Grab the top edge of one layer and fold it 3/8 inch inwards. Press flat with your iron and pin.
Press open the seam allowance on both side openings and pin it as well. Sew around the side openings.
Then fold the top edge inwards once again so that it meets the bottom of the side opening (about 1 1/4 inch). Press flat and pin.
Sew along the bottom of the fold. Strengthen the stitch by backstitching it.
STEP 10: Turn the drawstring backpack around
Turn the whole thing around and push the corners out.
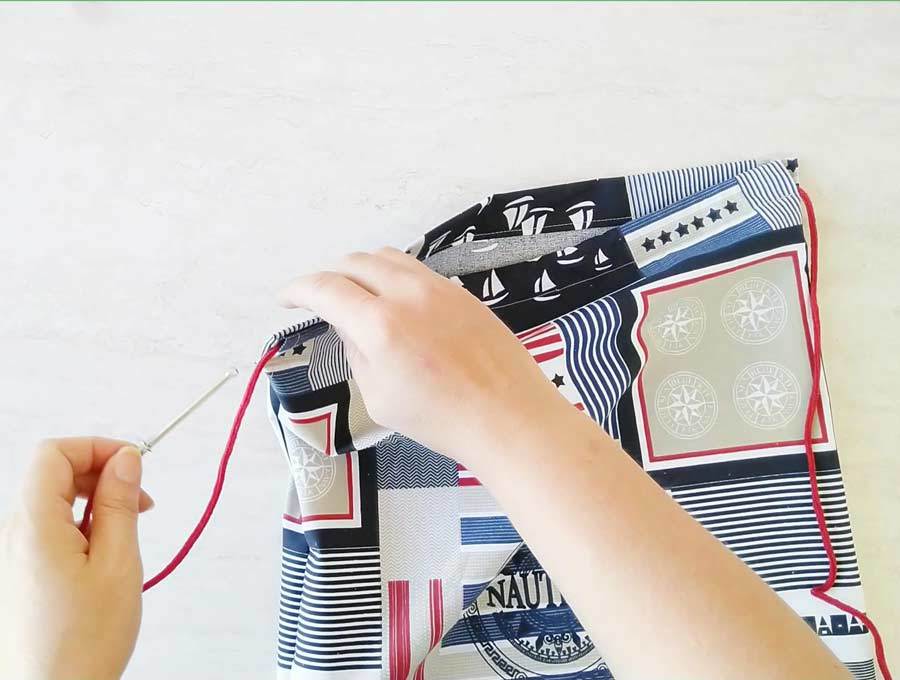
STEP 11: Thread the cords
Cut the cord in half, each piece should be about 2 yd. Attach a bodkin or a safety pin to the end of one string and thread it through the cord tab, then the through one end of the casing and back through the other. Repeat the same with the other cord, just in the opposite direction and through the other opening. Tie the ends in a knot.
STEP 12: (Optional) Sew the hanging loop
Sew in the hanging loop at the bottom of the drawstring casing.
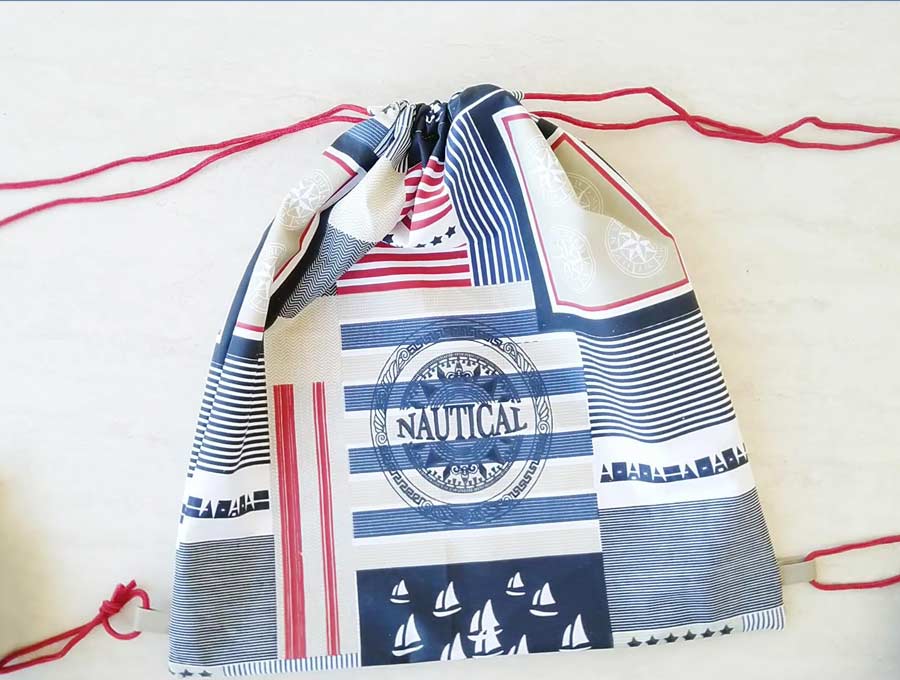
That’s it your drawstring bagpack is ready!
What do you think about the tutorial how to make a cinch bag? Did you find it useful? Try making a few DIY drawstring backpacks and let us know how they turned out in the comment section below! They’ll make wonderful presents for your loved ones. Have fun sewing!
Do you like this? Pin for later:
Wanna be friends? Click HERE and follow me on Pinterest
OTHER BAG TUTORIALS and PATTERNS: