")
Free DIY Dice Bag Pattern and Video Tutorial (It’s reversible!)
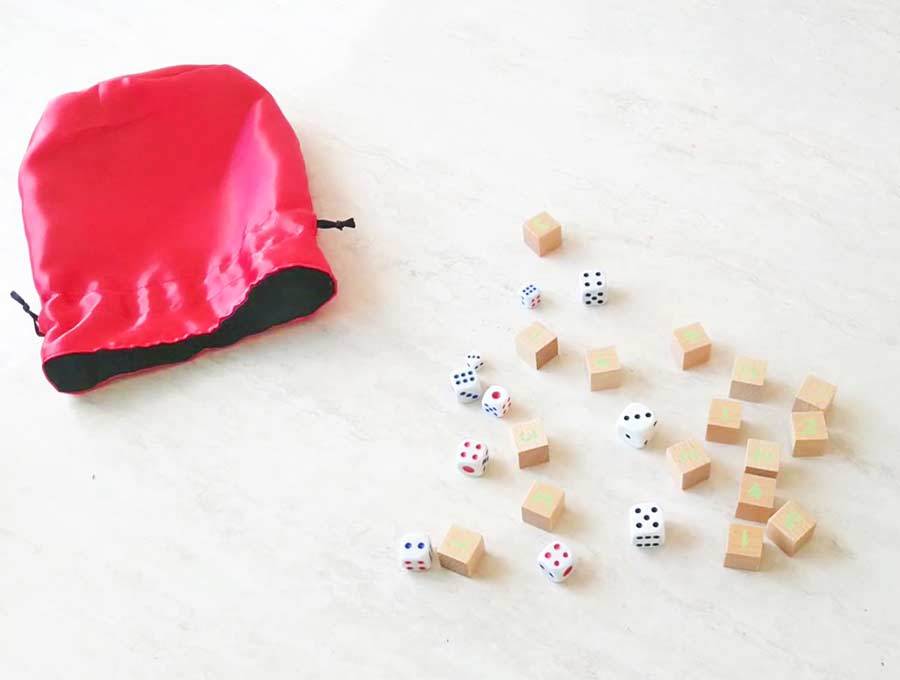
When you often play a game that requires the use of multiple dice, carrying, storing, and throwing those dice can become a bother. But you can avoid that nuisance with a practical dice bag.
This DIY dice bag is great for safely storing dice whenever you’re carrying them around, like when you’re going over to your friends for a game of D&D. You can also use the bag for rolling the dice easily without worrying if some of them will drop to the floor and get lost in an alternate dimension.
With our free dice bag pattern and easy step by step instructions, you’ll learn how to make a dice bag in a matter of minutes. And don’t worry about your skill level. This project isn’t complicated like most dice bag projects, so it’s suitable even for beginner sewing enthusiasts.
Below you will find my step by step written tutorial with VIDEO instructions for all the visual learners.
We occasionally link to goods offered by vendors to help the reader find relevant products. Some of the links may be affiliate meaning we earn a small commission if an item is purchased.
Table of Contents
- 1 How to make a Dice Bag
- 2 Supplies and tools
- 3 How To Sew a Dice bag
- 3.1 DIY DICE BAG VIDEO TUTORIAL
- 3.2 INSTRUCTIONS:
- 3.3 STEP 1: Prepare the dice bag sewing pattern
- 3.4 STEP 2: Cut out and mark the fabrics
- 3.5 STEP 4: Pin fabrics
- 3.6 STEP 5: Start sewing the dice bag
- 3.7 STEP 6: Press seams open
- 3.8 STEP 7: Sew the bottom to the tube
- 3.9 STEP 8: Sew the lining and the main fabric together
- 3.10 STEP 9: Turn around and sew
- 3.11 STEP 10: Make the drawstring casing
- 3.12 STEP 11: Insert drawstrings
- 3.13 STEP 10: (Optional) Decorate the dice pouch
How to make a Dice Bag
Supplies and tools
- fabric – 2 x 1/4 yard cotton, silk or velvet (one main, one lining)
- ribbon or cording – 2 pieces x 16 inches (40cm) long
- matching thread
- scissors (or rotary cutter and a cutting mat)
- ruler or measuring tape
- iron and ironing board
- sewing clips or pins
- sewing machine
Notes: You can use a variety of fabrics – satin, silk and velvet
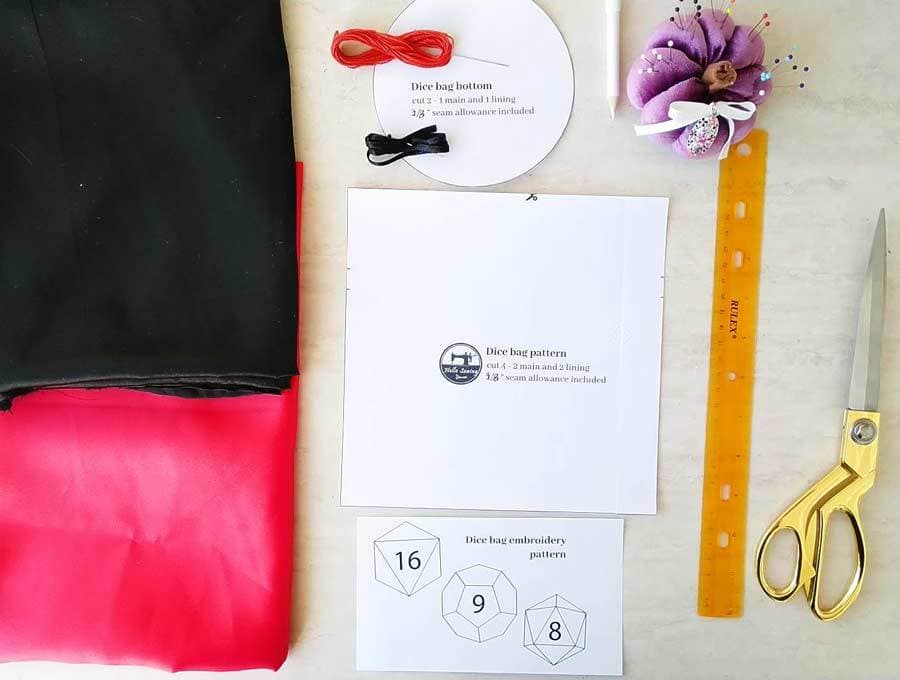
DOWNLOAD: FREE DICE BAG PATTERN (Free PDF file includes both dice bag sewing pattern and the dice bag embroidery pattern)
NOTE: All seam allowances are 3/8″ (1cm) unless noted otherwise and are already included in the pattern
Follow us for free patterns & tutorials! [easy-profiles]
How To Sew a Dice bag
Watch the diy dice bag video first and then follow the written step by step instructions below.
Please enjoy and don’t forget to Like and SUBSCRIBE over on YouTube to be kept up to date with new videos as they come out.
DIY DICE BAG VIDEO TUTORIAL
INSTRUCTIONS:
STEP 1: Prepare the dice bag sewing pattern
Download the D&D dice bag pattern and print it out on a piece of paper. Set the size to 100%, US settings.
Cut out the dice pouch pattern and get rid of any excess paper.
This pattern will provide you with the measurements for a flat bottom dice bag with a 4.5-inch (11.5cm) diameter and ~7 inch (18cm) height. It’s a bag that holds a lot of dice and you can even fit a pack of cards in there!
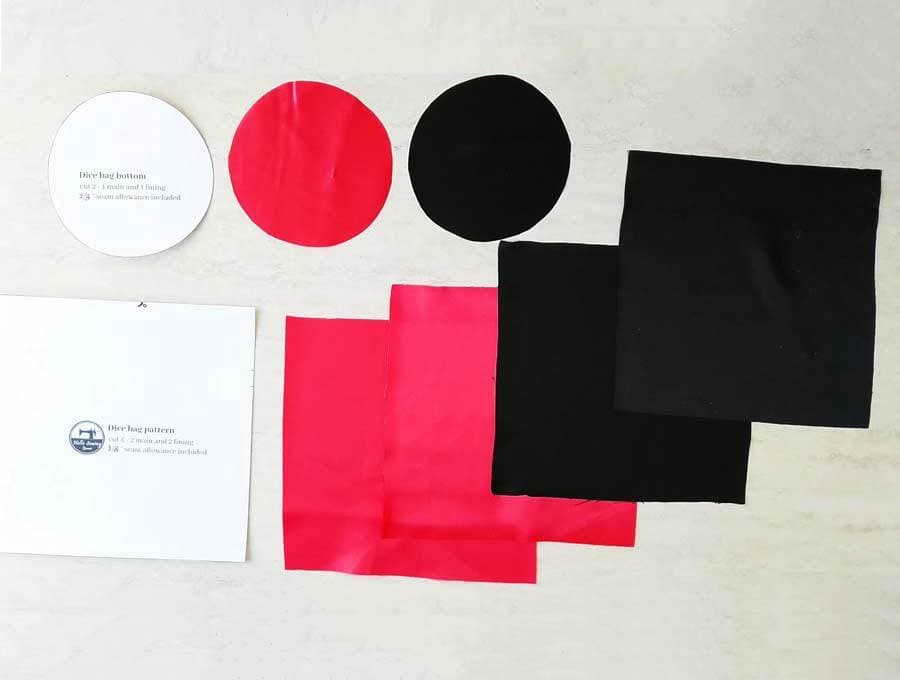
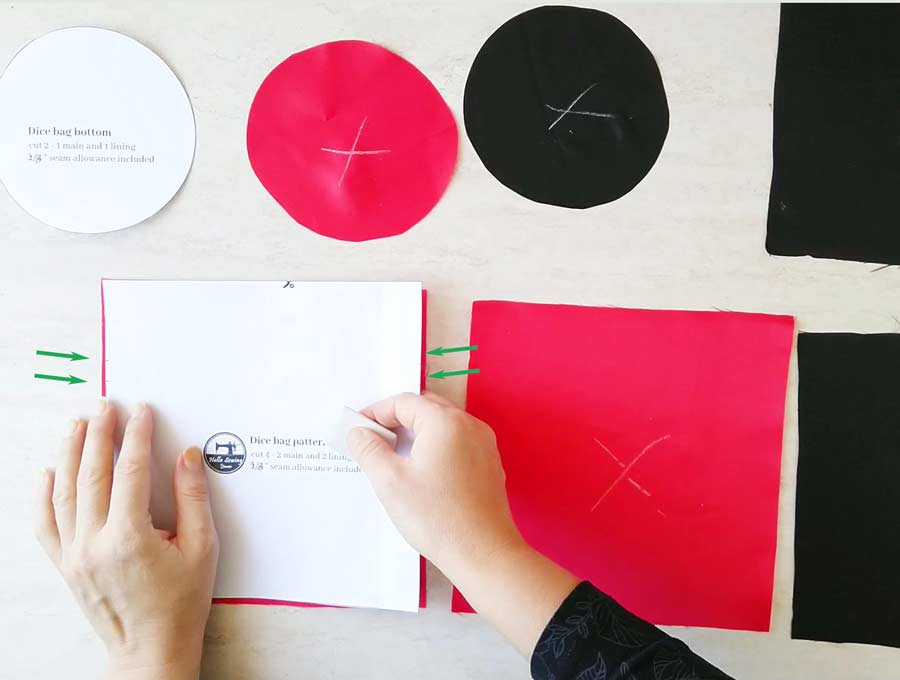
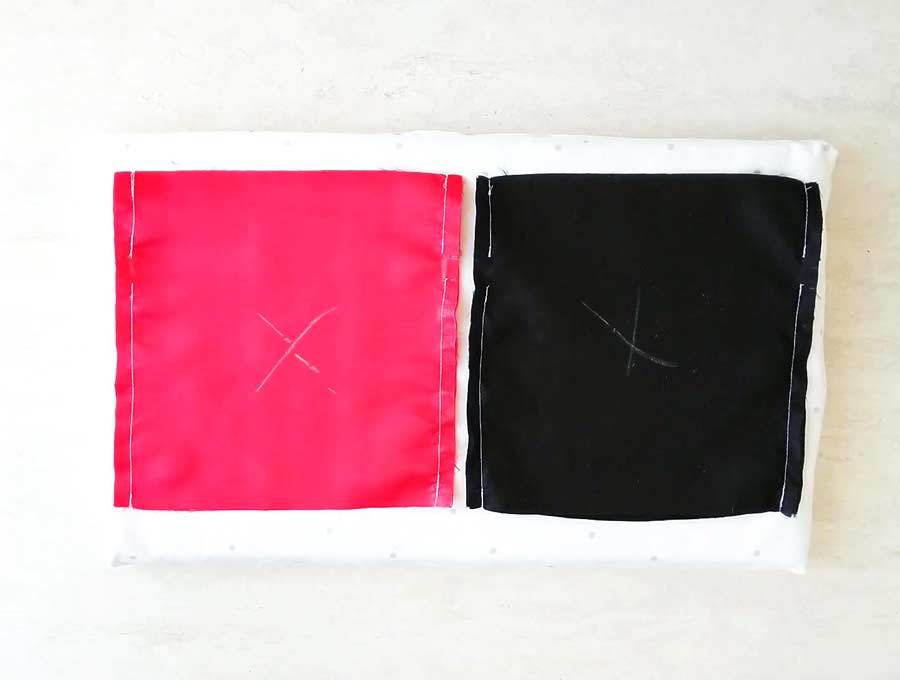
STEP 2: Cut out and mark the fabrics
Use your pattern as a guide and cut out the fabric. You will need two round pieces, one from the main fabric and one from the lining.
You will also need four rectangular pieces, two from each type of fabric.
If you want to, you can make the pouch a bit taller or shorter. Just adjust the size of the rectangular pieces according to your desires.
Mark the wrong side on all fabric pieces if it is difficult to tell the right from the wrong with just a look.
Also transfer the markings for the drawstrings on each of the rectangular pieces
STEP 4: Pin fabrics
Take the two lining rectangles and place them on each other with their right sides facing each other.
STEP 5: Start sewing the dice bag
Use a 3/8″ (1cm) seam allowance and sew the two pieces together along both long sides. You’ll get a fabric tube once you finish sewing. Leave an opening unstitched for the drawstring.
Take the two main fabric rectangles and sew them together in the same way you’ve sewn the lining rectangles, with just one difference.
Reinforce the seams with some backstitching.
STEP 6: Press seams open
After that, press the seams open and sew them in place to secure them. Pay attention not to sew the opening shut.
Stitch around the opening for the drawstrings – this will ensure that your drawstrings won’t entangle when you insert them and cinch the bag.
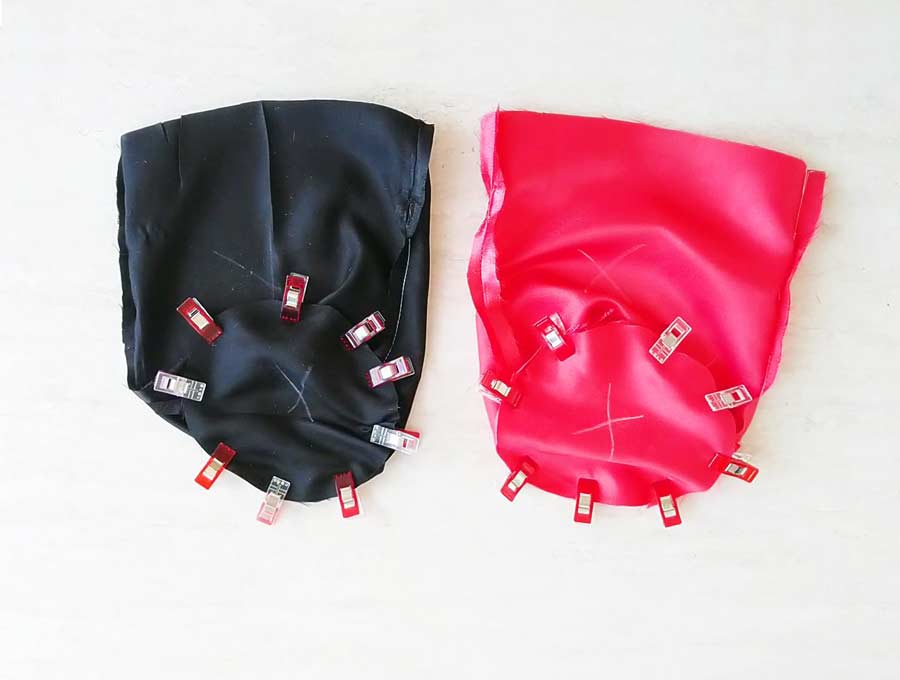
STEP 7: Sew the bottom to the tube
Pin the bottom side of the lining fabric tube to the lining fabric circle. Sew the two together with the same, 3/8 inch (1cm) seam allowance you used for all previous sewing.
Do the same with the main fabric pieces.
Make small cuts about an inch apart from each other all around the bottom round edge to allow the fabric to lay flat after you turn it right side out.
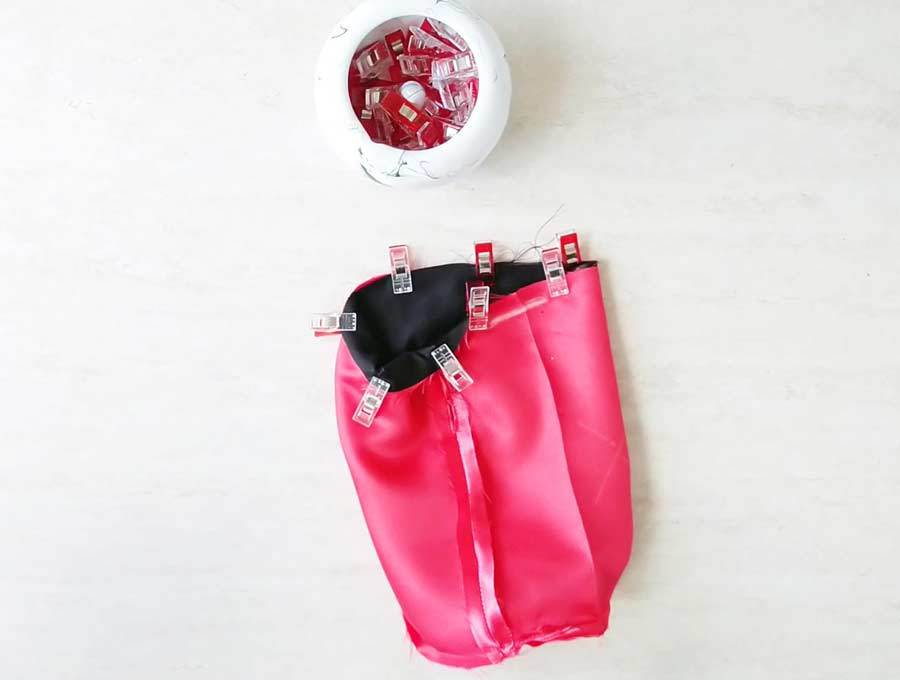
STEP 8: Sew the lining and the main fabric together
Turn the main piece around and insert it into the lining piece. Align the side seams. Make sure that the raw edges are aligned and that there’s no room between the layers.
Make a stitch along the top edge of the pouch, 3/8″ (1cm) from the top. Leave an opening of about one inch unstitched to turn the pouch through.
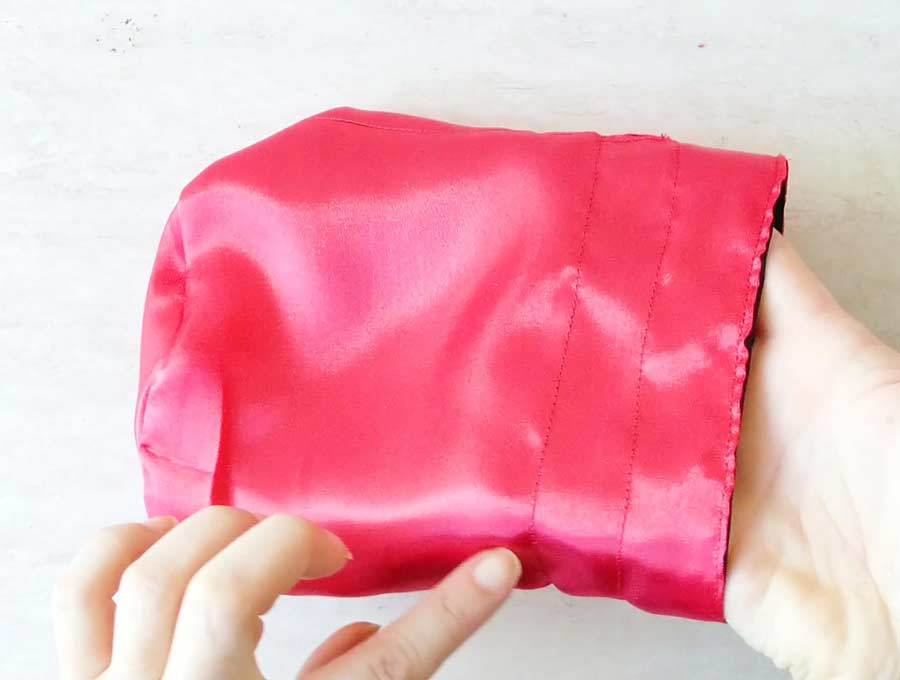
STEP 9: Turn around and sew
Turn the pouch inside-out. Fold the raw edges of the opening inwards and press them. Topstitch them with a stitch that’s about a 1/8″ (3mm) away from the top.
Tuck the lining back into the bag so that the right side of the bag is facing outward.
STEP 10: Make the drawstring casing
Now it’s time to make a drawstring casing and insert the string into it.
Sew two parallel stitches where you left the opening in the second step. One of the stitches should be just below the openings, and the other one on top of it. Go all around the pouch, but be careful not to sew the bag shut.
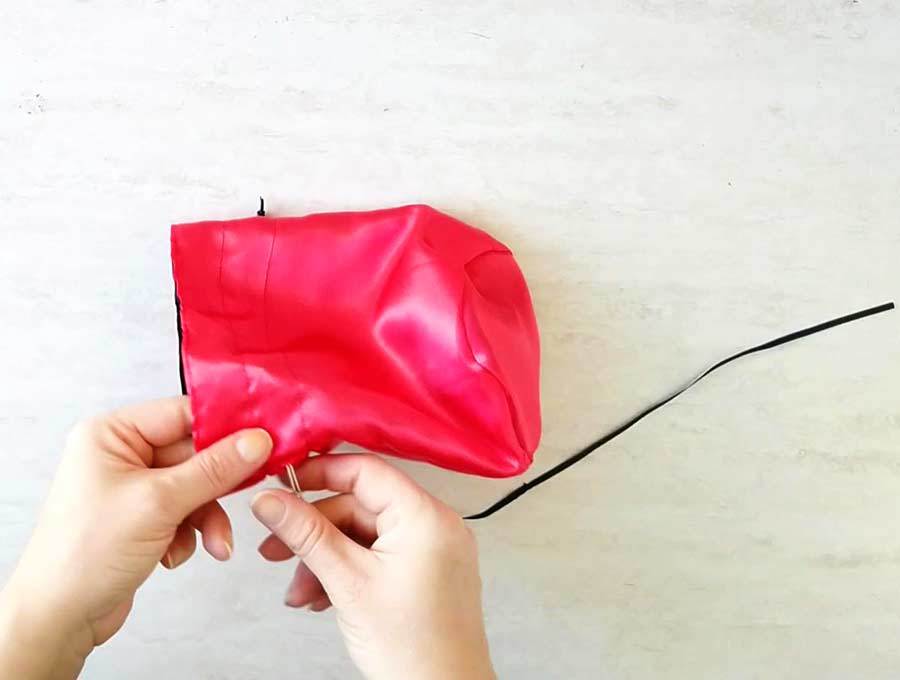
STEP 11: Insert drawstrings
Take one of the 16″ (40cm) ribbons and attach a safety pin to its end or use a bodkin. Thread it through the casing and tie it up to its own end.
Do the same with the second string, but in the opposite direction.
STEP 10: (Optional) Decorate the dice pouch
If you want to give your dice bag a bit of flair, you should add some embroidery to it.
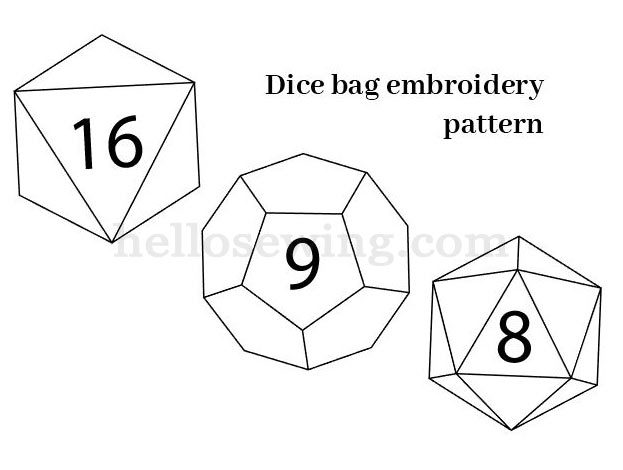
Download our dice bag embroidery patterns and print them out.
Trace the pattern on the tracing paper and center it on the bag. Then embroider it, starting about 1.5 inches (4cm) from the bottom of the bag.
That’s it, now you know how to sew a dice bag!

What do you think about our dice bag tutorial? Have you tried making this dice pouch yourself? Let us know how it turned out! Also, if you have any ideas for improving the project, share them with us in the comment section below, we’d love to hear them! Enjoy your next D&D game with your new dice bag!
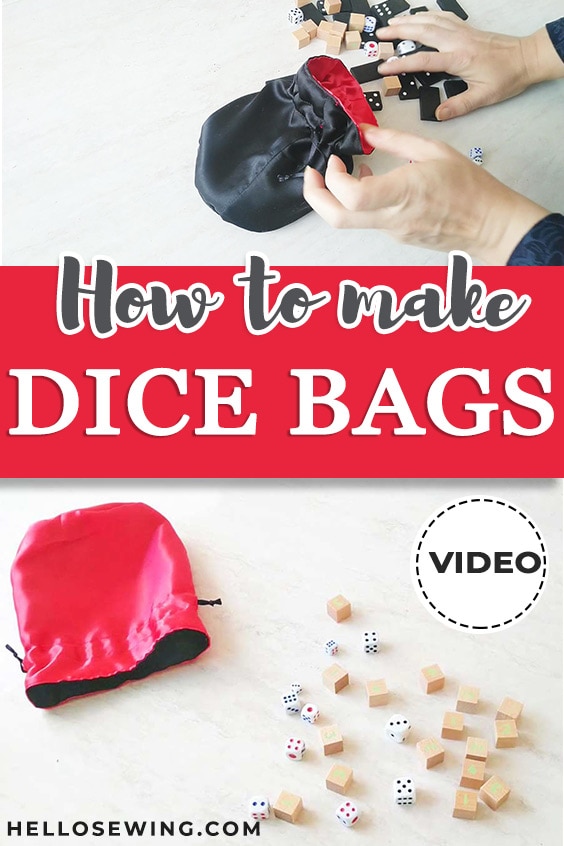
Do you like this? Pin the dice bag pattern for later:
Wanna be friends? Click HERE and follow me on Pinterest
P.S. Did you recognize the fabric? I used the same combination of red and black to make the full length cloak in my article How to sew a cloak
Love costuming and cosplay? It’s just for you!
OTHER BAG TUTORIALS and PATTERNS:
- Drawstring backpack pattern
- Japanese knot bag pattern
- Grocery market bag tutorial
- DIY Reusable produce bags
- Reusable snack bags
- Fabric basket tutorial
OTHER GIFTS FOR HIM: