
How to Make a Bow Tie – Pattern for Four Styles + VIDEO
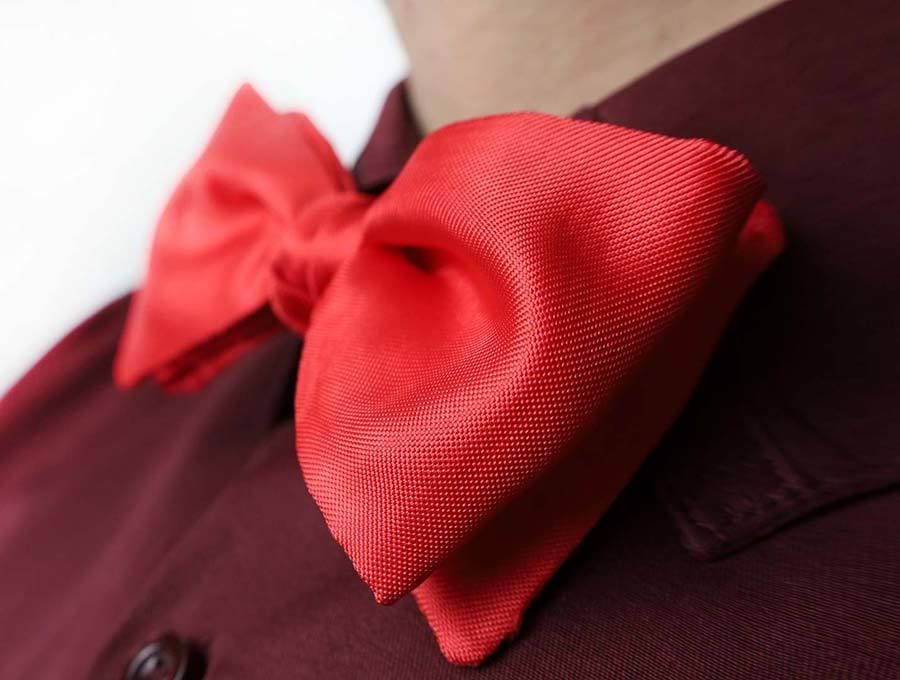
In recent years musicians and actors have made bow ties wildly popular, and for James Bond they have never gone out of fashion. Think of Daniel Craig in Casino Royale with that untied bow tie.
Yes, that’s the one I’m going to show you in this how to make a bow tie tutorial. Forget clip-on bowties – a real gentleman ties a bow tie. Your problems in finding a bowtie to coordinate a partner’s outfit with your dress will be over once you learn to how to sew a proper bow tie within a few minutes using this tutorial. Our bow tie is suited to beginner and intermediate sewists, who will breeze through this easy bow tie pattern.
However, before we dive into making the bow tie, let’s see where it originated. The bow tie was developed from the cravat worn by Croatian mercenaries employed by French King, Louis XIII, during the Thirty Years War of the 1600’s. The soldiers used the small neck scarf to wipe sweat off their faces, bind wounds, and keep cold winds from poking icy fingers down their jackets. The French soon took notice, and modified the practical neck cloth into the elegant bowtie.
To make the bow tie you’ll need ¼ yard of cloth. You can go for a plain or shiny finish cotton. Perhaps leave the satin and silk until you are experienced in working with these slippery fabrics. All seam allowances are ¼ inch.
Below you will find my step by step bow tie tutorial with VIDEO instructions for all the visual learners.
We occasionally link to goods offered by vendors to help the reader find relevant products. Some of the links may be affiliate meaning we earn a small commission if an item is purchased.
Table of Contents
- 1 How to make a bow tie
- 2 Supplies and tools
- 3 How To Sew a Bow Tie
- 3.1 DIY BOW TIE VIDEO TUTORIAL
- 3.2 DIY BOW TIE INSTRUCTIONS:
- 3.3 STEP 1: Print and assemble the bow tie pattern
- 3.4 STEP 2: Cut fabric and interfacing
- 3.5 STEP 3: Fuse interfacing to fabric
- 3.6 STEP 4: Sew together the skinny ends
- 3.7 STEP 5:
- 3.8 STEP 6: Sew around
- 3.9 STEP 7: Clip and notch
- 3.10 STEP 8: Turn inside
- 3.11 STEP 9: Press
- 3.12 STEP 10: Sew the gap closed
- 4 SEWING BOW TIE OPTIONS:
- 5 How to sew a bow tie – FAQs & Tips:
How to make a bow tie
Supplies and tools
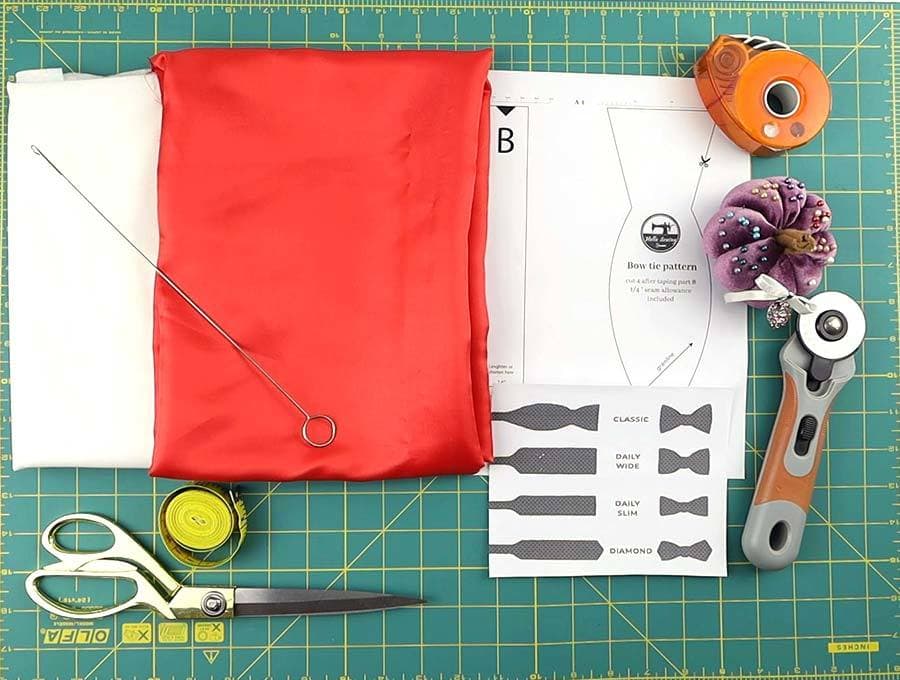
- fabric – 1/4 yd woven cotton (you can also use silk or satin)
- lightweight interfacing – 1/4 yd
- matching thread
- scissors (or rotary cutter and a cutting mat)
- ruler or measuring tape
- iron and ironing board
- sewing clips or pins
- sewing machine
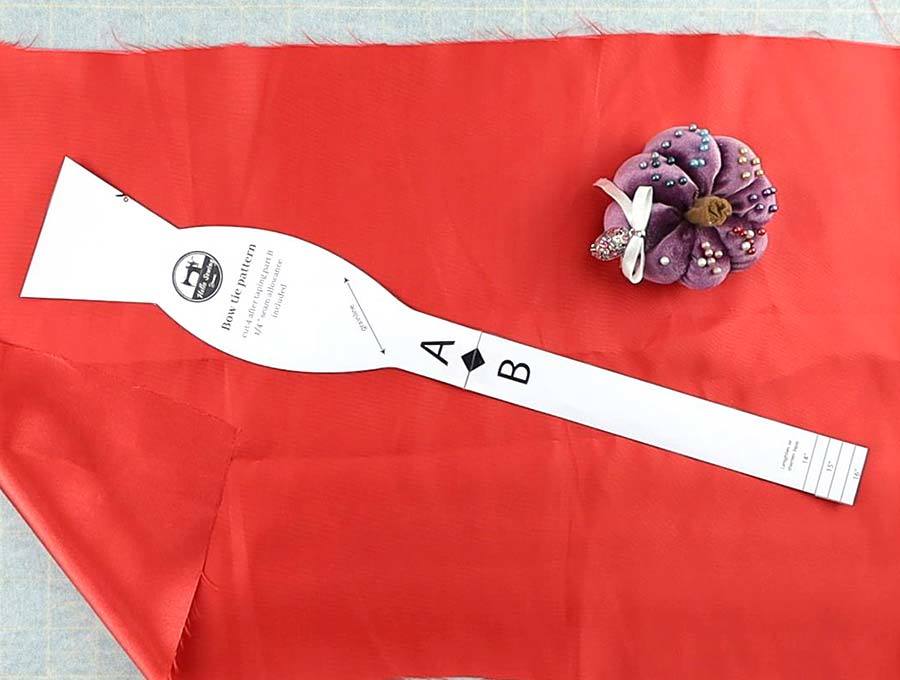
DOWNLOAD: bow tie pattern (Free PDF file)
We offer 4 bow tie style pattern options (see image above):
- Classic
- Wide daily
- Daily skinny
- Diamond
Follow us for free patterns & tutorials! [easy-profiles]
How To Sew a Bow Tie
Watch the diy bow tie video first and then follow the written step by step instructions below.
Please enjoy and don’t forget to Like and SUBSCRIBE over on YouTube to be kept up to date with new videos as they come out.
DIY BOW TIE VIDEO TUTORIAL
DIY BOW TIE INSTRUCTIONS:
STEP 1: Print and assemble the bow tie pattern
Print out the two bow tie pattern pieces supplied, exactly to scale, selecting the appropriate size according to neck measurement of the person for whom you are making the bow tie.
A note about neck sizes – on the tag for a formal shirt you will see a series of numbers. The first refers to the neck size – for example 15 means a 15-inch neck circumference. The second set of numbers refers to the length of the sleeve. You are only interested in the neck size for this project. If the shirt is imported you may have the size given in centimeters with numbers like 38, 40 or 42. Simply divide the first number by 2.54 to get the neck size in inches. For example, a size 38 will be a 15-inch neck.
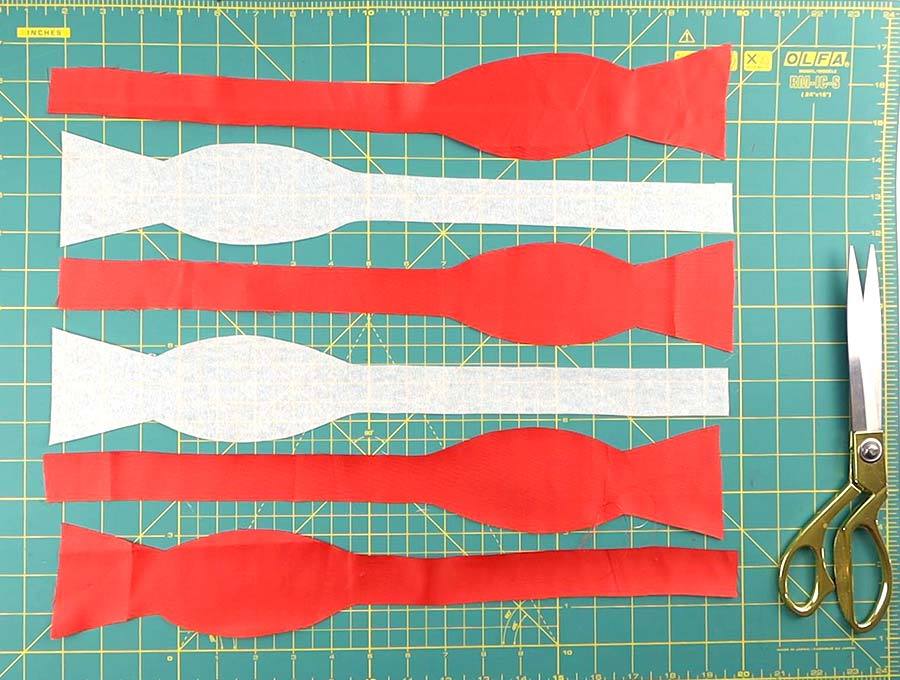
STEP 2: Cut fabric and interfacing
Fold your cloth, right side out and lay the pattern pieces on the bias of the fabric as indicated on the pattern, and pin into place.
Cut out the pattern pieces from the fabric– you will have two of each (4 pieces total).
Lay out you fusible lining and cut one set from your 2 pattern pieces after pinning them in place.
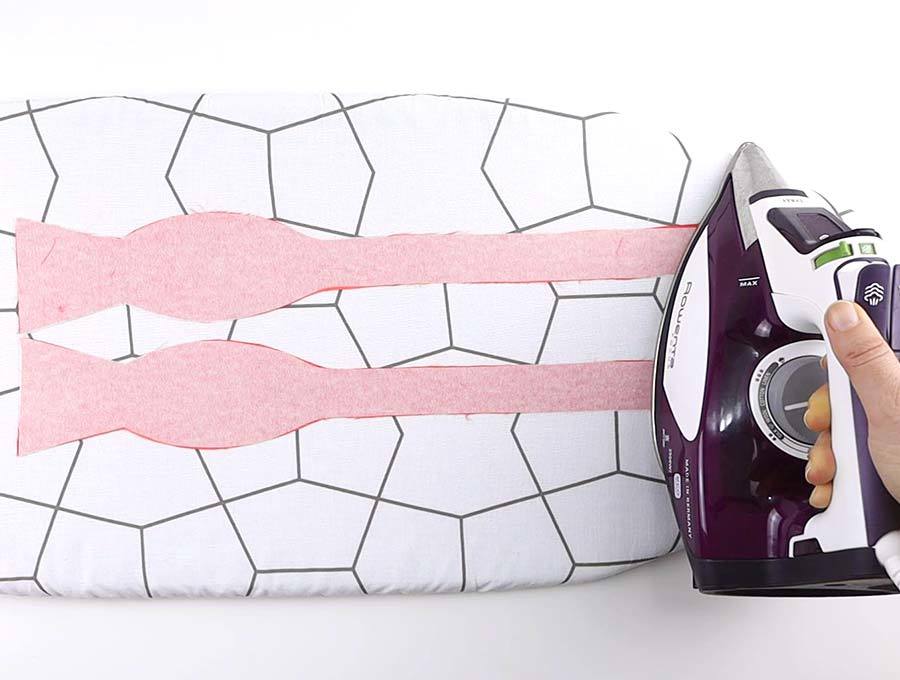
STEP 3: Fuse interfacing to fabric
Using an iron, fuse the lining, on the wrong side of the fabric to the two pieces cut from the top layer of the folded fabric.
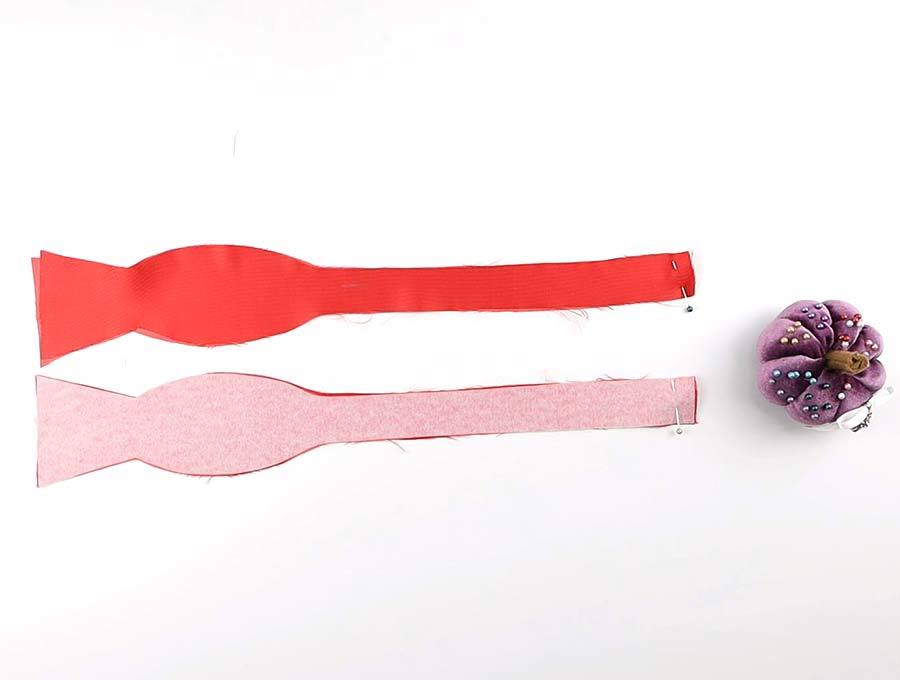
STEP 4: Sew together the skinny ends
Put the right sides of the fabric together, and on the wrong side machine stitch the skinny ends together. Press the seams open.
Join the other two pieces of fabric, right sides facing each other, skinny end to skinny end, then press the seam open.
STEP 5:
Now lay the two right sides of the joined fabric together, one will be wrong side out – this will be the inward facing part of the bow tie and the other will have the fusing showing – once turned this will be the outer side of the bow tie. Pin them together.
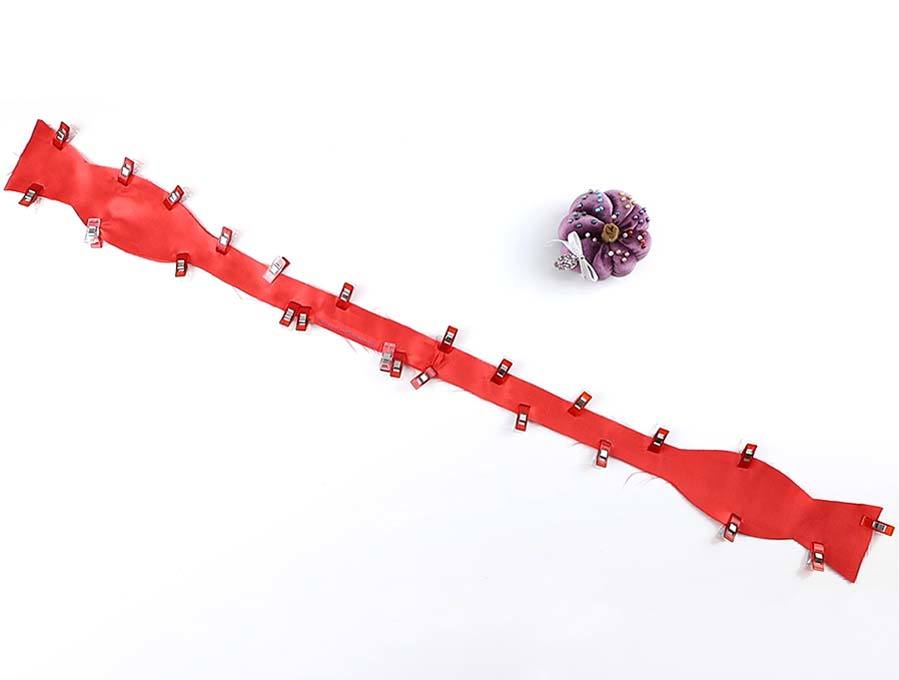
STEP 6: Sew around
Stitch around the whole piece of fabric leaving a gap of 1 ½ inches on either side of the skinny end seam on one side – this is to allow you space to turn the bow tie right side out.
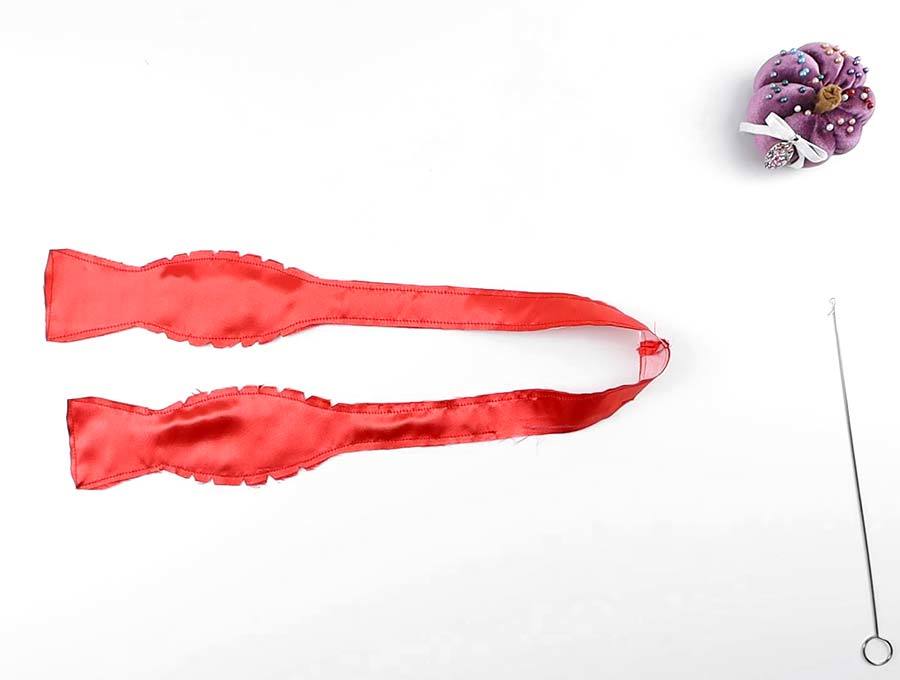
STEP 7: Clip and notch
Remove the pins and using your sewing scissors clip across the corners so you don’t have excess fabric puckering up the corners when you turn the bow tie. On the curve make small incisions with the scissors that don’t quite reach the stitching to ease the fabric, so it will lie flat.
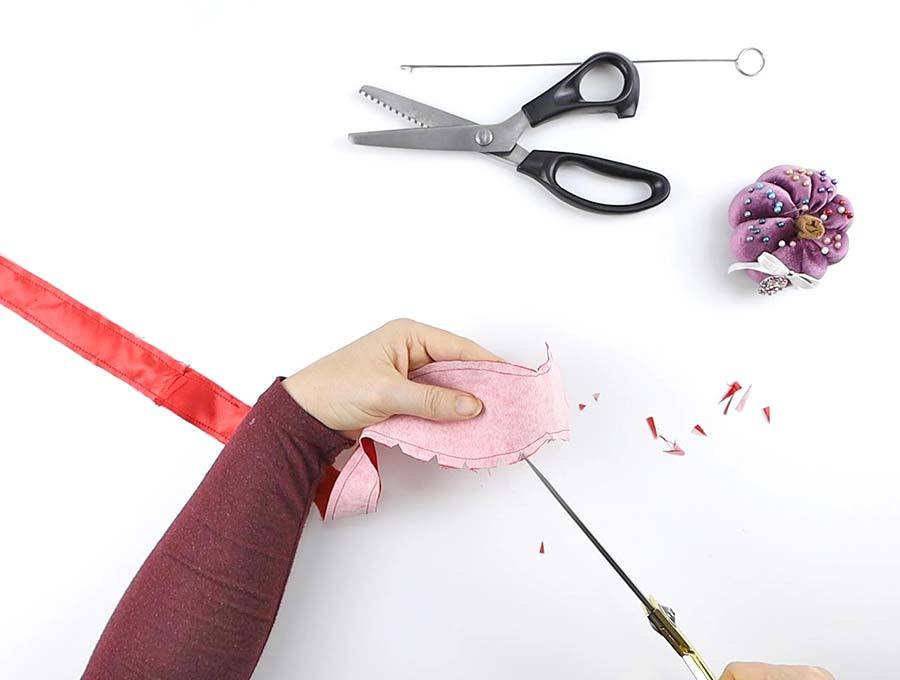
It should look like this when you finish notching:
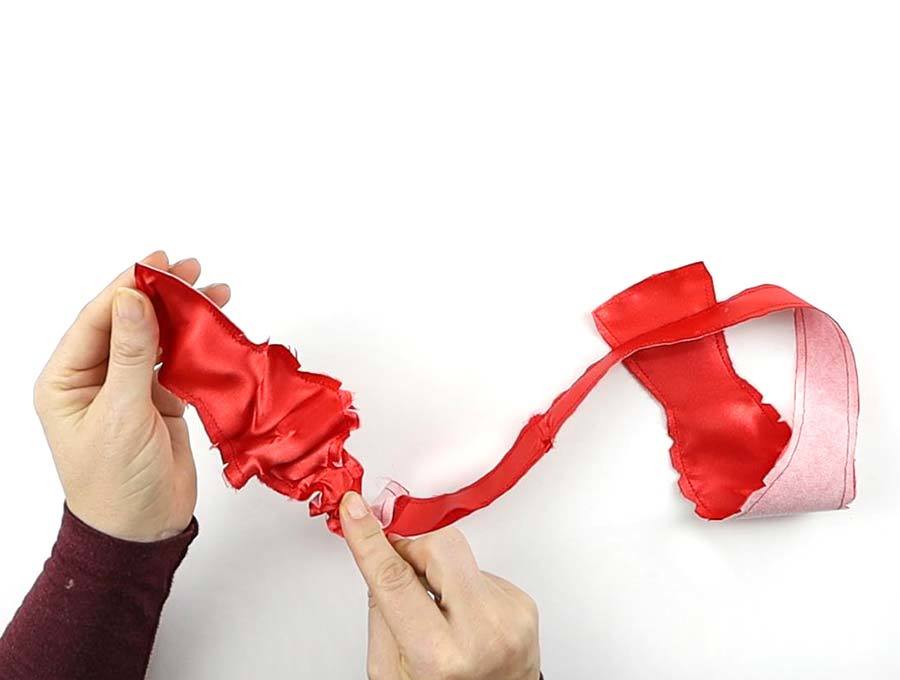
STEP 8: Turn inside
Turn the bow tie right side out through the slit in the neck. Start with one end and work the fabric down to get it through the slit and then work on the other end – a knitting needle or chop stick will work well. Make sure all the corners are pushed through.
STEP 9: Press
Press the bow tie carefully making sure the seams are flat and neat, also pressing the seam allowance inside where the slit was left.
STEP 10: Sew the gap closed
Using an invisible slip stitch join the seams of the slit together to finish.
If you are in a hurry or don’t particularly like handsewing, machine sew 1/8″ from the edge to close the gap.
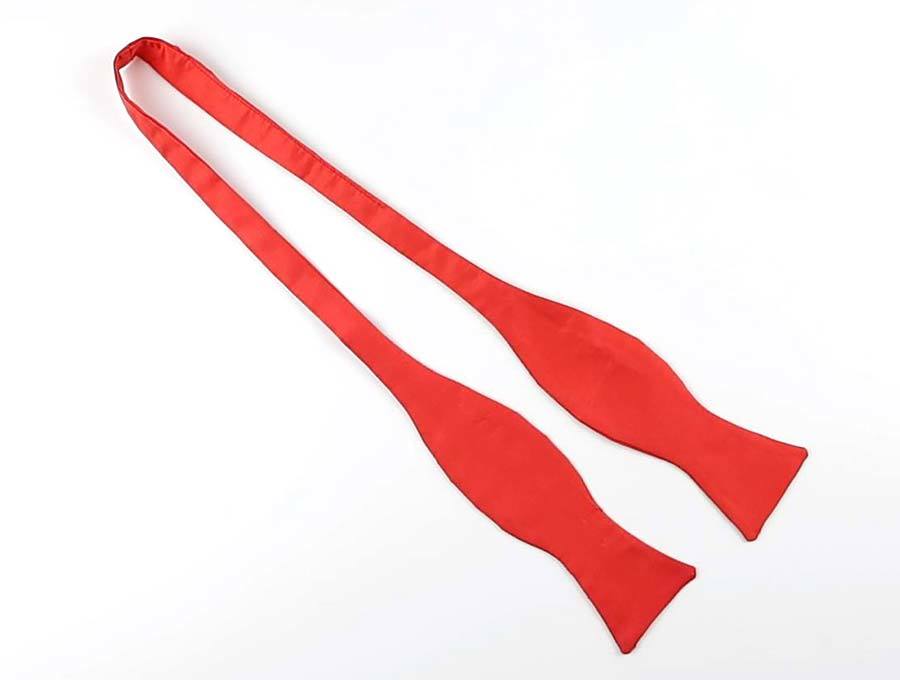
Voila! The DIY bow tie is now ready for use.
SEWING BOW TIE OPTIONS:
- STYLE: 4 different styles – I’m giving you a pattern for 4 bow tie styles: classic, daily wide, daily skinny and diamond
- COLOR: 2 colored bow tie – You can cut 2 pieces from one fabric and the other two from another coordinating fabric.
How to sew a bow tie – FAQs & Tips:
- For a good-looking bow tie try to select a fabric that is medium weight – if it is too heavy you will have difficulty turning the bowtie right way out and in tying it. If the fabric chosen is too flimsy the bow tie will be floppy. The look you are aiming for is effortless elegance, Bond style.
- Choose a light to medium weight fusible lining otherwise the bow tie won’t be easy to knot into shape.
- If you or your partner are not sure how to tie a bow tie, then watch my video above for the correct method.
Now you know the tailor’s tricks for creating bow ties you can confidently offer to help coordinate for the bow ties for groomsmen at friends’ wedding parties. You’ll also ensure you stand out at formal events with your partner’s bow tie picking up the color way of your outfit or sew a fabric bow to put in your hair or on for your dress, purse or jacket. And why not create a few just for fun – they make great gifts, and a man wearing a properly tailored shirt with a bow tie is bound to grab attention. The jacket for less formal occasions is no longer necessary as the bow tie enters the 21st Century still stylish and riding a wave of popularity.
Do you like this how to sew a bow tie tutorial? Pin for later:
[***pin img****]Wanna be friends? Click HERE and follow me on Pinterest
RELATED GIFTS FOR MEN and BOYS: