
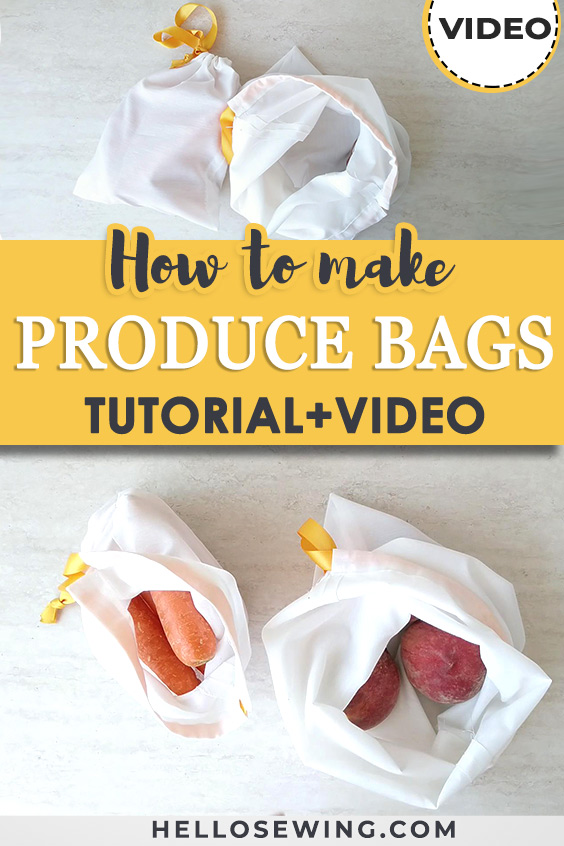
DIY Reusable Produce Bags – FREE Pattern + VIDEO Tutorial
Ever since I was a kid, I always wore reusable cloth produce bags to the store. Back then, my mother made them, but as soon I started sewing myself, I was the one who made one for every family member who didn’t have it.
The most important thing you have to keep in mind when making these is weight and strength. Your bag needs to be light enough to carry, but strong enough to hold a lot of products without tearing or coming undone.
A few other factors come into play of course, like the overall construction, appearance, and practicality. Fortunately, I have the ideal recipe for making a DIY produce bags, and I’ll share it with you here.
Below you will find my step by step written tutorial how to make reusable produce bags with VIDEO instructions for all the visual learners.
We occasionally link to goods offered by vendors to help the reader find relevant products. Some of the links may be affiliate meaning we earn a small commission if an item is purchased.
Table of Contents
- 1 How to Make Produce Bags
- 2 Supplies and tools
- 3 How To Sew Zero Waste Produce Bags
- 3.1 DIY PRODUCE BAGS VIDEO TUTORIAL
- 3.2 What is the best fabric for reusable produce bags?
- 3.3 INSTRUCTIONS:
- 3.4 STEP 1: Prepare the fabric
- 3.5 STEP 2: Mark the casing for the drawstring
- 3.6 STEP 3: Pin and sew around the fabric
- 3.7 STEP 4: Fold one edge and press
- 3.8 STEP 5: Stitch along the side openings
- 3.9 STEP 6: Prepare the drawstring casing
- 3.10 STEP 7: Finalize the casing
- 3.11 STEP 8: Insert the drawstring
- 3.12 STEP 9: Tie the drawstring
- 4 CLOSURE OPTIONS:
How to Make Produce Bags
Supplies and tools
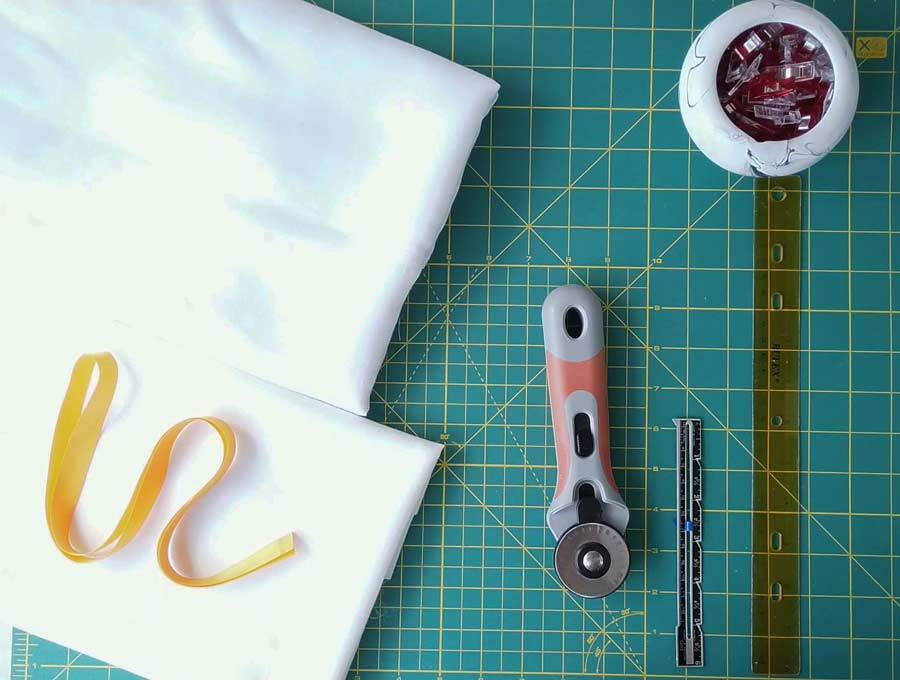
- fabric – 13 x 32″ cotton, mesh or voile for size Large
- matching thread thread
- scissors (or rotary cutter and a cutting mat)
- ruler or measuring tape
- pins or clips
- bodkin (optional) to insert the drawstring easily
- sewing machine (a home decor machine will do just fine, a serger will be even better, but you can even hand sew these)
Follow us for free patterns & tutorials! [easy-profiles]
How To Sew Zero Waste Produce Bags
Watch the cloth vegetable bags video first and then follow the written step by step instructions below.
Please enjoy and don’t forget to Like and SUBSCRIBE over on YouTube to be kept up to date with new videos as they come out.
DIY PRODUCE BAGS VIDEO TUTORIAL
What is the best fabric for reusable produce bags?
Before you start making these diy produce bags, you have to decide which fabric you will be using for it. I usually make mine from cotton muslin, or sometimes a lightweight polyester mesh that can stretch a little. You can use other materials such as voile of course, but keep a few things in mind while you’re choosing.
You want a light fabric so that the bag is light as well. You don’t need any additional weight in the bag, because it is usually weighted along with the products.
The bag should also be durable so that you can pack it with whatever you bought without worrying if it will rip open as you go back home. Slight stretching is fine, but if the fabric stretches too much, you’ll end up dragging the bag along the floor.
For practical reasons, I suggest you go with a material that doesn’t require special washing so that you can quickly and easily wash the bag with any other thing that fills the washing machine.
Remember that this project is environmentally friendly, so try using recycled materials. Repurposing an old shirt or a pair of pants can provide you with enough fabric, save you money, and help you protect the environment all at once. After you choose the fabric, you can start making truly zero waste produce bags.
INSTRUCTIONS:
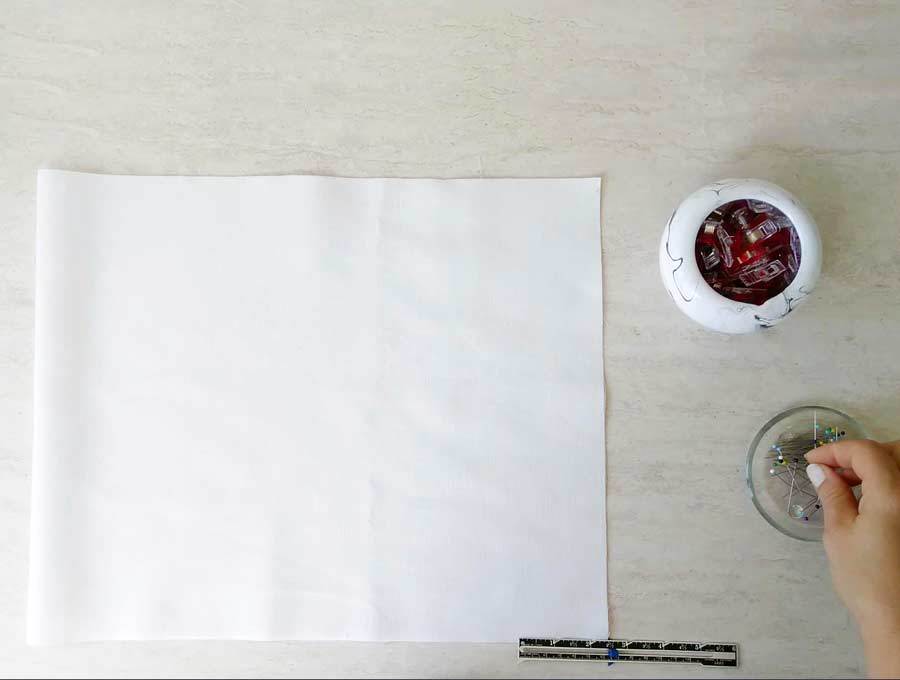
STEP 1: Prepare the fabric
This particular tutorial will explain how the drawstring opening style bag is made. Start by washing the fabric thoroughly to avoid any future shrinking of the material. Then fold it in half, place it on a cutting mat and use a rotary cutter or scissors to cut 13 x 16 inches on the fold. When unfolded, this would measure 13x 32″.

STEP 2: Mark the casing for the drawstring
Leave the two pieces you just cut out on each other. Then grab a measuring tape or a ruler and measure two and a half inches from one end of the longer edge. Mark this section with a straight pin or sewing chalk for later.
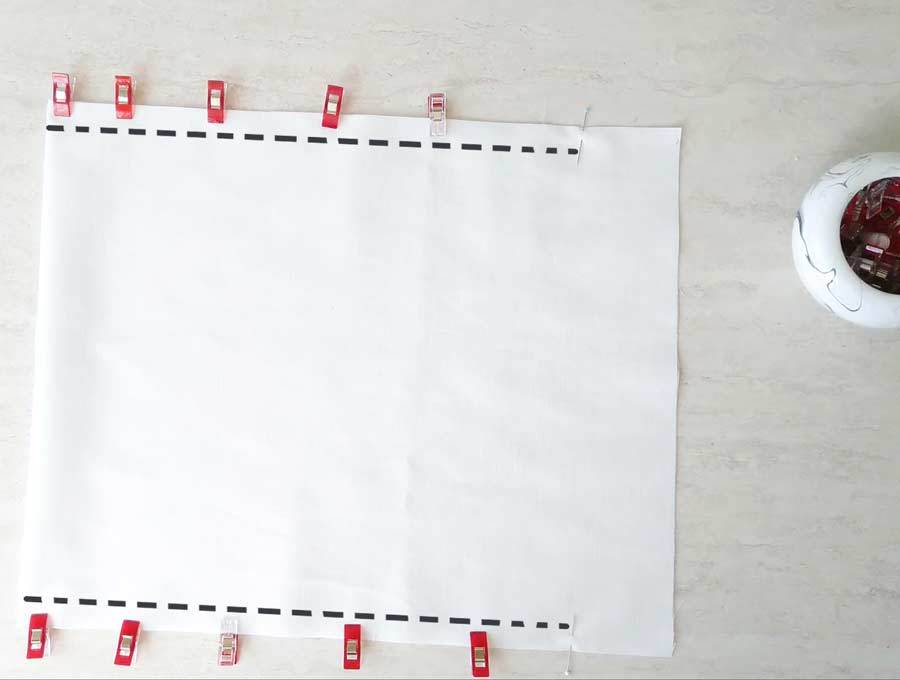
STEP 3: Pin and sew around the fabric
Start stitching from the place you just marked and go all the way around, sewing together the two layers on three sides. Leave one shorter side unstitched for the opening of the bag. Don’t stitch the section you marked either, that stays open for now.
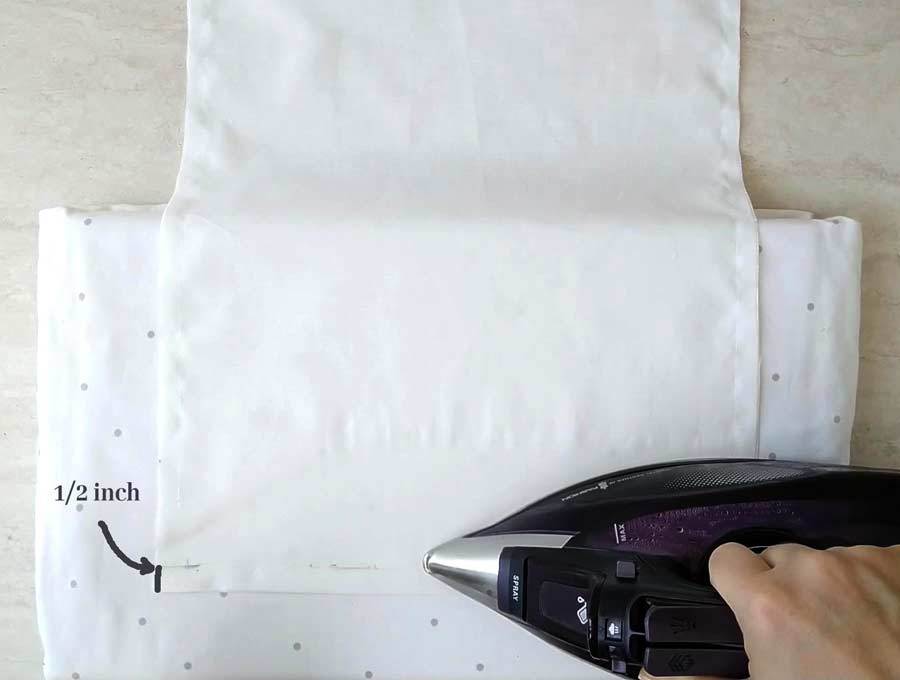
STEP 4: Fold one edge and press
Fold about half of an inch at the top edge, to the wrong side. Press it flat with your iron.
Use your iron to press open the seam allowance on the side of the opening, together with the two and a half inches you marked at the second step.
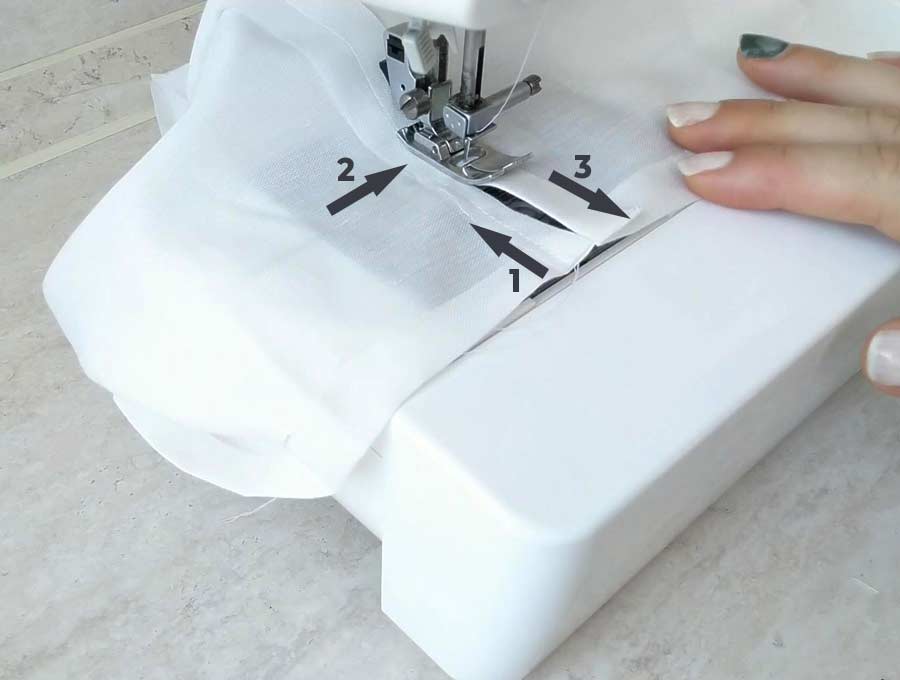
STEP 5: Stitch along the side openings
Start sewing from the top to the bottom, until you reach the end of opening for the drawstring casing. Then sew across the side seam just below the opening about half an inch. Finish by sewing back up the other side, ending at the top edge. Repeat for the opposite side.
STEP 6: Prepare the drawstring casing
Fold about one inch to the wrong side at the topand press with an iron.
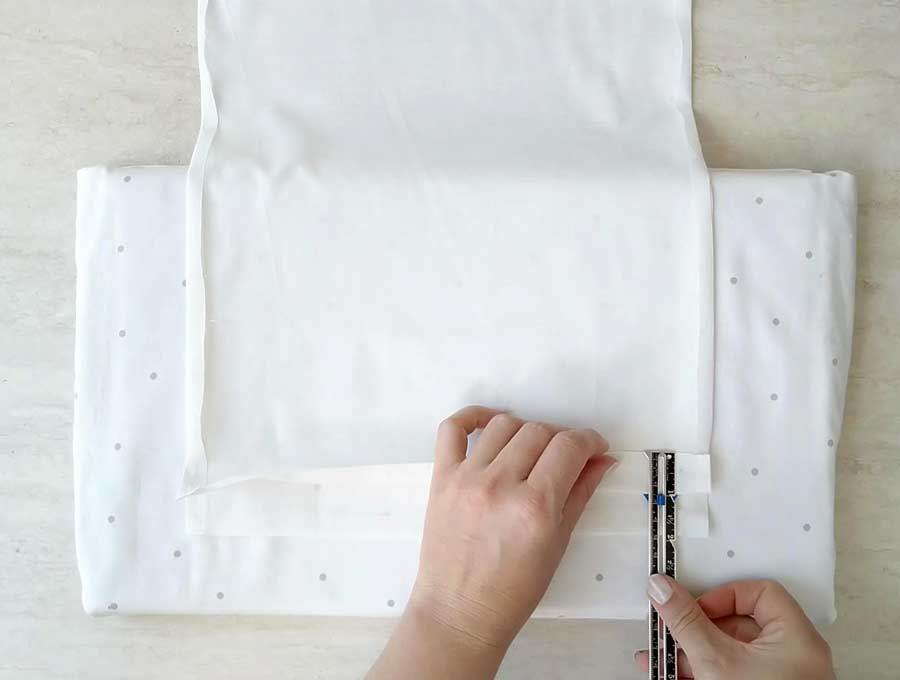
STEP 7: Finalize the casing
Stitch all the way around at the bottom of the folded section.
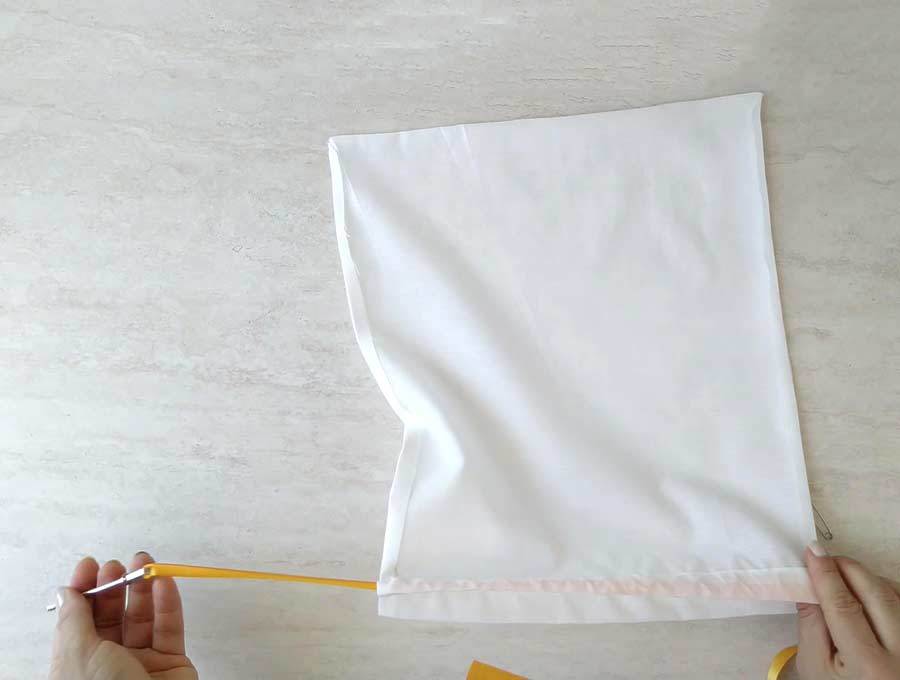
STEP 8: Insert the drawstring
Cut your drawstring so that it’s long enough to go around the back and have some extra length to tie a knot. Tape both of its ends with sticky tape. Then attach a safety pin to one end of the drawstring. Use the pin to thread the string through the casing. Remove the pin and the sticky tape.
STEP 9: Tie the drawstring
Tie both ends of the drawstring in a overhand knot.

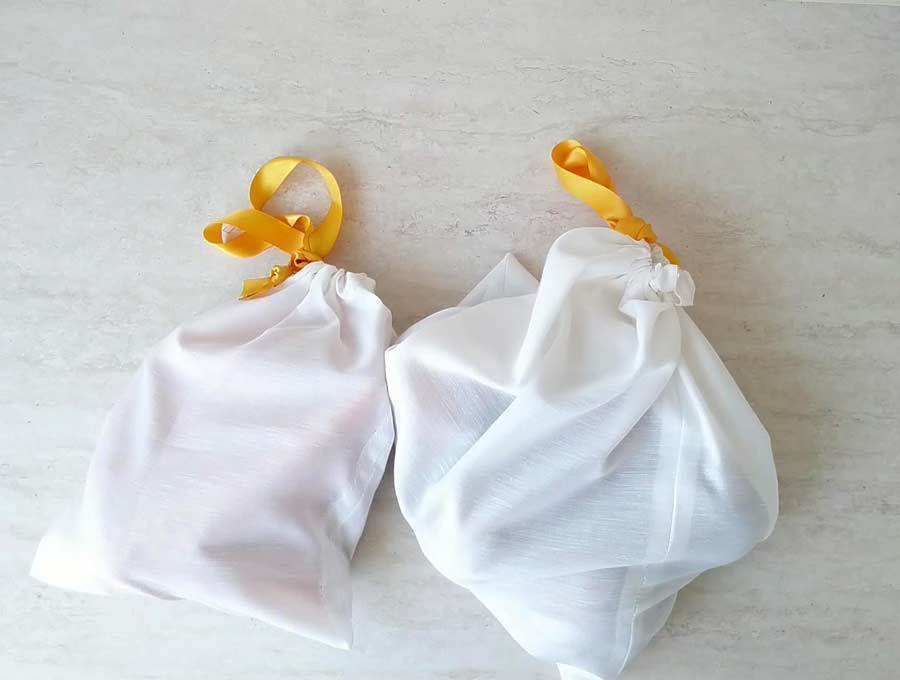
Your reusable produce bag is complete!
I hope you like the tutorial. Now you don’t have to use plastic nor paper bags and leave waste behind you after each trip to the store. Stay environmentally-friendly!
CLOSURE OPTIONS:
The bag you will be making isn’t exactly a one-mold-fits-all type. There are a couple of different variations you can choose from, and the main thing that separates diy produce bags from each other is their closing style.
- Regular hem opening is the simplest and in my opinion the best choice. You just hem the edges on the opening and that’s it. The downside to this type is the fact that it doesn’t quite keep the products inside safely. If you put too many items inside, they can fall out simply because nothing is there to stop them. A bag clip, however, can solve this issue.
- Elastic opening is great for keeping a lot of products safely inside the bag. To make this opening, cut out a piece of elastic about half of an inch longer than the circumference of the bag. Then insert the elastic like you would a waistband. This type isn’t exactly practical when you buy plenty of small items like nuts or hard candy because you can have difficulties removing them from the bag.
- Drawstring opening style is about halfway between the first two. You insert the drawstring or a plain shoelace at the hem of the opening. If you want, you can also put a cord-lock on it. This type can be of opening can be contracted for when you buy a lot of large items, or you can just leave it open like there is no string on it.
Do you like this? Pin the DIY produce bags for later:
Wanna be friends? Click HERE and follow me on Pinterest
OTHER SUSTAINABLE AND ZERO-WASTE PROJECTS:
- DIY plastic bag holder
- DIY Jar Opener
- DIY cloth napkins
- How to make reusable paper towels
- DIY doorstopper
- How to hem jeans and keep the original hem
- Reusable makeup remover pads
Other easy bag patterns: