
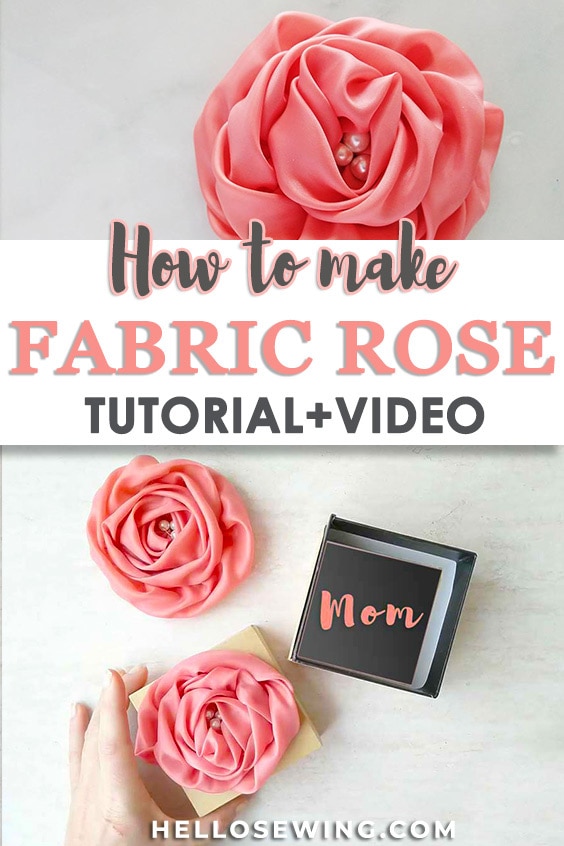
DIY: How to Make a Realistic Fabric Rose
Make a gorgeous fabric rose to add to your home decor or to give MOM for mother’s day. A gorgeous handmade gift topper you can sew by hand or machine. Stunning home decoration. Flowers are great for decoration of your home dining table, weddings, offices, and pretty much any other kind of space. The problem with real flowers is that they need to be taken care of properly or they eventually wither. And when I’m not home, no one remembers to water them regularly, no matter how many times I remind them.
But thanks to my kind husband being a bit lazy, I came up with an alternative to real flowers. Fabric roses. They look wonderful. They are also very easy and fun to make. You can make a few of them in less than an hour. Just follow the instructions from this tutorial and you’ll finish before you know it.

Below you will find my step by step written tutorial with VIDEO instructions for all the visual learners.
We occasionally link to goods offered by vendors to help the reader find relevant products. Some of the links may be affiliate meaning we earn a small commission if an item is purchased.
Table of Contents
- 1 How to Make a Fabric Rose
- 2 Supplies and tools
- 3 How to Sew a Satin Fabric Flower
- 3.1 REALISTIC FABRIC ROSE VIDEO TUTORIAL
- 3.2 INSTRUCTIONS:
- 3.3 STEP 1: Measure and cut the fabric strip
- 3.4 STEP 2: Fold the upper right corner down
- 3.5 STEP 3: Make a diagonal cut
- 3.6 STEP 4: Start stitching
- 3.7 STEP 5: Gather the strip of satin
- 3.8 STEP 6: Form the center of the rose
- 3.9 STEP 7: Preview your flower
- 3.10 STEP 8: Unroll and start stitching
- 3.11 STEP 9: (Optional) Add a fabric circle to the back
- 3.12 STEP 10: (Optional) Add bead to the center
- 4 DIY FABRIC ROSE OPTIONS:
- 5 FAQs, Tips and Troubleshooting:
How to Make a Fabric Rose
Supplies and tools
- fabric – 3″ x 40-50″ long strip of satin (you can also use silk or chiffon)
- matching thread thread
- scissors (or rotary cutter and a cutting mat)
- ruler or measuring tape
- sewing machine (a simple machine will do just fine, or you can even hand sew this, although admittedly it will take you more time)
Notes: You can use a variety of materials– satin, silk and even chiffon
Follow us for free patterns & tutorials! [easy-profiles]
How to Sew a Satin Fabric Flower
Watch the diy fabric rose video first and then follow the written step by step instructions below.
Please enjoy and don’t forget to Like and SUBSCRIBE over on YouTube to be kept up to date with new videos as they come out.
REALISTIC FABRIC ROSE VIDEO TUTORIAL
INSTRUCTIONS:
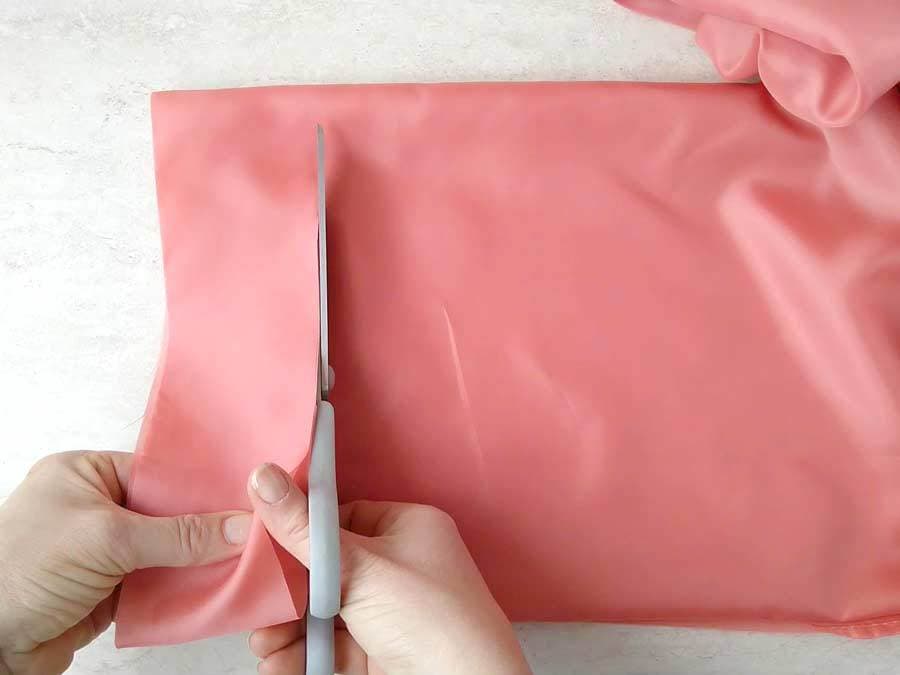
STEP 1: Measure and cut the fabric strip
You will need to cut the satin/chiffon into a pretty long piece. It should be 40 to 50 inches long, and around 3 -3.5 inches wide.
Cut longer strip of fabric if you want more voluminous rose. The longer your strip of fabric, the bigger your rose is going to be.
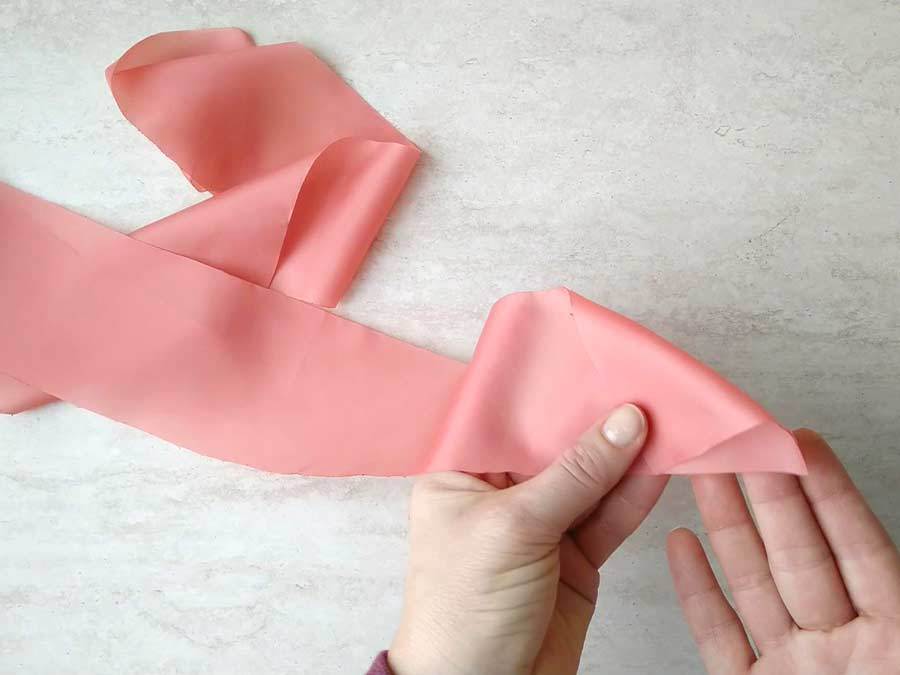
STEP 2: Fold the upper right corner down
Take one corner of the fabric piece, pull it down, and fold the fabric so that it touches the opposite long edge, about two inches from the top. You will end up with a small, irregular triangle at one end of the entire fabric piece.
STEP 3: Make a diagonal cut
Now cut the fabric slightly diagonally at the point where the corner of the fold touches the long edge. The corner you pulled down earlier. Cut towards the closer end of the fabric.
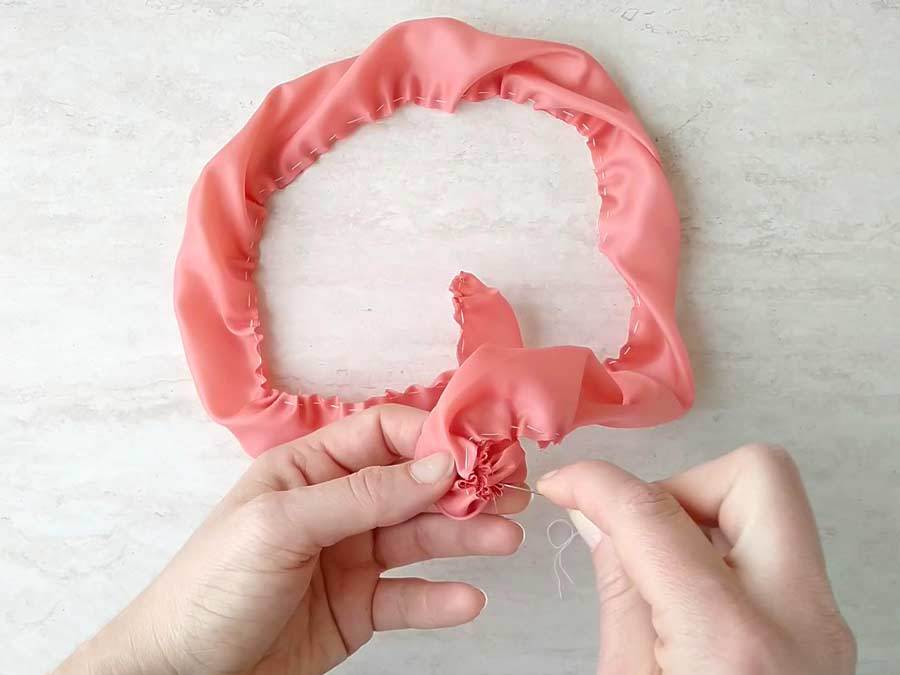
STEP 4: Start stitching
Now stitch along the shortest edge of the triangle. Once you have done that, fold the fabric so that the long edges meet and make a few stitches.
Keep folding and stitching all the way to the end of the strip.

STEP 5: Gather the strip of satin
Pull the end of the thread to gather the fabric strip.

STEP 6: Form the center of the rose
Pull the beginning of the thread even more to gather the center of the rose. Then adjust the gathering towards the center
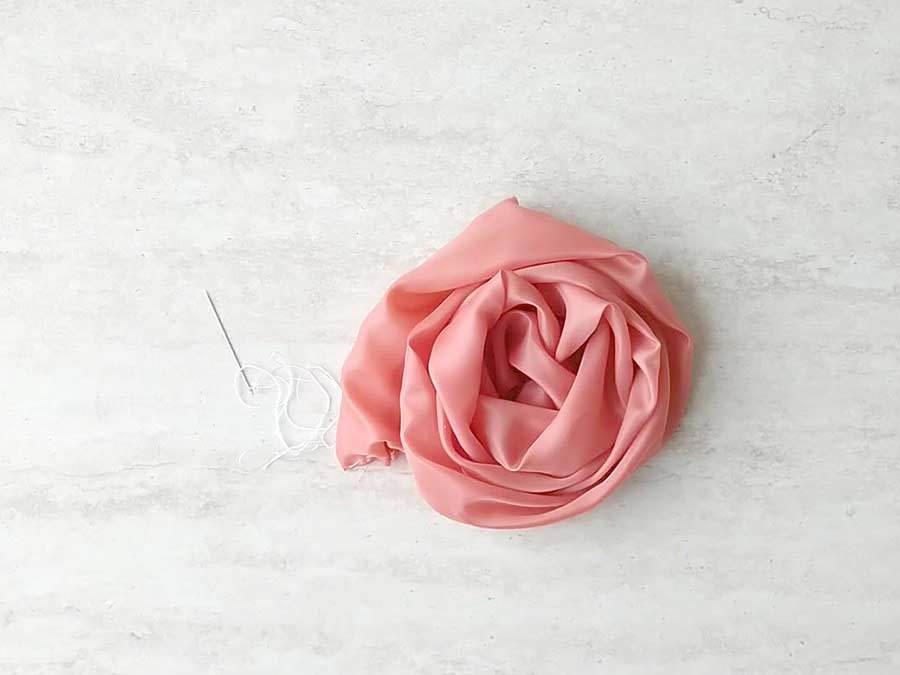
STEP 7: Preview your flower
Roll up your flower and fluff it to see how you like it.
STEP 8: Unroll and start stitching
Unroll the fabric flower and make a few stitches at the back to hold the center. Keep rolling and stitching. When you reach the end of the strip make a secure knot and trim the ends of the thread.
STEP 9: (Optional) Add a fabric circle to the back
Cut a circle of fabric and either glue it or stitch it to the back of the flower
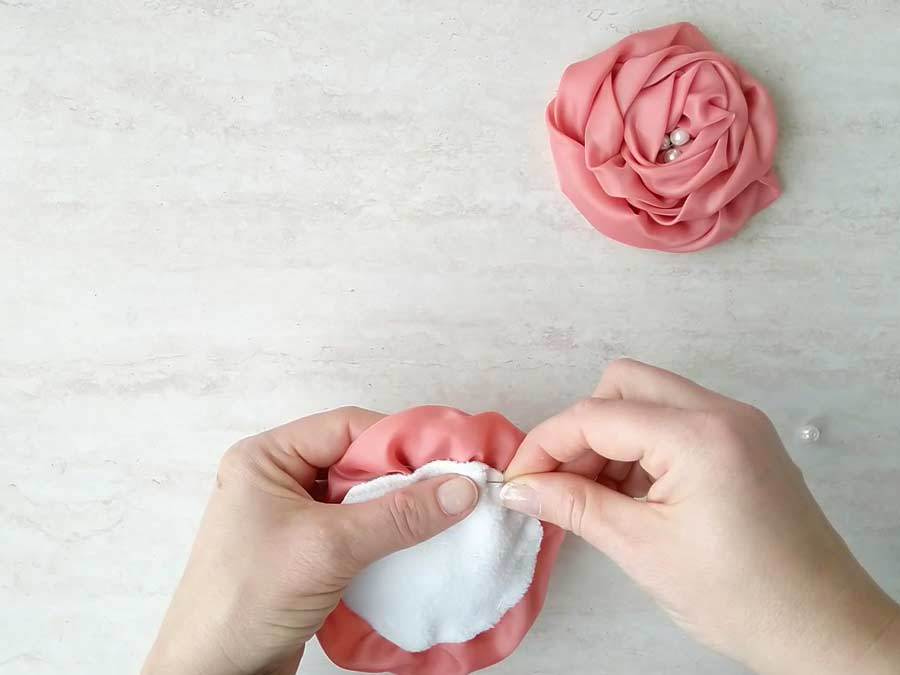
STEP 10: (Optional) Add bead to the center
Sew three medium white beads to the center of the flower
That’s it your fabric rose it ready!

DIY FABRIC ROSE OPTIONS:
- ADD STEM to make a bouquet – Use a floral wire to make a stem. Using a dab of glue attach the rose to the stem
- ADD BEADS to the center of your rose for a more polished look
- Attach a felt or flannel circle to the back of the rose and use it as a table top decoration
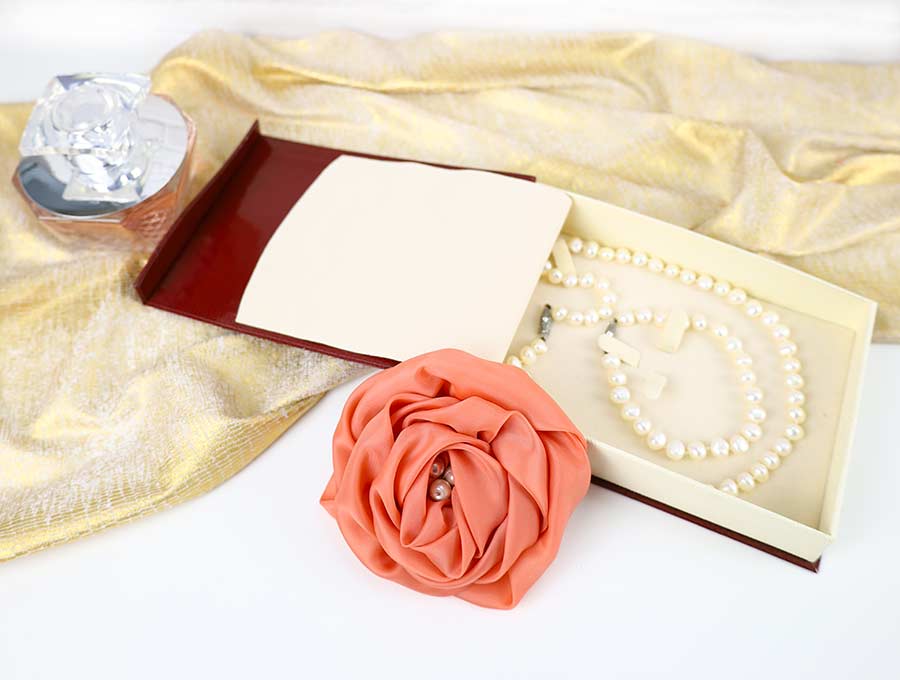
- Turn it into a gift box topper – use a bit of clear tape or flue to attach it to a gift box for a truly memorable gift
OTHER HAIR ACCESSORIES:
FAQs, Tips and Troubleshooting:
- My fabric does not twist and the flower looks different. Why so?
Do you like this? Pin for later:
Wanna be friends? Click HERE and follow me on Pinterest
RELATED: