
Easy DIY Blouse with Ties for a Glamorous Look
Fancy a soft pretty blouse that is easy to make with our visuals and step by step tutorial? Check out this easy DIY blouse with ties!
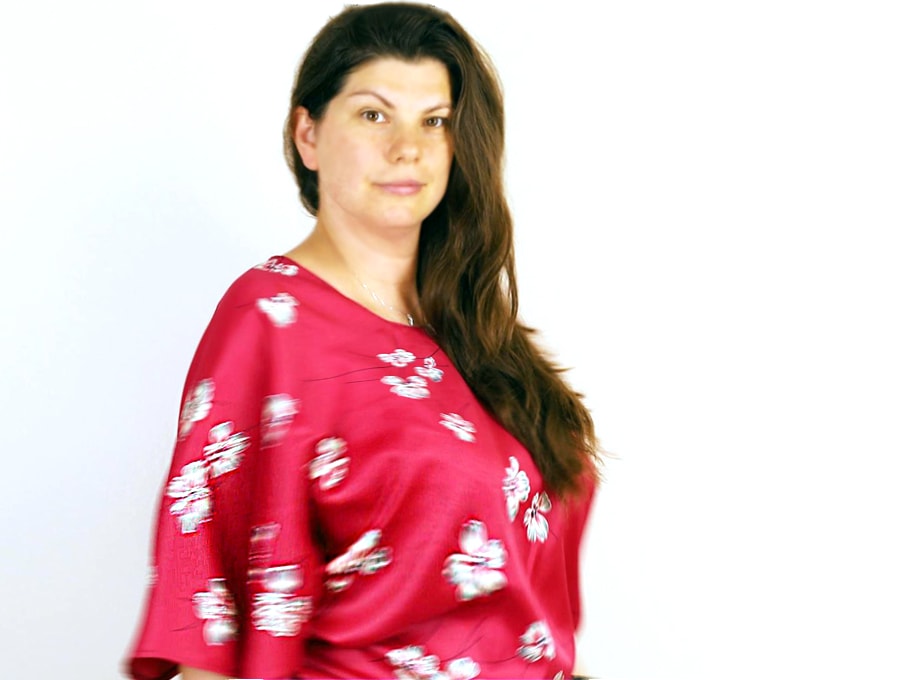
We guide you every step of the way as you make this easy circular blouse that drapes to your figure. Wear it after a day at the beach to show off bronzed skin, on a bicycle ride, or for an evening out. It ties at the sides for easy adjustment. Try it in a bright silky fabric or soft printed cotton voile for sunny days, or make a version in a heavier silk jersey knit in a darker color to wear at night for a glamourous look.
This super easy blouse needs a flowy fabric as it is cut in a circle and drapes to the figure. With the ties on either side it make adjusting for size easy. It’s summery piece that can be worn over a bikini top on hot days, or over a tank top. Follow our step by step instructions to make this easy blouse that needs no buttons or buttonholes, no cuffs or collars to fiddle with. It’s such a fun sewing project to add to your wardrobe. Choose bright silks or jersey knits, or any other fabric that drapes well.
Below you will find my step by step written tutorial with VIDEO instructions for all the visual learners.
We occasionally link to goods offered by vendors to help the reader find relevant products. Some of the links may be affiliate meaning we earn a small commission if an item is purchased.
Table of Contents
- 1 How to make an Easy Blouse with Ties
- 2 Easy blouse Supplies and tools
- 3 How to Sew a DIY blouse with ties
- 3.1 DIY blouse with ties
- 3.2 VIDEO TUTORIAL
- 3.3 DIY BLOUSE INSTRUCTIONS:
- 3.4 STEP 1:
- 3.5 STEP 2: Create the side curve
- 3.6 STEP 3: Cut out the side curve
- 3.7 STEP 3:
- 3.8 STEP 3:
- 3.9 STEP 3:
- 3.10 STEP 3:
- 3.11 STEP 3:
- 3.12 STEP 3:
- 3.13 STEP 3:
- 3.14 STEP 3:
- 3.15 STEP 3:
- 3.16 STEP 3:
- 3.17 STEP 3:
- 3.18 STEP 3:
- 3.19 STEP 3:
- 3.20 STEP 3:
- 3.21 STEP 3:
- 3.22 STEP 3:
- 3.23 STEP 3:
- 3.24 STEP 3:
- 3.25 STEP 3:
- 3.26 STEP 3:
- 3.27 STEP 3:
- 3.28 STEP 3:
- 3.29 STEP 3:
- 3.30
How to make an Easy Blouse with Ties
Easy blouse Supplies and tools
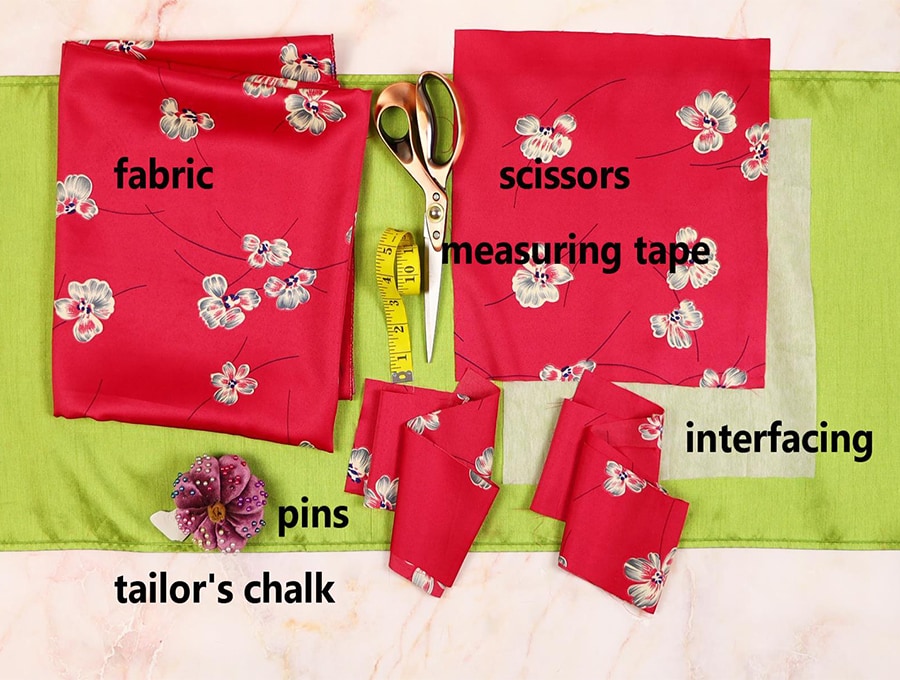
- fabric – 100% silk or similar fabric that drapes well
- fusible interfacing 12 x 12″(30x30cm)
- matching thread
- scissors (or rotary cutter and a cutting mat)
- ruler or measuring tape
- iron and ironing board
- sewing clips or pins
DOWNLOAD: easy pattern drawing [Free pdf file]
***pattern coming soon***
Follow us for free patterns & tutorials! [easy-profiles]
How to Sew a DIY blouse with ties
Watch the diy blouse with ties video first and then follow the written step by step instructions below.
Please enjoy and don’t forget to Like and SUBSCRIBE over on YouTube to be kept up to date with new videos as they come out.
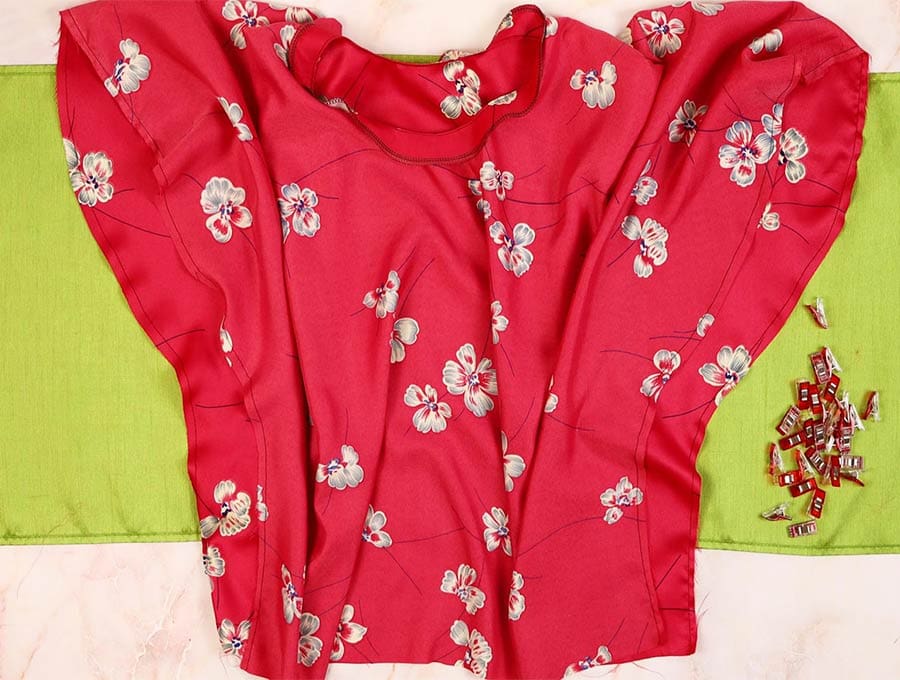
DIY blouse with ties
VIDEO TUTORIAL
DIY BLOUSE INSTRUCTIONS:
Materials you will need for the blouse
For the blouse:
Size M (US 8): One piece of fabric 40 inches x 40 inches (100 x 100 cm)
Size L (US 10): One piece of fabric 44 inches x 44 inches (110 x 110 cm)
Size XL (US 12): One piece of fabric 48 inches x 48 inches (120 x 120 cm)
For the Ties:
Two pieces 48 inches x 4 inches (120 x 10 cm)
For the neck facing:
- One piece 12 inches x 12 inches (30 x 30 cm)
- lightweight interfacing – 12 inches x 12 inches (30 x 30 cm)
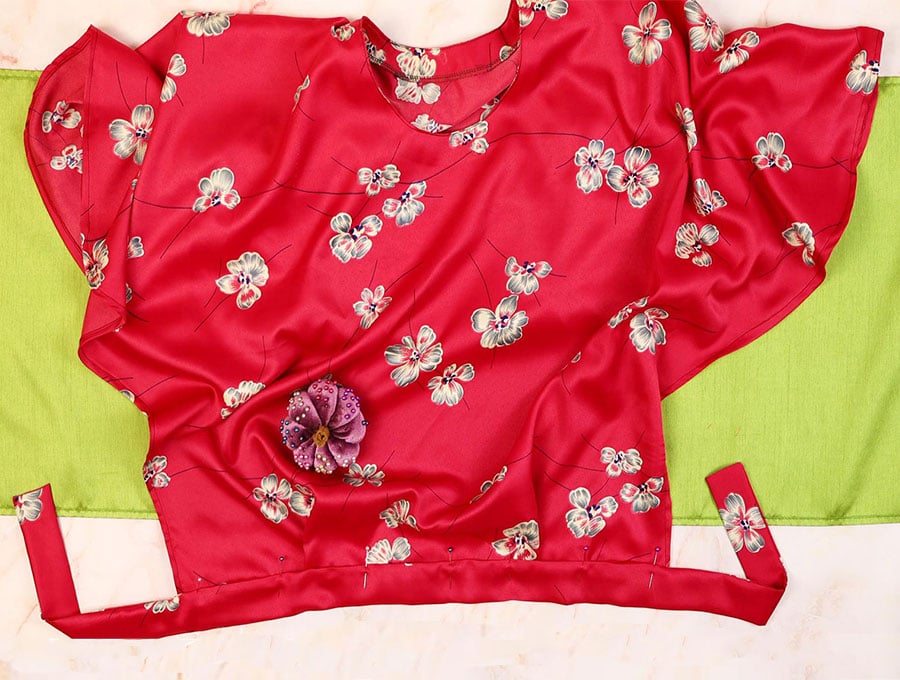
STEP 1:
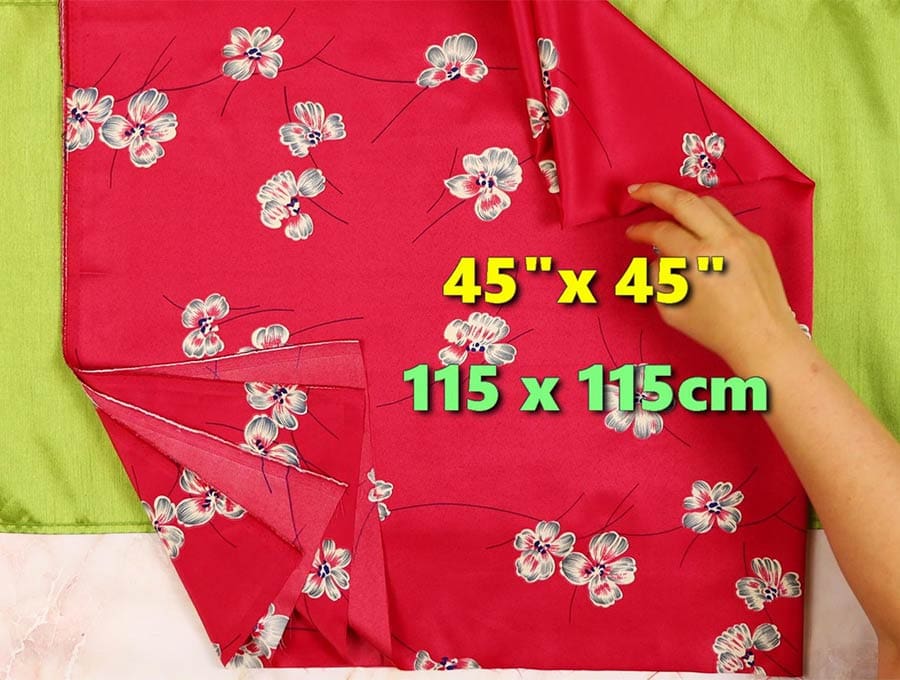
With the wrong side of the fabric uppermost, fold the large piece of fabric in half downwards and then in half across from right to left, so you have a 4-layer square. Place a couple of pins in the layers to keep them aligned.
STEP 2: Create the side curve
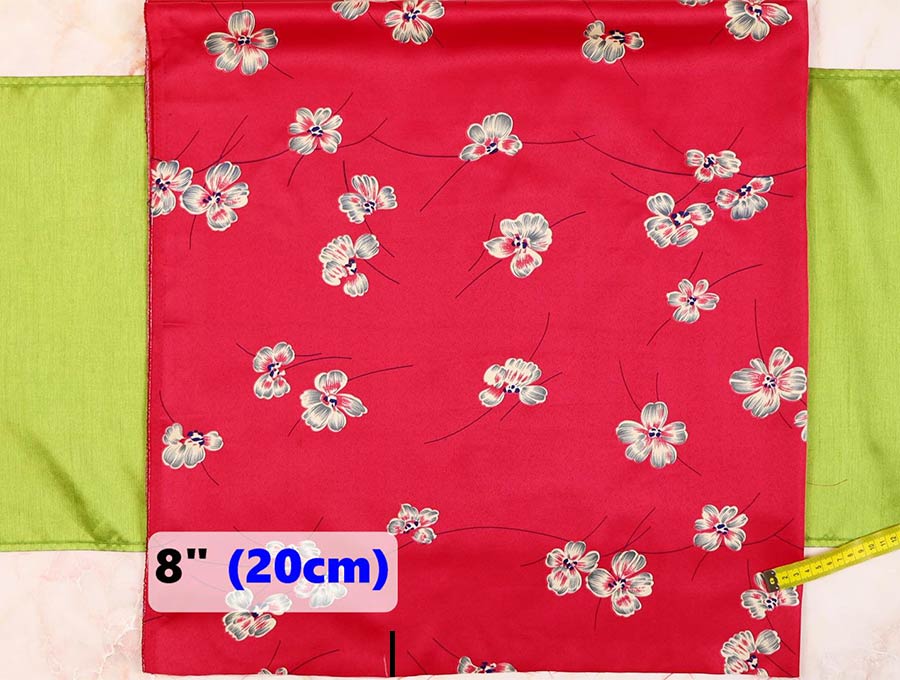
- On the left-hand side – where there are no folds measure inwards 8 inches (20 cm) along the bottom edge of the fabric and make a mark with your erasable fabric marker.
- Use a ruler to join the mark up with the top left-hand corner of the fabric.
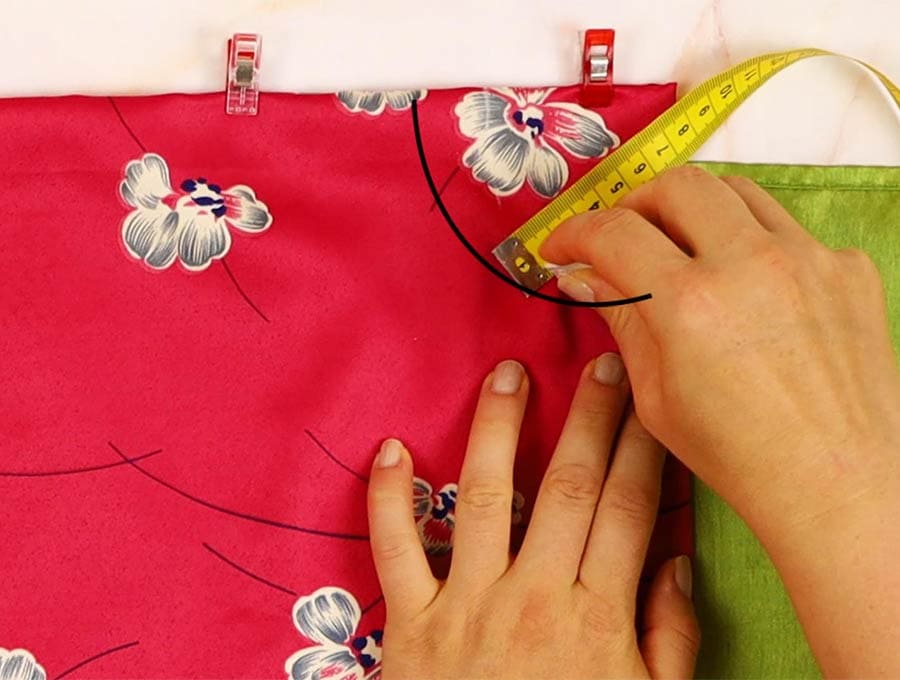
- Create the curve for the sleeve by measuring 6 inches (15 cm) from the base upwards along the diagonal line you drew in Step 3, and make a mark. Then measure 1.5 inches (4 cm) inwards towards the fold from that mark to make a new mark.
- Measure 6 inches (15 cm) from the top left-hand corner along the diagonal line and make a mark. Now from that mark measure 1.57 inches (4 cm) outwards towards the left-hand side and make a mark.
- Now using a smooth curve join up the top left-hand corner to the mark that goes outwards, then from there to the mark that goes inwards 1.5 inches (4 cm), then curve it gently down to the mark at the bottom that was 8 inches (20 cm) in from the bottom edge.
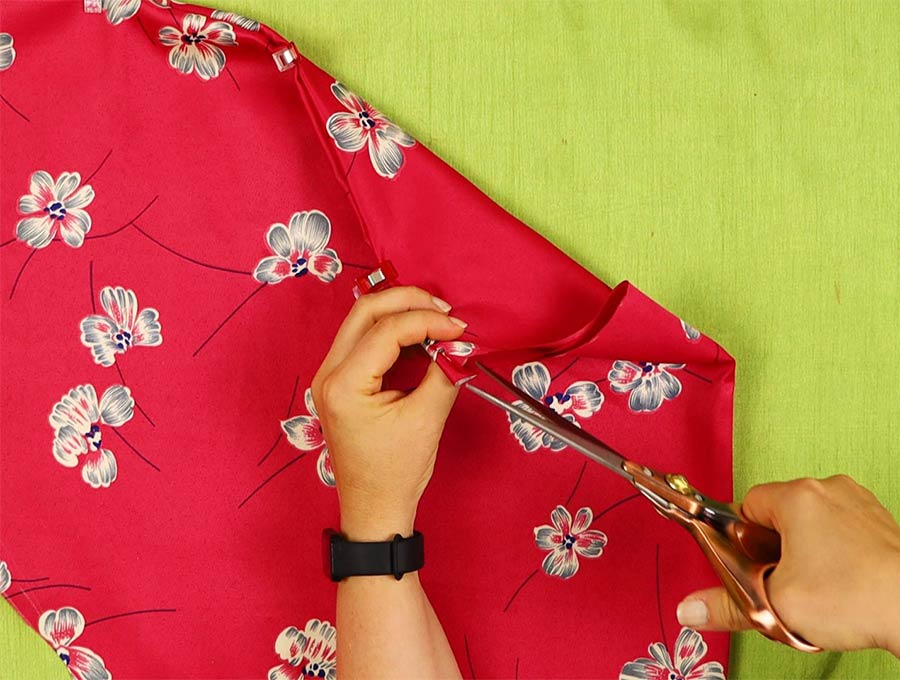
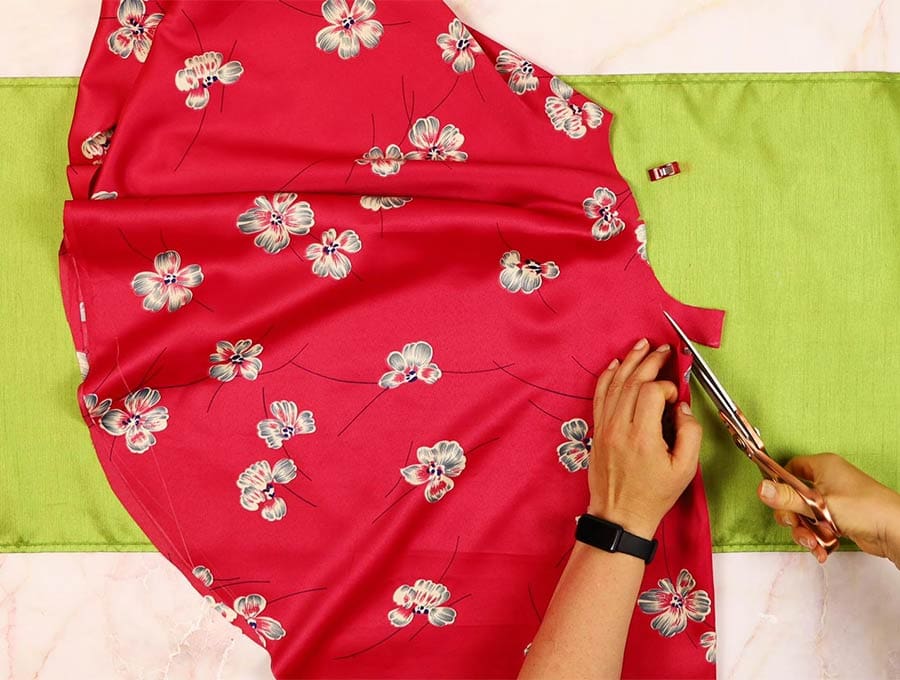
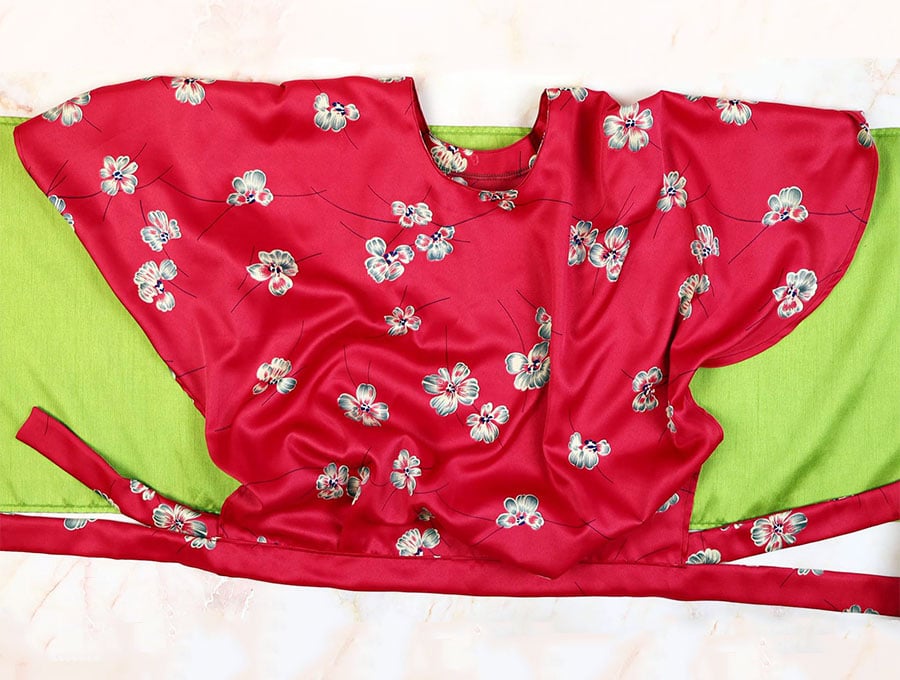
STEP 3: Cut out the side curve
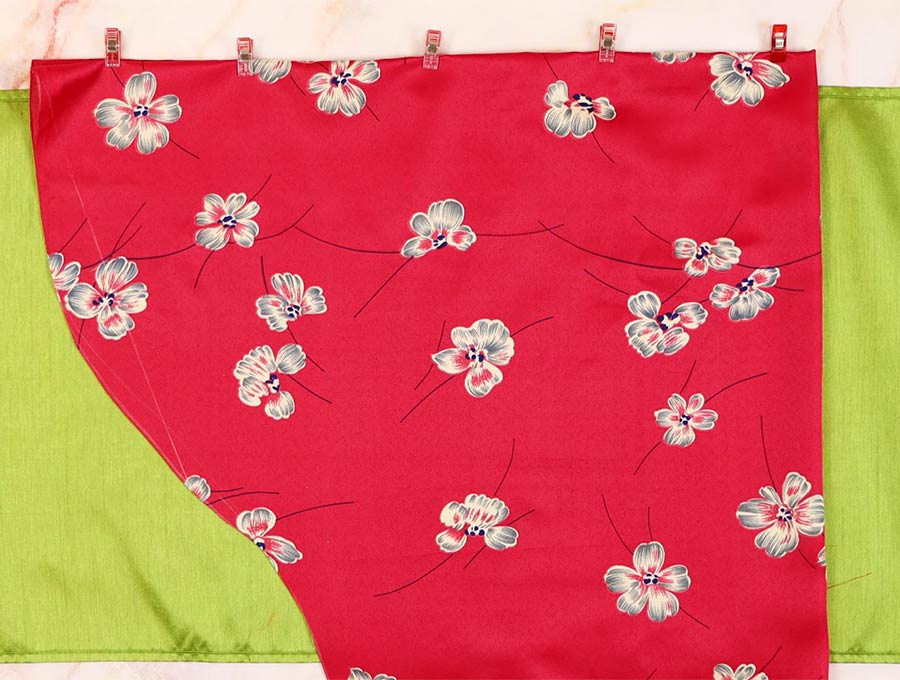
cut out the excess fabric
STEP 3:
To mark the neckline measure 2.75 inches (7 cm) from the top right-hand corner to the left and make a mark, then swing your ruler and make marks at intervals long the fabric until you reach the right-hand side fold. Join the marks in a curve to create the neck line.
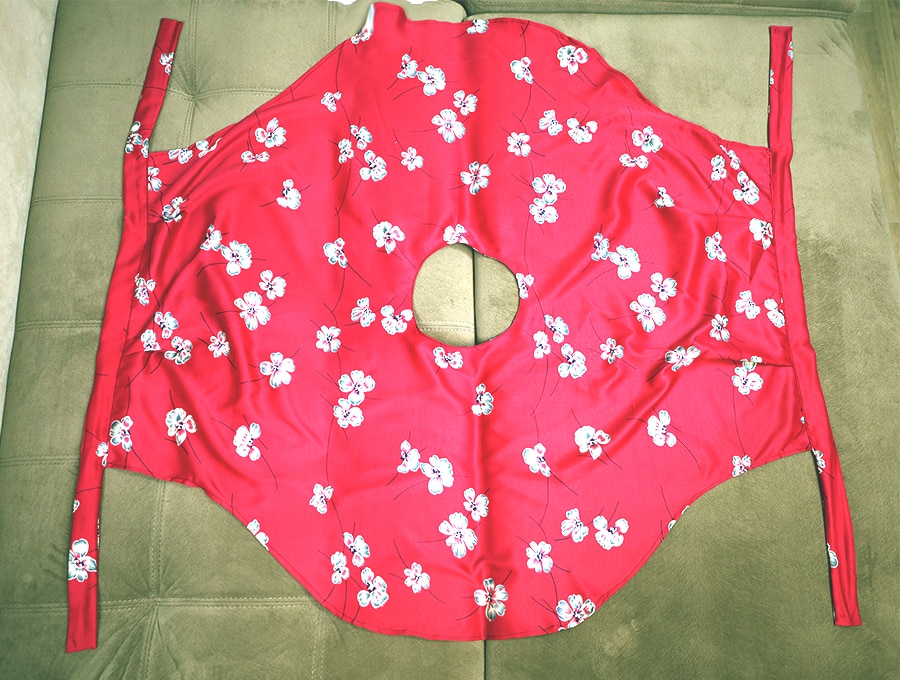
STEP 3:

Cut away the extra fabric outside the curve you drew on the left and the extra fabric in the top right-hand corner outside the curve.
Make notches in the seam allowance to mark the quarters.
STEP 3:
Now measure down 1.25 inches (3 cm) from the fold on the right-hand side and cut a slit.
Mark the shoulder point at the top fold with a fabric marker, then join the end of the slit to the shoulder mark with a fabric marker in a smooth curve. Remove the pins holding the layers together and fold the fabric so the front is folded in half.
STEP 3:
Line up the shoulders and cut along the mark you made only for the front of the neck, which will be slightly lower than the back of the neck.
STEP 3:
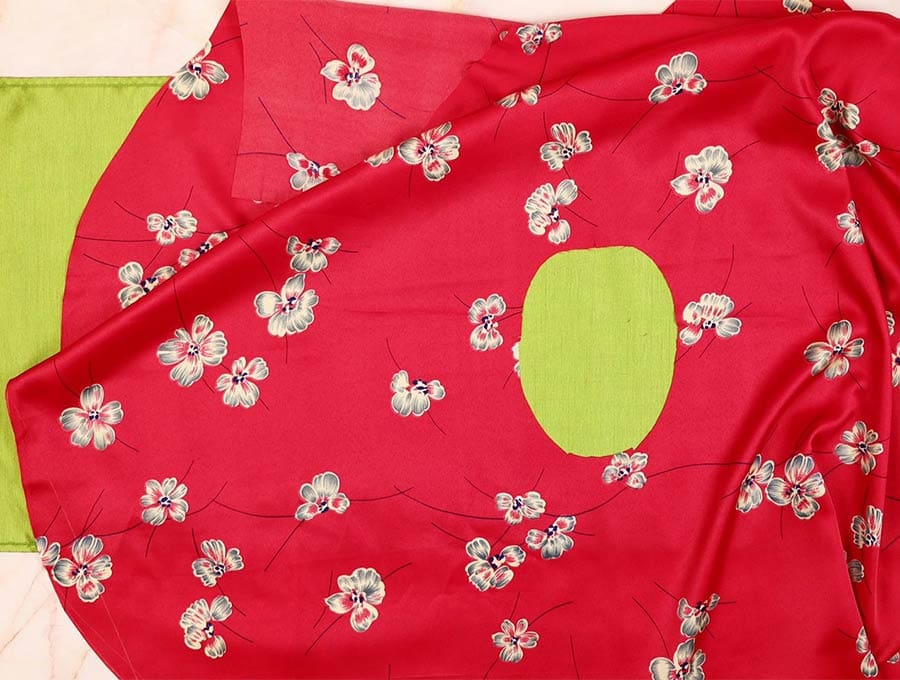
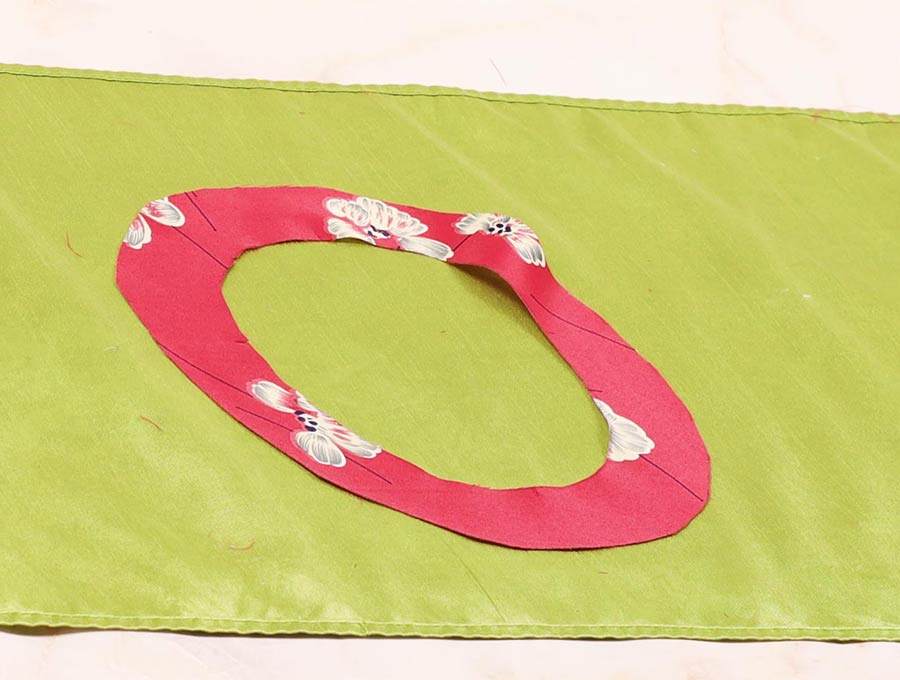
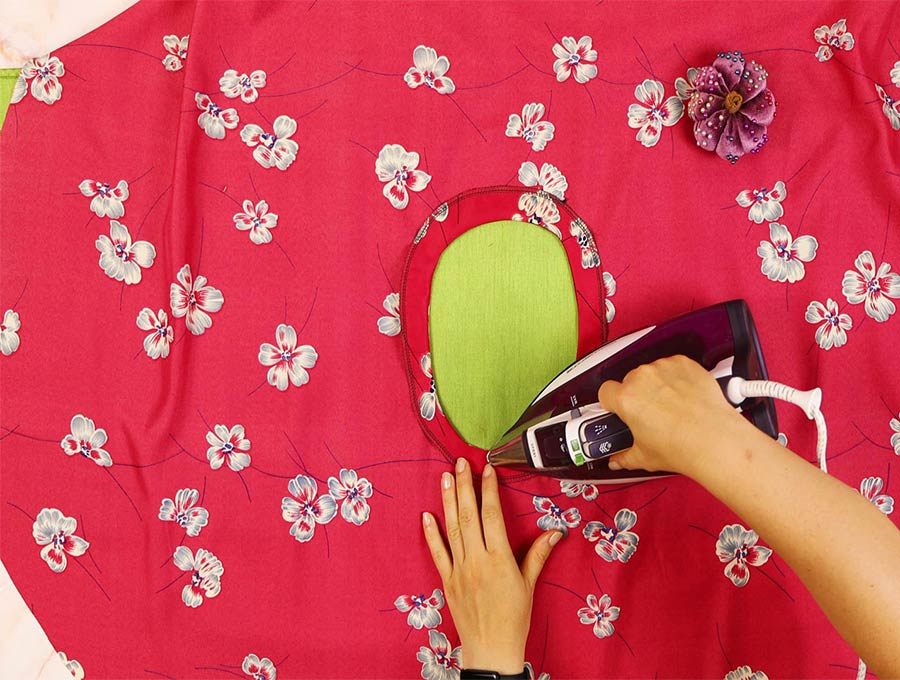
Take a piece of the same fabric the blouse is cut from, 12 inches x 12 inches (30 x 30 cm) and apply a lightweight interfacing to the wrong side of the fabric as per the manufacturer’s instructions.
STEP 3:
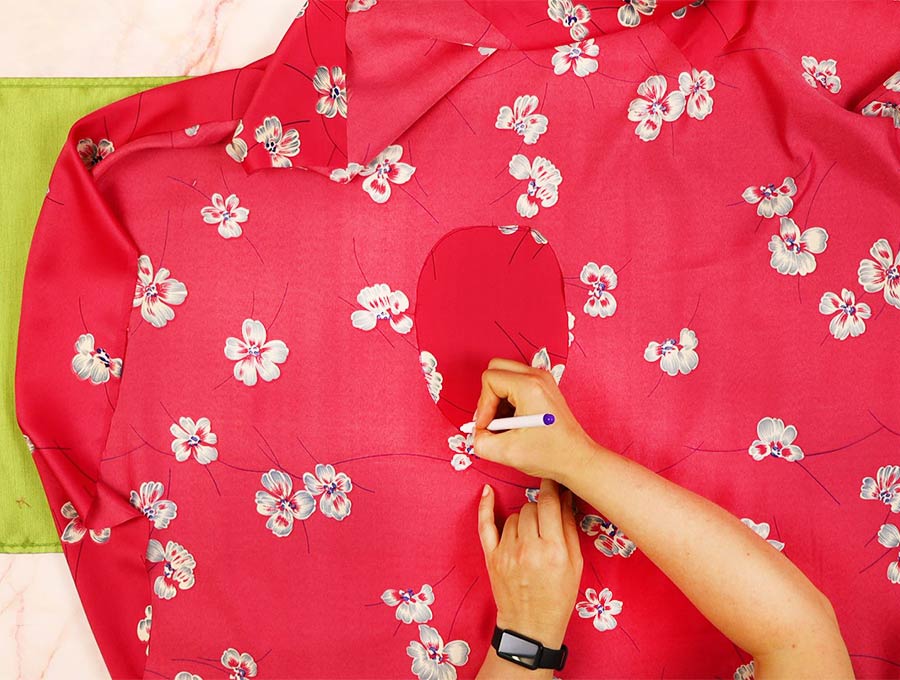
Place the fabric square with interfacing wrong side up on the worktop and over it place the blouse with hole cut for the neckline equidistantly placed over the square. Using a marker pen trace around the edge of the hole.
STEP 3:
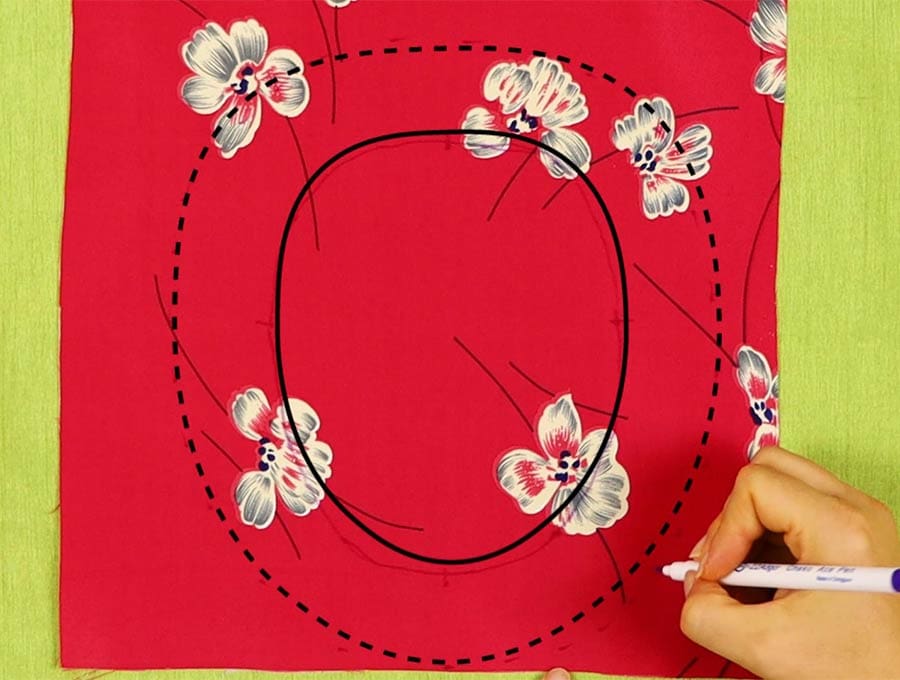
Remove the blouse piece and with a ruler mark 1.5 inches (4 cm) around the outside of the neckline shape as intervals, then join the dots in a small curve to create the facing for the neckline.
STEP 3:
Cut out the extra fabric beyond the 1.5 inches (4 cm) border, as well as the fabric inside the shape of the neck line.
STEP 3:
Serge (overlock) the outside edge of the facing. If you do not have a serger (overlocker) then you can use a zig-zag stitch on your machine to ensure the edge does not fray.
STEP 3:
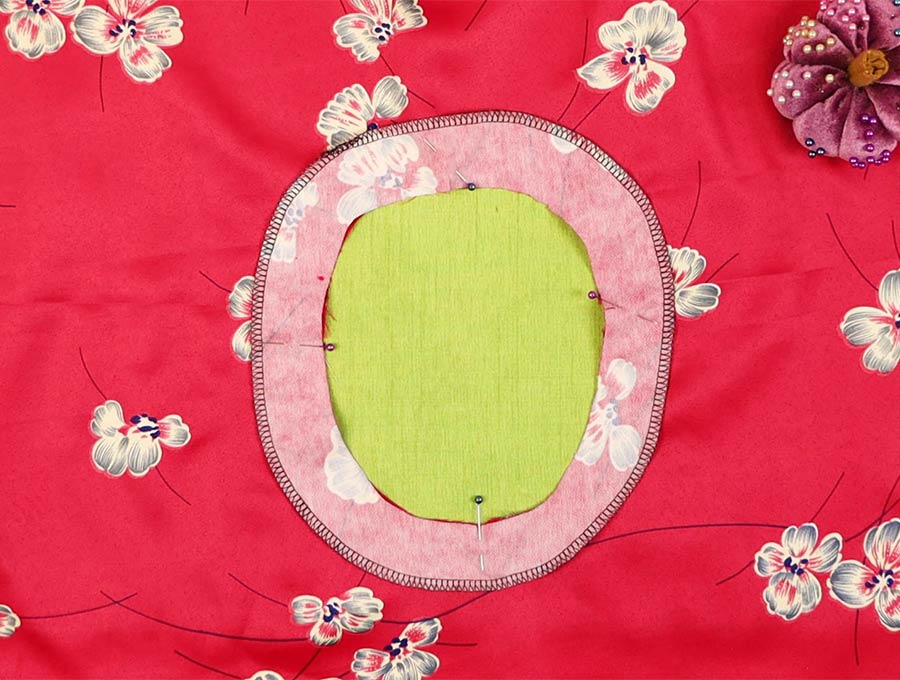
Lay the blouse fabric right side up on your worktop and on top of it place the neck facing with the right side facing downwards. Line up the edges of the curves of the neck so they match before pinning in place
STEP 3:
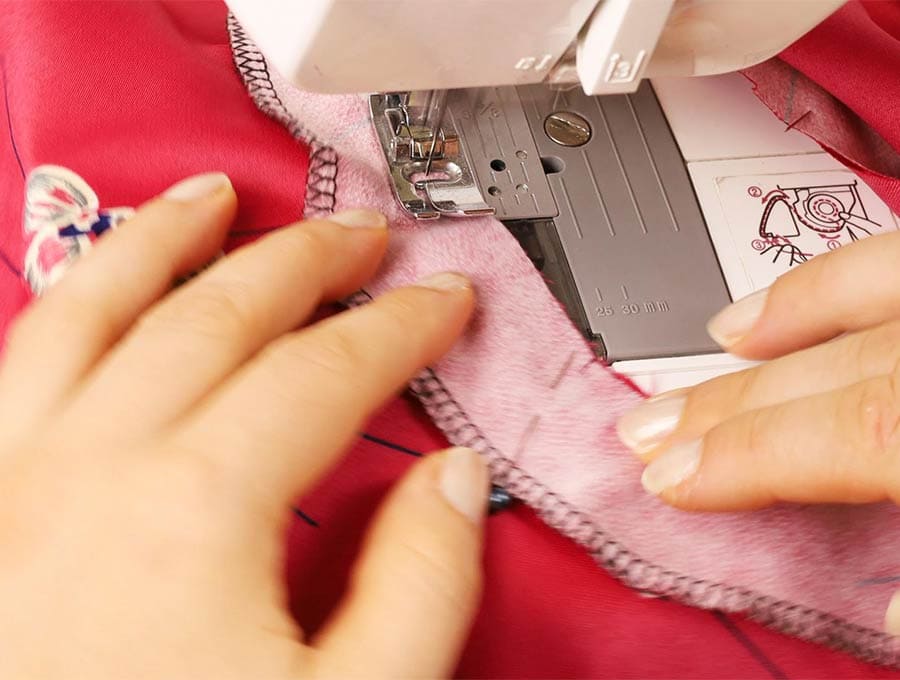
Stitch around the edge using 1/4″(6mm) seam allowance.
STEP 3:
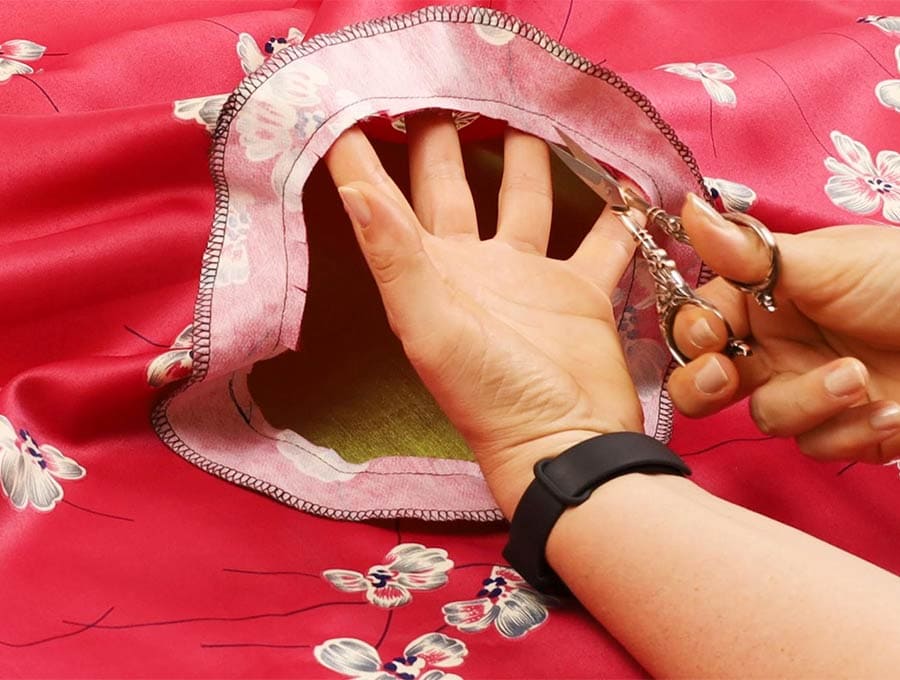
Make small nicks around the edge of the curved neck to ensure the fabric lies flat when it is turned, ensuring you do not cut right up to the stitch line.
STEP 3:
Flip the fabric over and turn the facing so it lies with the wrong side to the wrong side of the fabric and pin in place and press, before top stitching all the way around 0.2 inches (0.5 cm) from the edge.
Remove pins.
STEP 3:
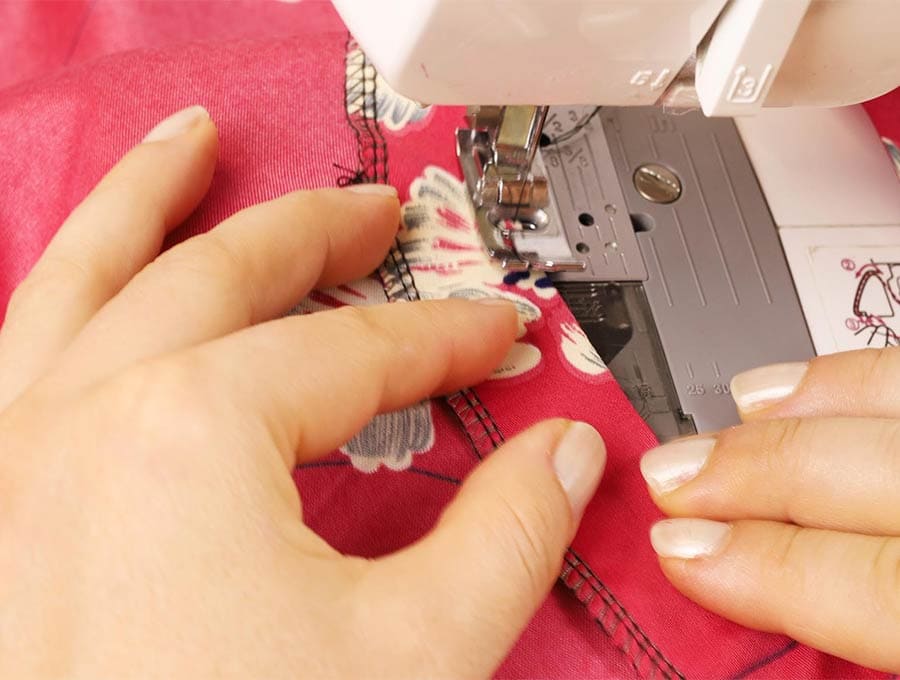
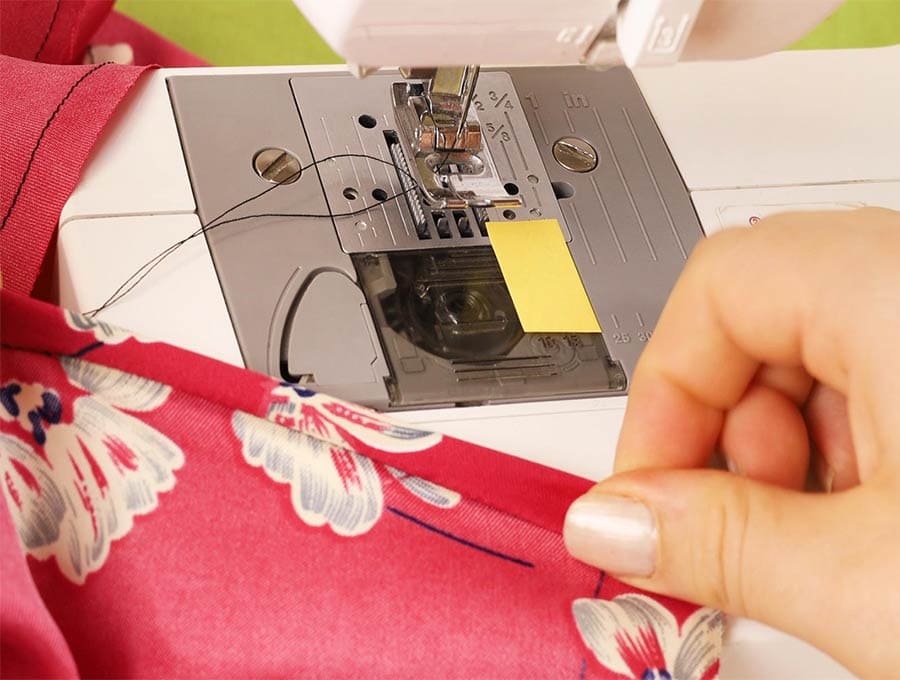
To work on the sides of the blouse start at one side of the blouse where it goes up to the sleeve and down the other side and stitch all around the sides of the blouse 1/4″(6mm) from the edge
STEP 3:
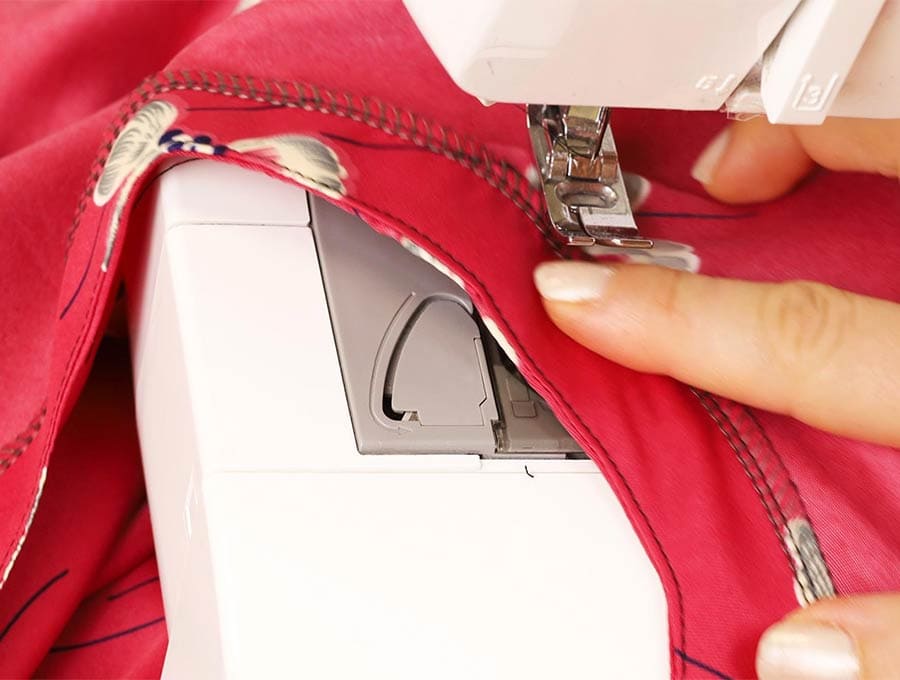
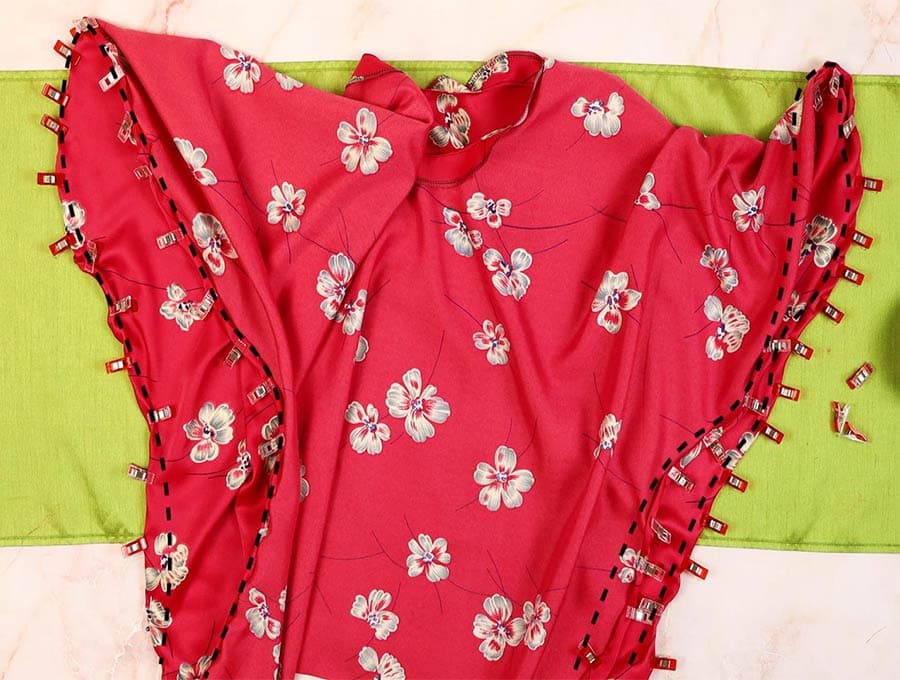
Fold over along the seam once and then once again and pin in place.
Stitch right around. Repeat with the other side of the blouse.
STEP 3:
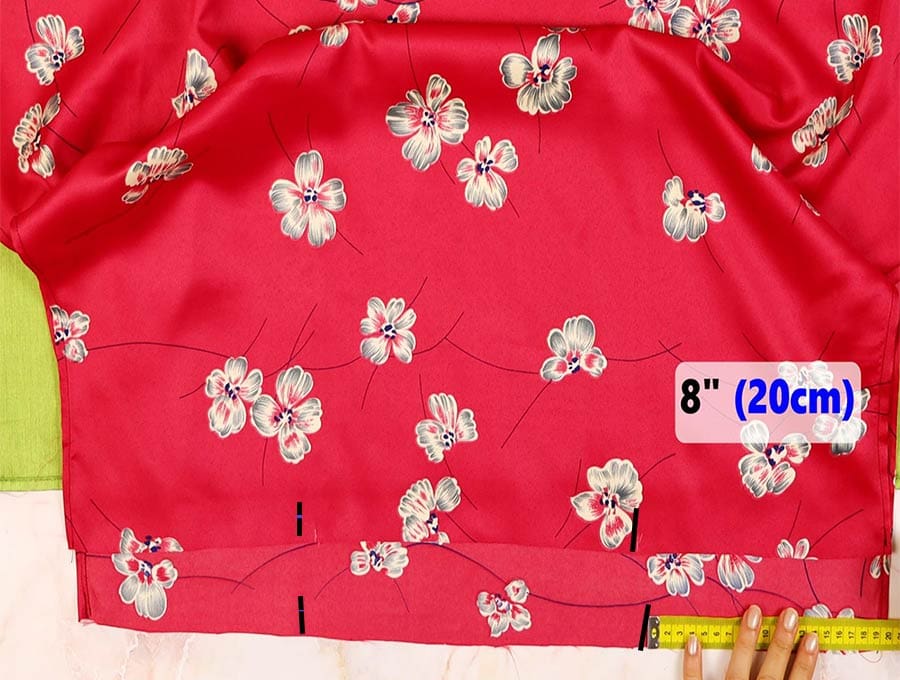
Lay the blouse flat right side up on the worktop with the front nearest you and measure 8″ (20 cm) in from either side and create a 1″ (2.5cm) fold over facing toward the side.
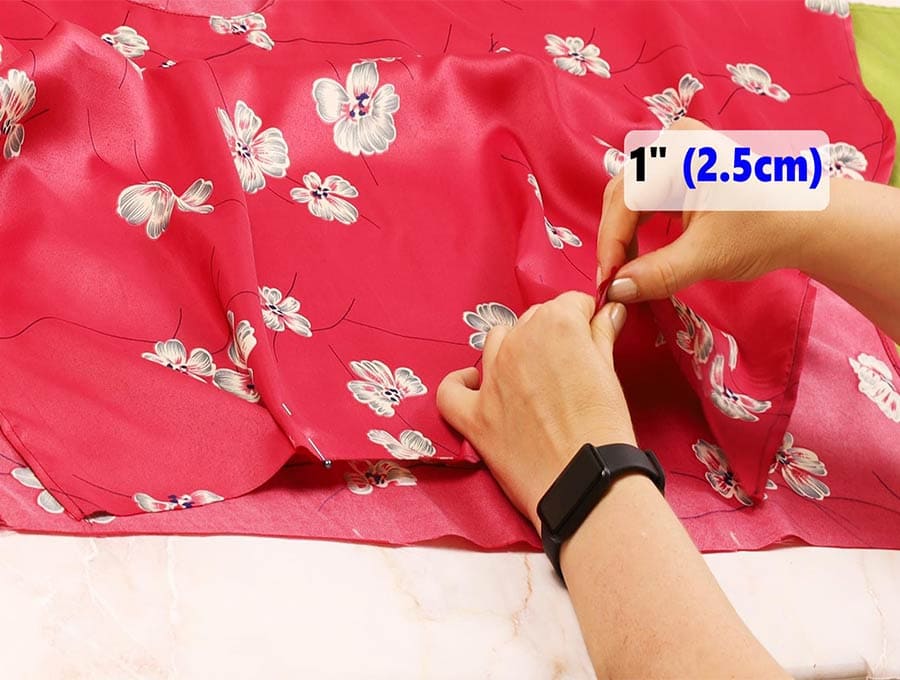 Repeat on the other side of the front of the blouse. This provides some shaping. Repeat with the back of the blouse.
STEP 3:
For the ties cut two pieces of fabric 48 inches (120 cm) x 3.94 inches (10 cm). You can cut it shorter for the smaller sizes
Find the center of each piece and mark them.
STEP 3:

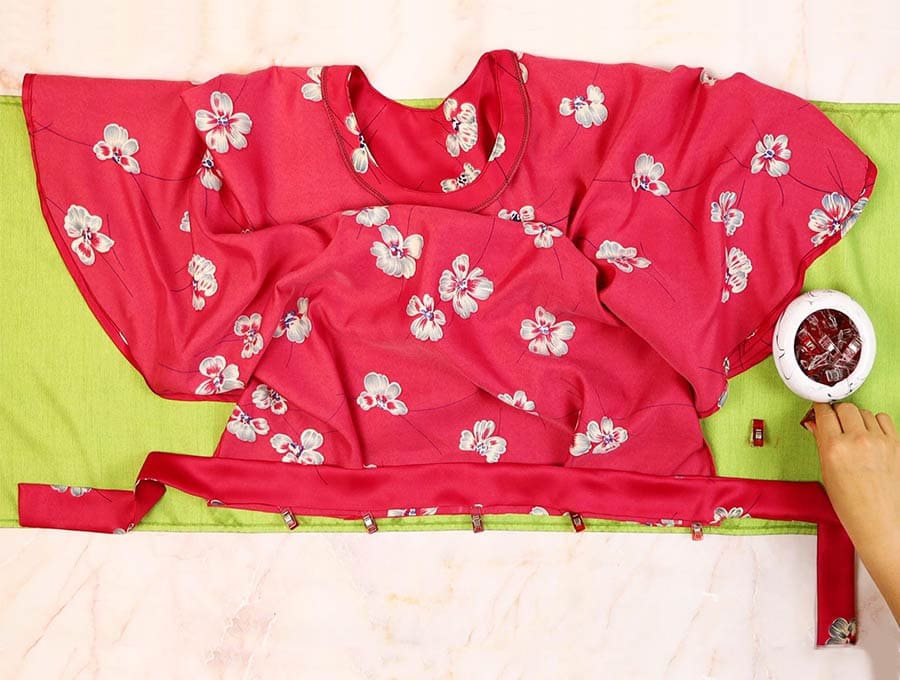
Take one of the long piece you marked in Step 21 and find the center front of the blouse. Pin the centers together then measure outwards and where she sides of the blouse end mark the long piece on either side. Repeat with the other tie length at the back of the blouse.
STEP 3:
Remove the pin at the center and with the right sides facing along the length of the long piece stitch down the short sides and along to the mark on either side. Trim the corners at the ends near the seam allowance by cutting off a small triangular piece, taking care not to cut too close to the seam – this allows for the corner to lie flat when turned. Repeat with the other length.
STEP 3:

Make a small snip with the scissors or either side of the seam and fold back the width of the seam allowance, and press flat for both tie lengths
STEP 3:
Turn the fabric the right way out, carefully poking out the corners so they lie flat on each tie length. Press
STEP 3:
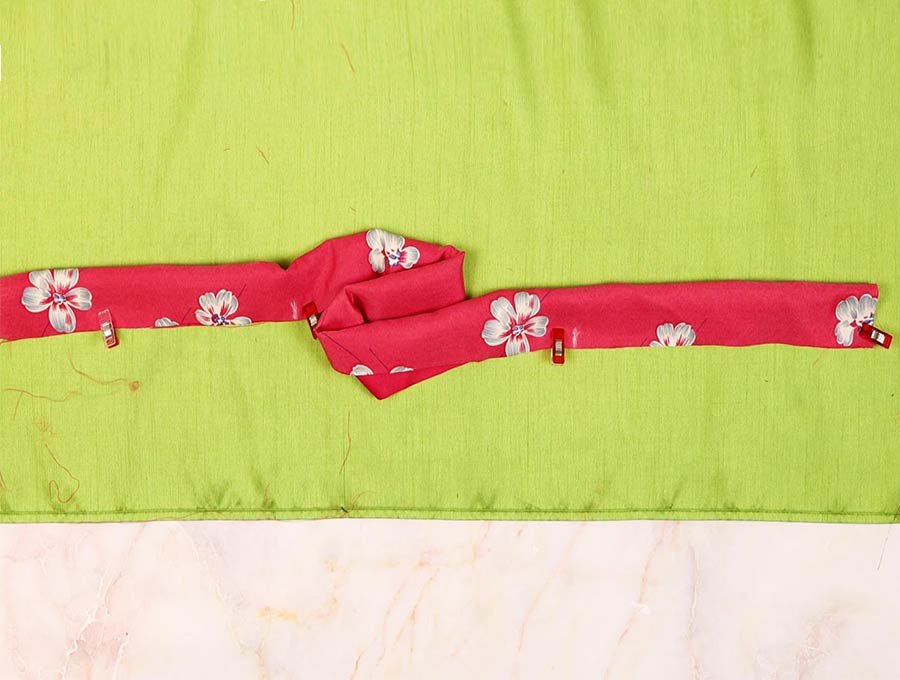
Place blouse with wrong side up on your worktop. Carefully line up the raw edge of one tie length with the edge of the blouse front and pin in place before stitching 0.25 inches (6mm) in from the edge.
 Repeat with the back of the blouse.
STEP 3:
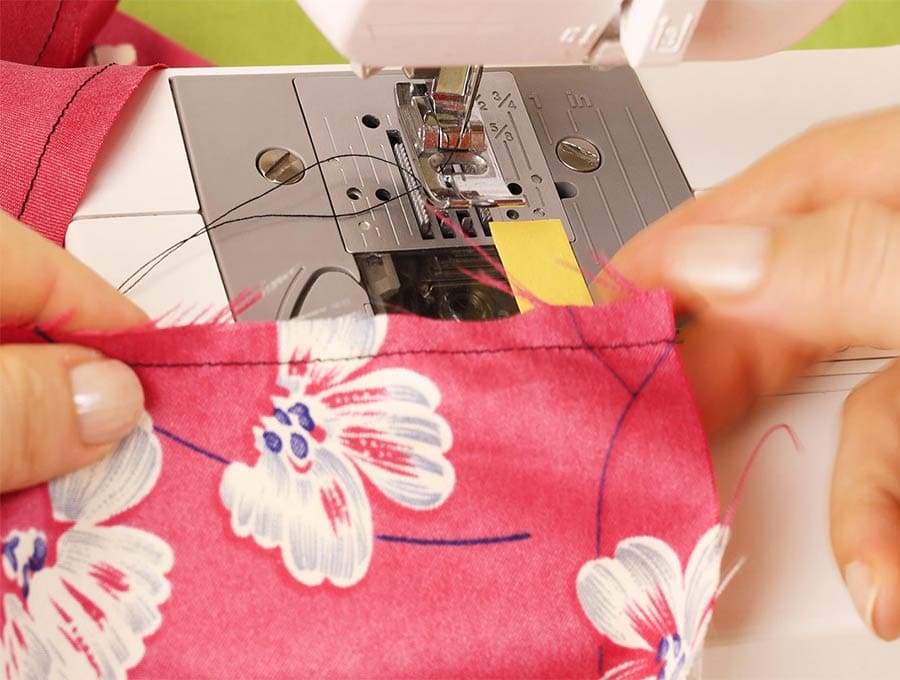
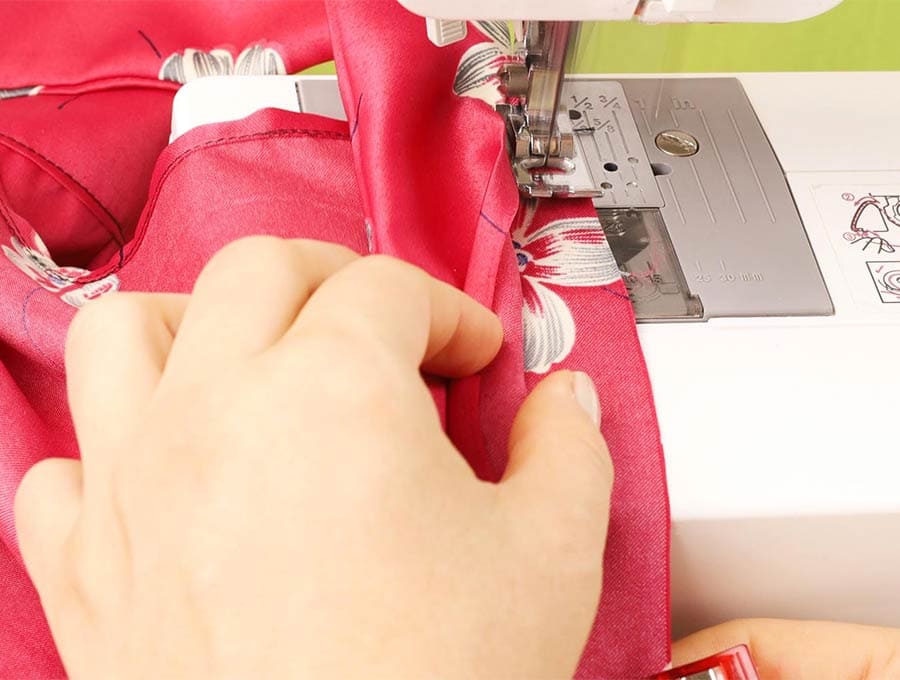
Turn the blouse so the right side of the material is facing you and pin the raw edge of the fabric up so it lines up with the tie ends and stitch along the seam, stopping where the tie ends start. Back tack at start and finish. Repeat with the back of the blouse.
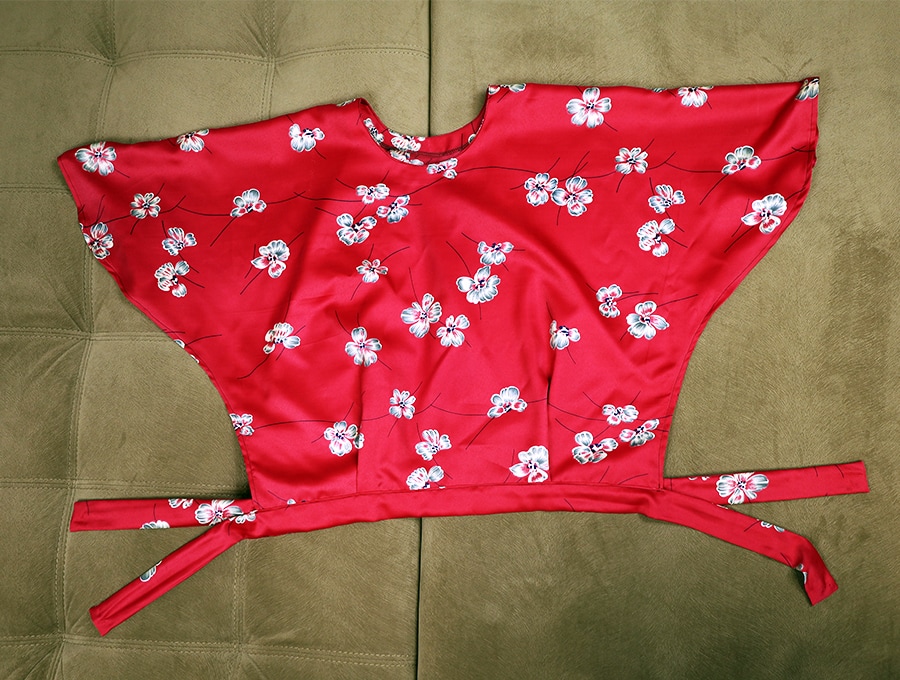
You now have a silky draped blouse which ties on each side ready to wear. If you loved this project then subscribe to have updates of our latest sewing projects delivered straight to your inbox.
Do you like this? Pin for later:
Wanna be friends? Click HERE and follow me on Pinterest
RELATED: