")
How to Make a Rope Bowl or Basket (with a Fun Twist)
Rope bowls are bang on trend right now and our easy step by step tutorial shows you exactly how to make this coveted item. Rope bowls look impressive, but are actually quite easy to make, and you can vary the finishes and colors to create a host of different looks. They are useful in the bedroom for holding hair accessories, toiletries, jewelry and make up. In the sewing room you can organize sewing accessories in these attractive bowls that will form part of the display. Put one on a hall table to hold keys, in the office to hold phone and laptop chargers, display with a pretty pot plant in the kitchen or the lounge – in fact the ways to use the DIY rope bowls seem endless.
A rope basket is one of the most wanted home décor items right now. When you can watch and follow our step-by-step tutorial, then why spend a fortune when you can make your own DIY rope basket. They are so much fun to do and can be made in various thicknesses of cotton rope or macramé thread, from small to large. As long as it can fit under your machine you are good to go. They are a wonderful present to make for birthdays, as housewarming gifts and to fill with goodies for various celebrations – where the container is also the present and can be used afterwards for storing or displaying various items.
Below you will find my step by step written tutorial with VIDEO instructions for all the visual learners.
We occasionally link to goods offered by vendors to help the reader find relevant products. Some of the links may be affiliate meaning we earn a small commission if an item is purchased.
Table of Contents
How to make a rope bowl or basket
Supplies and tools
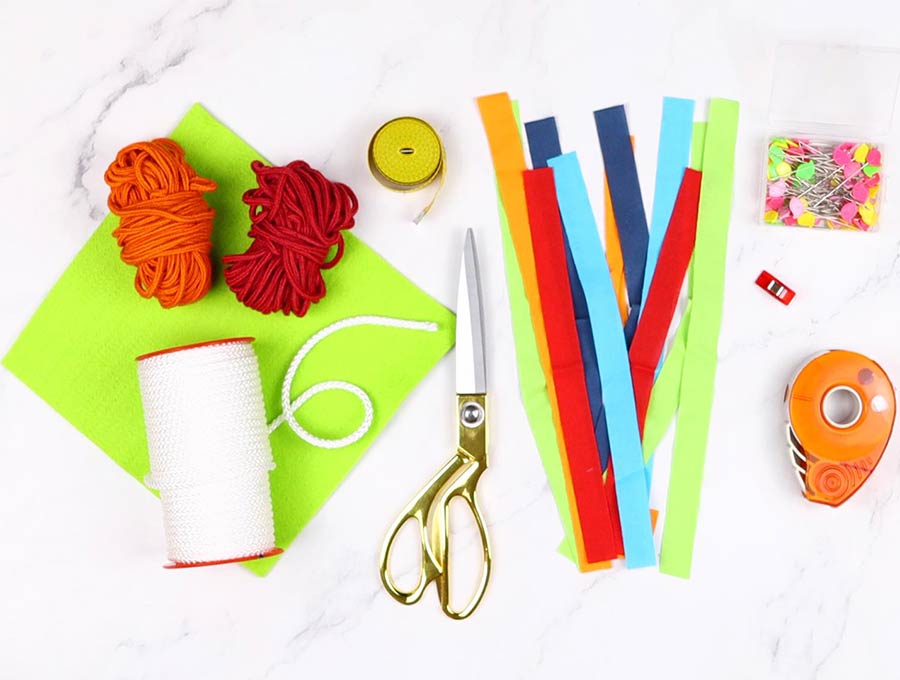
- cotton rope or macramé thread – 5/16″ (5mm) thick
- (optional) fabric – 1″ x 8″ long strips of cotton fabric in various colors
- matching or contrasting thread
- scissors (or rotary cutter and a cutting mat)
- ruler or measuring tape
- sewing clips or pins
- sewing machine with a zig-zag stitch
Follow us for free patterns & tutorials! [easy-profiles]
How to Sew a rope bowl or basket
Watch the diy rope bowl video first and then follow the written step by step instructions below.
Please enjoy and don’t forget to Like and SUBSCRIBE over on YouTube to be kept up to date with new videos as they come out.
ROPE BOWL / BASKET VIDEO TUTORIAL
What do I need to make a rope bowl?
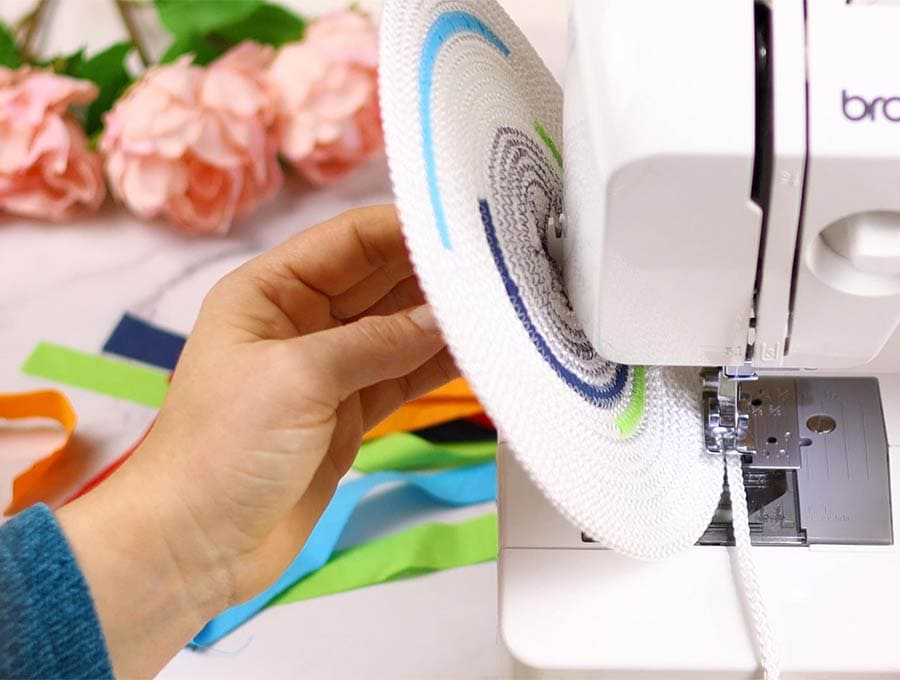
To make a rope bowl you will need cotton cording or macramé rope. A DIY rope bowl can be made on a domestic sewing machine, as long as it has the option of doing a zig zag stitch. You’ll also need some strong thread, pins, and you are all set to go once you have established the best width of the zig zag setting. Set the machine to a zig zag stitch – you might have to fiddle around a bit to get the right setting that pleases you by practising on some rope first. Experiment with a couple of small coils to check how the zig zag falls across the two pieces of cotton rope that it will be joining – we explain how to make a small coil in Step 2 below.
INSTRUCTIONS
How to make a circular rope bowl by sewing (METHOD #1)
STEP 1:
Decide on the diameter of the base of the bowl – it could be six inches, eight inches or more – it just depends what you plan on using it for. You will also need to decide on the shape – will it be flattish, flared outwards or have straight sides. You may have an idea of making a rope bowl as a container for a pot plant in which case it will need to fit the pot. You can always add plastic into the bowl later so when you water the plant it will not mark your rope bowl. Once you have your shape in mind you are ready to start.
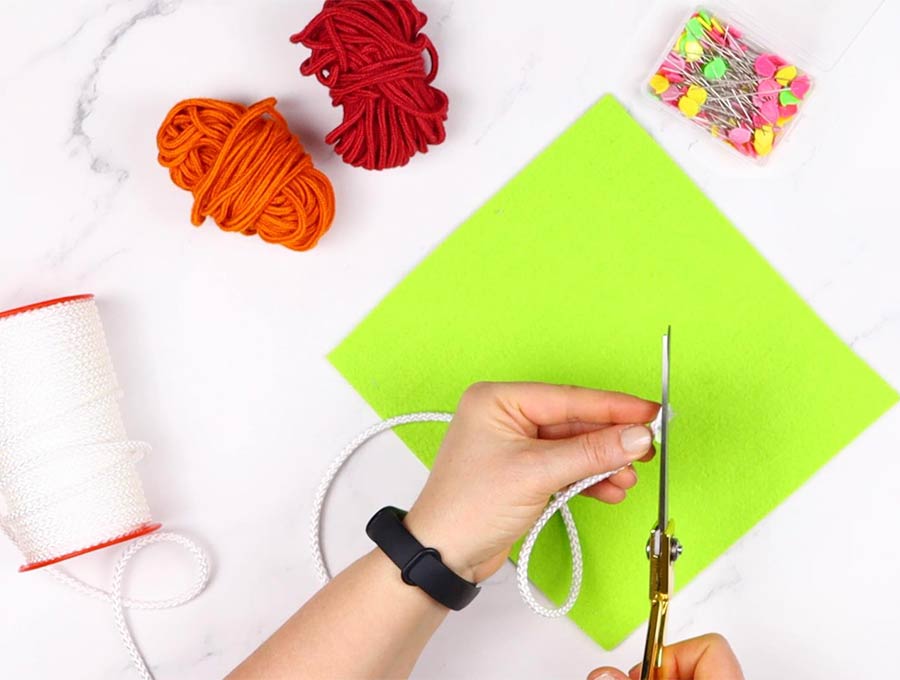
First, cut the end of the rope at 45 degrees angle
STEP 2:
To make a circular rope bowl start by coiling a small section of your cotton rope into a flat tight spiral between your fingers.
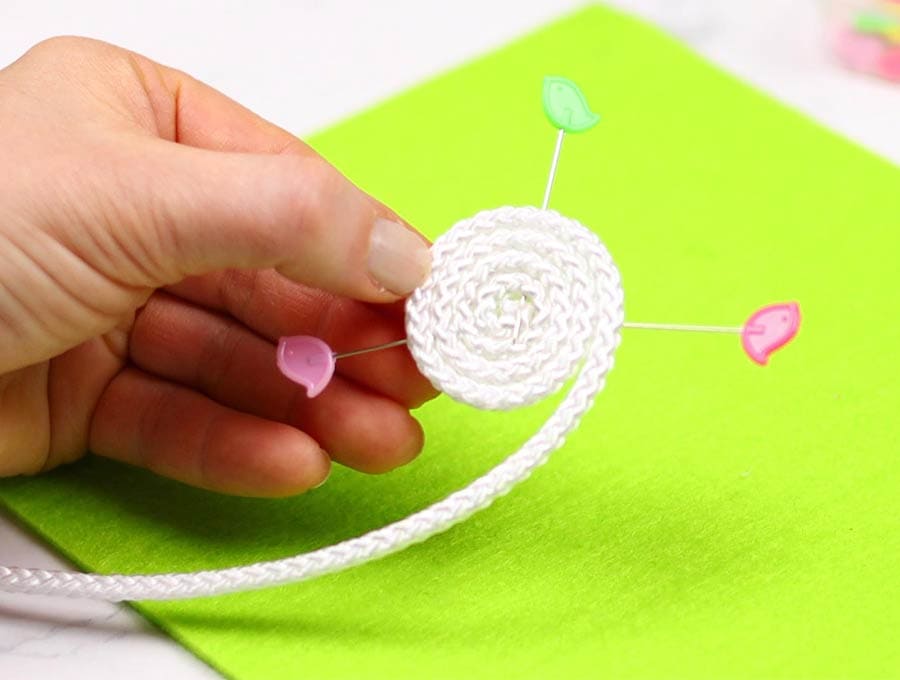
Once it is about an inch or so in diameter then you can place it under the foot of your sewing machine, ensuring the coil faces to the left and that any new cotton rope that is to be wound on, will be fed from the right. You want the bowl to grow from the left as you make it, otherwise it is going to be impossible to manoeuvre under the sewing machine as it grows larger.
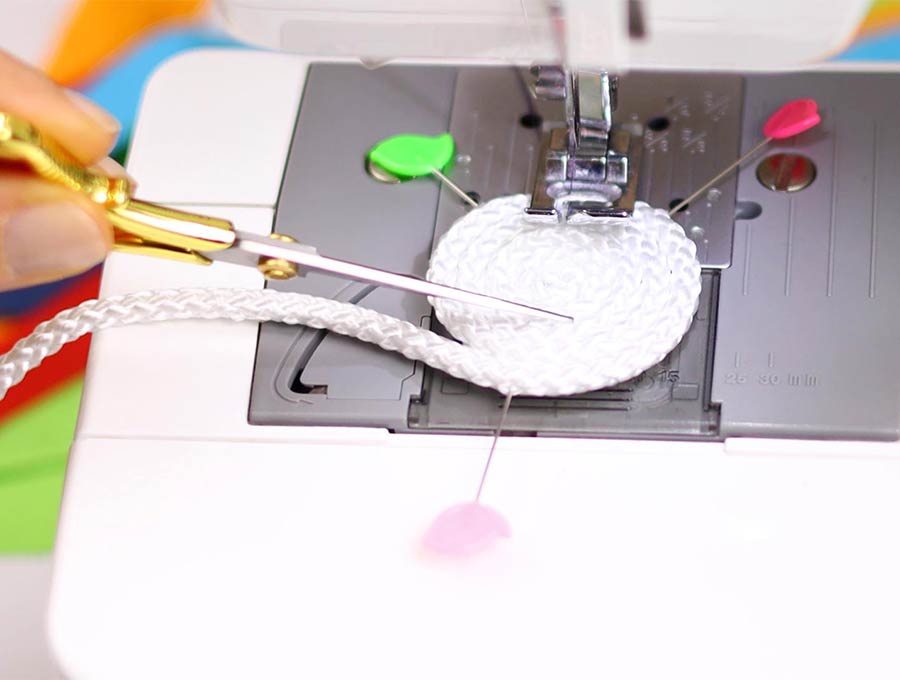
STEP 3:
Back tack to establish the start of the coil. Then carefully add to the coil feeding the cotton rope from the right while stitching – the zig zag will bind the rope together as you feed it through. In the beginning it is a bit fiddly as you have the make fairly tight turns as the coil is small but it gets easier as the coil gets bigger. When you start you may have to lift the presser foot, while keeping the needle in the rope to make the small turn, then put the presser foot down again before sewing again.
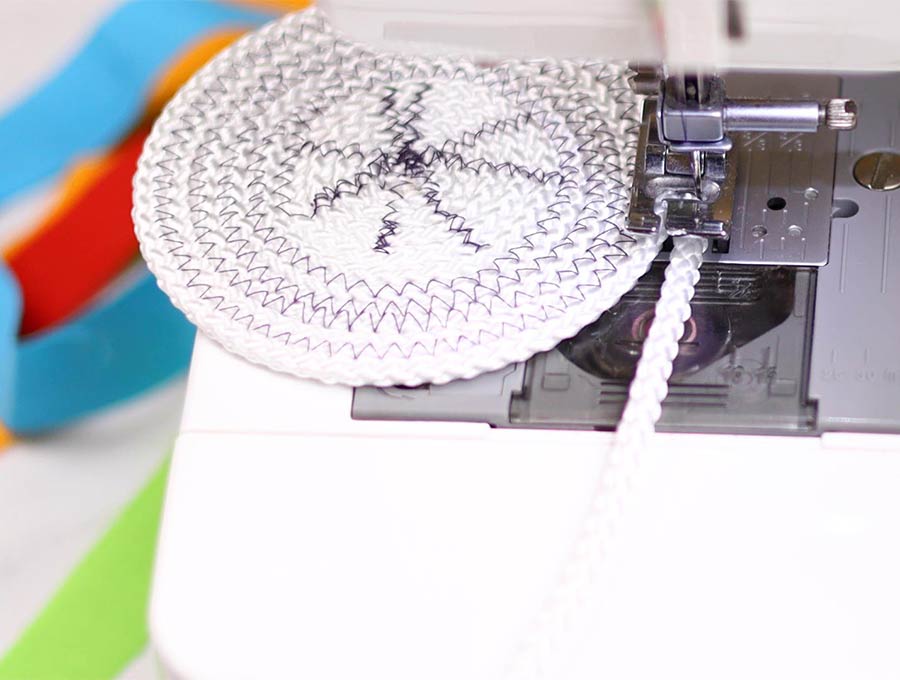
STEP 4:
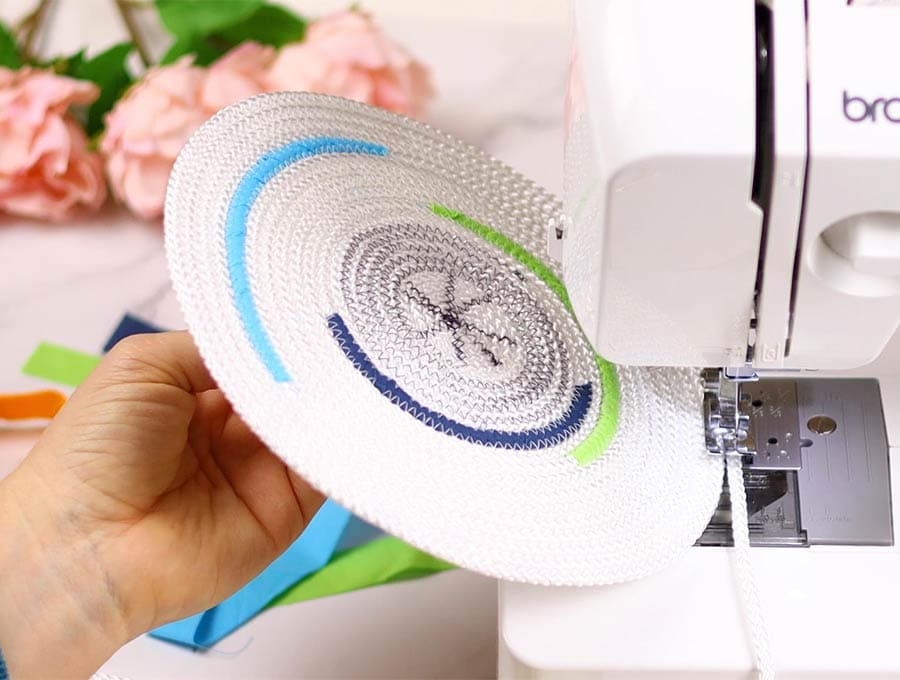
Add new rope continuously while continuing to join with the zig zag stitch.
Once the correct diameter is reached it is time to start building the sides.
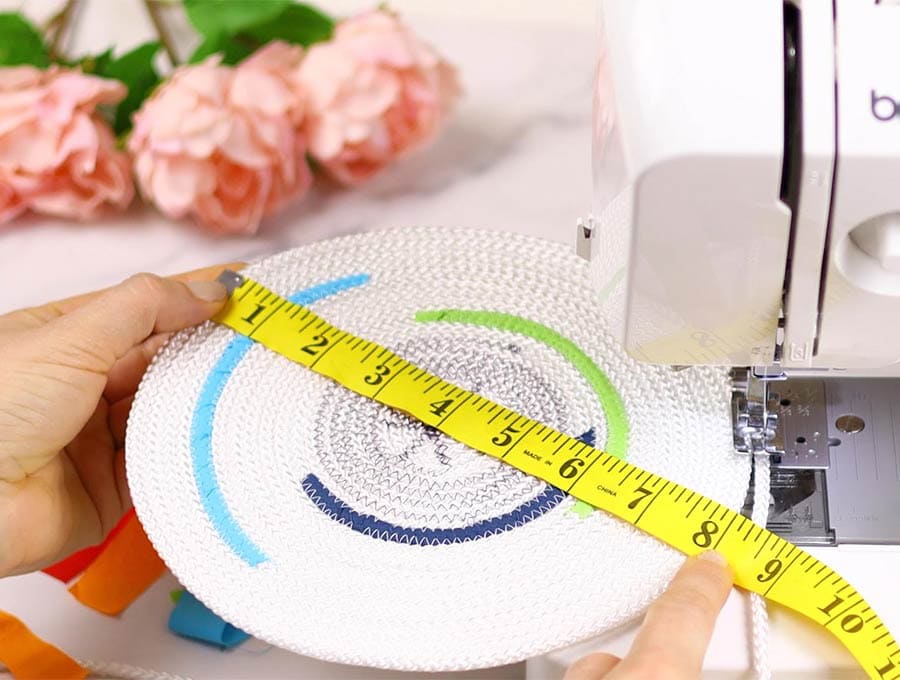
I settled on 8″ (20 cm) base for this one
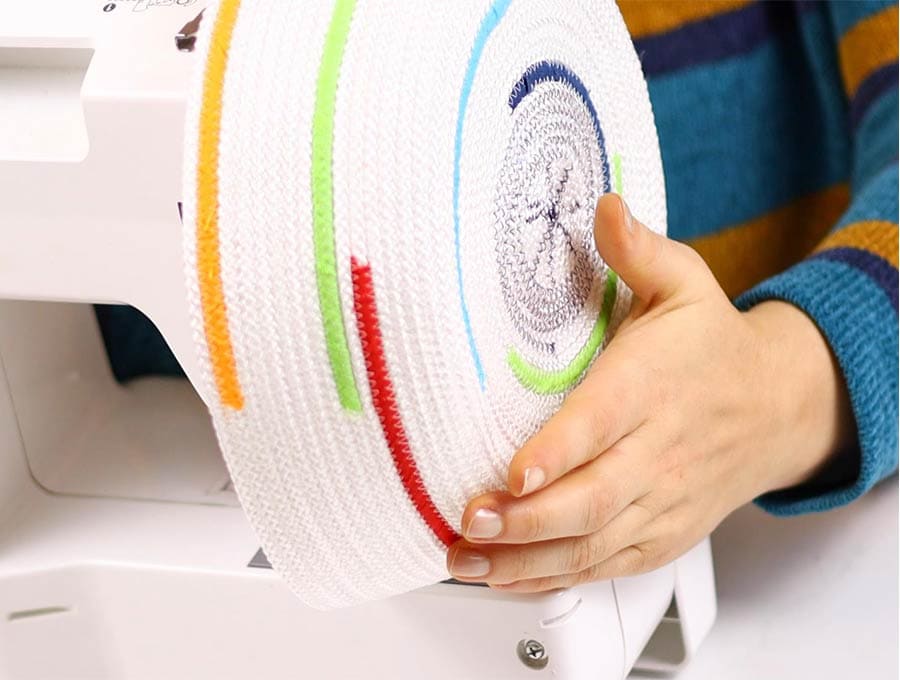
STEP 5:
Up until this point the base has been kept flat on the left of the sewing machine as the circles get bigger and bigger. Now to get the walls to go up straight simply tip the base upwards almost to a 90-degree angle to your sewing machine and continue feeding in the coil and zig zag stitch each new coil to the base.
If you want the bowl to flare out slightly then simply lower the angle from a 90 degree upright to be slightly closer to the machine surface – this will make it flare outwards, to bring it up perpendicular lift again to the 90-degree angle.
When the coil of rope runs out you can add another piece, overlaying slightly where the first piece ended and backtacking to keep the ends in place, then continue with the zig-zag stitch. You can also use this method to change cotton rope colors if you are planning on having a different band of color, or a series of bands, on the rope basket.
I find this the easiest method to gently guide the bowl:
STEP 5: Finishing the end of the rope
When you have completed the basket shape there are a number of ways of finishing off the end of the rope:

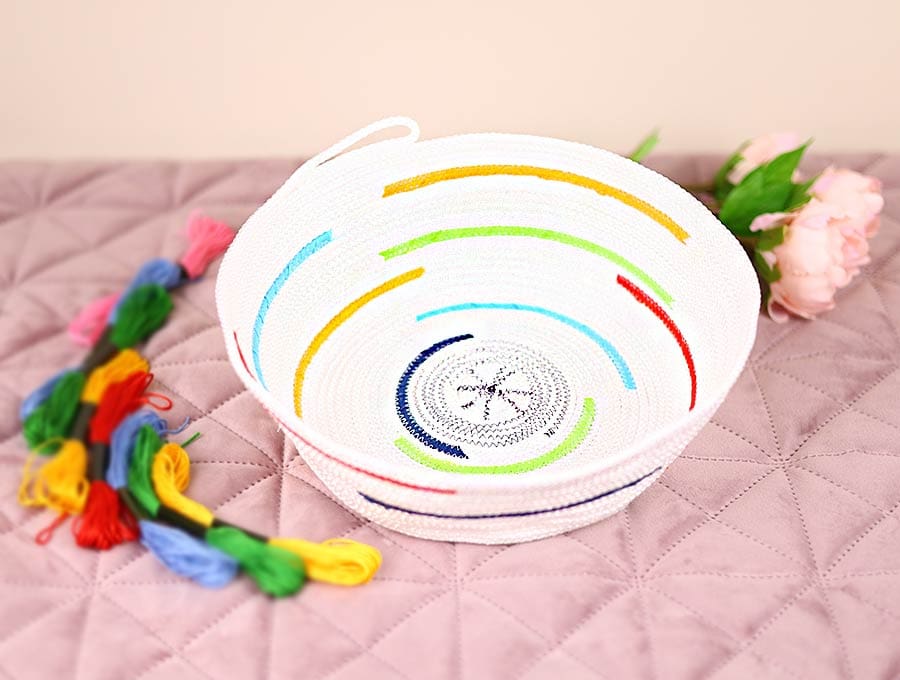
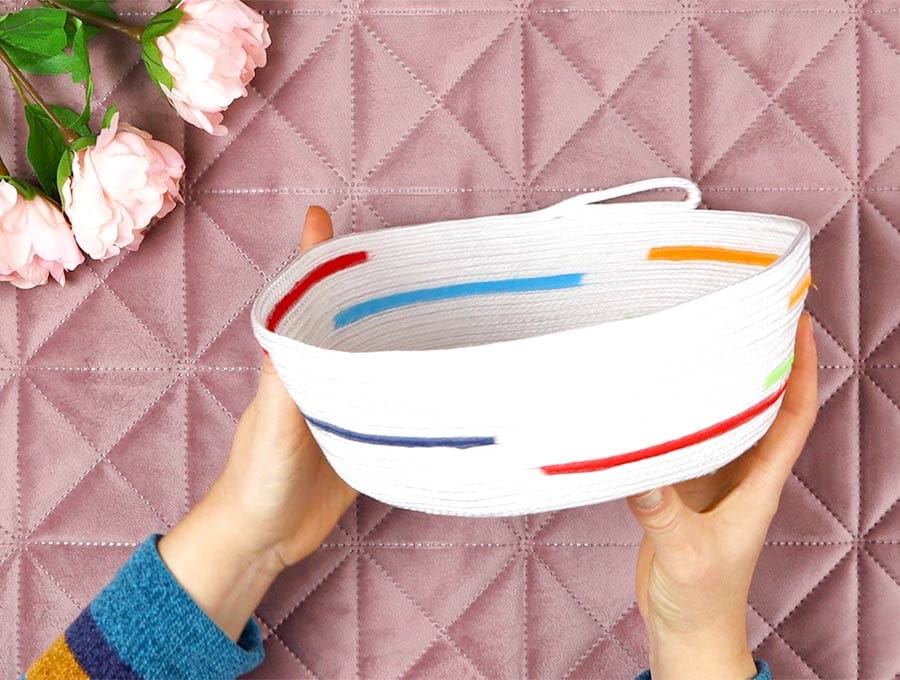
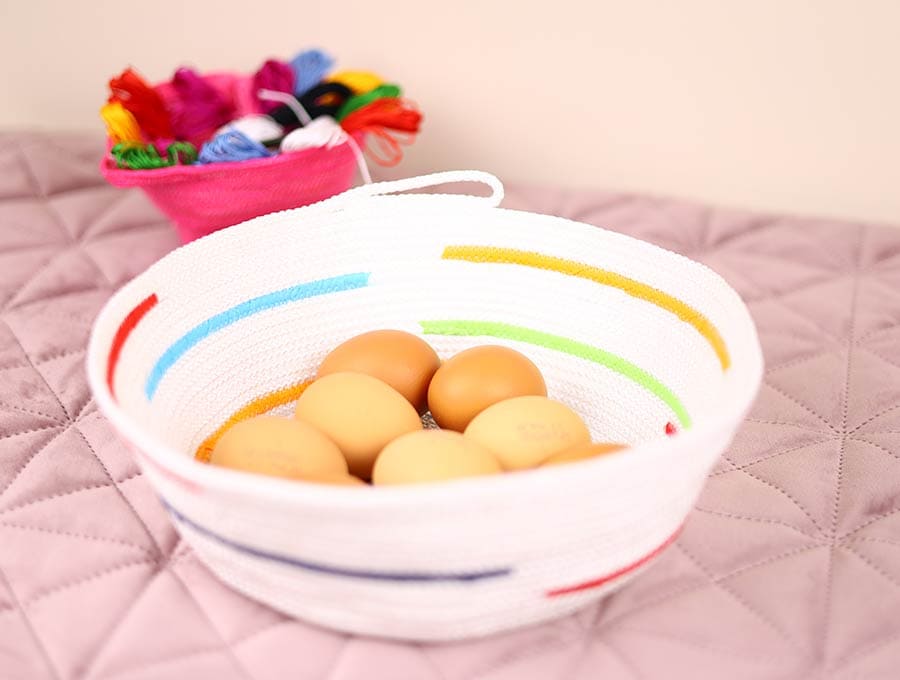
- You can simply cut and tuck the raw edges of the rope downward on the inside of the bowl and zigzag in place, back tacking so it is secure and no bit fray out. (white rope basket pictured in the tutorial)
- Use a glue gun and stick down the last bit of the coil to keep it in place.
- Make a small loop with the rope and stitch it back onto the inside of the basket. You can attach some beads, shells, leather thongs or feathers to the loop to decorate the basket.
- Simply back tack about five inches from the end of the rope and tie a decorative knot in the rope and fray out the loose end.
- Back tack close to the end then fasten a decorative beaded or silken tassel, or a couple of feathers to the end of the rope.
- The end can also be finished with a large bead that can pass over the last bit of rope and be knotted into place.
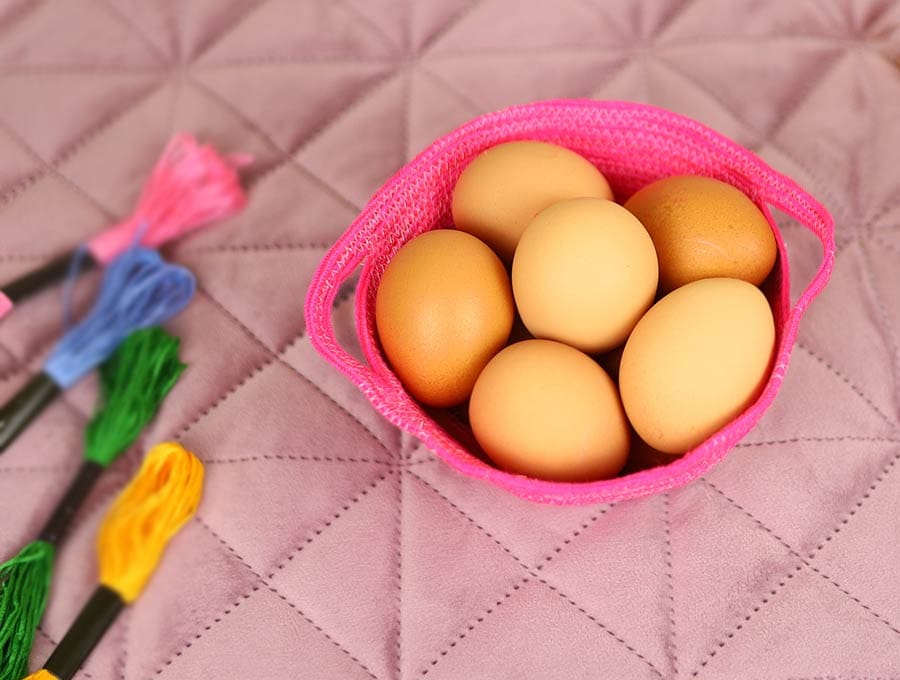
- You can create handles by stitching on a couple of coils together and adding them to the basket. (pink rope bowl pictured above)
No-Sew Rope basket – Method #2:
If you don’t have a sewing machine but still want a rope bowl then you can join the coils with a hot glue gun. Watch your fingers when you work with the glue gun (says someone who has had the experience of hot gluing fingers). Gluing is probably not the best way to make the bowl as it doesn’t have the flexibility that the zigzag stitching brings to the baskets. Try to find a friend with a machine and work together on making these.
DIY Rope Bowl FAQs:
Q: Can I use contrasting color thread or should it blend with the color of the rope?
A: You can create a feature of the stitching with a high contrast thread that will bring extra texture to the basket. Most people tend to use a neutral color to blend with the basket color. There are no ‘rules’ – whatever you think is beautiful.
Once you have made one of these baskets you are going to want to play around with making different shapes of basket. They are a wonderful present to make for birthdays, as housewarming presents and for festive seasons – fill with Easter eggs, candy for Halloween, pumpkin spice muffins for fall and with various small gifts, or baked goods at Christmas time. If you loved this project please hit the subscribe button so you don’t miss out on any of our great tutorials.
Do you like this? Pin for later:
Wanna be friends? Click HERE and follow me on Pinterest
RELATED: