
DIY Suitcase Cover // Easy Luggage Cover Sewing Pattern and Tutorial [in ANY size]
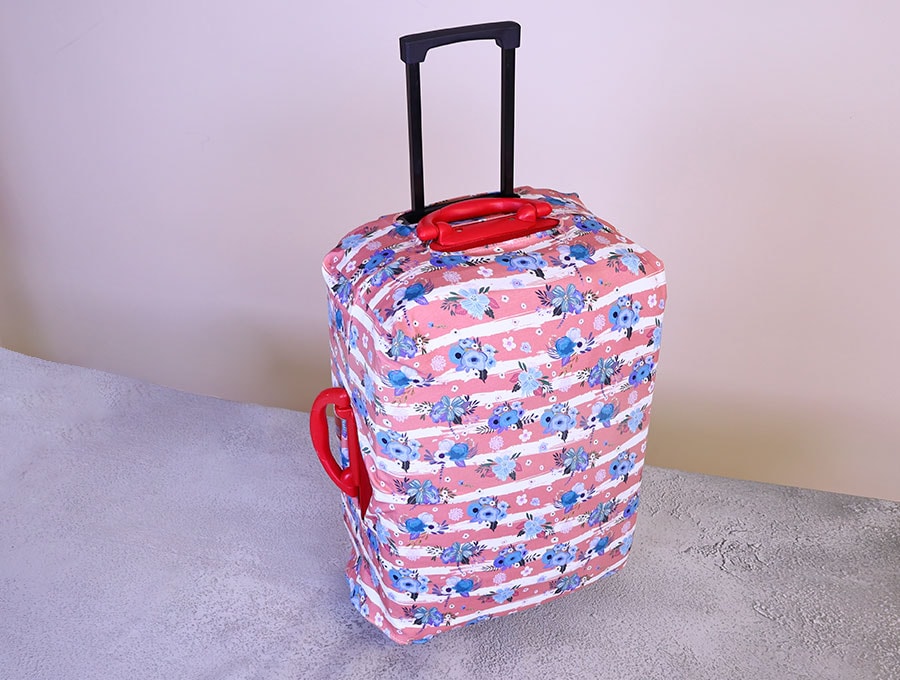
These luggage covers are super useful when storing your luggage at home so it does not get dusty or scratched, and when travelling because it protects your suitcase – and we all know how suitcases get handled at airports! You can make this in any size to fit your suitcase and it doesn’t take long once you have the measurements worked out to suit your bag. It also makes stealing from your case a bit more difficult because thieves have to get the cover off before pilfering items when you are transferring to hotels, and the huge bonus is being able to identify your bag easily on the baggage carousel by its individual cover.
Sew this stretch fabric luggage cover in a jiffy to protect your suitcase when it is being stored, to save it from scratches when travelling and to identify it easily on baggage carousels. It’s also a deterrent against petty pilfering from your bag when travelling.
Below you will find my step by step written tutorial with VIDEO instructions for all the visual learners.
We occasionally link to goods offered by vendors to help the reader find relevant products. Some of the links may be affiliate meaning we earn a small commission if an item is purchased.
Table of Contents
- 1 How to make the luggage or suitcase cover
- 2 Supplies and tools
- 3 How to Sew a suitcase cove
- 3.1 Luggage or suitcase cover VIDEO TUTORIAL
- 3.2 INSTRUCTIONS:
- 3.3 STEP 1:
- 3.4 STEP 2:
- 3.5 STEP 3:
- 3.6 STEP 4:
- 3.7 STEP 5:
- 3.8 STEP 6:
- 3.9 STEP 7:
- 3.10 STEP 8:
- 3.11 STEP 9:
- 3.12 STEP 10:
- 3.13 STEP 11:
- 3.14 STEP 12:
- 3.15 STEP 13:
- 3.16 STEP 14:
- 3.17 STEP 15:
- 3.18 STEP 16:
- 3.19 STEP 17:
- 3.20 STEP 18:
- 3.21 STEP 19:
- 3.22 STEP 20:
- 3.23 STEP 21:
- 3.24 STEP 22:
- 3.25 STEP 23:
- 3.26 STEP 24:
- 3.27 STEP 25:
- 3.28 STEP 26:
- 3.29
How to make the luggage or suitcase cover
Supplies and tools
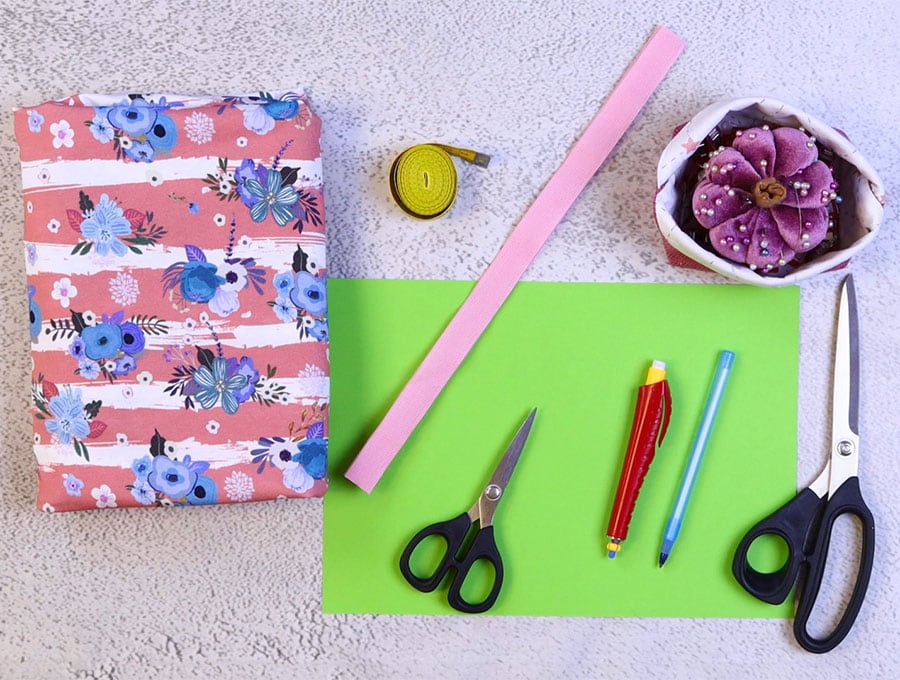
- Fabric – Sufficient stretch (knit) fabric such as jersey cotton or spandex to accommodate your luggage
- matching thread
- scissors (or rotary cutter and a cutting mat)
- ruler or measuring tape
- iron and ironing board
- sewing clips or pins
- fabric marking pen
- Piece of Velcro for the closure at the bottom
- A4 piece of paper and pencil or pen, for drawing out the dimensions
Follow us for free patterns & tutorials! [easy-profiles]
How to Sew a suitcase cove
Watch the diy luggage cover video first and then follow the written step by step instructions below.
Please enjoy and don’t forget to Like and SUBSCRIBE over on YouTube to be kept up to date with new videos as they come out.
Luggage or suitcase cover VIDEO TUTORIAL
INSTRUCTIONS:
STEP 1:
Measure the length, width and height of your suitcase.
Measure the length of the handles
Transfer these measurements onto a box sketch on a piece of paper to help you visualise better how the cover will work.
STEP 2:
Transfer the measurement of the large front side of the suitcase to a piece of paper to show the dimensions. For example, the suitcase I measured for this project was 15 x 21 inches (38 x 53.4 cm) on the front, so I drew a rectangle in the middle of the paper to represent that ( not in scale, just a drawing to help me visualize the concept)
STEP 3:
On the sides of the upright rectangle, I added half the measurement for the width of the suitcase – in my case 9 inches (23 cm) and half of that was 4 ½ inches (11.5 cm) – so I drew rectangles on either side of the central panel that were 4 ½ inches x 21 (11.5 x 53.5 cm)
STEP 4:
Add the measurement for the top and bottom of the suitcase – in my case 4 ½ x 15
Inches (11.5 x 38 cm) at the top and at the bottom the same, but I added on a bit more for the flap where the luggage cover will fasten snugly around the suitcase. For all suitcases add a standard 1 inch (2.5 cm) extra length by the width of the suitcase.
STEP 5:
Add the final measurements across the top – for me it was 4 ½ + 15 + 4 ½ inches (11.5 + 38 + 11.5cm). This totalled 24 inches across the top (61 cm).
STEP 6:
Add up the measurements for the height. Mine were 4 ½ + 21 + 4 ½ + 1 inch (11.5 + 38 + 11.5 cm + 2.5 cm) which totalled 34 inches (86.5 cm).
STEP 7:
Use a stretch cotton fabric to cut two pieces to the final measurements – in my case 2 fabric pieces 24 x 34 inches (61 x 86.5 cm) each
STEP 8:
Lay the fabric right side to right side, line up and pin to keep it in place while you cut out the corners of 4 ½ inches (11.5 cm) in my case. You’ll be able to judge form your diagram the dimensions of the corners.
STEP 9:
Mark the openings for the handles. Check where your handles have been indicated on your sketch and match them to the correct position on the fabric. For each handle, measure to find the center of the side where the handle will be, then measure on each side of the center so the gaps for the handles are precisely placed.
When you have marked the ends where the handles reach make a small nick in both layers of fabric with your scissors.
STEP 10:
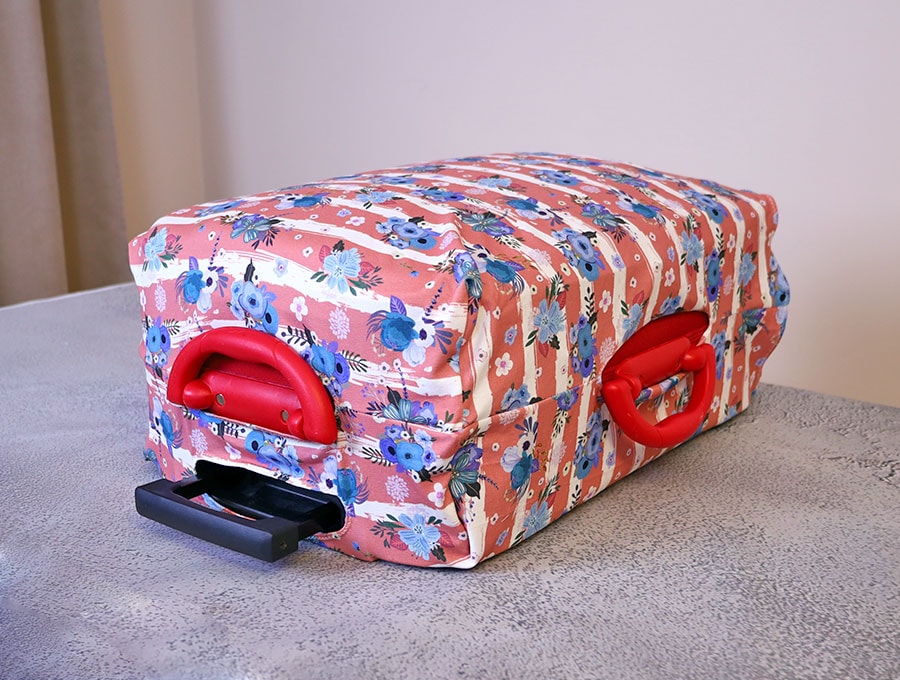
To create the fold over for the fastening at the bottom of the suitcase you need to make sure it doesn’t interfere with the wheels on the case. For my case I measured 3 inches (7.5 cm) in from each side on the bottom flap and made a mark.
STEP 11:
Join the mark made on the edge going back up to the corner of the flap with a curved line. Repeat with the other side – then cut out the flap pieces. That area will look a bit like a baby’s onesie where you fasten it at the bottom once the nappy is on!
STEP 12:
Separate the two pieces of fabric you have pinned or clipped together and join the edges at the top corners to make a boxed corner. Clip or pin and then stitch 3/8 of an inch (1cm) from the edge. Repeat with the other corner at the top of the suitcase cover.
STEP 13:
Serge (overlock) or zig zag around the curved bottom flap.
STEP 14:
Repeat steps 12 and 13 with the other side of the suitcase cover.
STEP 15:
Match up the top and side seams for the two sides of the cover and clip in place.
STEP 16:
Serge (overlock) or zigzag the seams, avoiding the gaps where the handle on the top and the handle on the side have been marked.
STEP 17:
Remember you made small nicks where the handles begin and end. Now serge (overlock) or zigzag around the opening for each of the handles to finish off the raw edges.
STEP 18:
Fit the luggage cover over your bag and mark the opening for the telescopic handle, using pins to mark each end.
STEP 19:
Remove the cover and use a fabric marking pen to mark the gap, make a small nick with scissors at each end, then cut along the marked line.
STEP 20:
Serge (overlock) or zigzag around the edge of the opening for the telescopic handle.
STEP 21:
Turn the luggage cover inside out and for each of the three handle openings, fold over ¼ of an inch (6 mm) and using a medium zigzag stitch work around the opening to finish off so there are no raw edges.
STEP 22:
This step will depend on where the luggage wheels are on your case. You will need to fit the cover and check the wheel position. For suitcase with 4 wheels you don’t need to adjust anything. For those with two wheels you may need to adjust the flap at the bottom by marking out a V shape where each of the wheels go then cutting out the shape and serging (overlocking) or zigzagging around the edge of the Vs then as in Step 23 turning over to the wrong side and stitching with a medium zigzag stitch so there are no raw edges showing.
STEP 23:
For the opening at the bottom turn back the extra 1 inch (2.5 cm) you added when cutting the pattern, to the wrong side and pin. The part where you may have needed to cut out the V shapes for the wheels will be in three parts – just fold back each part to the wrong side and pin.
STEP 24:
Now take a piece of Velcro and pin in position on the side with no V shapes cut in it to the right side of the fabric, lining it up near the edge.
STEP 25:
Take the other side of the Velcro and pin to the wrong side of the fabric where you have pinned the overlap. This piece of Velcro will need to be cut into three pieces to accommodate the gaps where the V shapes were cut to accommodate the wheels – if this was necessary – otherwise just one long piece across the length of the overlap will be fine.
STEP 26:
Stitch the pieces of Velcro in position making sure to backtack at the start and finish.
Sew as close to the edges as possible.
Your luggage cover in now ready to use as you please. It’s going to save you time when preparing for your next trip as you won’t have to spend time cleaning the suitcase as it’s been neatly stored and protected from dust. Sew a second one for travelling – nice and bright to make sure no one takes your bag by mistake!
Remember we would love you to LIKE and SUBSCRIBE to HelloSewing to get more useful sewing projects as they drop.
Do you like this? Pin for later:
Wanna be friends? Click HERE and follow me on Pinterest
RELATED: