
DIY Spring flower table topper or placemat [Pattern + VIDEO]
Welcome the warmth of spring with this flower-shaped placemat — a sewing project to add a fresh, whimsical touch to any dining space, whether inside or al fresco. Brighten up everyday meals, or cause a sensation at a brunch with these petal-shaped placemats that are as practical as they are pretty, beginner-friendly yet impressive enough to gift or sell. We provide the free printable sewing pattern at HelloSewing.com. So, sort through your stash to find some floral prints, and let’s bring a little springtime magic to your table!
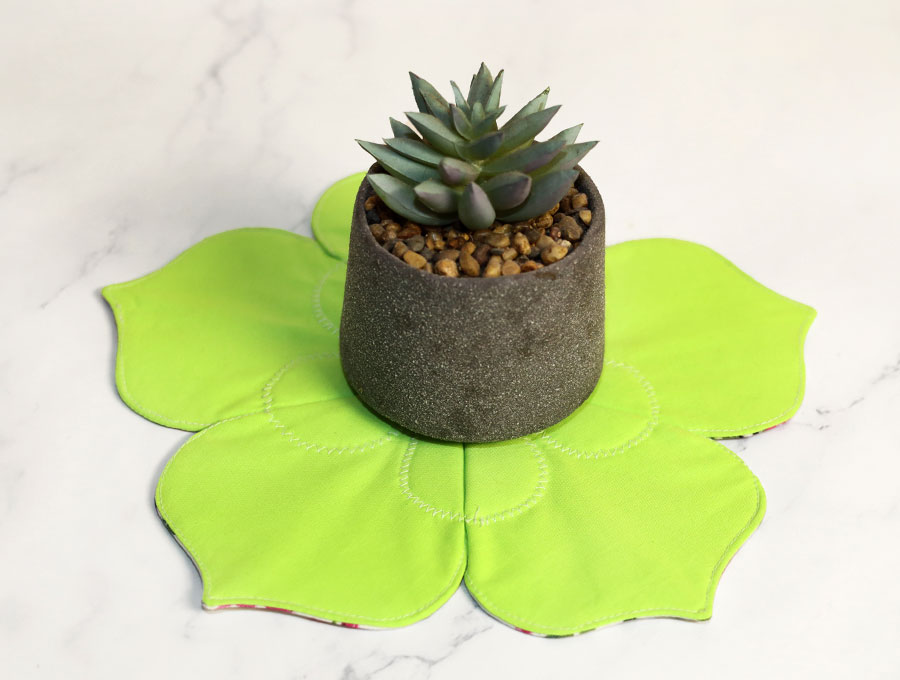
Sew a lovely table topper or placemat with this easy pattern
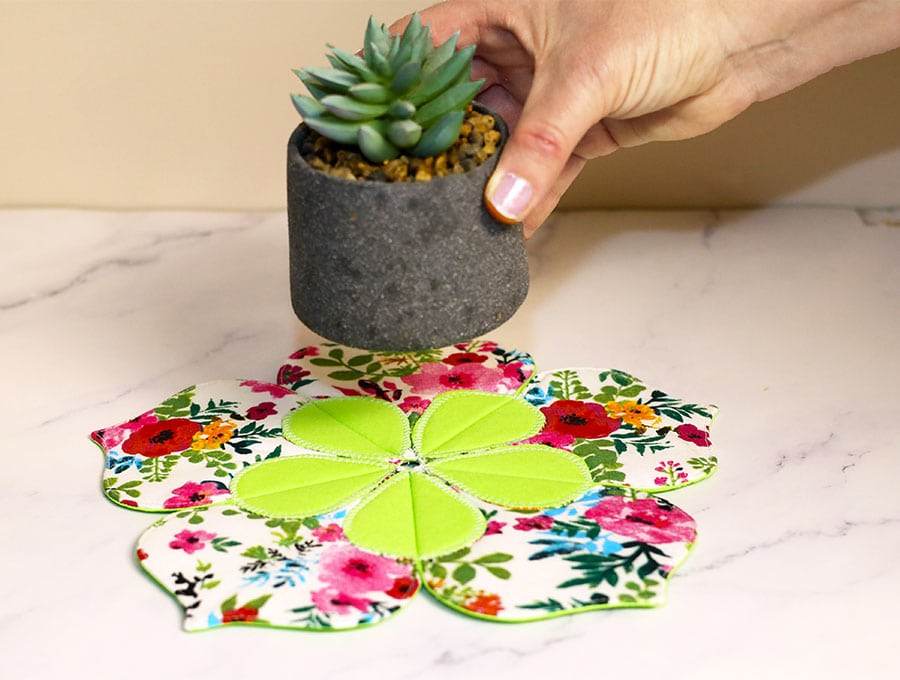
It’s reversible
Below you will find my step by step written tutorial with VIDEO instructions for all the visual learners.
We occasionally link to goods offered by vendors to help the reader find relevant products. Some of the links may be affiliate meaning we earn a small commission if an item is purchased.
Table of Contents
How to make the Spring Flower Placemat
Supplies and tools
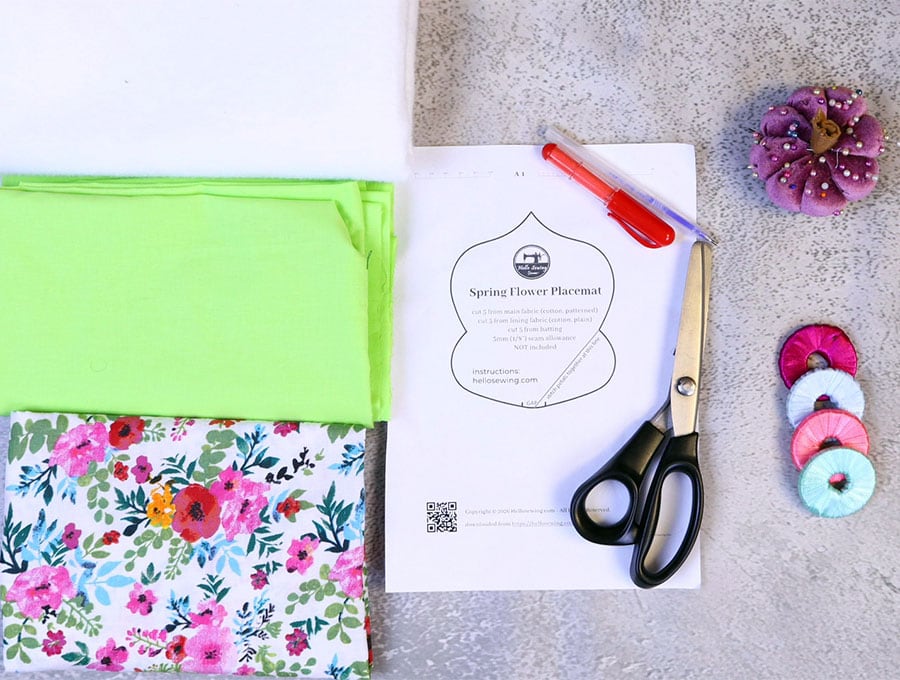
- fabric – 2 pieces of 100% woven cotton (one main, one lining)
- matching thread
- scissors (or rotary cutter and a cutting mat)
- ruler or measuring tape
- iron and ironing board
- sewing clips or pins
DOWNLOAD: Spring Flower Placemat pattern [Free pdf file]
Follow us for free patterns & tutorials! [easy-profiles]
How to Sew a spring flower Placemat
Watch the diy spring flower table topper video first and then follow the written step by step instructions below.
Please enjoy and don’t forget to Like and SUBSCRIBE over on YouTube to be kept up to date with new videos as they come out.
Spring Flower Table Topper VIDEO TUTORIAL
INSTRUCTIONS:
STEP 1:
Print out the pattern onto a sheet of A4 or US letter paper, then cut it out. If you do not have access to a printer then go to our FAQ section where I give the dimensions for creating your own pattern.
STEP 2:
Assemble your fabrics – prints for the front and plains for the back.
You will need to cut five petals for each placemat – 5 from the printed fabric, five from the plain fabric, and five pieces of batting.
STEP 3:
Lay one batting pattern piece down and over it the printed cotton fabric right side up, then over them place the backing piece right side down. Clip or pin together towards the corners.
STEP 4:
Place the pattern piece over the fabric ensuring it is equidistant form the sides and top and bottom then place some weights on it before marking around the edge with a fabric marking pen, also marking a gap at the bottom of the petal.
STEP 5:
Stitch around the petal on the marked line, backtacking on either side of the gap.
STEP 6:
Carefully cut the batting quite close to the stitch line.
STEP 7:
Now trim the rest of the fabric quite close to the stitch line making sure not to get too close or cut through the stitching. Do not trim across the gap as you will need extra fabric to turn the raw edges in neatly.
STEP 8:
Make small v shaped nicks into the sides where the petal shape indents, and cut off a small triangle at the top of the petal.
STEP 9:
Turn the petal the right way out by pulling the fabric through the gap. The easiest way is to use a hemostat that enables you to grip the fabric and pull in through the small gap. They look like a pair of scissors with blunt ends but have a grip lock that enables you to hold an item like cotton or fabric firmly.
STEP 10:
Press out the shape using a turning tool, ensuring the petal lies flat, turn in the raw edges of the gap in line with the seam and pin, then give the petal a press with your iron.
STEP 11:
Repeat Steps 3 to 10 with 4 more petals.
STEP 12:
Place all 5 petals printed side up on your worktop. Take the pattern piece and fold back along the solid line marked on the right-hand side.
STEP 13:
Place the pattern over a petal and use a ruler and fabric marking pen to draw along that straight line. Repeat with all 5 petals.
STEP 14:
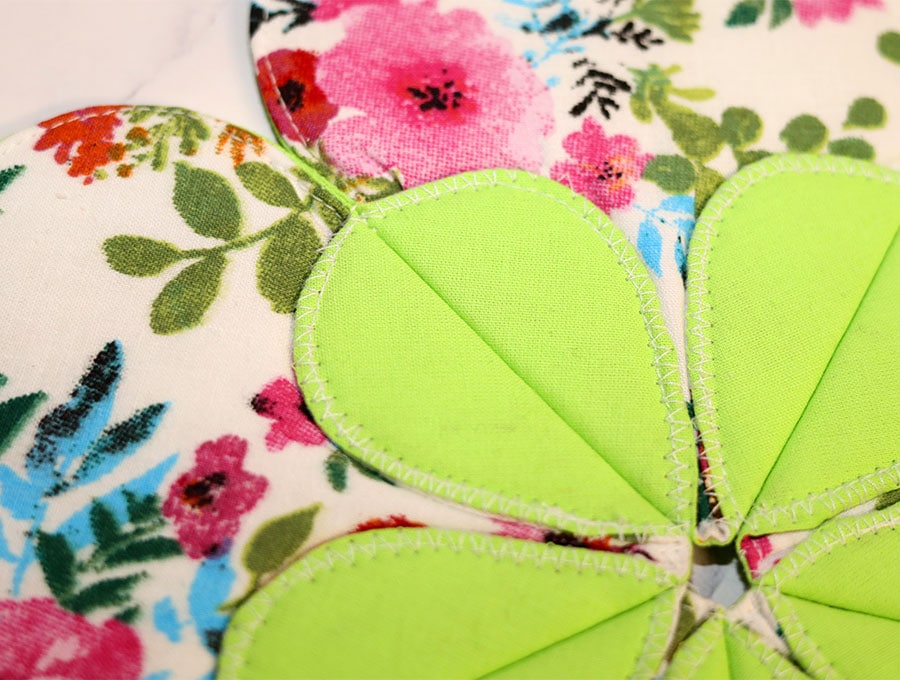
Top stitch the gap on each petal closed, or you may choose to topstitch all the way around each petal, closing the gap as you do so. Either way works. When you topstitch, stitch 1/8 of an inch (3 mm) from the edge.
STEP 15:
To join the petals, place 2 petals with the plain sides facing each other and stitch along the marked straight line to join them.
STEP 16:
Add another petal, plain side to plain side and stitch together, working your way around until all five petals are joined together.
STEP 17:
Press the flaps flat, and stitch around the edges of the flaps to join them to the rest of the
petals. You can topstitch with a straight stitch or set your machine to a small zigzag stitch.
Your placemat is ready to use – you just need to make a few more to have a set. It works really well if you bulk cut all the pieces and stitch as in a production line. Give us a like and subscribe for more quick and easy projects delivered straight to your inbox.
FAQ
Q: I don’t have a printer, so how do I make the pattern for the spring flower placemat?
A: This is how to go about it:
- Cut a square of brown paper or thin card (the brown card from inside a roll of gift wrap is perfect) 5 1/8 x 5 1/8 inches square (13 x 13 cm).
- Fold in half, with the folded edge toward the right-hand side of your worktop.
Do you like this? Pin for later:
Wanna be friends? Click HERE and follow me on Pinterest
RELATED: