
How to Make Fabric Butterflies in Minutes / Origami Fabric Tutorial
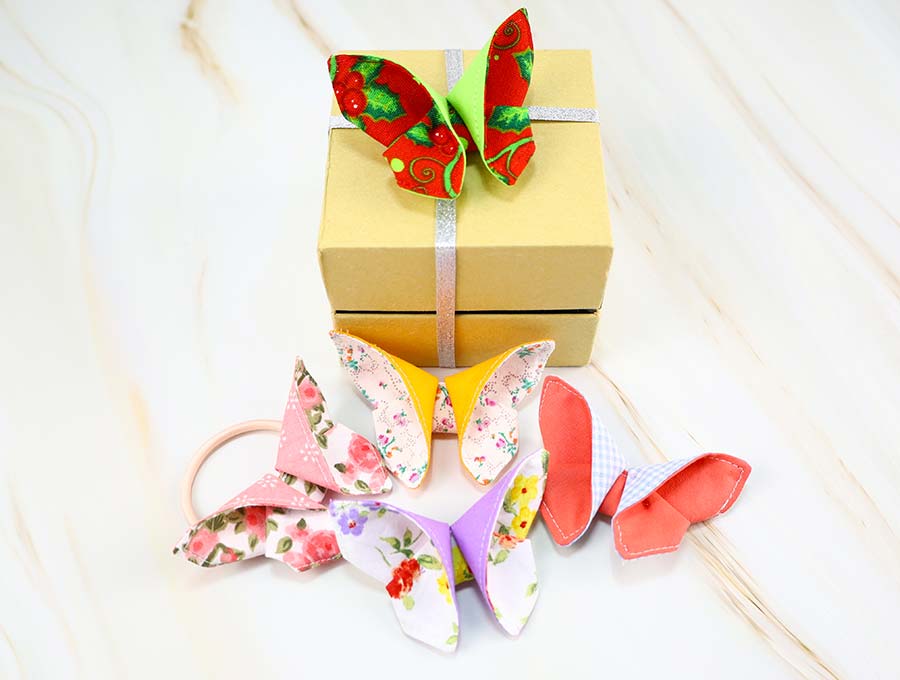
I’m so incredibly excited by this project! I can see they DIY fabric butterflies in silver and white on Christmas trees; white or pale-yellow ones floating suspended on invisible fishing line in the garden with fairy lights to give a magical effect, attached to girls scrunchies, as pretty décor on parcels, or as place name holders. Each butterfly takes just a few minutes to make.
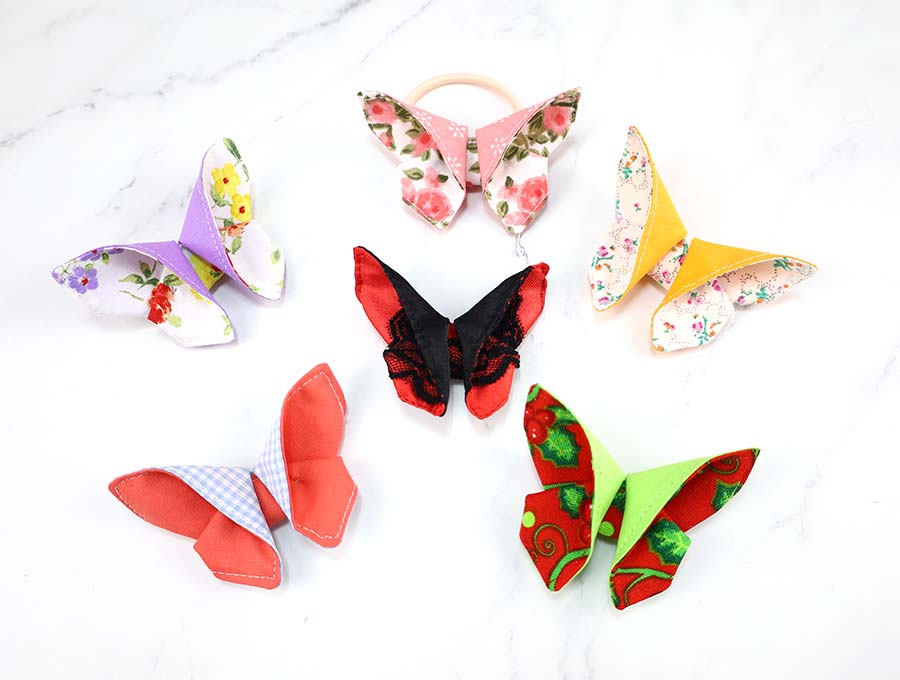
You can decorate them with the tiny but beautiful bits of lace that you haven’t been able to throw away, and the eyes on the butterfly wings can be made from odd beads and sequins you have been saving.
Below you will find my step by step written tutorial how to make a butterfly with fabric along with VIDEO instructions for all the visual learners.
We occasionally link to goods offered by vendors to help the reader find relevant products. Some of the links may be affiliate meaning we earn a small commission if an item is purchased.
Table of Contents
- 1 How to make a fabric butterfly
- 2 Origami Butterfly Supplies and tools
- 3 How to Sew a fabric butterfly
- 3.1 ORIGAMI FABRIC BUTTERFLY VIDEO TUTORIAL
- 3.2 FABRIC BUTTERFLY INSTRUCTIONS:
- 3.3 STEP 1: Cut fabrics
- 3.4 STEP 2: Pin
- 3.5 STEP 3: Sew
- 3.6 STEP 4: Trim corners
- 3.7 STEP 5: Turn around
- 3.8 STEP 6: Iron
- 3.9 STEP 7: Topstitch
- 3.10 STEP 8: Sew
- 3.11 STEP 9: Fold
- 3.12 Step 10: Make the wings
- 3.13 Step 11: Stitch the wing
- 3.14 Step 12: Stitch the other wing
- 3.15 Step 13: (optional) Handsew
- 4 DIY Fabric Butterflies FAQs, Tips and Troubleshooting:
How to make a fabric butterfly
Origami Butterfly Supplies and tools
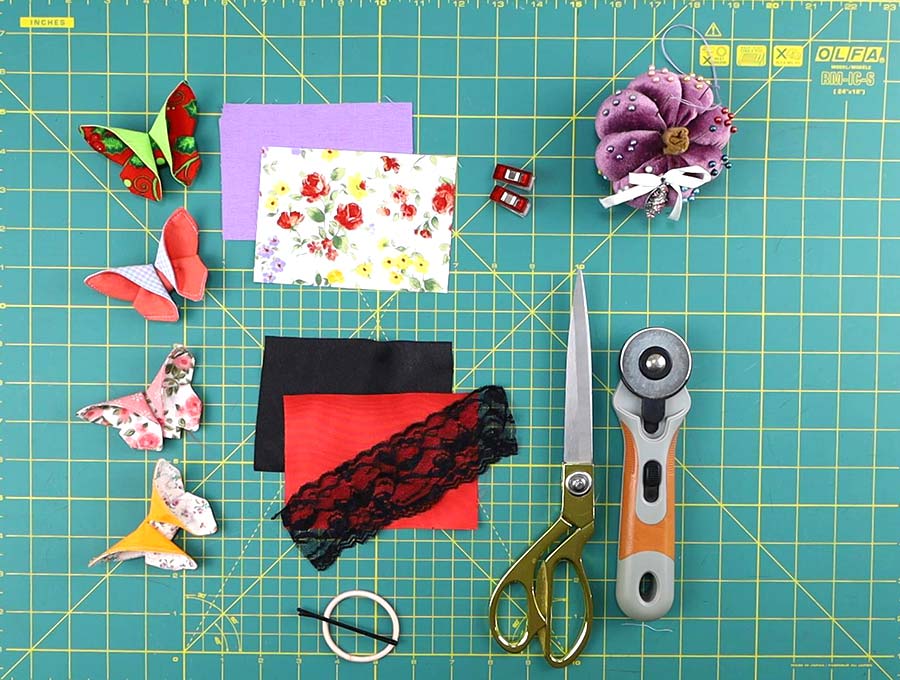
- fabric – 2 coordinating pieces of cotton fabric (one patterned, one plain) – 5 x 3.5″ (13 x 9cm)each
- matching thread
- scissors (or rotary cutter and a cutting mat)
- hand sewing needle and thread
- ruler or measuring tape
- iron and ironing board
- sewing clips or pins
- sewing machine
Follow us for free patterns & tutorials! [easy-profiles]
How to Sew a fabric butterfly
Watch the diy fabric butterfly video first and then follow the written step by step instructions below.
Please enjoy and don’t forget to Like and SUBSCRIBE over on YouTube to be kept up to date with new videos as they come out.
ORIGAMI FABRIC BUTTERFLY VIDEO TUTORIAL
FABRIC BUTTERFLY INSTRUCTIONS:
STEP 1: Cut fabrics
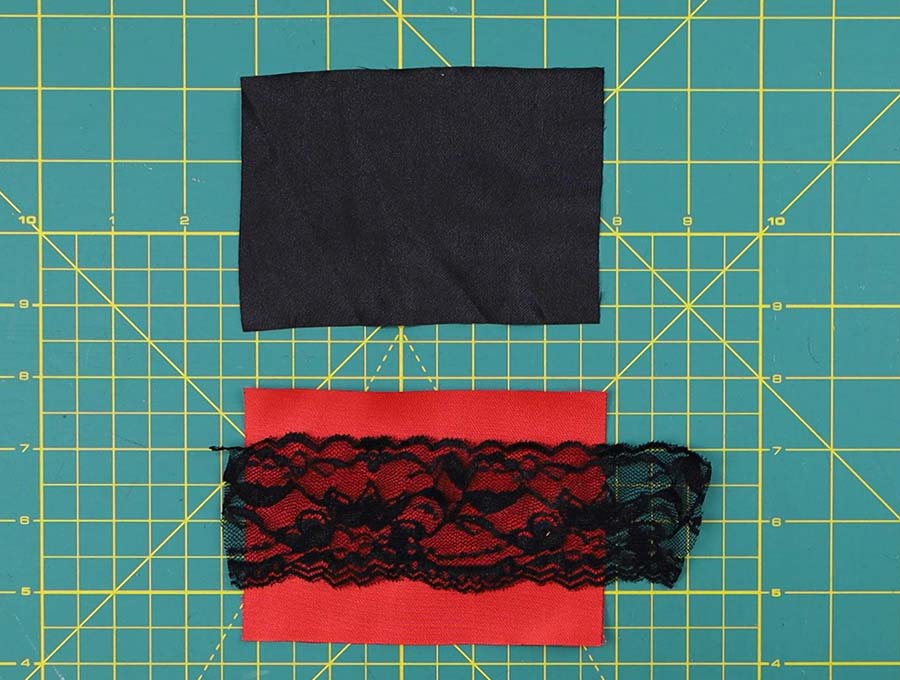
Cut out two 5-inch by 3.5-inch (13 x 9cm) rectangles for this butterfly. Use two different colors, or patterns that mix and match, for the rectangles, to get an effective contrast when you fold the butterfly.
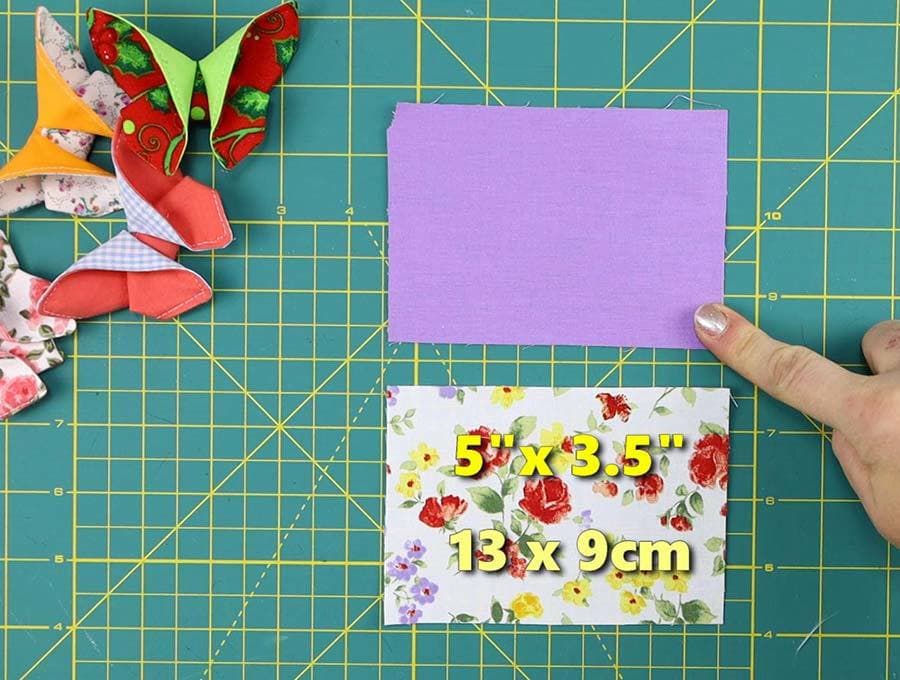
You can make larger or smaller butterflies but just need to remember if you are scaling that the length is 70% of the height.
- To scale up the 5 x 3.5-inch butterfly you would choose a height – say 6 inches and using a calculator multiply by .7 giving you 4.2 inches.
(If you are using metric measurements that would be 15cm, multiply that by 0.7 giving you 10.5cm, so cut your fabrics 15 x 10.5cm) - To make it smaller – say 4 inches multiply 4 x .7 = 2.8 inches.
(METRIC: 10 cm height multiplied by 0.7 = 7cm, cut fabrics 10 x 7cm)
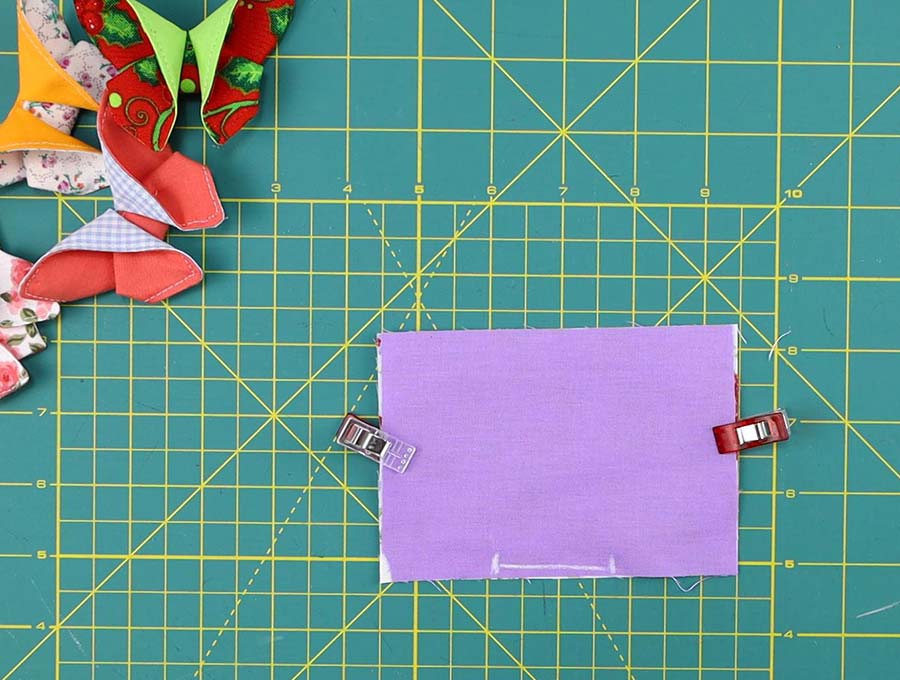
STEP 2: Pin
Place the two rectangles right side to right side and line them up, then make a 2-inch (5cm) mark on the long end of the rectangle. Pin
STEP 3: Sew
Proceed to sew from the lower edge of the mark ¼ inch (6mm) from the edge, back tacking when you start.
When you reach the corner, at ¼ inch (6mm) from the edge make sure the needle is down, then release the presser foot so you can swing the fabric without losing your stitch position. Repeat until you have worked your way right around the rectangle and are back at the upper edge of the opening where you will back tack and cut the threads.
STEP 4: Trim corners
Carefully trim across all four corners, taking care not to cut too close to the stitch line. This gets rid of excess fabric that could make your corners look bulky.
STEP 5: Turn around
Turn the fabric right way out by pulling through the gap left on the long side of the fabric. Use a knitting needle or chop-stick to poke out the corners and run it along the seams to make sure they lie flat.
STEP 6: Iron
When you are satisfied that the seams have been pushed out and the corners are neatly flattened, iron the rectangle, making sure the edges at the gap are neatly turned in so no raw edges show.
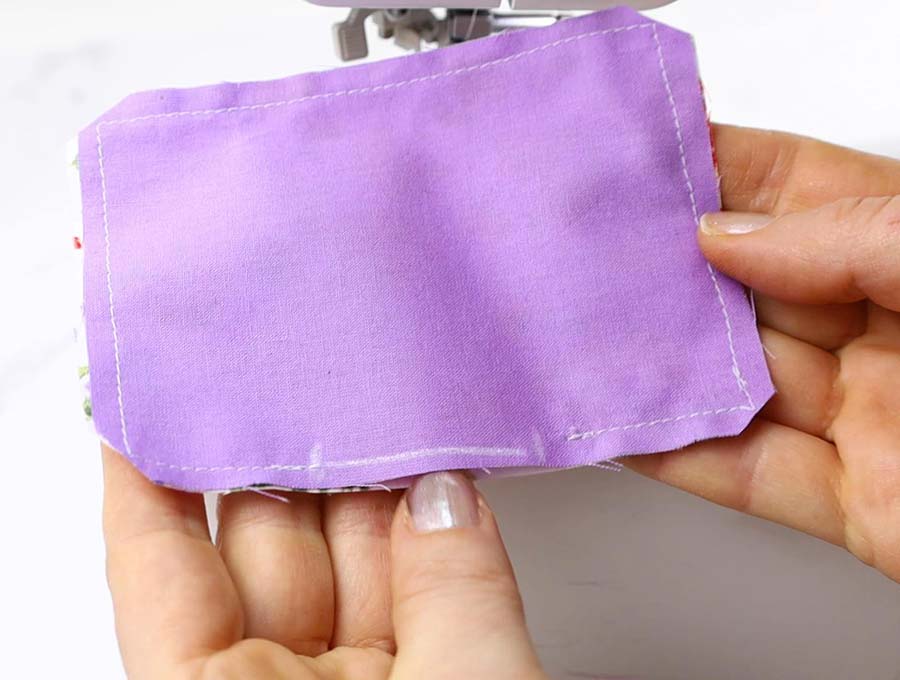
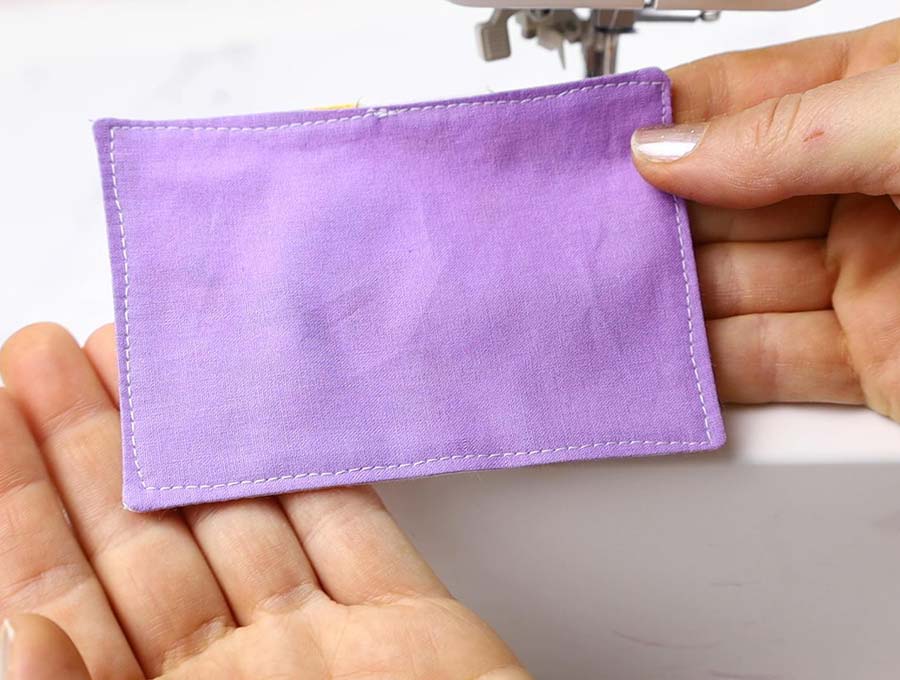
STEP 7: Topstitch
Make sure the color thread matches the main fabric color, and if using for example a red print on the front and a white print at the back that you thread your machine with red on the machine and white on the bobbin so the colors blend with the fabric. Back at the machine, starting at the middle of the gap run a row of top-stitching all the way around the edge of the rectangle, 1/8 inch (3mm) from the edge, sewing across the gap, whose edges have been turned in and pressed, and back tacking at start and finish, so you have a sealed rectangle. Trim all the loose threads.
STEP 8: Sew
Thread a hand sewing needle with a piece of thread that will match the color of the front print on the butterfly, make it about 26 inches long, and pull through so the ends meet. Make a knot in the two ends so you have a double thread that is 13 inches long. Set aside while you fold the butterfly.
STEP 9: Fold
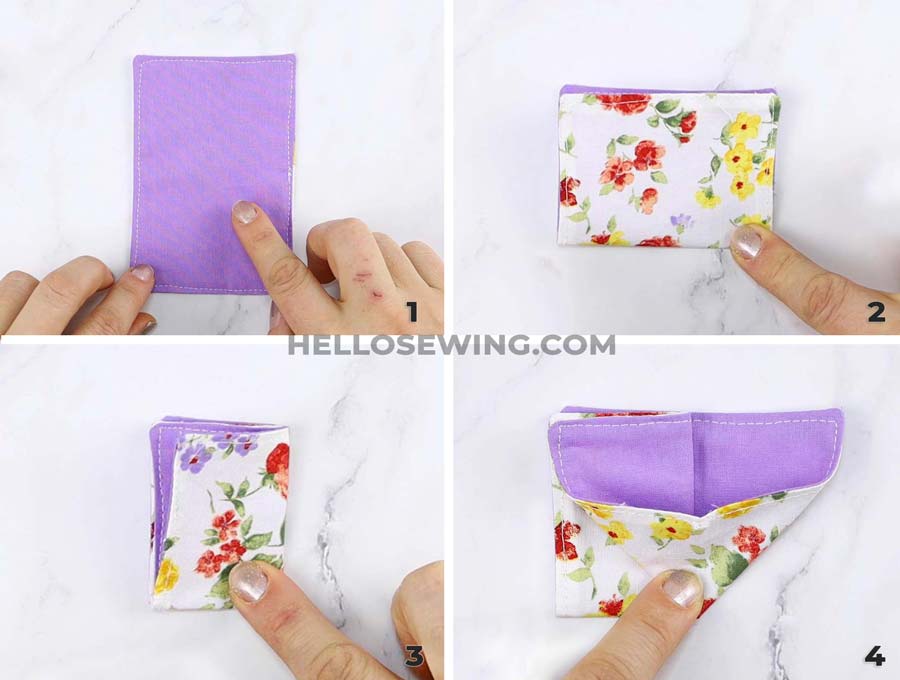
- Place the shorter end of the rectangle horizontal with the bottom of your worktable and wrong side on top (img1).
- Fold the rectangle in half from the bottom up, line up the corners neatly, then finger press the fold (2).
- Now fold in half again from right to left, lining up the corners. You now have a small rectangle with the folded corner in the lower right-hand side. Finger press the right-hand side fold (3).
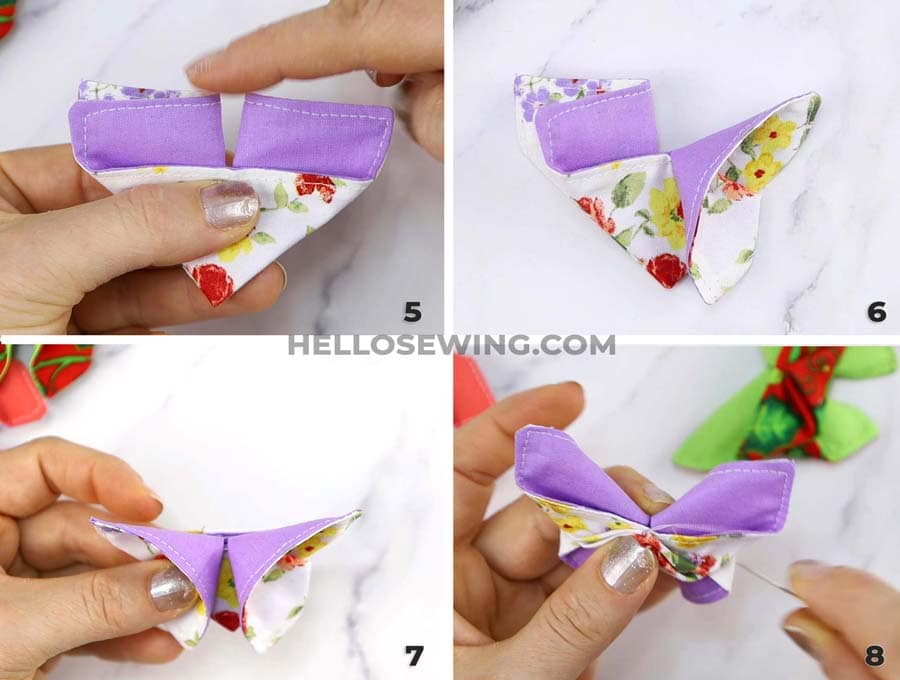
- Lifting the top layer from the top left-hand side with one hand, keeping a finger on the other three layers, open out the fold to the right so a triangular pocket is formed (4).
- Make sure the edges line up at the top and then holding the left-hand lower side of the fabric flip over, lay flat and take the top right corner and fold to the left, creating another triangular pocket at the bottom, lining up the edges neatly (5).
Step 10: Make the wings
 You now have a piece of fabric that is triangular at the bottom and rectangular at the top (5). The video shows this clearly, making it easy to follow.
- Where the fabric splits at the center, take the fold to the right-hand side and bend it downward, creating another triangular pocket whose opening is facing to the right and lining up the fold with the center, but pulling it down slightly more, as this will make the lower butterfly wing slightly larger than the upper one and give that top folded wing more of an angle – making for a realistic butterfly shape (6).
 You now have a piece of fabric that is triangular at the bottom and rectangular at the top (5). The video shows this clearly, making it easy to follow.
Step 11: Stitch the wing
Securing the origami wing in place involves still keeping a hold on the folds, but turning the half-folded butterfly over so you can use your previously threaded needle to make three small stitches very close to each other ½ an inch (12mm) from the edge, on the lower wing side. The stitches must reach all the way through to the front, but not through the bent upper part of the wing. Finish off and clip the thread, then make a knot in the thread ready to stitch the second half and set aside.
Step 12: Stitch the other wing
Flip over the half-finished butterfly to the front and taking the fold on the left-hand side of the center split, pull it down to create a triangular pocket, lining it up so it matches the right side of the butterfly(7).
Stitch the left-hand wing in place as you did in the previous step.
Step 13: (optional) Handsew
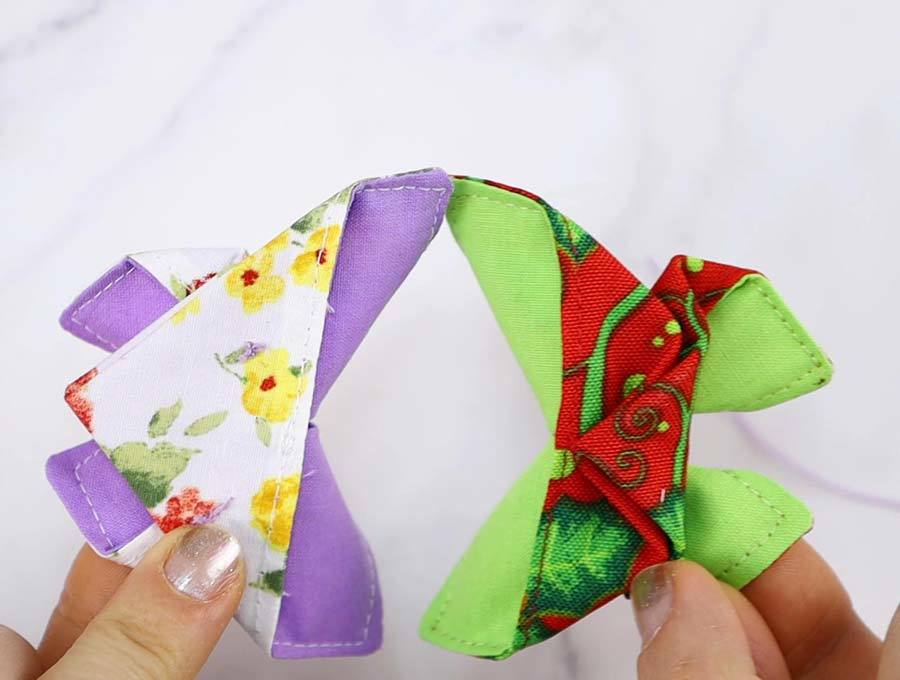
unstitched triangle bottom piece (left) vs stitched (right) – view from back side
To finish the butterfly, take the folded triangle in the center between the wings and fold upward to meet the point between the wings and secure in place with a couple of stitches(img8).
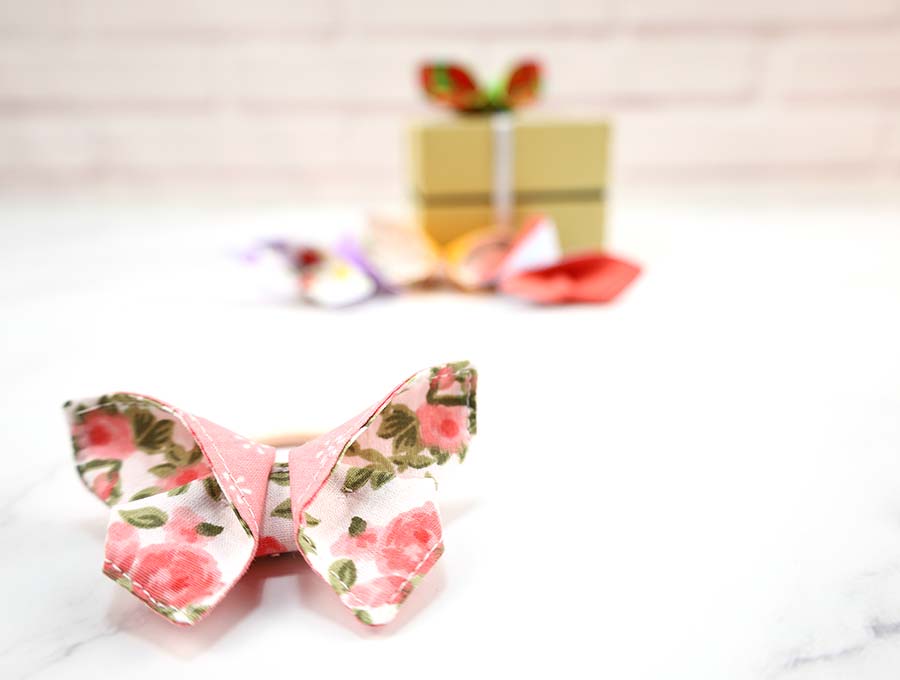
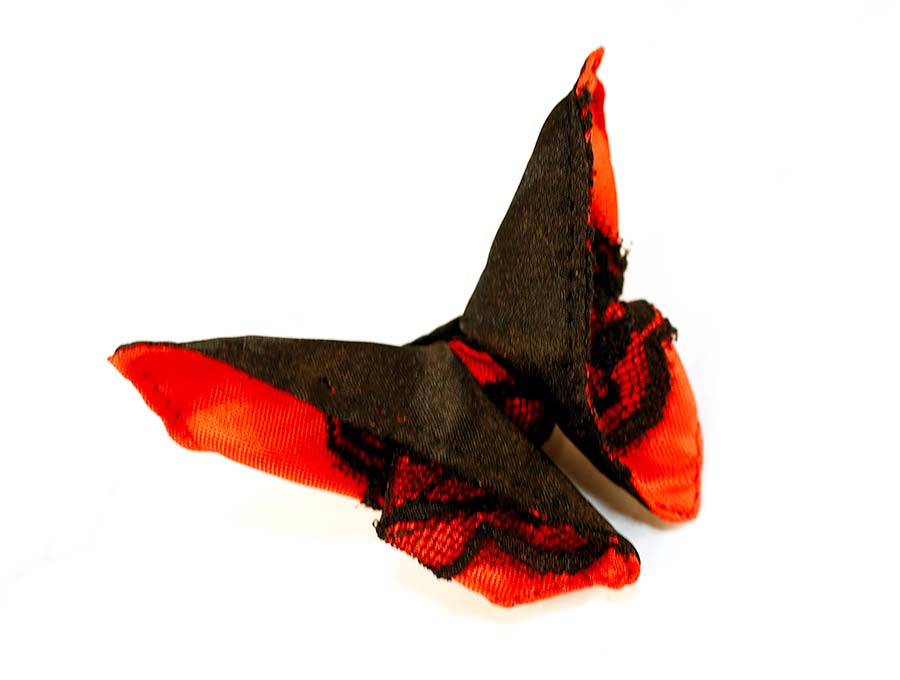
That’s it your fabric butterfly is ready!
DIY Fabric Butterflies FAQs, Tips and Troubleshooting:
Q: At which point do I add lace to my fabric?
A: On one of the rectangular pieces add a piece of lace centrally place horizontally along the longer side of the rectangle. Pin in position and stitch down on each side of the lace, then proceed with Steps 2 to 13.
Q: How do I secure the butterfly to an elastic hair tie?
A: Complete the butterfly to step 12, then when you flip up the bottom triangle, flip it over the hair elastic and stitch in place. The hair elastic should be able to slide freely through the gap.
Q: How do I secure the butterfly to a scrunchie?
A: In the case of a scrunchie compete the butterfly to step 12 then stitch it secure to the scrunchie, working through the center of the butterfly. You can decorate with a few beads along what would be the body of the butterfly with a couple of beads to hide the stitches – two rounded beads for head and thorax and a longer one for the abdomen would be perfect.
Q: How do I secure the butterfly to make it a hanging Christmas ornament?
A: If using ribbon, then simply stitch a folded piece of ribbon to the back of the butterfly, securing the ends of the ribbon neatly. If using a piece of fishing line then it would be better to secure a tiny ring – available from bead and craft shop to the back with a few stitches, then tie the fine fishing line to the ring and preferably singe the ends of the line, so it doesn’t come undone.
Q: How can I make feelers for the butterfly?
A: Take a piece of wire and thread with tiny beads, bending over the ends with a pair of pliers, or use a colored pipe cleaner bent into a v shape and curled at the end then stitch either the beaded wire or the pipe cleaner to the central point of the butterfly.
The origami fabric butterfly is a beautiful little project and is so quick to make – the longer part is reading through the step-by-step fabric butterflies tutorial – but once you have made one you can line up your fabrics and make dozens of them taking only a few minutes for each one. If you were inspired by this post then subscribe to receive news straight to your inbox full of fun and seasonal sewing projects that use up all those tiny bits of fabric in beautifully creative ways.
Do you like this? Pin for later:
Wanna be friends? Click HERE and follow me on Pinterest
RELATED:
DIY hair bun maker
tulle skirt pattern