
How to Make a Tutu | Easy No Sew Tutu DIY
Whether kids take ballet classes or not, they love to pirouette around in a make-believe world pretending they are princesses or fairies. This DIY no-sew tutu is really so easy and quick, it is going to be a breeze to make a child’s heart swell with joy and pride when wearing it. And the tutu looks so cute on babies! When we say no-sew tutu, it’s kind of hard to believe. Seriously, never mind a sewing machine, all you need a needle and thread to fasten the elastic to make this tutu, but you can avoid even that.
So, there are no excuses for not going out to get the supplies – or ordering them online, if these crazy times we live in make getting to the shops a mission you would prefer to avoid. Choosing a soft tulle is essential for this style of no-sew tutu for youngsters.

Below you will find my step by step written tutorial how to make a tutu skirt with VIDEO instructions for all the visual learners.
We occasionally link to goods offered by vendors to help the reader find relevant products. Some of the links may be affiliate meaning we earn a small commission if an item is purchased.
Table of Contents
How to Make a Tutu Skirt
DIY Tutu Supplies and tools
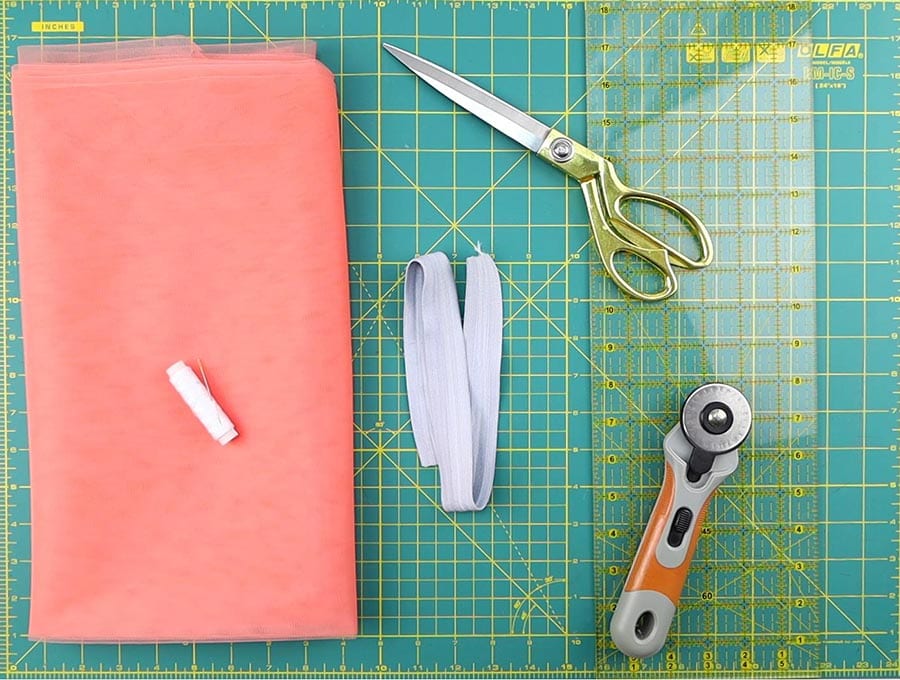
- soft tulle fabric – 1 – 1.5 yds of 118-inches (300cm) wide tulle *
- 1″ (2.5cm) flat elastic – 15-20″ long **
- matching thread
- scissors (or rotary cutter and a cutting mat)
- ruler or measuring tape
- iron and ironing board
- sewing clips or pins
- sewing machine
Notes: * You can substitute the extra wide tulle with other tulle you have, you’ll just need to fold it differently
** You can use a variety of materials for the waistband – elastic, ribbon or crocheted headband
Follow us for free patterns & tutorials! [easy-profiles]
DIY Tutu Skirt for a Child
Watch the diy tutu video first and then follow the written step by step instructions below.
Please enjoy and don’t forget to Like and SUBSCRIBE over on YouTube to be kept up to date with new videos as they come out.
TUTU DIY VIDEO TUTORIAL
DIY TUTU SKIRT INSTRUCTIONS:
STEP 1: Determine the waist size of the tutu
The first step is to establish the waist size of the child you are making this for – and although I could (and will) give you an age to size chart children differ so much in size it isn’t worth much. I’m sure you’ve heard mom’s comparing children’s sizing: a petite 12-month-old that wears 6-month-old’s clothing, and a two-year-old that wears clothes for a three or four-year-old comfortably.
What I have listed below is a waist measurement to length ratio that will help in determining the correct proportions of the tutu, and this ranges from babies to young teens, although feel free to shorten or lengthen as you choose.
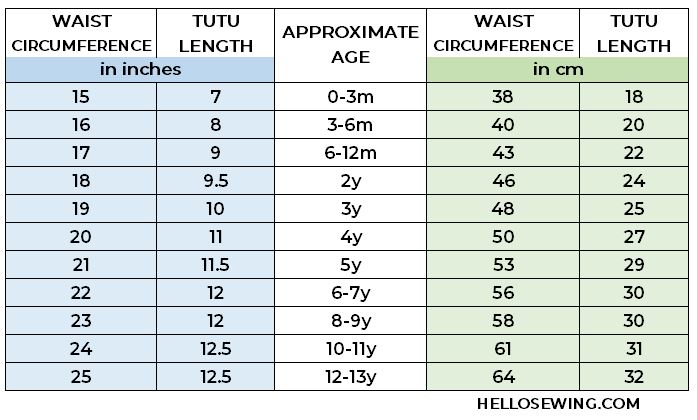
STEP 2: Do a little math
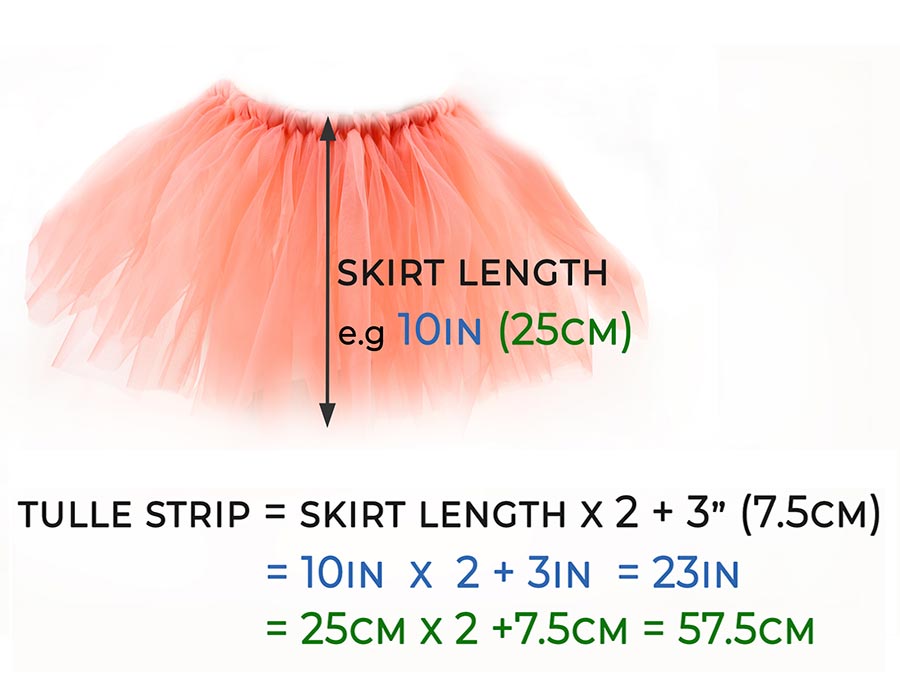
Now that you have the waist size, you can see on the chart the length the tutu should be. So, let’s say you are making a tutu for a two-year-old with a waist measurement of 19 inches, then that means the length should be 9 inches. You are going to double that length to get the tulle strip length – so that means 10 x 2 = 20 inches. Because the strip is looped at the waist you need a bit more length – so add another 3 inches (7.5cm), that makes a 23 inch long tulle strip. Establishing how much fabric you need comes first, along with testing the way the tulle stretches – it will stretch one way but not the other, so there should never be stretch along the length of the strip but there can be stretch across the width of the 23 inch strip in this case. The width commonly used is 4 inches across.
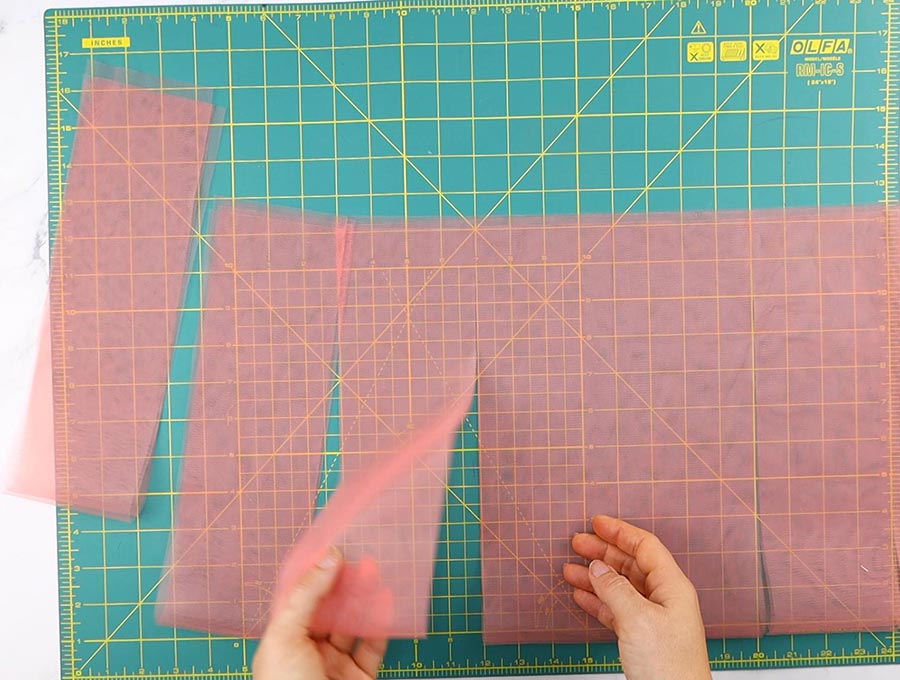
To make the skirt you will need 2 pieces of tulle each 118 wide by 23 inches in length from where you will cut the tulle strips.
STEP 3: Fold and cut
We are going to be looking at folding the tulle fabric to make the most economical use so that 3 inch margin for the knotting could vary slightly. As an example, let’s say I have extra wide (118 inch/3m) tulle that is 23 inches long, so I fold the piece along the width three times – 118 inches now folded becomes 59 inches. Then 59 inches divided in half becomes 29.5. And finally 29.5 folded in half one last time is 14.75″. You don’t have to measure – just fold it in half three times as you see in the diagram below by folding the tight side to the left and adjusting until the corners line up neatly.
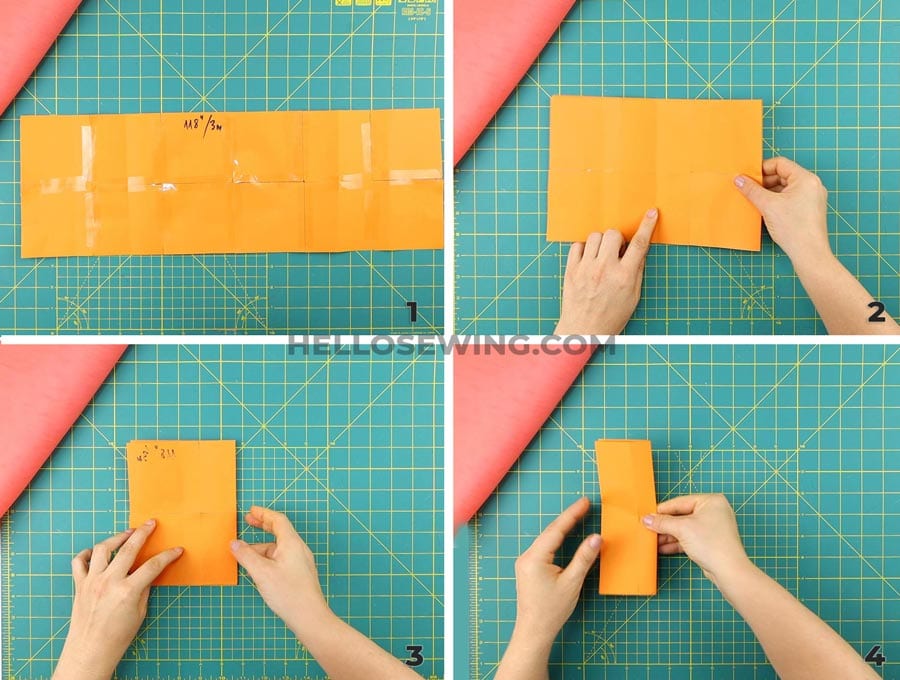
Rotate the fabric so that the shorts sides are on the left and right and cut 2 pieces of fabric according to the length you calculated in the previous step. I cut 2 pieces of fabric each 23″ long and 118″ wide.
Unfold one of the fabric pieces, and fold it once lengthwise and once widthwise as shown below.
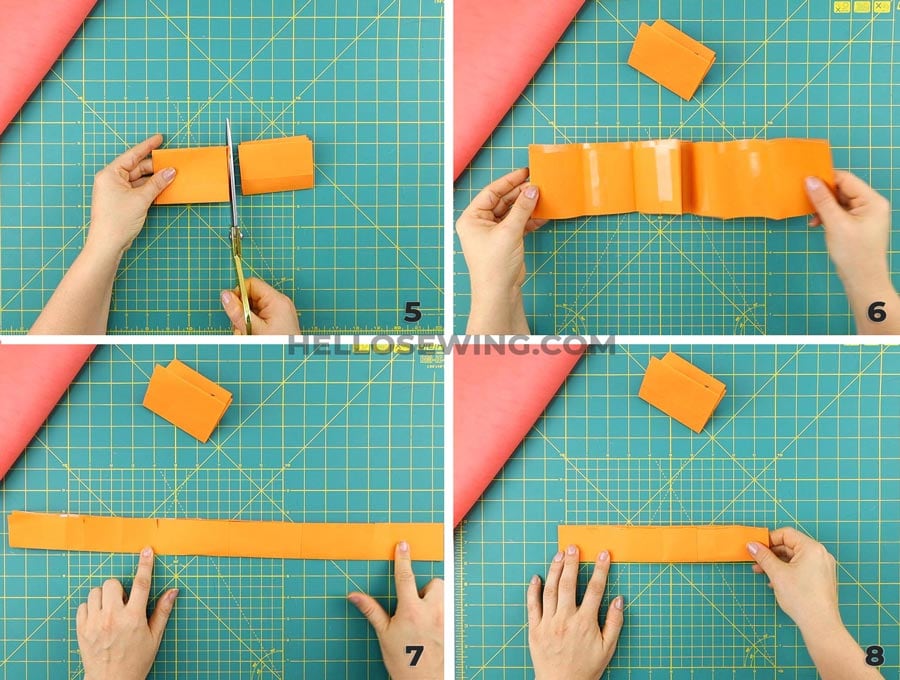
STEP 4: Cut the tulle strips
You will be able to cut your tulle strips each 4 inches in width from each fabric piece. From the two pieces you’ll have a total of 58 strips for a lovely full tutu.
Skimping on the number of tutu strips will just make it look scanty – tutus need to be full and poufy for the princess effect.
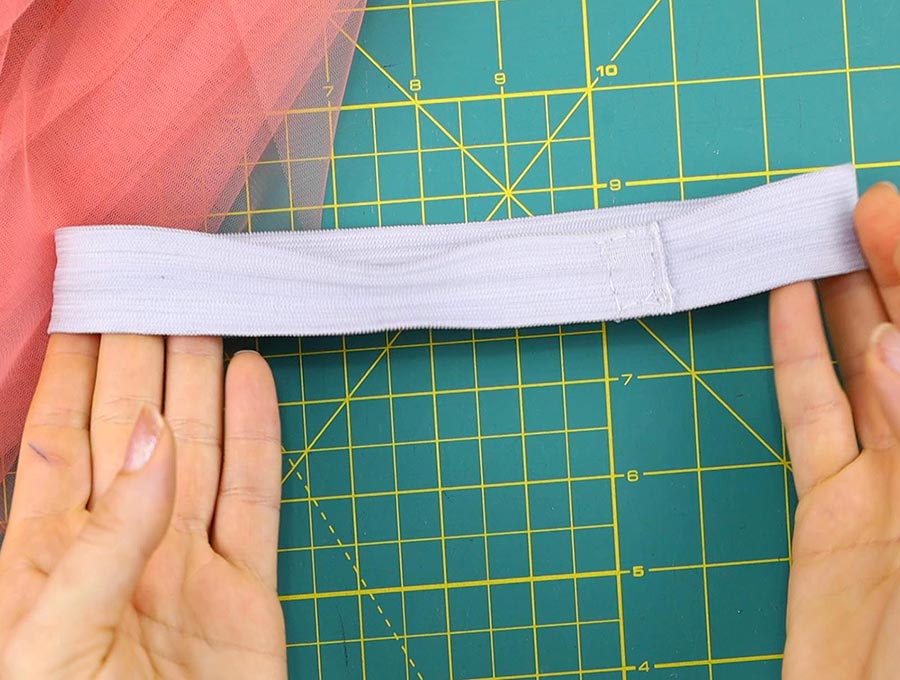
STEP 5: Prepare the elastic
Time to prepare the elastic for the waistband. To make it genuinely no-sew you could glue the elastic ends together, but I think it is safer to simply use a needle and thread to overlap the ends by ½ an inch and stitch securely in place so the elastic does not part company when the child pulls the skirt on or off.
STEP 6: Make slipknots
Assembling the tutu is the most fun part. An easy way to fold the elastic firm while you work is to slide the elastic circle up over your foot onto your thigh, sit down and start adding the strips by folding each length in half, holding the top loop securely in one hand, and the two free ends in the other hand, then sliding the loop under the elastic waistband, bending the loop forward and pulling the free ends through the loop and tugging to secure firmly.
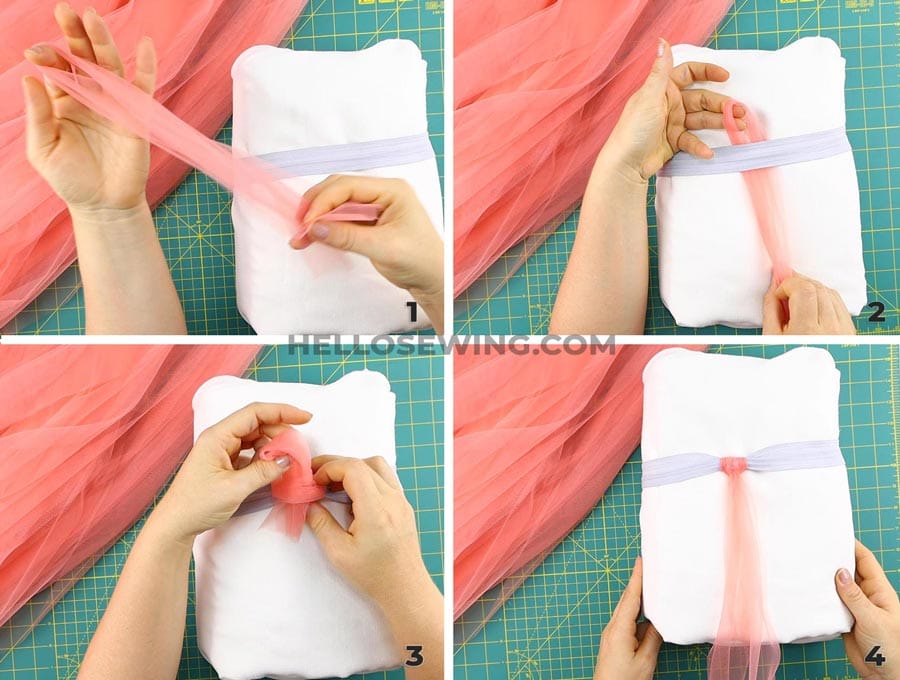
Just keep adding the tulle strips until you add all 58 strips you have. You may have to adjust the rest of the strips to make space for the new ones
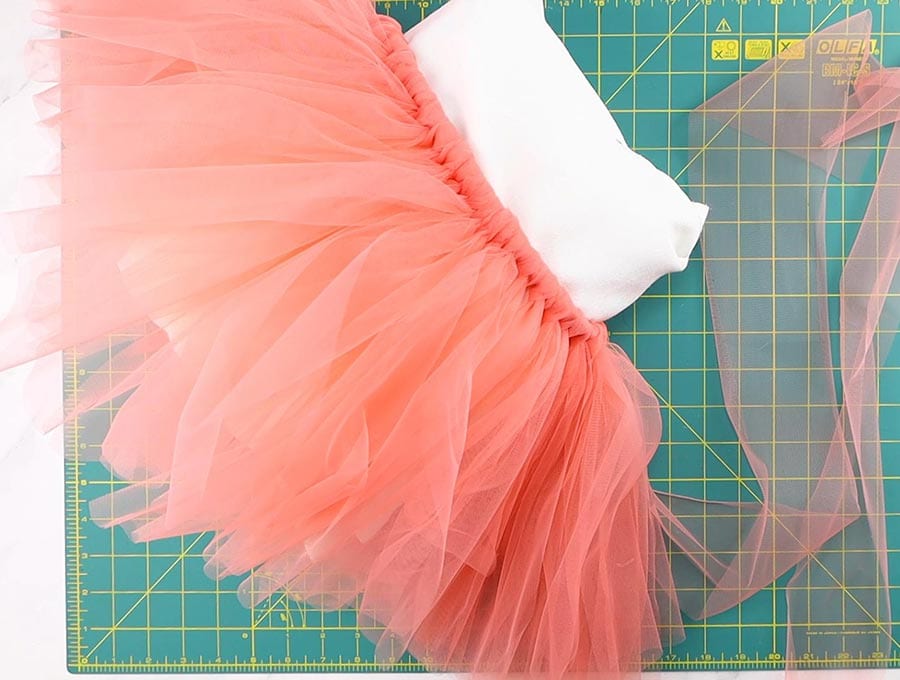
STEP 7: Trim
Once you are finished adding the strips, lay the tutu out in a full circle on the floor or an large table and check the edges are even, and trim if necessary.
While you are making the skirt it is wise to cut a few extra strips and keep them in a small plastic or fabric bag stored with the no-sew tutu – that way you can easily find them should a strip get ripped or stained – you know what kids are like when they are playing. According to specialists in child development and education, fantasy play helps children develop life and literacy skills, so let your youngster have fun with the DIY tulle no-sew tutu, bringing characters from favorite movies and books to life. If you liked this tutorial then please subscribe
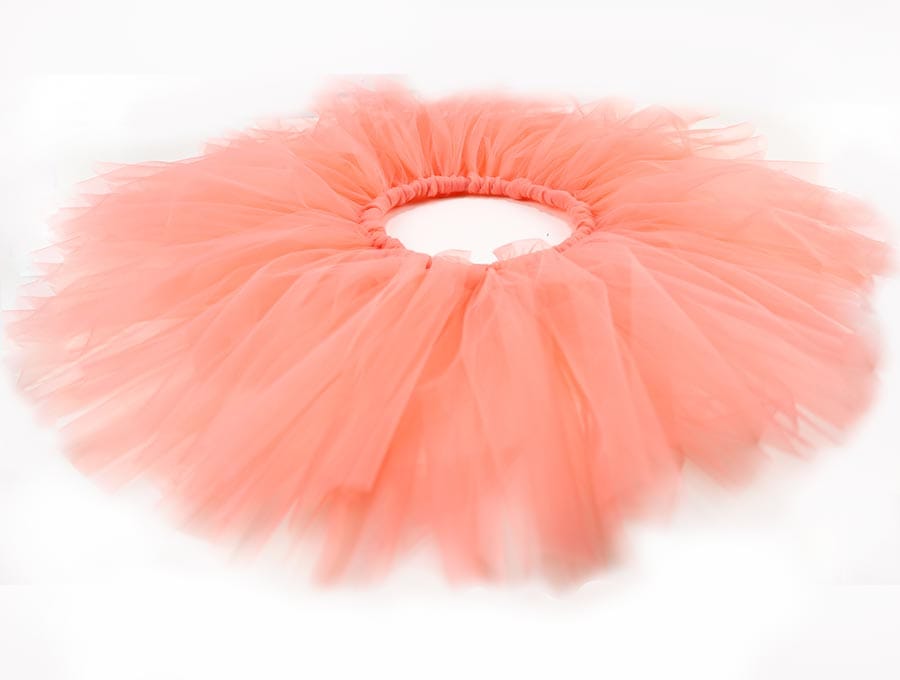
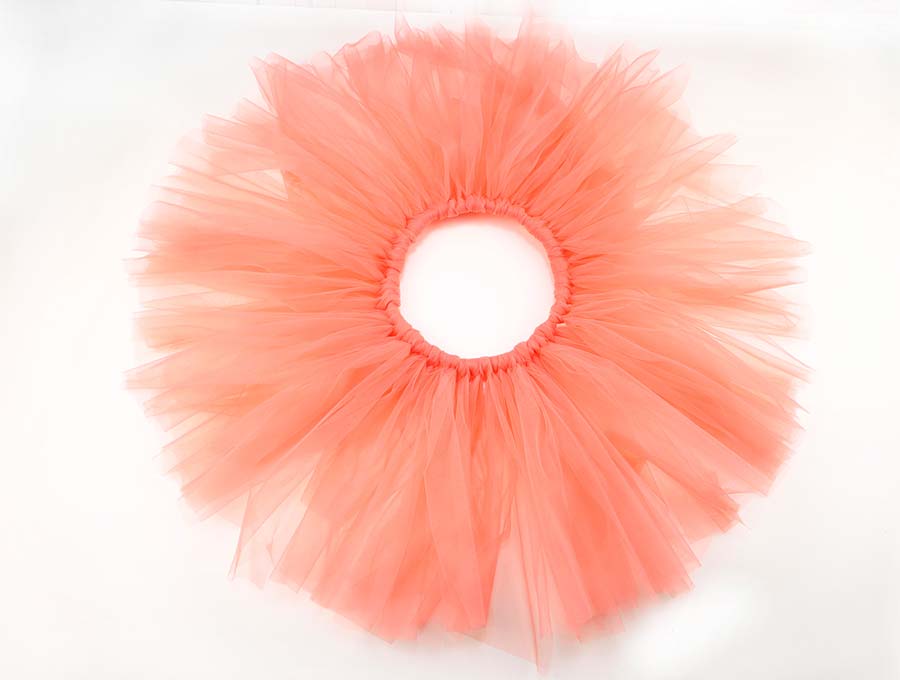
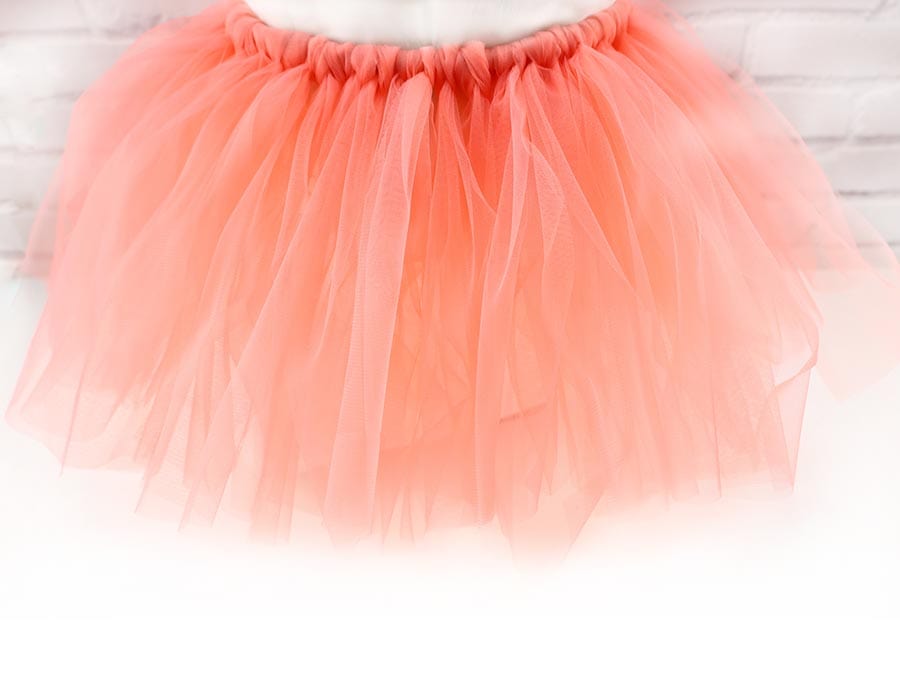
That’s it your diy tutu is ready!
DIY Tutu FAQs, Tips and Troubleshooting:
Q: Can I use more than one color on the no-sew tutu?
A: You can use as many colors as you like. Just divide the colors strips evenly – for example red and orange for a fire fairy skirt, or blue and green for a sea fairy skirt. You can even do a rainbow skirt with the seven colors of the rainbow being added in sequence around the skirt.
Q: My child outgrew the tulle tutu but still wants to wear it. What can I do?
A: It’s quite easy to add to the circumference of the skirt – simply untie 3 to 4 strips, cut the elastic, and add in a piece of elastic, stitch both ends securely to the existing waistband and add some more tulle strips.
Q: What is the best way to store the tulle tutu?
A: The best way is to hang the skirt onto a hangar with clips/grips that hold the waistband securely, then slip a clothes bag or large plastic bag over it so it doesn’t get dusty or have other hangars hooking into the tulle and tearing it. This way you won’t have a crumpled tutu that needs tedious ironing.
Q: What about washing the no-sew tulle skirt?
A: Hand-wash using a mild fabric liquid in warm water, gently squeeze out and place on a hangar to dry outside. Do not place in a washing machine with other clothes or in the tumble drier. The skirt will last for years if gently cared for.
Do you like this? Pin for later:
RELATED:
- DIY tulle skirt for adults – make a matching mom and me set with this pattern
- 10+ stylish skirt sewing patterns
- Easy summer dress patterns for beginners