
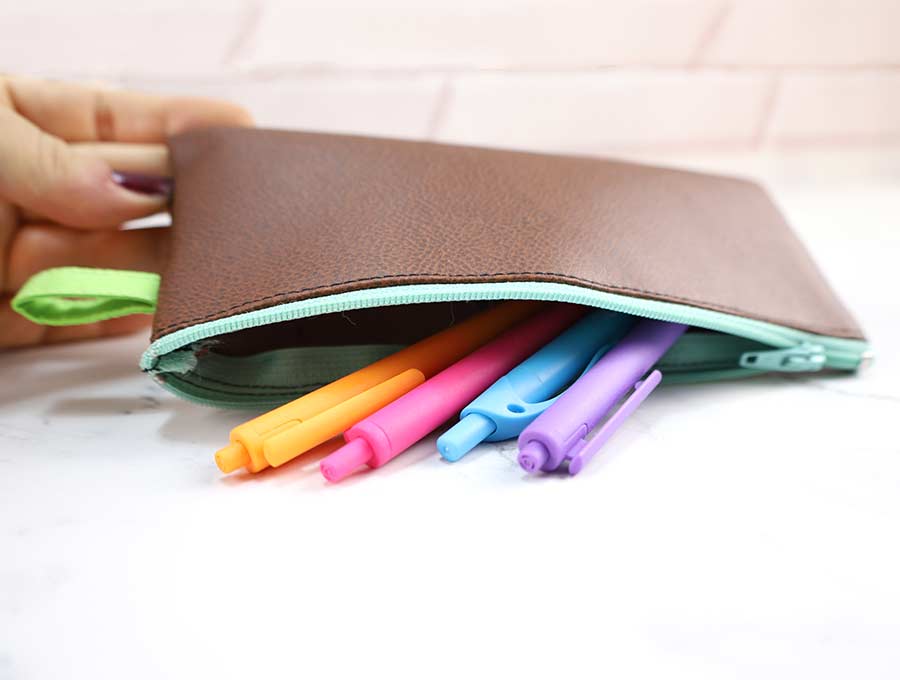
DIY Pencil Case in 10 minutes – Perfect for School
A quick and easy project to use up odd bits and pieces of fabric or faux suede or leather, the DIY pencil case should take around 10 minutes of sewing once the material has been selected and cut to size. You can scale the pencil cases to suit various requirements. For home offices, and for school, you’ll need to create a pencil case with a bit of extra space for a mini stapler, a small punch, various pens, pencils and sharpies. In certain places the case you take into an exam room needs to be see-through so the examiner can see there are no crib notes – in this case you’ll only need space for a pen, ruler, sometimes a calculator, pencil, and eraser, and that’s about it.
The pencil case can either be made from faux leather or suede, or a neoprene type material which means no need for seaming edges that can fray or creating a lining. This tutorial will give you the step by step method for creating a pencil case from a fabric that can fray and from a non-fraying material.

The finished size will be 8.5 inches by 3.5 inches, but you can create virtually any size you want to accommodate the type of stationery you plan on storing inside.
Below you will find my step by step written tutorial with VIDEO instructions for all the visual learners.
We occasionally link to goods offered by vendors to help the reader find relevant products. Some of the links may be affiliate meaning we earn a small commission if an item is purchased.
Table of Contents
- 1 How to make a Pencil Case
- 2 Supplies and tools
- 3 How to Sew a Pencil Pouch
- 3.1 DIY Fabric Pencil Pouch VIDEO TUTORIAL
- 3.2 INSTRUCTIONS:
- 3.3 STEP 1: Cut the fabrics according to the pencil case pattern
- 3.4 STEP 2: Attach the zipper to the top of fabric
- 3.5 STEP 3:
- 3.6 STEP 4: Create the pull tab (optional)
- 3.7 STEP 5:
- 3.8 STEP 6:
- 3.9 STEP 7: Clip the corners and turn around
- 3.10 STEP 8: (Optional) Add a leather pull tab
How to make a Pencil Case
Supplies and tools
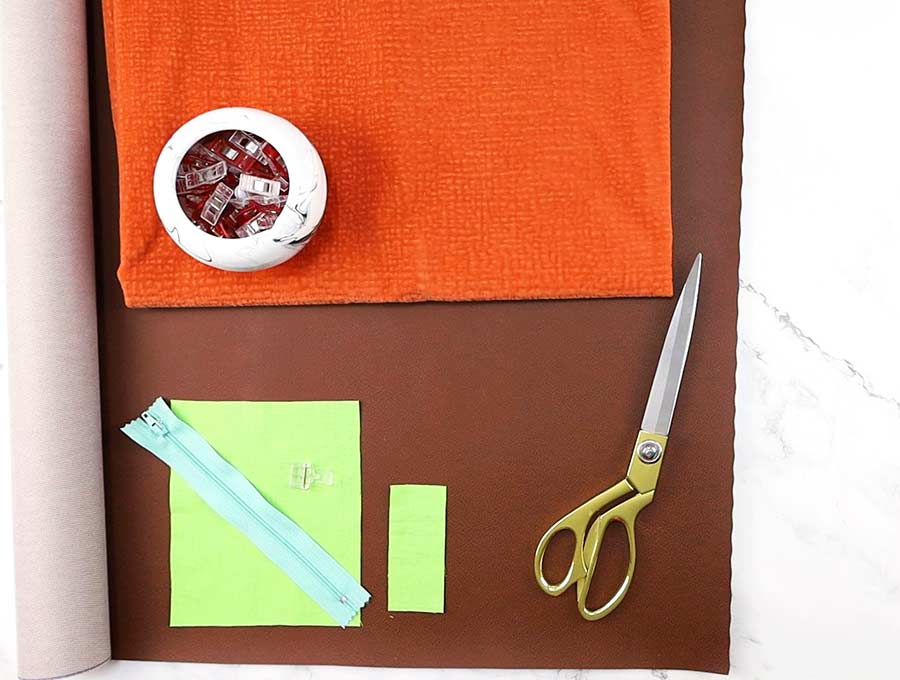
- fabric – faux leather, suede or home decor fabric
- small scrap piece of cotton fabric for the tab (optional)
- a zipper
- matching thread
- scissors (or rotary cutter and a cutting mat)
- my free pencil pouch pattern (link below)
- ruler or measuring tape
- iron and ironing board
- sewing clips or pins
- sewing machine
DOWNLOAD: fabric pencil case pattern (Free PDF file)
Follow us for free patterns & tutorials! [easy-profiles]
How to Sew a Pencil Pouch
Watch the diy pencil case video first and then follow the written step by step instructions below.
Please enjoy and don’t forget to Like and SUBSCRIBE over on YouTube to be kept up to date with new videos as they come out.
DIY Fabric Pencil Pouch VIDEO TUTORIAL
INSTRUCTIONS:
What you need:
- A piece of 7 inch by 9 inch fabric for a 3.5 x 8.5 inch finished size (FS). If you want to make the pencil pouch larger you can go with either 8 x 10 inches (4 x 9.5 FS), or 12 x 14 inches(6 x 13.5 FS).
- A piece of cotton fabric to make the pull tag that is 3.5 x 1.5 inches. This is optional.
- a 9″ zipper. If making a larger pencil case keep in mind that the zipper length has to be the same as the length of the fabric – so either an 9 inch, 10 or 13 inch one.
The fabric should be a non-fraying upholstery fabric – the faux suedes are a suitable weight, whereas some of the vinyls can be quite thick and awkward to work with. For a see-through pencil case a clear PVC works well. The material should be thicker than you average quilting cotton however, so it has some body to it. If you are planning on using quilting cotton then use a medium to heavy fusible backing to give it some added body. Any medium weight upholstery fabric will work well and if it is a fraying type then before you commence making the DIY pencil case, use an overlocker around all four edges, or use a zig-zag stitch to prevent fraying. You can also use pinking shears to prevent fraying
STEP 1: Cut the fabrics according to the pencil case pattern
Cut your two rectangles – one for the body of the pencil case and one for the tab to hang up the pencil case – which is optional. If using a fraying material then overlock, or zig-zag the edges
You can either use the measurements given above or download and use the fabric pencil pouch pattern. It’s a simple pencil case sewing pattern (just rectangles) but it’s great for those of you who make more than one pencil pouch or those who prefer to work from a template.

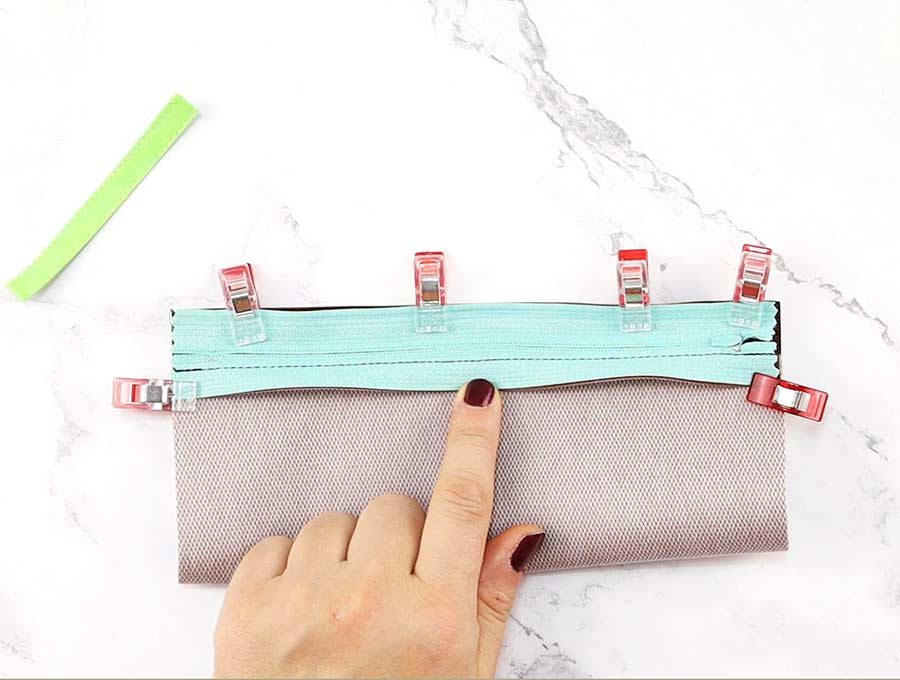
STEP 2: Attach the zipper to the top of fabric
Place the 9 x 7 inch rectangle right side facing upward, and clip or pin the zipper with the wrong side facing upward to the 9 inch edge of the fabric so the edge of the zipper tape lines up with the edge of the fabric. Clip or pin in place, then using a zipper foot, run a stitch, back-tacking at start and finish along the length of the zipper close to the teeth of the zipper.
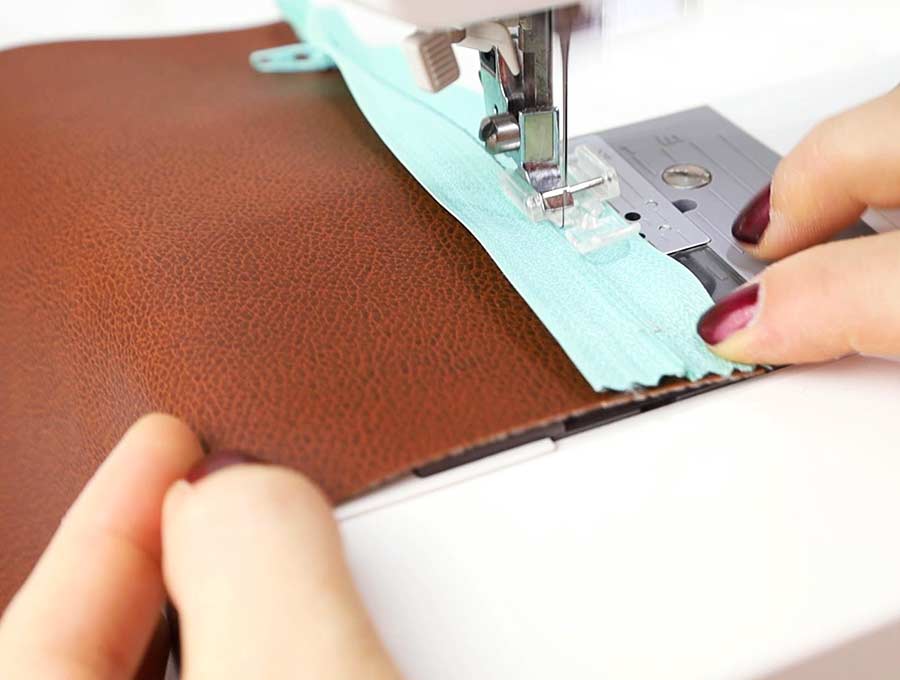
this is how it should look like at this point
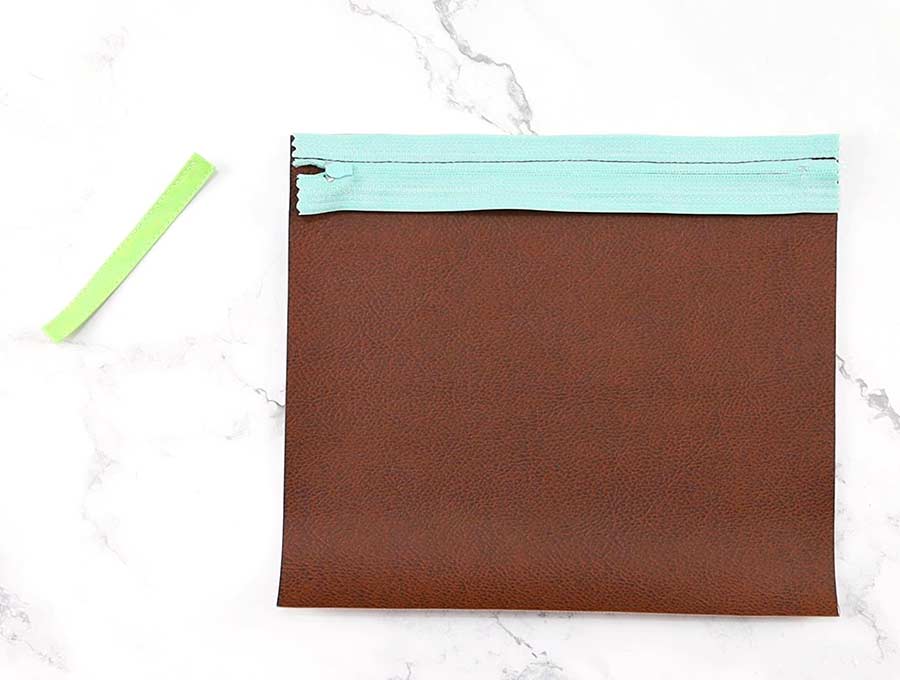
STEP 3:
Flip open the piece you have sewn and taking the other side of the zipper tape line it up with the other 9 inch side of the fabric, so the other zipper edge is placed wrong side up on top of the right side of the fabric. Sew the zipper in place back tacking at start and finish.
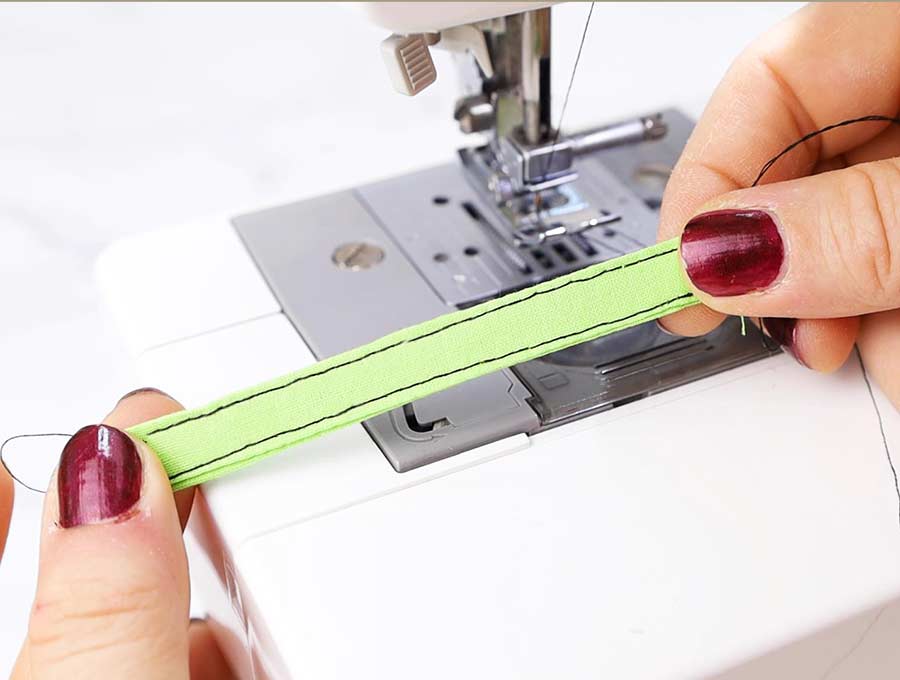
STEP 4: Create the pull tab (optional)
Creating the pull tab. Take the 1.5 x 3.5 inch piece of fabric and fold in half along the length so you have a piece that is .75 inches by 3.5. Press the fold into place with an iron.
Open out the small piece of fabric and fold each long side to the central fold, and press in place. Now fold over one more time so that you have a piece of 3.5 inch fabric that is just .375 of an inch wide. Press folds in place.
Machine stitch down one side as close to the edge as possible, then lift the zipper foot and turn and do the same on the other side.
STEP 5:
Open the zipper about half way down the length of the pencil case. This is important as it enables you to flip the case right way out when you are finished. Fold the 3.5 inch piece in half to make a loop and position at the side where the zipper pull starts, about .5 of an inch down from the zipper, and clip or pin in place with the loop facing in towards the main piece of fabric and flush with the side.
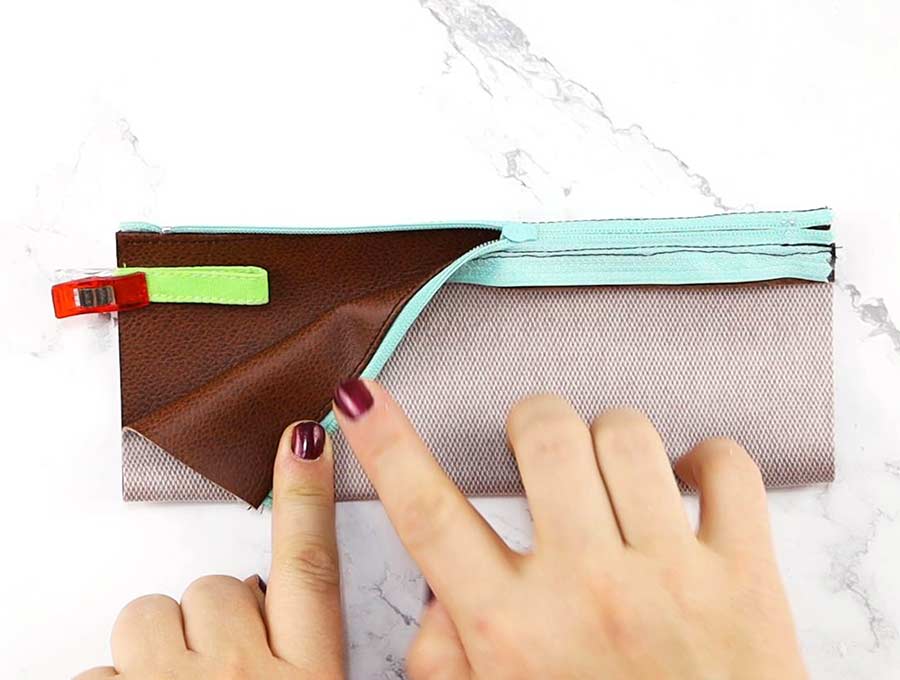
STEP 6:
On the side, where you have placed the tab, pinch the ends of the zipper tape so that they lie flat on top of each other and the sides line up, then stitch down the side, back tacking at start and finish.
Repeat with the other side, where the zipper ends, pinching to lay the zipper tapes flat and stitching along the seam, back-tacking when you start and when you finish.
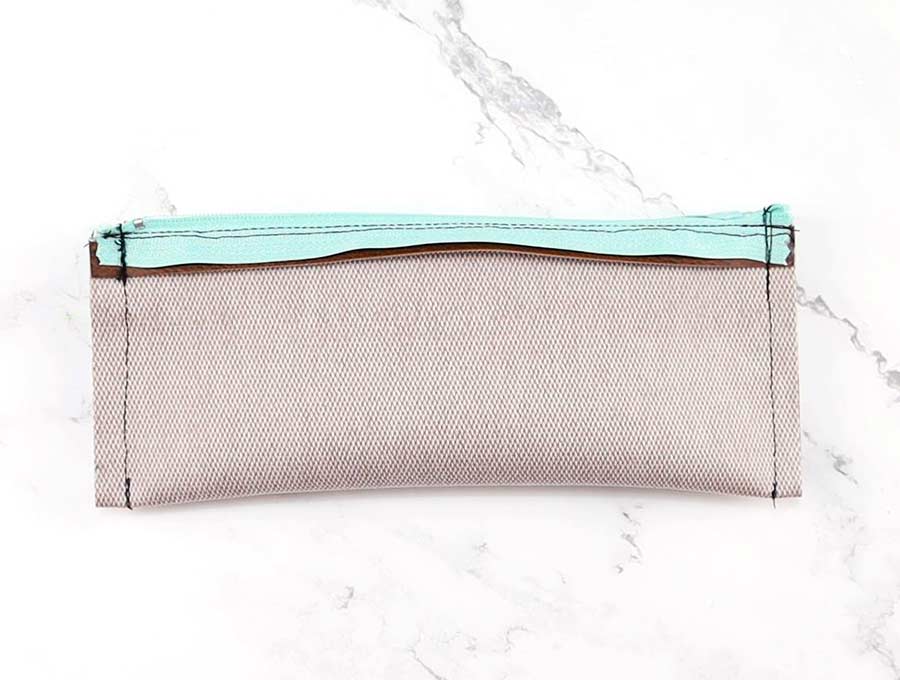
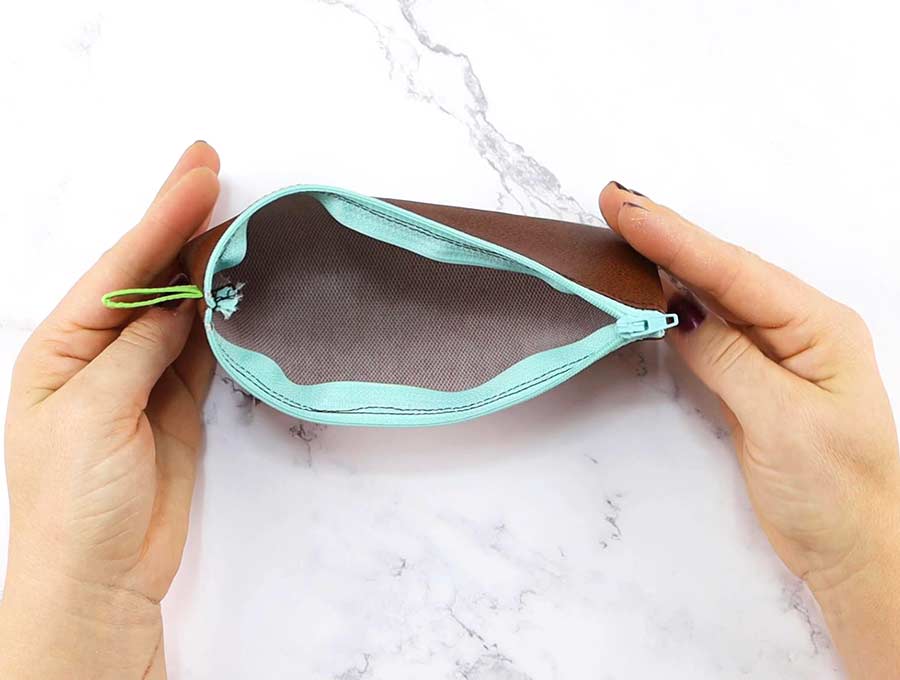
STEP 7: Clip the corners and turn around
All that remains to be done is to snip off any loose threads, clip the corners, turn the bag right way out through the half open zipper and zip it up. Voila! One pencil case done.
STEP 8: (Optional) Add a leather pull tab
Cut a long thin piece of leather, fold it in half and thread the loop through the zipper pull. Insert the ends through the loop and pull to tighten.
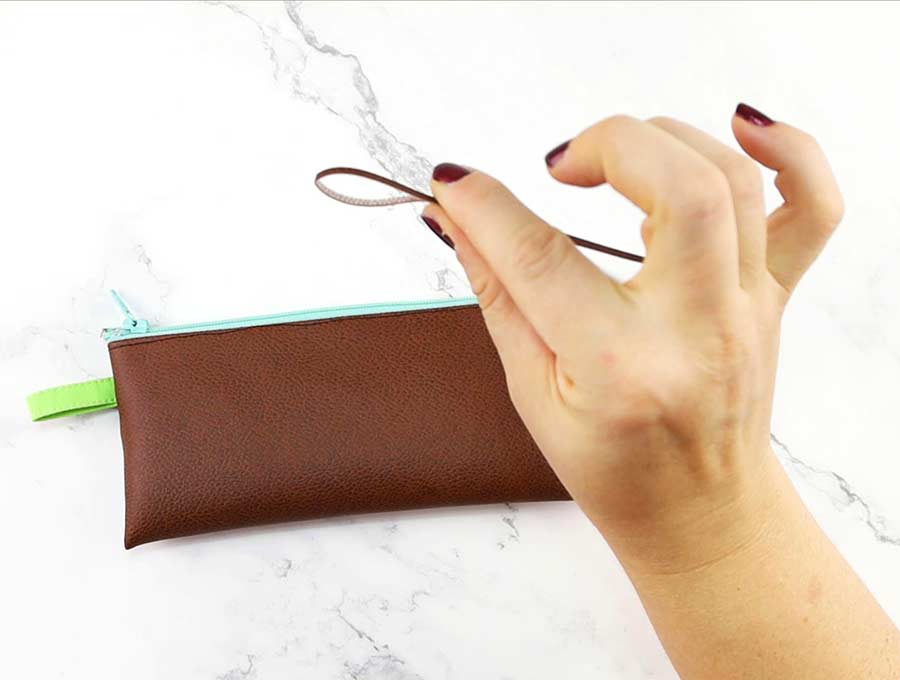
Clip the ends at a 45 degrees angle.
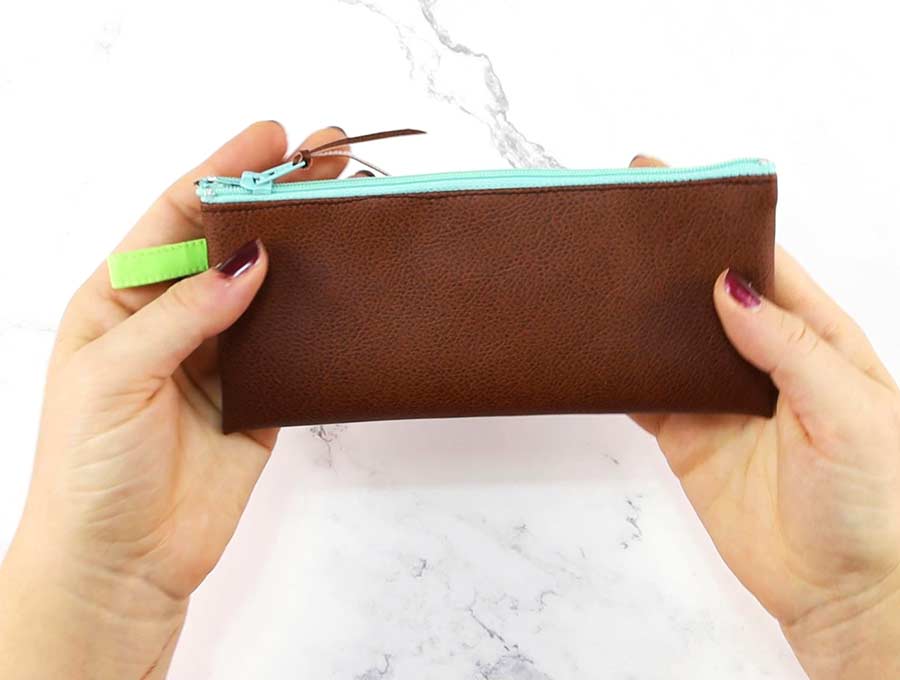
That’s it your fabric pencil pouch is ready!
These DIY pencil cases make great presents for the start of the school term, filled with shiny new stationery. For teacher appreciation days a pencil case with a couple of pens and highlighters, and a mini-box of Swiss or Belgian chocolates will be welcome. Home offices all need one of these to keep supplies together, and co-ordinated to the color scheme of the office. It is advisable for kids to have one case for home and one for school use, stocked with exactly the same items so they don’t have to carry cases back and forth and there can be no excuses about not being able to do homework because they left their stationery at school or vice versa.
Do you like this? Pin for later:
Wanna be friends? Click HERE and follow me on Pinterest
RELATED: