
How to Make a Clutch Purse | No-SEW or SEW DIY Clutch Purse + VIDEO
Clutch purses are a show stopper that is really quick to make. Let me show you how to make a clutch purse in less than 5 minutes flat. You can either sew it or just glue it using fabric glue. Both will work.
You can make a placemat clutch for yourself and/or to give as gifts. This DIY clutch purse makes an awesome gift that will sure be appreciated. It’s seriously the cutest thing ever!
If you want to personalize your clutch, there are plenty of options for embellishments – just choose yours. I’ll even show you how to make a stunning fabric rose, that you can use for embellishment. Ready? Let’s dive in the clutch purse tutorial!
Below you will find my step by step written tutorial with VIDEO instructions for all the visual learners.
We occasionally link to goods offered by vendors to help the reader find relevant products. Some of the links may be affiliate meaning we earn a small commission if an item is purchased.
Table of Contents
- 1 How to make a clutch purse
- 2 Placemat purse supplies and tools
- 3 How To Sew a placemat clutch purse
- 3.1 DIY Placemat Bags VIDEO TUTORIAL
- 3.2 INSTRUCTIONS:
- 3.3 STEP 1: Decide on how you’ll sew the placemat purse
- 3.4 STEP 2: Making the body of the placemat bag
- 3.5 STEP 3: SEW or GLUE the sides
- 3.6 STEP 4: Mark the snaps position
- 3.7 STEP 5: Install the male snap into the flap of the placemat bag
- 3.8 STEP 6:Install the female snap on the body of placemat clutch
- 3.9 STEP 7: Embellish your diy clutch bag
How to make a clutch purse
Placemat purse supplies and tools
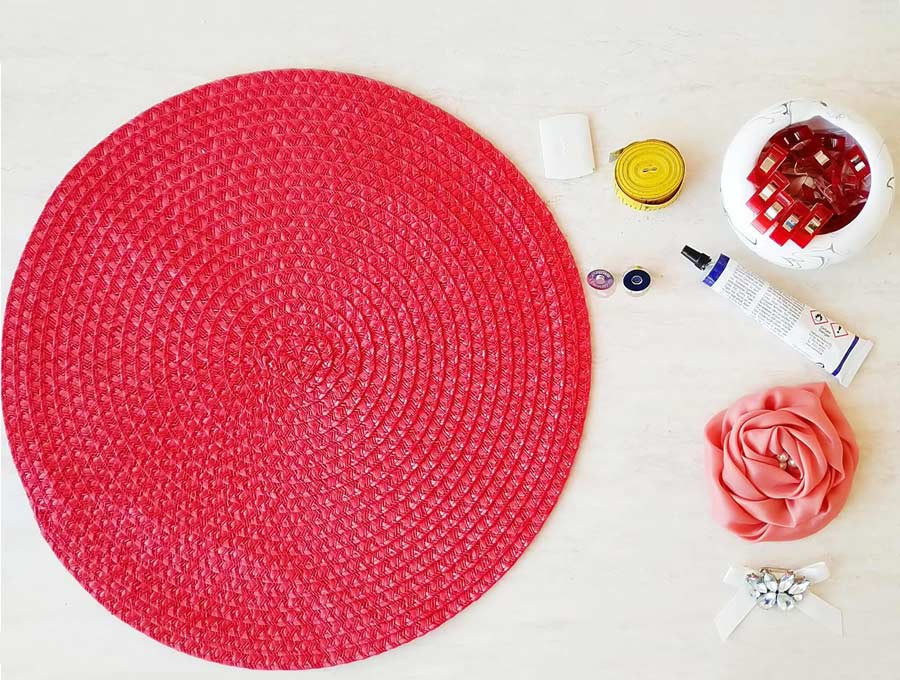
- round placemat
- magnetic button clasp
- cute embellishment kit
- fabric glue
- matching thread (optional)
- ruler or measuring tape
- sewing clips or clothespins
- sewing machine (optional)
Follow us for free patterns & tutorials! [easy-profiles]
How To Sew a placemat clutch purse
Watch the diy clutch purse video first and then follow the written step by step instructions below.
Please enjoy and don’t forget to Like and SUBSCRIBE over on YouTube to be kept up to date with new videos as they come out. Don’t forget to ring the bell as well to be notified when a new video is released.
DIY Placemat Bags VIDEO TUTORIAL
INSTRUCTIONS:
STEP 1: Decide on how you’ll sew the placemat purse
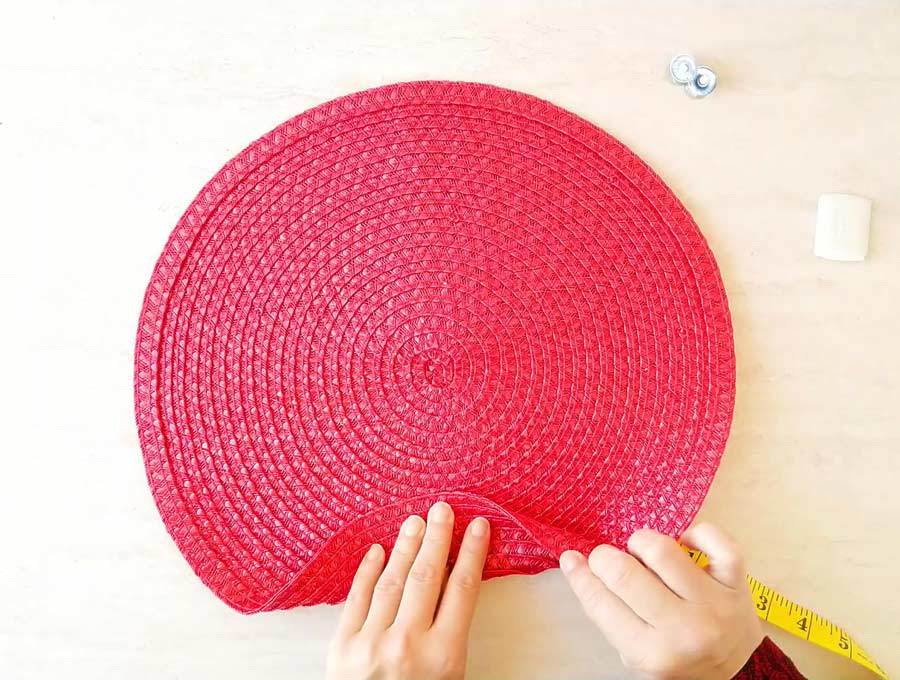
Lay the circular placemat wrong side up. Take a careful look at your placemat so you can determine which is the wrong side and which is the right (prettiest side) of the placemat.
Fold the placemat in half so that the end of placemat is inside. You’ll need to inspect the wrong side to find where the end part is. You’ll want this part to get inside the fold to make your placemat clutch as pretty as possible. Unfold.
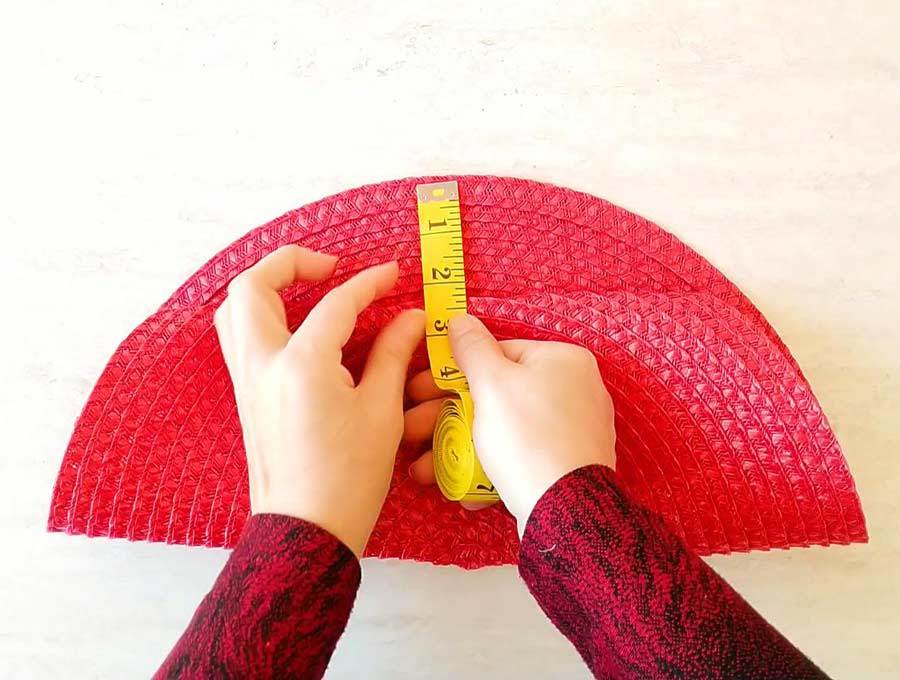
STEP 2: Making the body of the placemat bag
Fold the bottom part inside about 2.5in / 6cm and pin with wonder clips or clotheslines clips. At this point I usually fold the flap in order to determine whether I like the look. You can do the same or just skip that and proceed.
Apply a generous amount of glue inside the fold of the flap. Press down the glued part well. Hold in place using clips, pins or clothing pegs
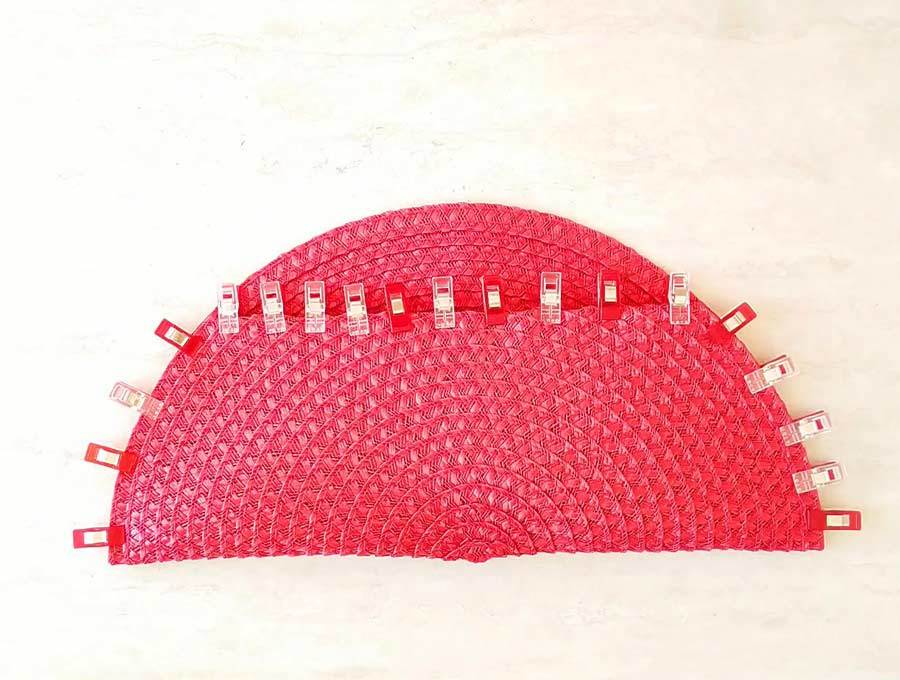
Fold the whole placemat in half and pin the sides using clips. This is how your purse will look like at this point.
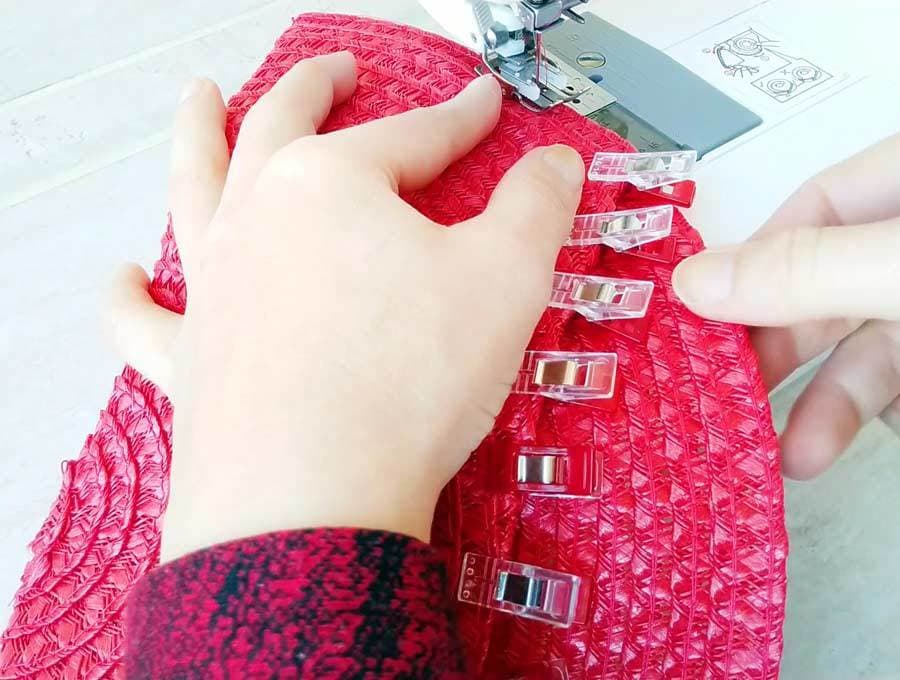
STEP 3: SEW or GLUE the sides
This is the only sewing for this whole project. Sew the sides of the placemat clutch using a straight stitch. I’d like to reinforce the seams by backstitching the whole seam or just backstitching the beginning and the end. It’s just two seams. Remove the clips as you sew.
(NO-sew version)
If you don’t sew, you can use glue the sides instead of sewing them. Secure with pins or clips.
Remove clips from the top part after the glue has dried.
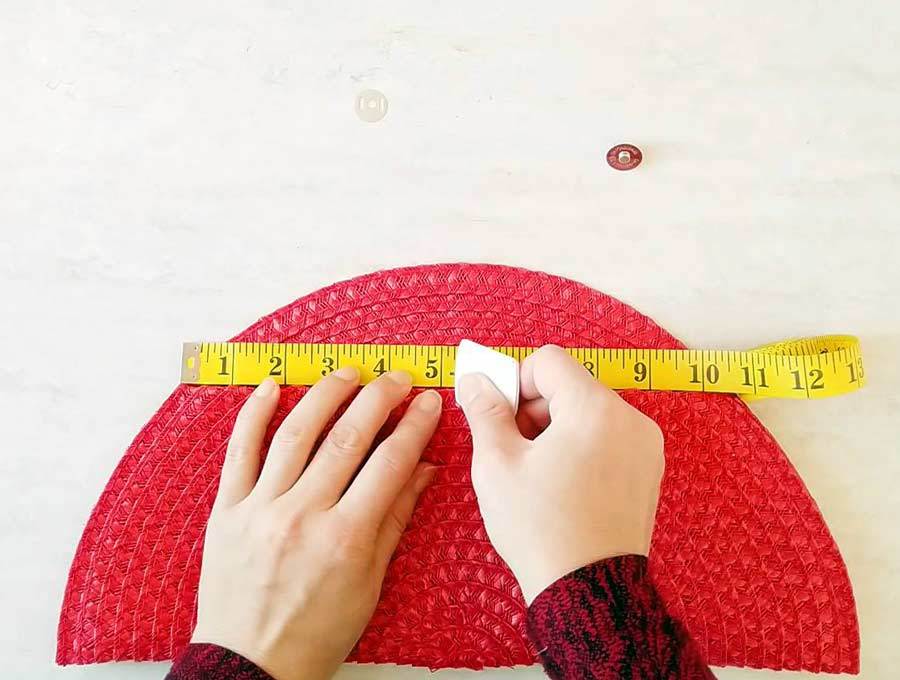
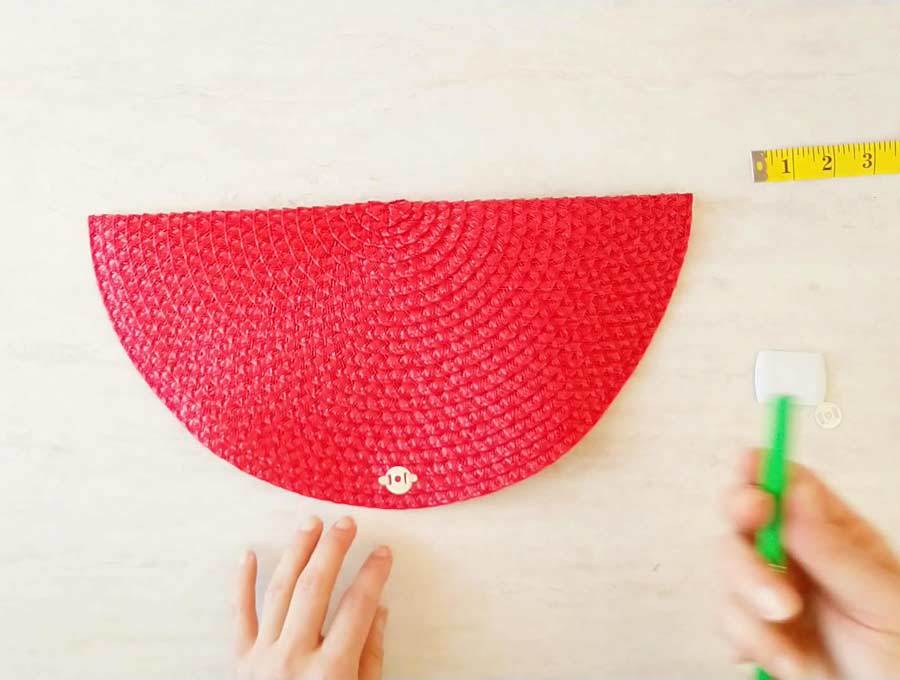
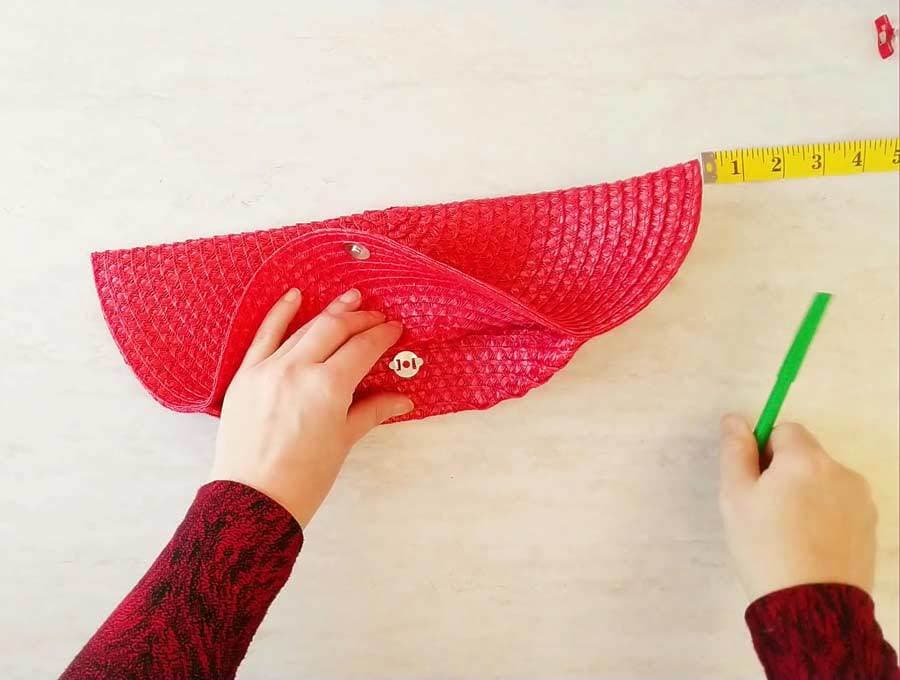
STEP 4: Mark the snaps position
Mark the middle of the flap and the body. Place the measuring tape on top of the body fold and mark the middle using a tailor’s chalk or disappearing fabric pen. Carefully list the tape and bring it to the top of the flap and mark the middle of the flap as well
STEP 5: Install the male snap into the flap of the placemat bag
Just follow the directions of the metal snaps to install them securely on the flap and the body of your bag. Below are general directions you can use to install the snap.
Push the prongs of the male snap into the flap and press firmly against the flap.
Place the metal washer over the prongs and fold the prongs in opposite directions. If you eat your spinach regularly (hello, Popeye) and your hands are strong enough you can fold the prongs using your fingers. Other ways you can accomplish folding the prongs are using pliers or just a pen/pencil to push them against the flat surface.
STEP 6:Install the female snap on the body of placemat clutch
Mark the position of the female snap by marking the male snap with chalk or fabric pen. Fold the top and push the marked part against the body of the bag so that it leaves a mark. Use your fabric pen to make this mark more visible and install the female snap. Place the female snap on top of the marking and push its prongs through the body of the bag. It will be a bit trickier than installing of the male snap as you’ll have to pierce through double layer of the placemat. Figgie it a bit to find gaps. If your placemat is too dense, use scissors or utility knife to gently make little holes for the prongs.
Again, place the metal washer over the prongs on the wrong side of the flap and push the prongs in opposite directions to secure them in place.
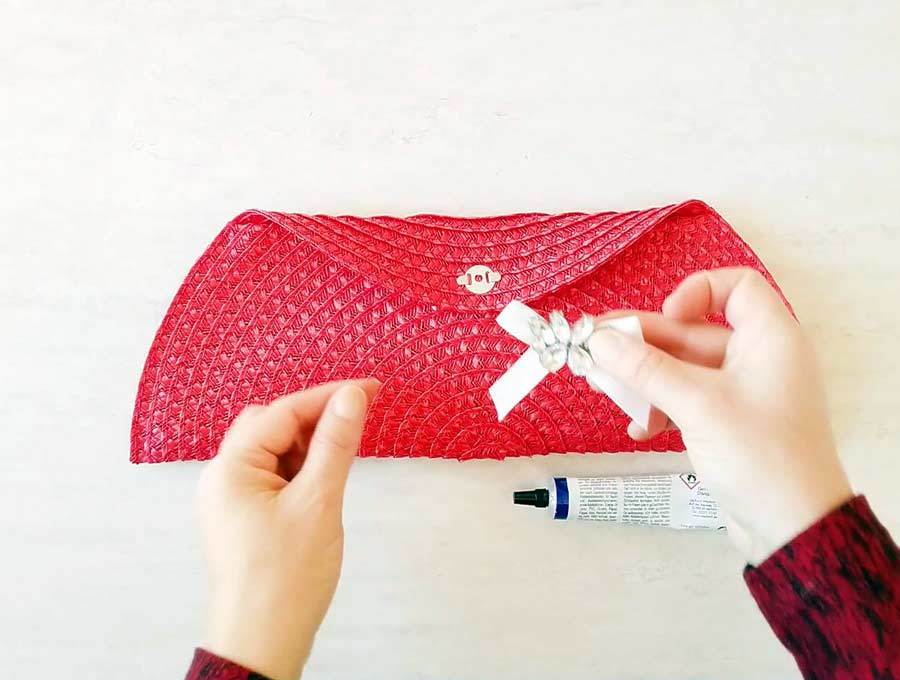
STEP 7: Embellish your diy clutch bag
Now for the fun part. Embellish your diy clutch purse bag. You can use a bag jewelry kit, bow, tassels, pom pom trims or whatever strikes your fancy.
Glue the embellishment on the flap of the placemat purse.
That’s it. Making placemat bags is so easy.
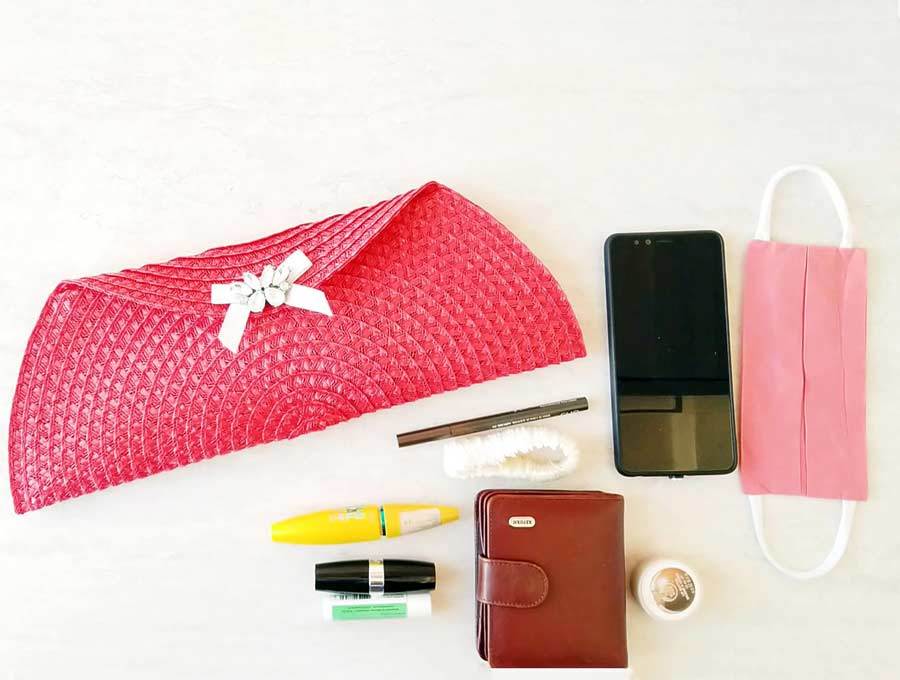
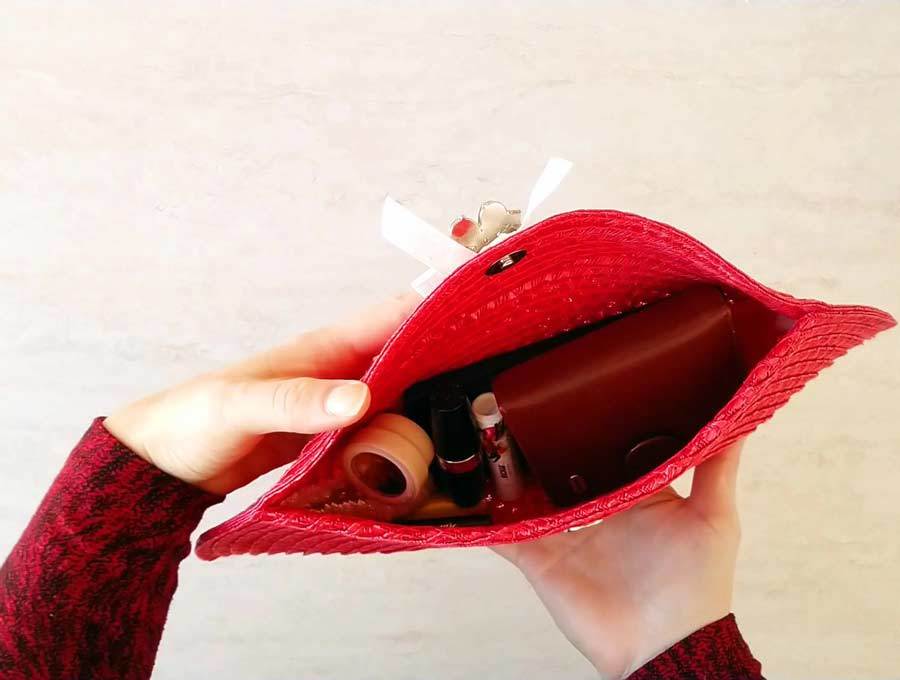
Here’s the finished DIY placemat clutch. I’m dying from cuteness overload. It’s seriously the cutest thing ever!
Isn’t it pretty? Now fill it up with your stuff. It holds quite a bit of stuff. You will be surprised at how many things can fit inside this tiny bag! Look!
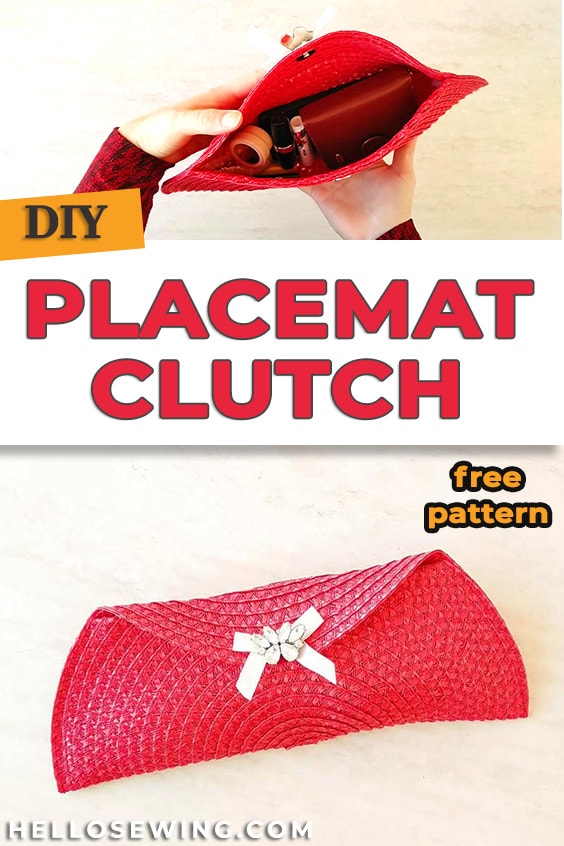
Do you like this? Pin for later:
Wanna be friends? Click HERE and follow me on Pinterest
RELATED:
- Origami bag pattern
- Beret hat pattern – it pairs up beautifully with this bag. I have proof. Go see the pictures