
DIY: Upcycle Your T-shirts Into Cloth Napkins
In this day and age, recycling has become an activity that isn’t reserved only for big factories or companies. Practically any household can and probably should practice recycling as much as possible. It’s a logical thing to do after all. Why throw something away if it can be repurposed and used for something else? And why would you waste money on a product you can make yourself. Like maybe, napkins?
We buy napkins and throw them away soon, instead of making our own reusable cloth napkins from items we don’t use anymore. Those paper towels or paper napkins if you will, cost a lot of money on a monthly basis. You might think that they’re the most practical solution for dealing with kitchen mess or for quickly cleaning up something your child spilled on the floor but that’s not exactly true.
You can do all that just as well with a cloth napkin. Actually, handmade cloth napkins are far better because you can use them over and over again. Just wash them and rinse them after each use and that’s it. One cloth napkin can replace over a hundred rolls of paper towels.
Paper napkins are in fact, completely unnecessary. Do you think our grandmothers had the luxury of using them? Of course not, yet they ran their households perfectly despite that.
We should all stop wasting money and throwing reusable stuff away. Having said that, let me show you how you can save a fair amount of money and how to make cloth napkins from old T-shirts.
Table of Contents
Supplies You Will Need
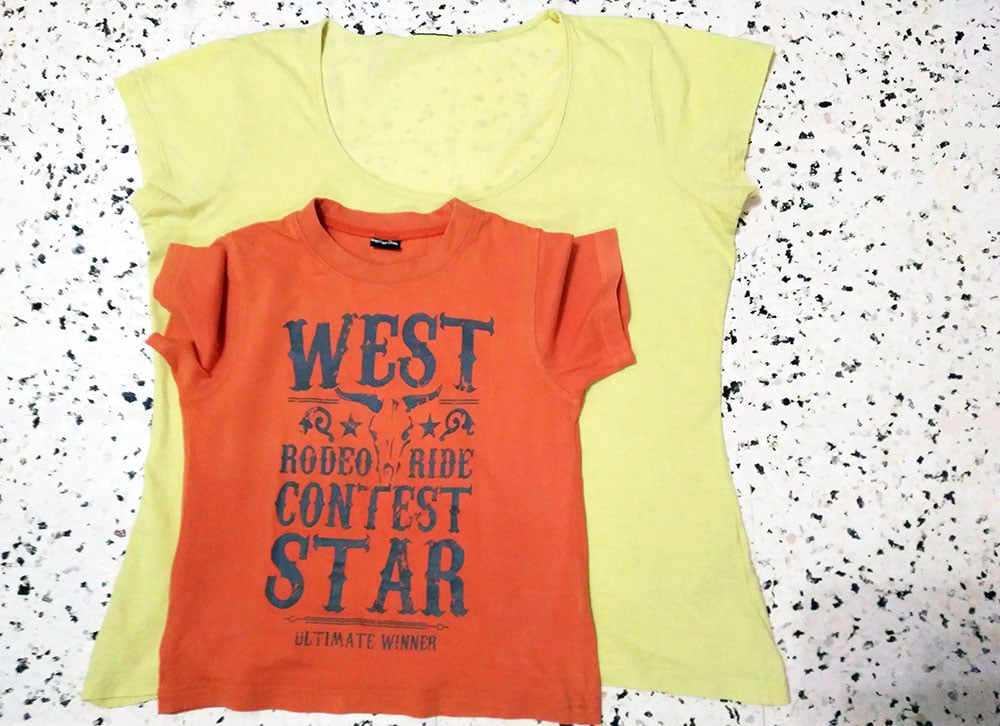
- Old T-shirts
- Matching thread
- Contrasting thread
- Sewing Machine (see here what we recommend)
- Scissors – I use these
- clips or pins
- iron
- rotary cutter and a cutting mat (optional, you can simply use the scissors)
- Chopstick or that handy purple corner turner
- (optional, for turning the corners)
DIY Cloth Napkins – Instructions:
Step 1: Decisions, decisions
Cloth napkins are traditionally much larger than paper napkins. Standard sized napkins are usually square and range from 12″ x 12″ for informal luncheon napkins to 18″ x 18″ for dinner napkins [1]. One yard of 45-inch wide fabric yields four 16- to 18-inch napkins [2]. One t-shirt will make one large or two smaller napkins. Cotton fabric is soft, washable and absorbent, making it a perfect choice for napkins. I decided that mine would be 18″ x 12″, but you can make yours any size you want.
Decide how large you want your napkins and whether you want them square or rectangular.
Step 2: Cut your cloth napkin
Cut your fabric around all sides 1/2 inch larger than what you want your finished napkin to be. Use your rotary cutter and cutting mat
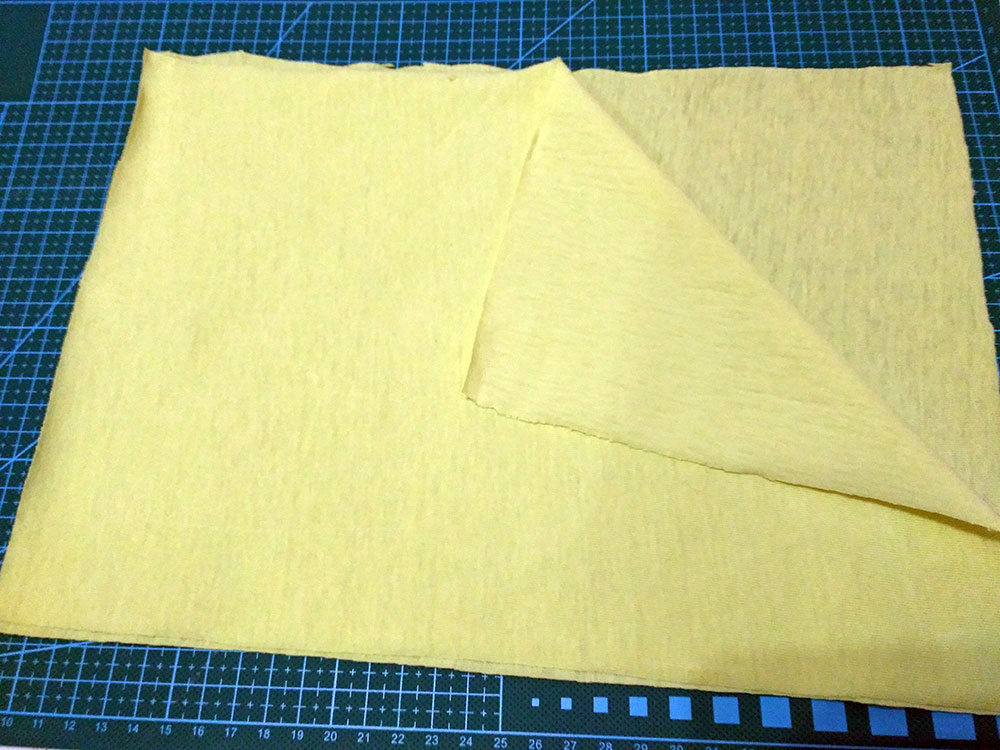
Step 3: Layer and pin
Place the two pieces right sides together and make sure to line up the edges. Mark a 2- or 3-inch opening for turning. Pin the fabric in place.
Step 4: Sew all around and leave a small opening
Use a 1/4 inch allowance and sew all around the napkin leaving an opening so that you can turn it right-side out in the next step.
Start in the middle of one of the sides and stop couple of inches from the starting point
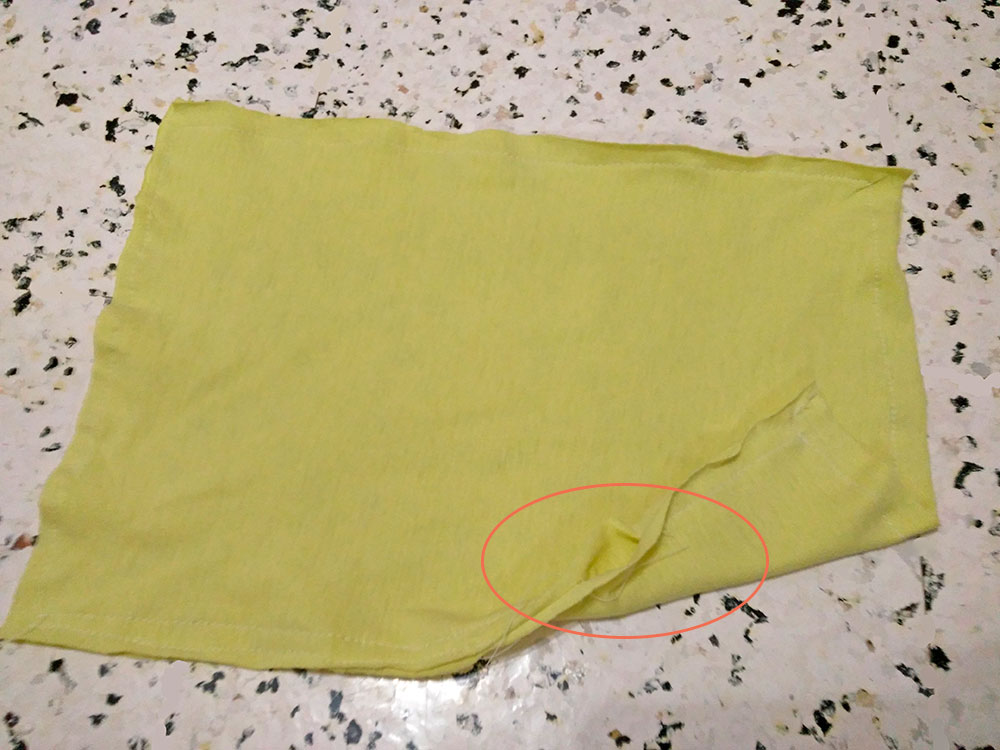
Step 5: Clip excess fabric to get crisp corners
Clip the corners so that the points will come out neat. Clipping reduces the bulk, and helps the fabric lay flat so you get crisp corners. Be careful not to cut through the seams
Step 6: Turn it RSO
Turn the napkin right side out through the opening. Use the chopstick to push out the corners of the napkin. Tuck the raw edges of the opening inside, press well and try to match the existing edges. Hand sew the opening close using either a whip stitch or a ladder stitch. I prefer the latter as it is truly invisible and gives the napkins more polished look
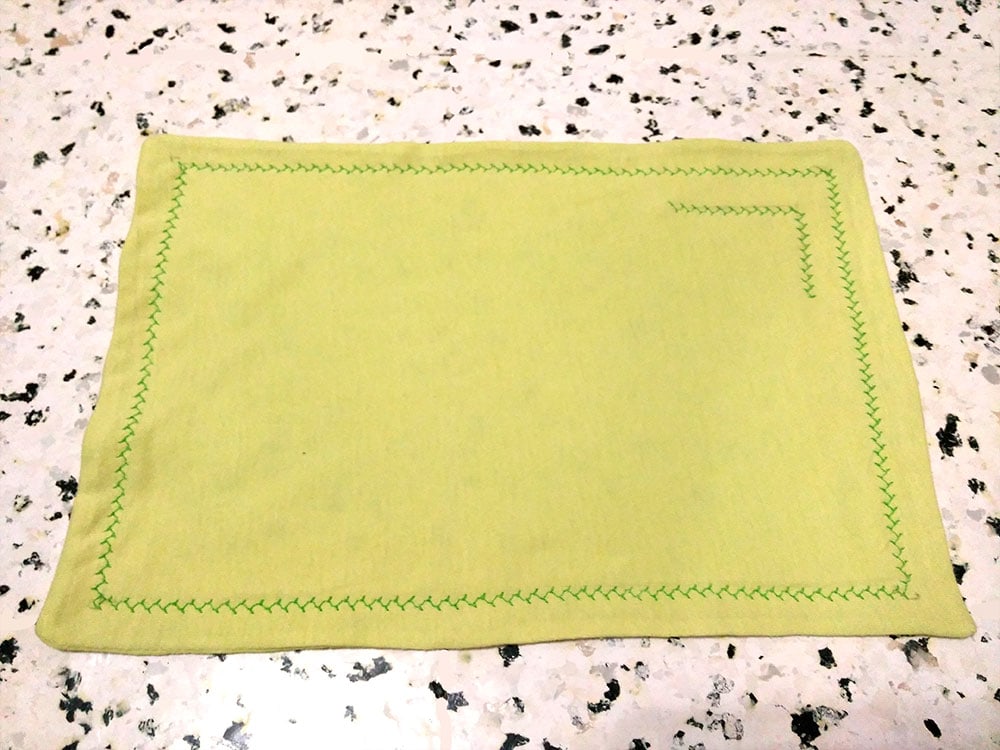
Step 7: Decorate it
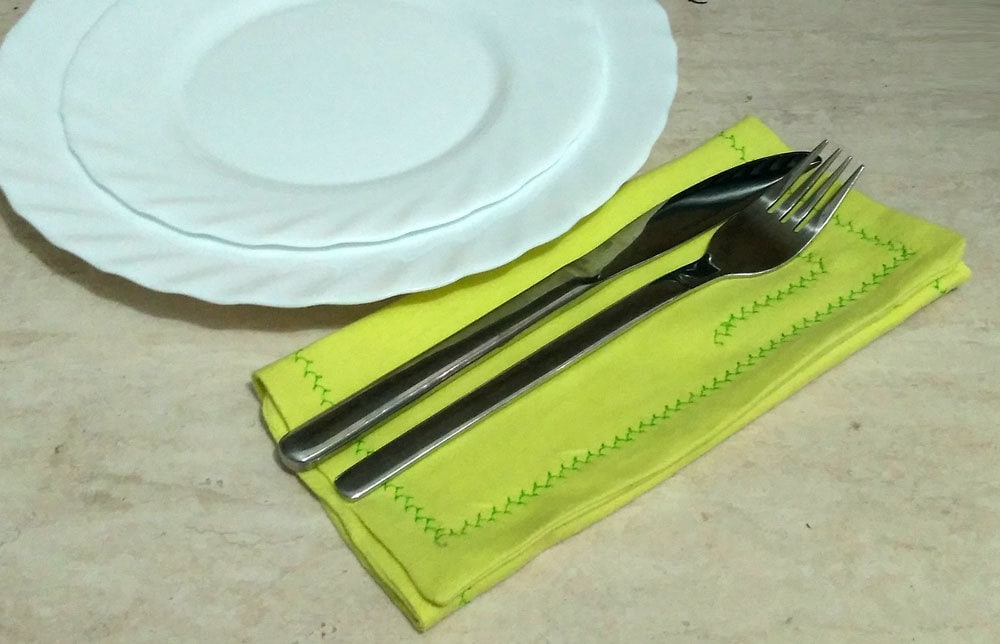
Using a decorative stitch of your choice, sew all the way around using a ½ inch allowance. I used the feather stitch with a a contrasting green thread to add a splash of color to my napkins. This is truly the easiest sew ever, you can make a full set in just an hour.
Additional tip – how to sew placemats
There you have it – a beautiful reusable cloth napkin perfect for your table! But how to sew matching placemats? You can use the same technique to make colorful placemats – just use a batting to stabilize it, and quilt on top of it using either meandering stitch or simple straight lines. One T-shirt makes one placemat. You can either choose t-shirts with similar colors or pick up t-shirt in different colors for a splash of color on the table.
RELATED:
Reusable produce bags tutorial
How to hem jeans and keep the original hem
DIY home decor: handmade fabric rosettes
free quilt patterns for table runners
So, do you currently use DIY cloth napkins? Have you considered making the switch from paper napkins to cloth napkins?