
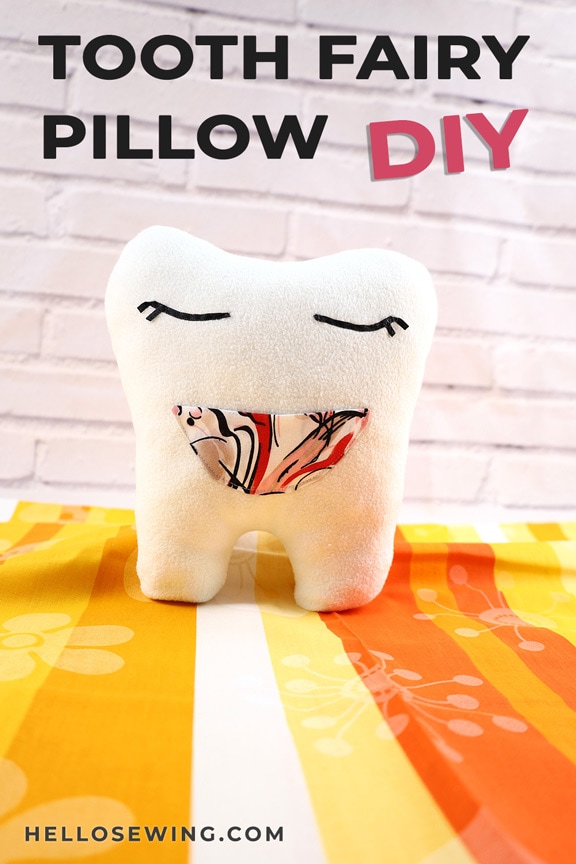
DIY Tooth Fairy Pillow Pattern | Tutorial and Video
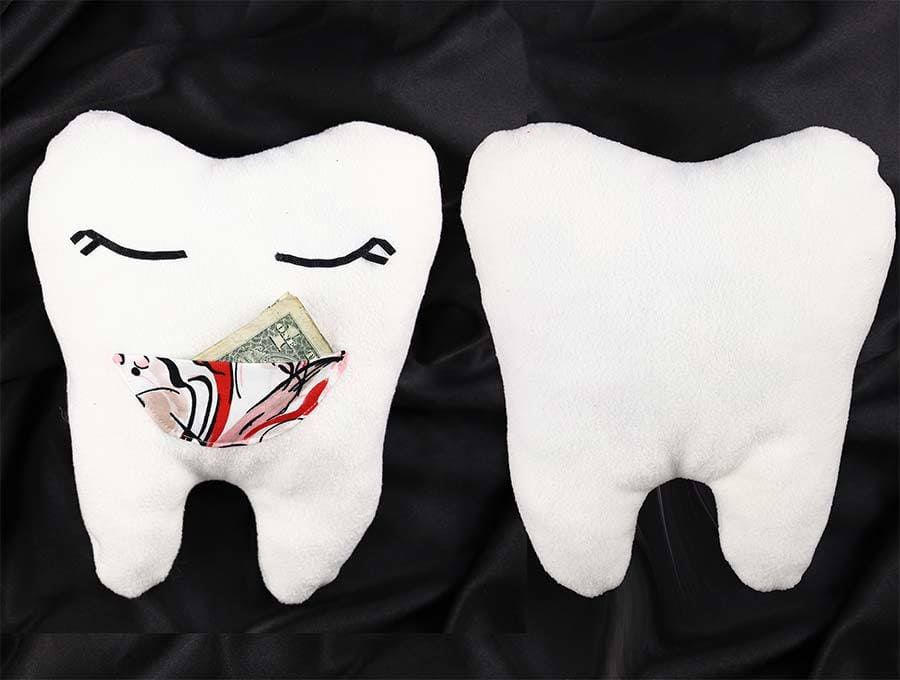
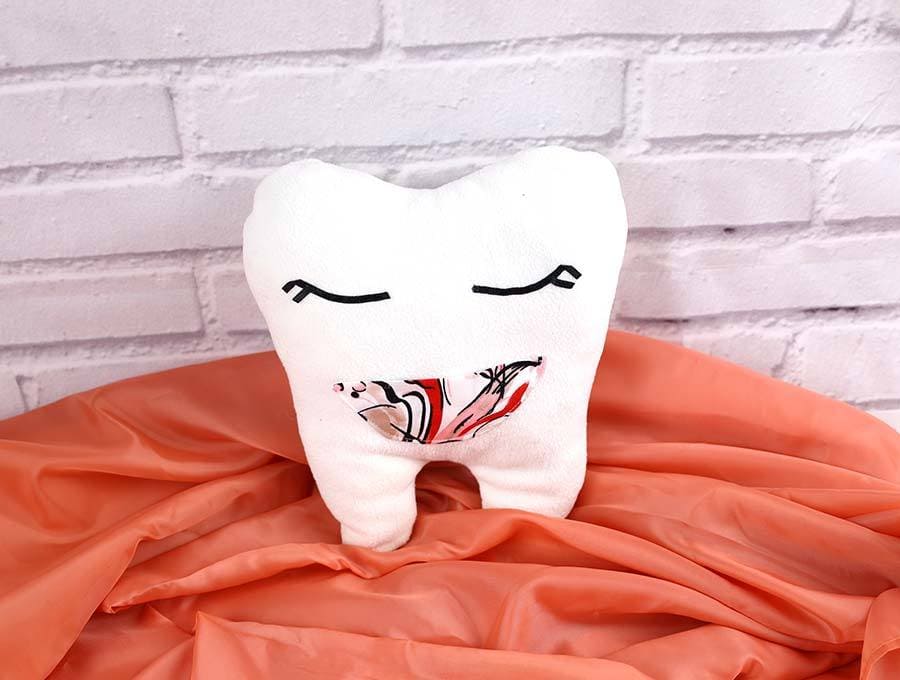
A tooth fairy pillow is not only a charming idea but it certainly makes life much easier. Imagine the fiddling to get the gift from the tooth fairy under the pillow of a sleeping child, silently praying the child does not wake. Imagine destroying the child’s illusions when they wake in the night to realize it was mummy or daddy and not a ‘real fairy’. In the old days the gift from the tooth fairy or tooth mouse was left in the child’s shoe, probably not the most hygienic spot! Welcome to the tooth fairy pillow – a delightfully whimsical receptacle for the tooth fairy’s gift.
This tutorial includes a DIY tooth fairy pillow pattern which can be downloaded and printed as is or scaled to suit the size of the tooth pillow you want to create.
Below you will find my step by step written tutorial how to make a toothfairy pillow with VIDEO instructions for all the visual learners.
What I love about our tooth pillow pattern is that you don’t even have to have a sewing machine. If you choose felt, instead of cotton or fleece fabric, you can simply over-stitch around the edges and voila, a pillow is born. For those sewists who want to work this pillow with a sewing machine follow the step by step instructions. The instructions for hand sewing will be included in brackets.
We occasionally link to goods offered by vendors to help the reader find relevant products. Some of the links may be affiliate meaning we earn a small commission if an item is purchased.
Table of Contents
- 1 How to make a toothfairy pillow
- 2 Supplies and tools
- 3 How to Sew Tooth Fairy Pillows
- 3.1 TOOTH FAIRY PILLOWS VIDEO TUTORIAL
- 3.2 DIY TOOTH FAIRY PILLOW INSTRUCTIONS:
- 3.3 STEP 1: Cut out the tooth fairy pillow pattern
- 3.4 STEP 2: Cut out the fabrics
- 3.5 STEP 3: Stitch the mouth
- 3.6 STEP 4: Clip and turn right side out
- 3.7 STEP 5: Pin mouth to body
- 3.8 STEP 6: Stitch the mouth to the body
- 3.9 STEP 7: Position the eyes on the body
- 3.10 STEP 8: Stitch the eyes
- 3.11 STEP 9: Stitch tooth pillow body
- 3.12 STEP 10: Clip and turn right side out
- 3.13 STEP 11: Fill the tooth pillow with stuffing
- 3.14 STEP 12: Stitch the gap closed
- 4 FAQs + Tips for the tooth fairy pillow pattern:
How to make a toothfairy pillow
Supplies and tools
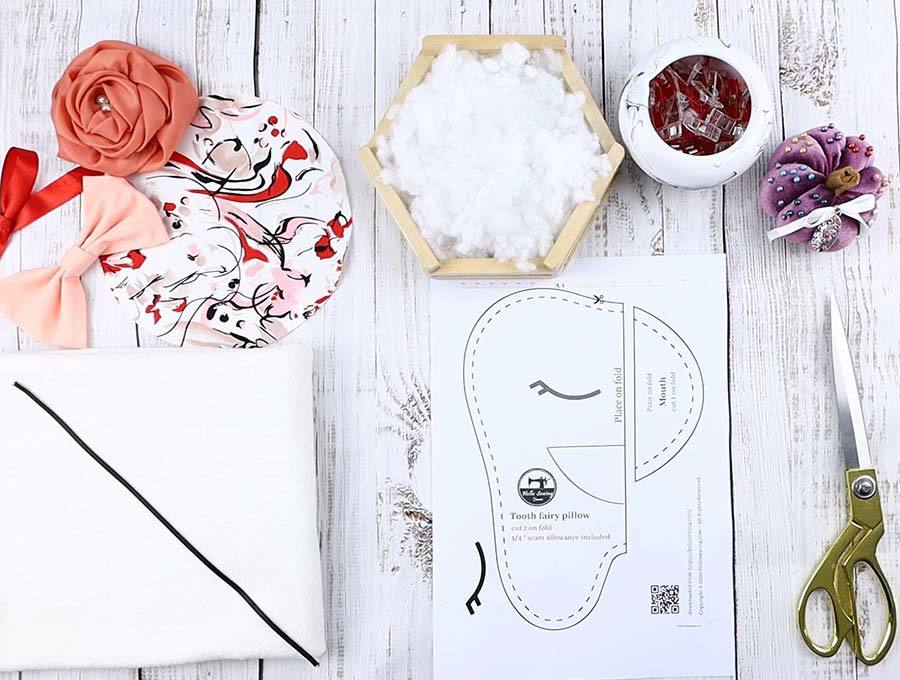
- fabric – 1/4 yard of white fleece or cotton
- fabric – small piece of red or colored fabric for the mouth/pocket
- tooth fairy pillow template (download for free below)
- polyester stuffing (you’ll need a lot more than you think you’ll need!)
- matching thread
- scissors (or rotary cutter and a cutting mat)
- ruler or measuring tape
- iron and ironing board
- sewing clips or pins
- sewing machine
DOWNLOAD: tooth fairy pillow pattern (Free PDF file)
Follow us for free patterns & tutorials! [easy-profiles]
How to Sew Tooth Fairy Pillows
Watch the diy tooth fairy pillow video first and then follow the written step by step instructions below.
Please enjoy and don’t forget to Like and SUBSCRIBE over on YouTube to be kept up to date with new videos as they come out.
TOOTH FAIRY PILLOWS VIDEO TUTORIAL
DIY TOOTH FAIRY PILLOW INSTRUCTIONS:
STEP 1: Cut out the tooth fairy pillow pattern
Cut out the tooth pillow pattern pieces. Make sure you print it at 100% (no scaling).
You’ll end up with three template pieces – main body piece, mouth piece and the eye piece.
Prepare a white piece of fleece fabric on the worktop large enough to cut two identical pieces of the tooth body. You will also need a small printed piece of fabric to cut out the pocket / mouth.
TIP: If you don’t have a printer, or have run out of ink, you can simply trace the tooth fairy pillow pattern on your screen using a soft tip pencil or freehand the design on a piece of paper.
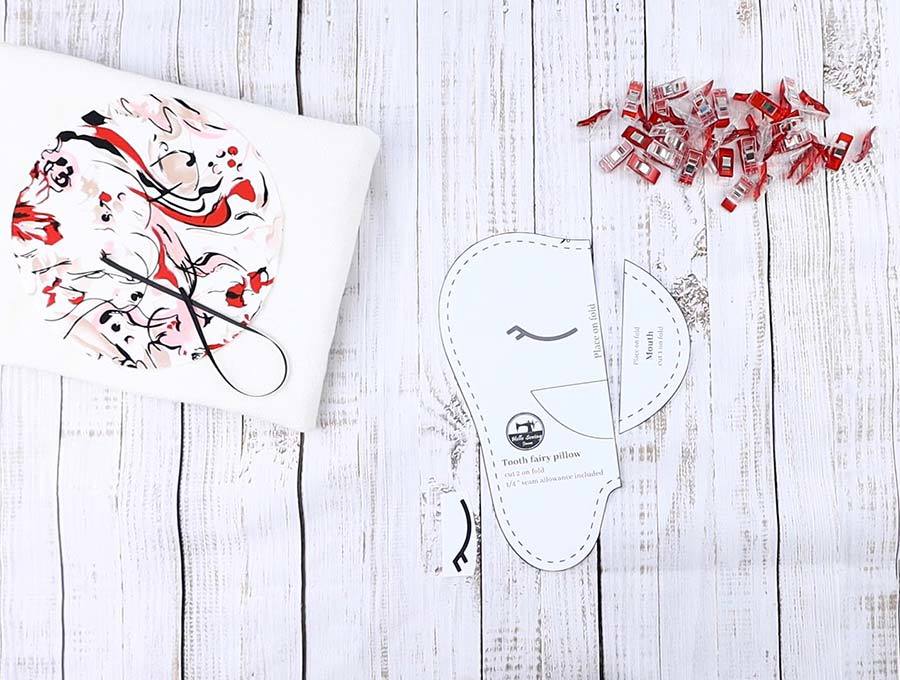
STEP 2: Cut out the fabrics
Fold both fabrics in half and lay out the pattern pieces on the fabric fold. Pin or clip in place before cutting them out.
Cut out 2 identical pieces out of the white felt for the tooth body and one piece for the mouth from the colored fabric. Place the white felt aside.
STEP 3: Stitch the mouth
Take the mouth piece and fold it in half, right sides facing. Stitch around the raw edge leaving a 2cm (3/4 inch) gap through which you can turn the fabric right side out.

STEP 4: Clip and turn right side out
Make small nothes or just clip around the curve with short cuts towards the stitching – this will allow for the fabric to lie flat when turned.
Turn the mouth/pocket piece right way out through the opening. Press flat, turning in the seams at the opening when pressing, then either pin the opening or slip stitch it shut.
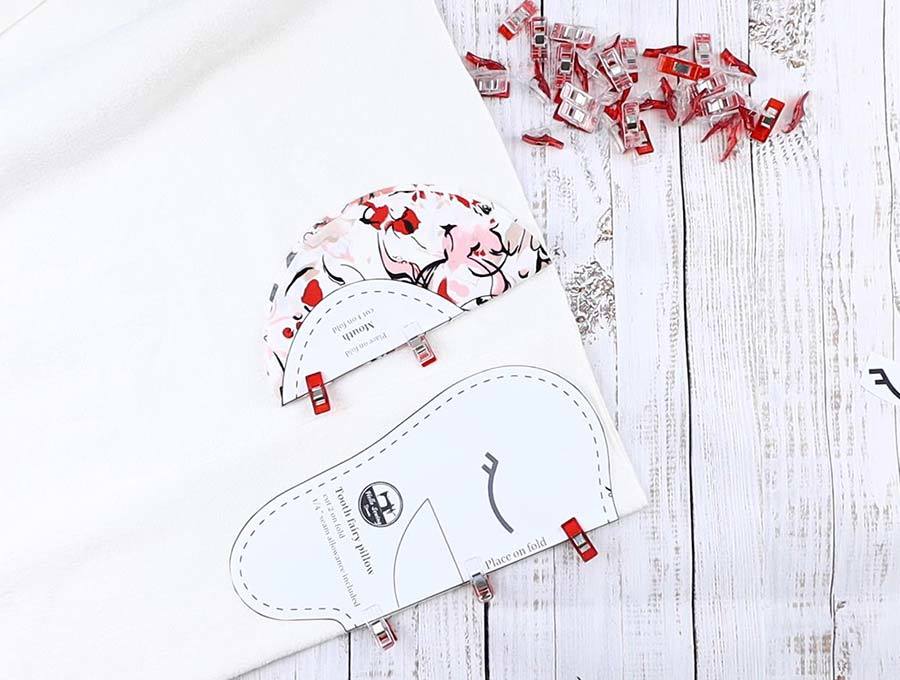
STEP 5: Pin mouth to body
Place the pattern on top of one body piece and align the mouth as indicated on the pattern.
Line up the center of the mouth piece with the center of the tooth and pin in position, right side facing you. The mouth or pocket bottom edge should be just above where the root pieces of the tooth divide. Feel free to move up or down with positioning the mouth/ pocket, until you are happy, before committing to the pinning, then pin in place
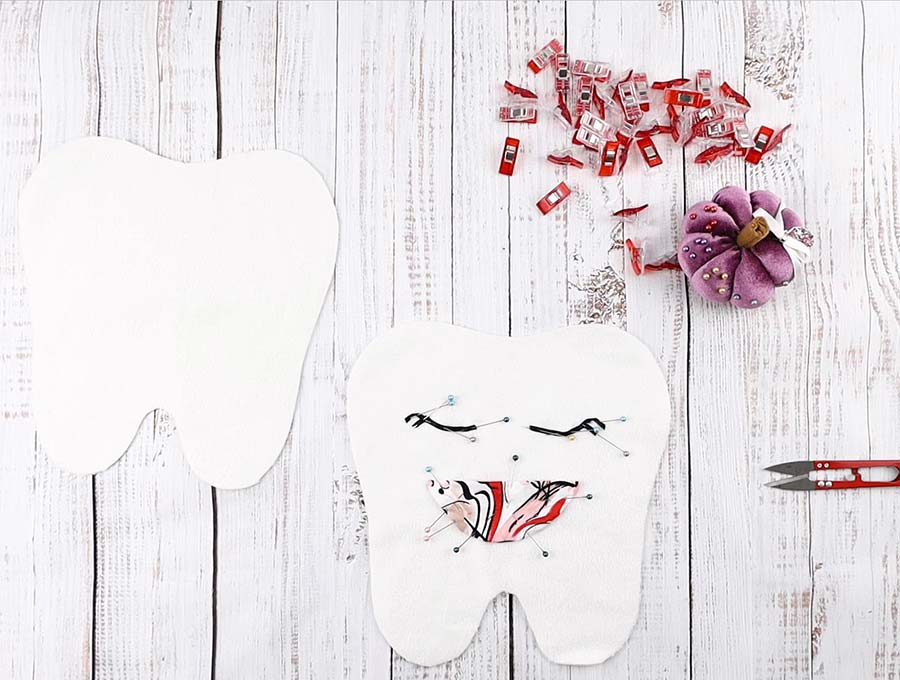
STEP 6: Stitch the mouth to the body
Once pinned, sew around the curved part of the pocket. Leave the top part (where the fold is) unsewn so that you can safely slip in the coins or tuck in a note.
STEP 7: Position the eyes on the body
Now to position the eyes, mark the center of the tooth with a pin, cut two small pieces of 1/8 (3mm) black ribbon and place them above the /mouth/pocket. Place them according to the pattern or move them up or down, closer together or further apart until you are happy with the expression. Use a lighter to slightly melt the edges of the ribbon to prevent freying.
If you don’t have ribbon and prefer to embroider the eyes I would suggest marking their position with a pencil. Eyes can be either open or closed – for closed eyes use a longer piece of ribbon and finish with a couple of stitches to indicate lashes at the corners.
STEP 8: Stitch the eyes
Hand stitch the pieces of ribbon using a running stitch, or embroider the eyes with black thread.
STEP 9: Stitch tooth pillow body
Now place tooth pieces right side to right side, line them up and stitch around using a 6mm (1/4″) seam allowance and leaving a 4cm (1.5 inch) gap at the side for turning right side out.
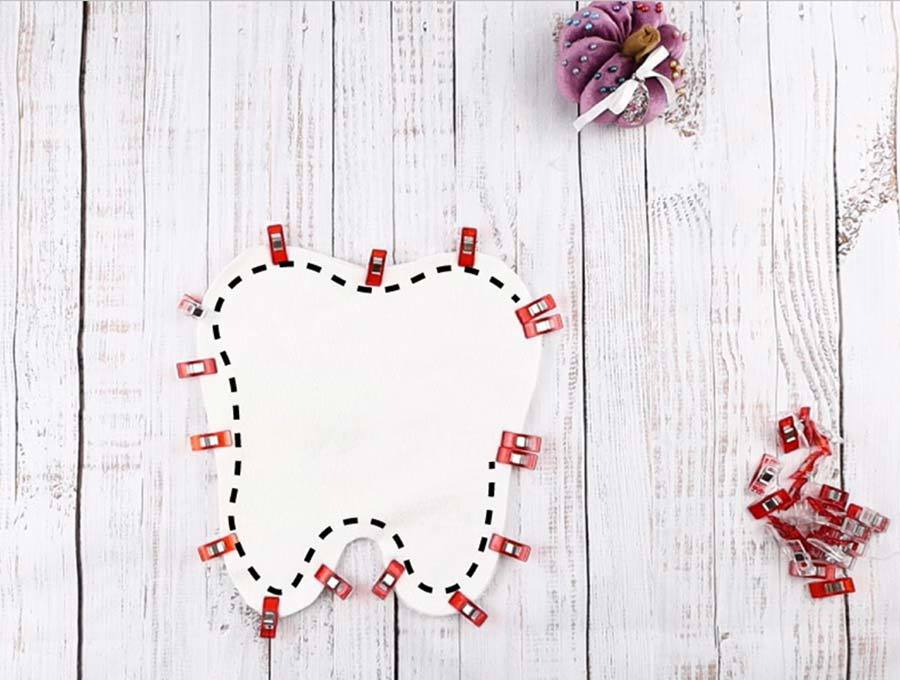
STEP 10: Clip and turn right side out
Clip all around the curves so the tooth will lie flat once turned.
Turn right way out, making sure the tooth pillow is even and all points are pushed out, then give it a quick press.
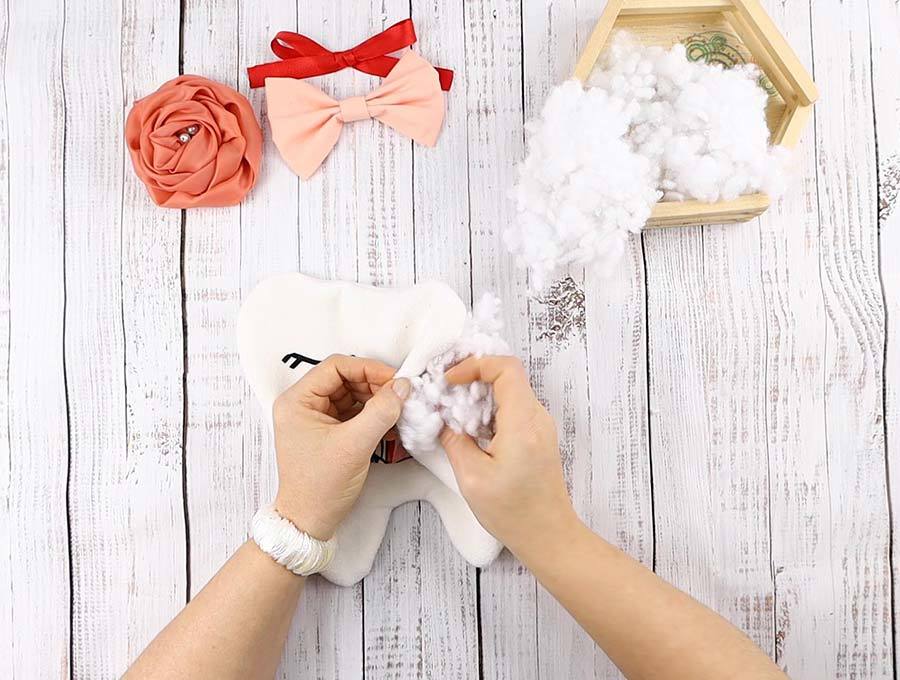
STEP 11: Fill the tooth pillow with stuffing
Push the stuffing into the tooth pillow ensuring you fill the roots section using smaller amounts of stuffing at a time to get an even filling, then work your way up to the crown of the tooth.
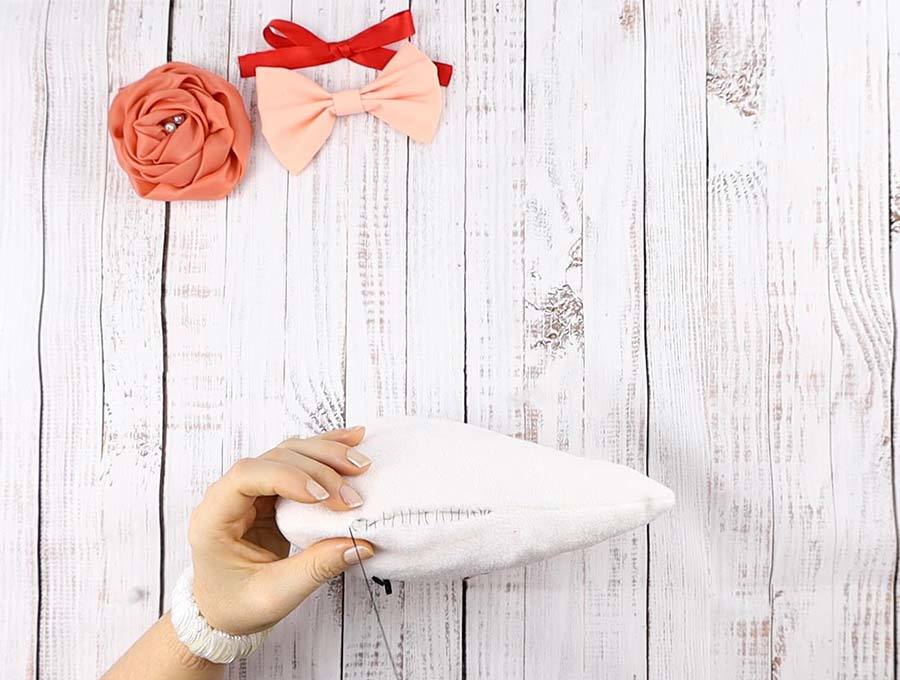
STEP 12: Stitch the gap closed
Hand sew the gap closed, turning raw edges in and using a slip stitch for an invisible finish.
Don’t delay on making this cute tooth fairy pillow for youngsters. Download the printable toothfairy pillow pattern, find some suitable left over bits to use, or buy the supplies listed in our handy materials list at the top of these instructions to make the sweet DIY tooth fairy pillow. I used to add a note written in tiny writing on a very small piece of paper, purportedly from the tooth fairy, thanking the child for such a lovely tooth. My kids kept those miniature notes for years!
FAQs + Tips for the tooth fairy pillow pattern:
- If you have a child that is a very light sleeper then before closing the top after stuffing, add in a ribbon loop, long enough so that you can hang the tooth fairy pillow over the bedroom door handle. This will make the tooth fairy’s delivery so much easier.
- You might want to add a tiny fabric bow below the mouth of the tooth as a finishing touch.
Do you like my tooth fairy pillow pattern and template? Pin for later:
Wanna be friends? Click HERE and follow me on Pinterest
RELATED PILLOWS:
- Burrito style pillowcase
- Neck pillow for long travels
- free heart pattern for throw pillow
- Reading pillow pattern
- dog bone pillow
OTHER STUFFED TOYS:
- Sock monkey tutorial
- Crewmate plushie from Among us game
- Imposter plushie from Among us game
- Egg plush pattern