1

How to Make Felt Finger Puppets {+FREE WOLF pattern}
Felt finger puppets are a great craft for both kids and adults! They are a ton of fun and surprisingly simple to make. Once you get the hang of this, you will be able to whip a puppet in as little as 15 minutes flat!
Do you know what is the best part? You can make the puppets resemble anything you like. Just use your imagination, a little creativity, (and some inspiration from the internet)! Making those simple finger puppets is so easy, that even a child can do it.
If you are not good with needle and thread, you can glue the parts and still make the puppet.
Supplies needed for DIY felt finger pattern:
- pencil and paper to draft your pattern
- scissors
- felt in different colors
- matching thread + black thread
- needle
- optional (black beads for the eyes)
How to make it:
- Freehand the desired design. You don’t need to be too accurate, just draw a basic idea to paper. Tweak it to your liking. Keep in mind that the shapes will be cut out from felt, don’t make them too tiny and don’t add too much detail.
- Use your finger to create the body. Draw around your finger leaving about 1/4 inch on all sides
- Cut out the paper pattern
- Cut out the felt pieces according to pattern
- Layer both body parts, face, muzzle, beak, horns and whatever parts you’ve drawn
- Blanket stitch muzzle/beak to face
- Blanket stitch face to body
- Stitch around the body, leaving bottom open. Use either running stitch or blanket stitch
- Add details – sew on eyes, nose and mouth. You can use black beads for the eyes or sew them using black thread and french knows
- Optional: for added detail use white thread to sew few stitches to front of the body and inside ears
How to make a wolf felt finger puppet:
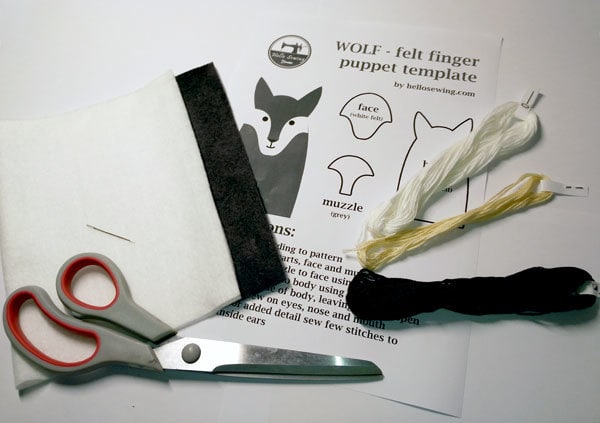
You will need:
- finger puppet pattern (click here: Wolf finger puppet pattern)
- grey felt
- white felt
- grey thread
- white thread
- black thread
- scissors
- needle
- (optional) black beads for eyes
Step by step:
-
- Gather your materials

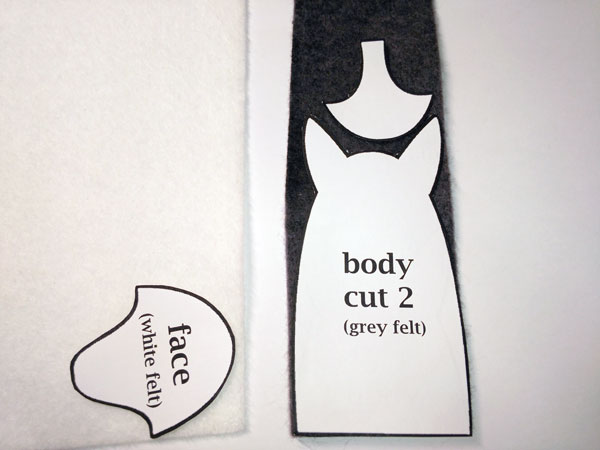
- Cut felt pieces according to pattern

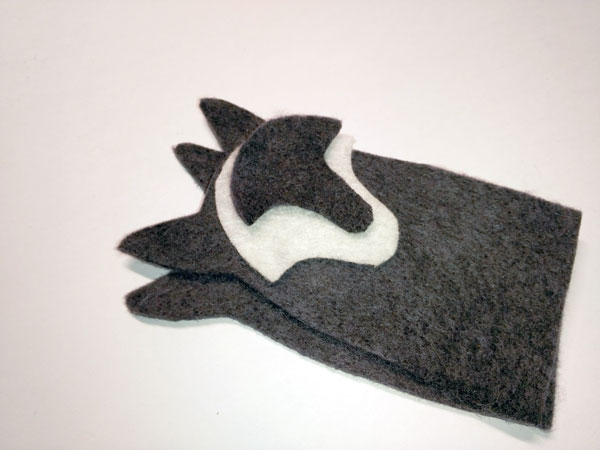
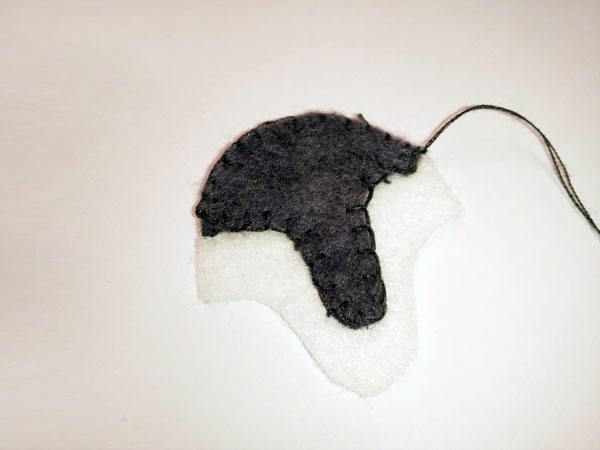
- Layer both body parts, face and muzzle
- Blanket stitch muzzle to face using grey thread
- Blanket stitch face to body using white thread
- Blanket stitch side of body, leaving bottom open
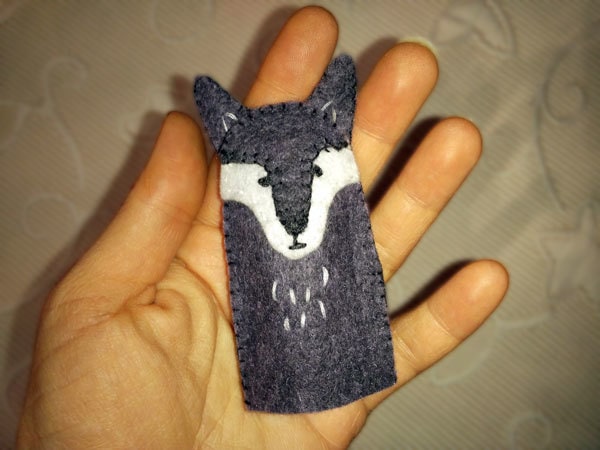
- Add details – sew on eyes, nose and mouth
- Optional: for added detail sew few stitches to front and inside ears
- Gather your materials
CLICK to DOWNLOAD the FREE WOLF FELT FINGER PATTERN
SEW MORE TOYS:
Elf on the shelf sewing patterns
Felt animals DIY– 25 + cute and easy free patterns