
Folded Fabric Ornament | Handmade Christmas Decoration
These DIY fabric ornaments are a must-sew kind of project for all sewing enthusiasts who like to give their homes that special holiday charm. It doesn’t matter how skilled you are at sewing, it’s a project for beginners and experts alike! They are fun and easy to make, and they take a short amount of time just like the Christmas tree napkins and the Christmas stocking wine dispenser.
If you realized that you need these decoration pieces, just follow our folded fabric ornaments instructions and you’ll have them in no time!

Below you will find my step by step written tutorial with VIDEO instructions for all the visual learners.
We occasionally link to goods offered by vendors to help the reader find relevant products. Some of the links may be affiliate meaning we earn a small commission if an item is purchased.
Table of Contents
- 1 How to Make Folded Fabric Ornaments
- 2 Supplies and tools
- 3 How To Sew Folded Fabric Ornaments
- 3.1 FOLDED FABRIC CHRISTMAS ORNAMENT VIDEO TUTORIAL
- 3.2 Sewing Christmas Ornaments INSTRUCTIONS:
- 3.3 STEP 1: Prepare the pattern
- 3.4 STEP 2: Cut out the fabric
- 3.5 STEP 3: Start sewing the folded fabric ornament
- 3.6 STEP 4: Turn the folded Christmas ornament
- 3.7 STEP 5: Start forming the folded fabric Christmas ornament
- 3.8 STEP 6: Finish the Christmas decoration
- 3.9 STEP 7: Add the finishing touches
How to Make Folded Fabric Ornaments
Supplies and tools
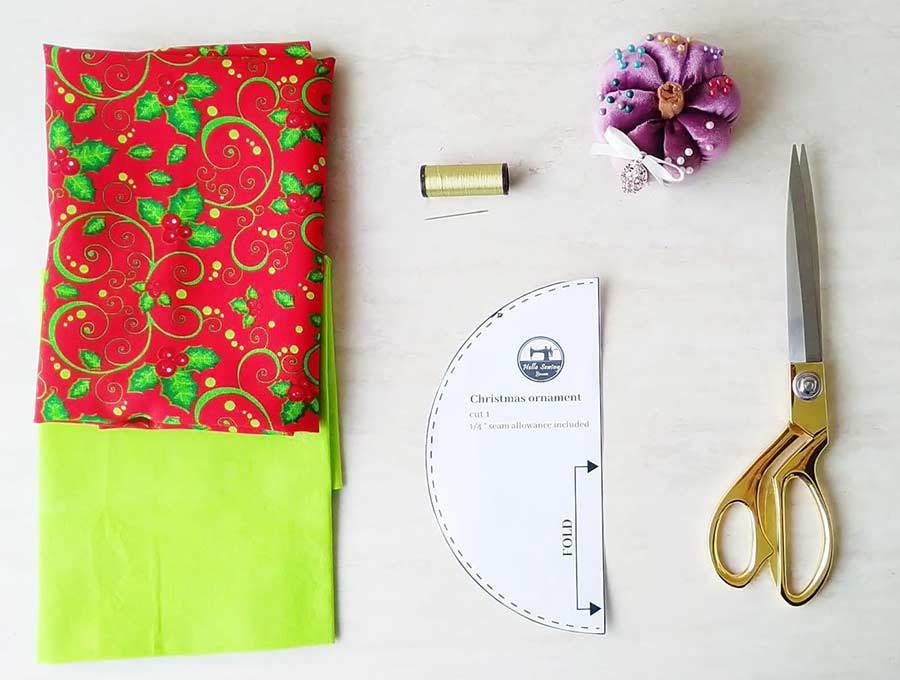
- (2) contrasting Christmas fabrics – 9″ x 9″
- matching thread
- scissors (or rotary cutter and a cutting mat)
- ruler or measuring tape
- iron and ironing board
- sewing clips or pins
- sewing machine (there are some amazing Black Friday sewing machine deals)
DOWNLOAD: folded fabric ornament pattern (Free PDF file)
Follow us for free patterns & tutorials! [easy-profiles]
How To Sew Folded Fabric Ornaments
Watch the diy Fabric ornament video first and then follow the written step by step instructions below.
Please enjoy and don’t forget to Like and SUBSCRIBE over on YouTube to be kept up to date with new videos as they come out.
FOLDED FABRIC CHRISTMAS ORNAMENT VIDEO TUTORIAL
Sewing Christmas Ornaments INSTRUCTIONS:
STEP 1: Prepare the pattern
Download and print the Christmas ornaments pattern. Make sure to print it at 100%, no scaling at all! The pattern is designed to be cut on fold!
TIP: If you don’t have a printer, find something circular with about 8 inches diameter to serve as a pattern, or cut one out from paper and make a pattern yourself.
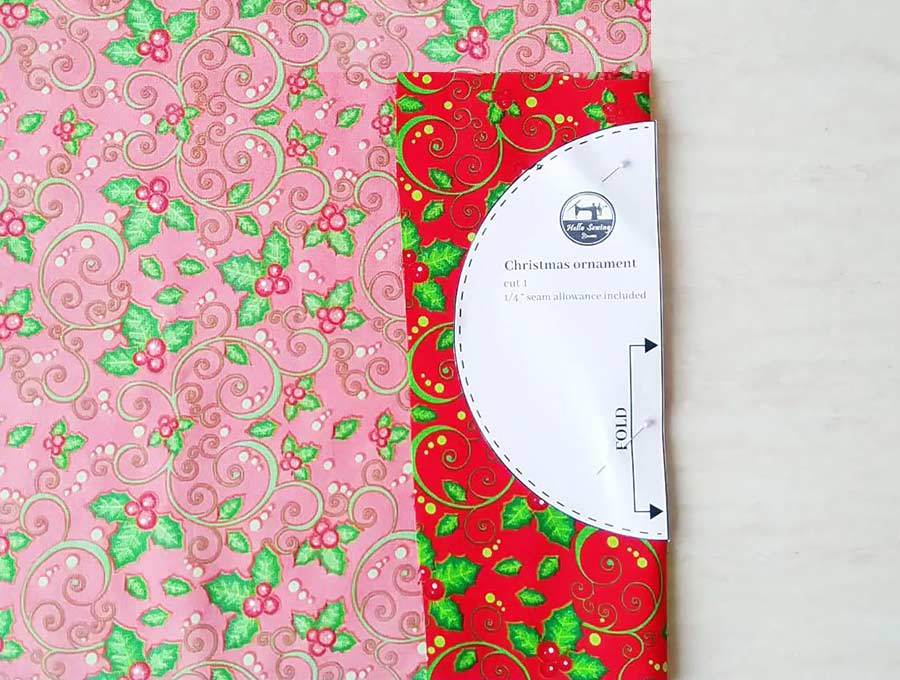
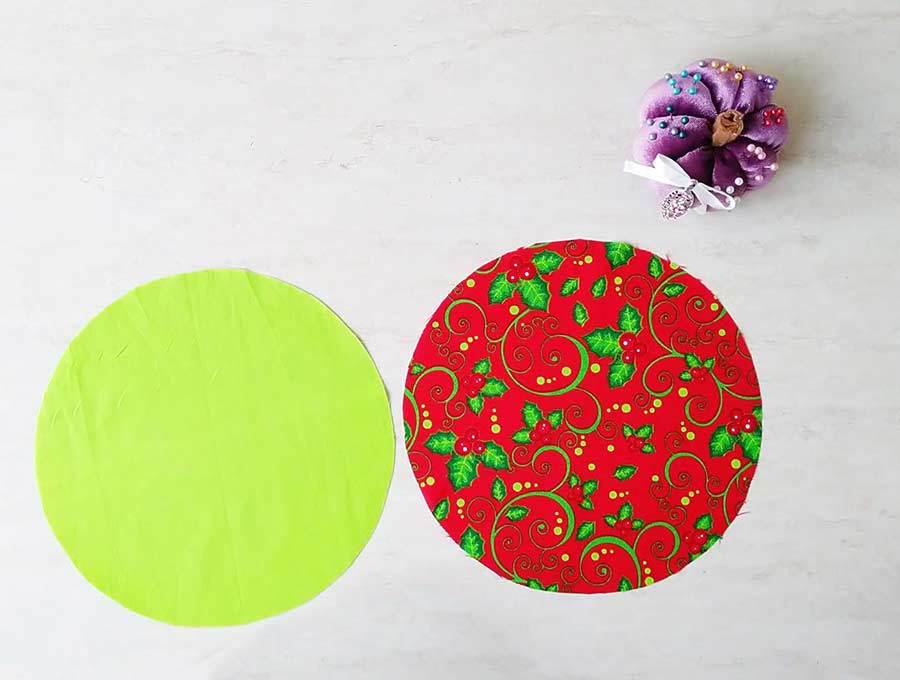
STEP 2: Cut out the fabric
The first thing you’ll need to do is to cut out two identical pieces of fabric, one from each fabric you have. Fold the fabric in half, pin the pattern on the fold and cut out according to the Christmas element pattern. Remove the pattern and unfold each piece. You will have two round pieces of fabric.
TIP: Don’t forget to wash both fabrics thoroughly and iron them well before you cut them. This prevents them from deforming later on after you wash them.
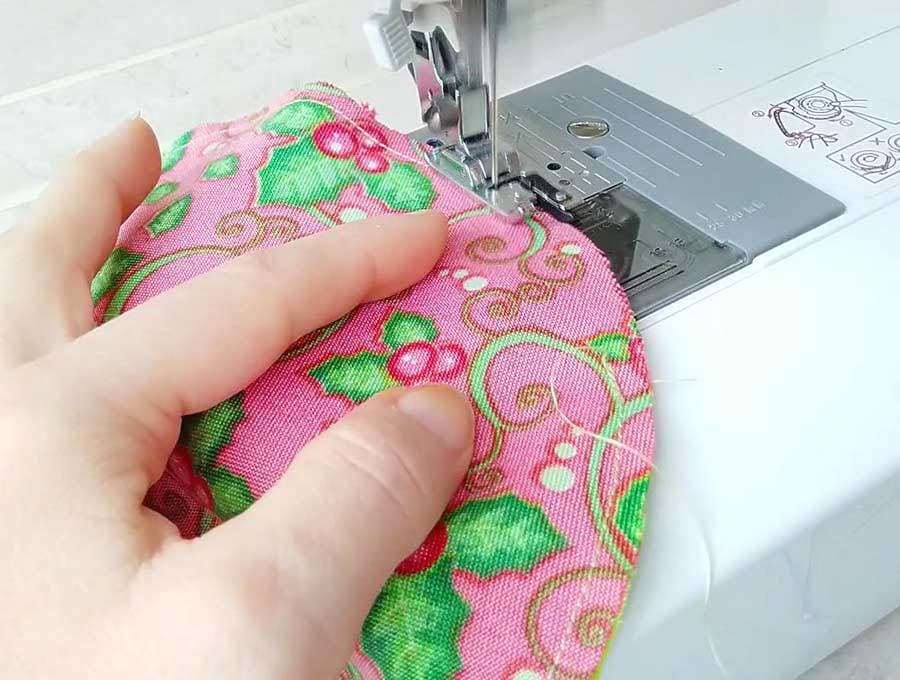
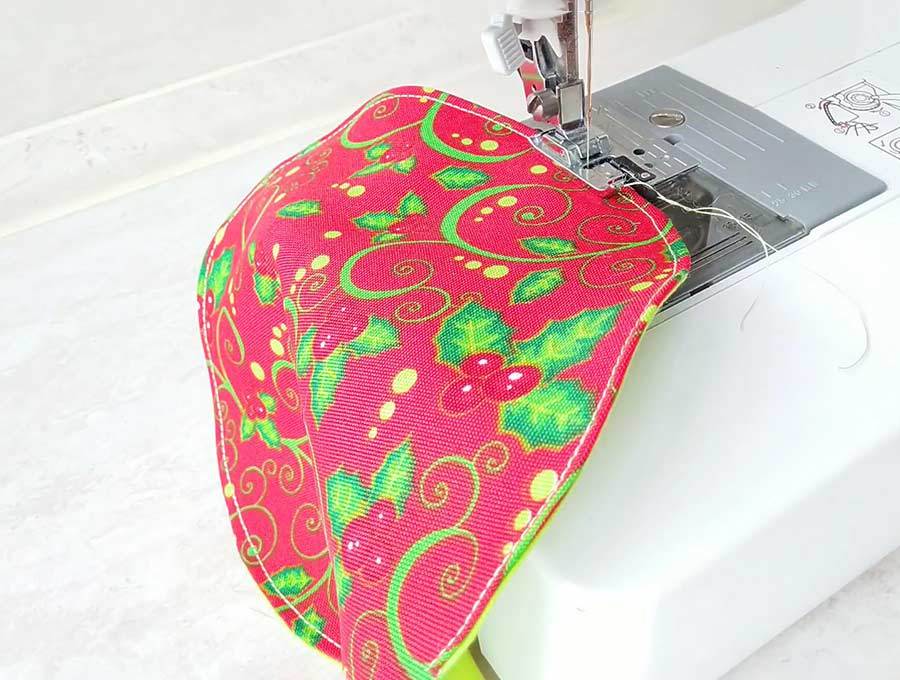
STEP 3: Start sewing the folded fabric ornament
Place the two fabric pieces on each other with their right sides facing inward. Align the edges and use pins or clips to secure the layers in place.
Sew all around the circle with a quarter-inch seam allowance. Leave a small opening unstitched so that you can turn the whole thing later on. Remember to backstitch at the beginning and end of your stitch.
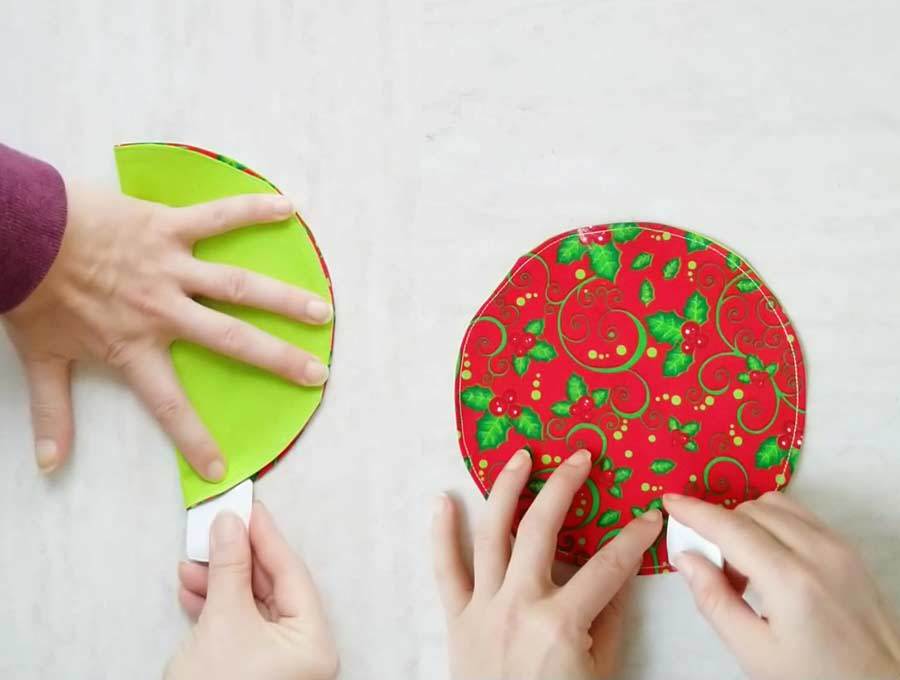
STEP 4: Turn the folded Christmas ornament
Turn the entire thing through the opening you left. Flatten everything out and fold the edges of the opening inward a bit. Press them and topstitch the opening shut.
STEP 5: Start forming the folded fabric Christmas ornament
Decide which side you want to dominate and then fold the round fabric piece in half, making sure to keep that side on the inside.
Take a needle and a thread and run it into the corner, at the beginning of the fold crease. Don’t cut the thread!
Run the needle into the opposite corner, in the same manner. Tighten the thread until the entire circle is folded. Join the two points with the threads going through them by making a stitch or two over the point where they touch.
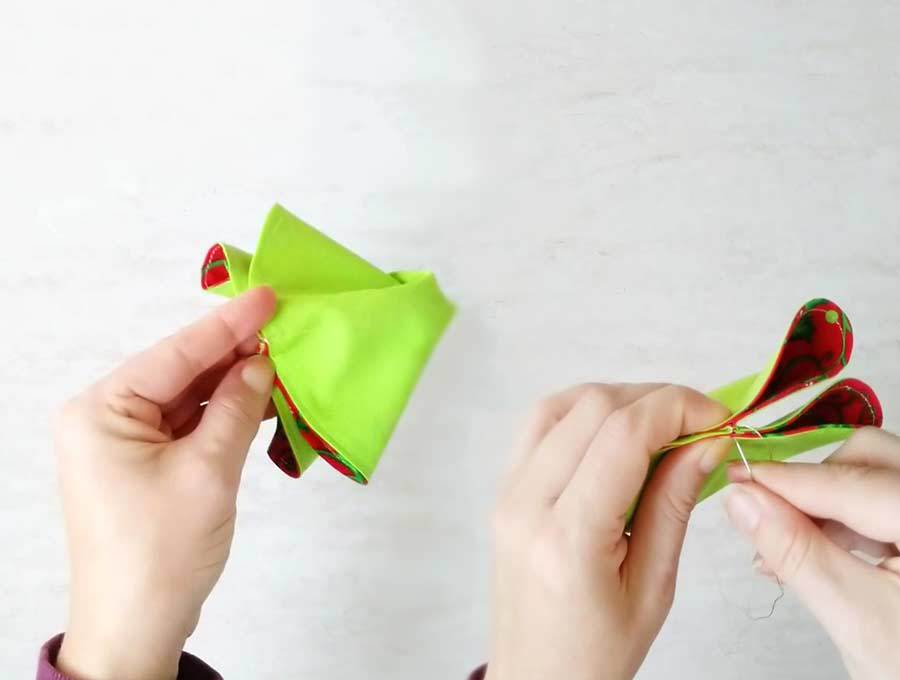
Without cutting the thread, repeat the process on the two remaining corners.
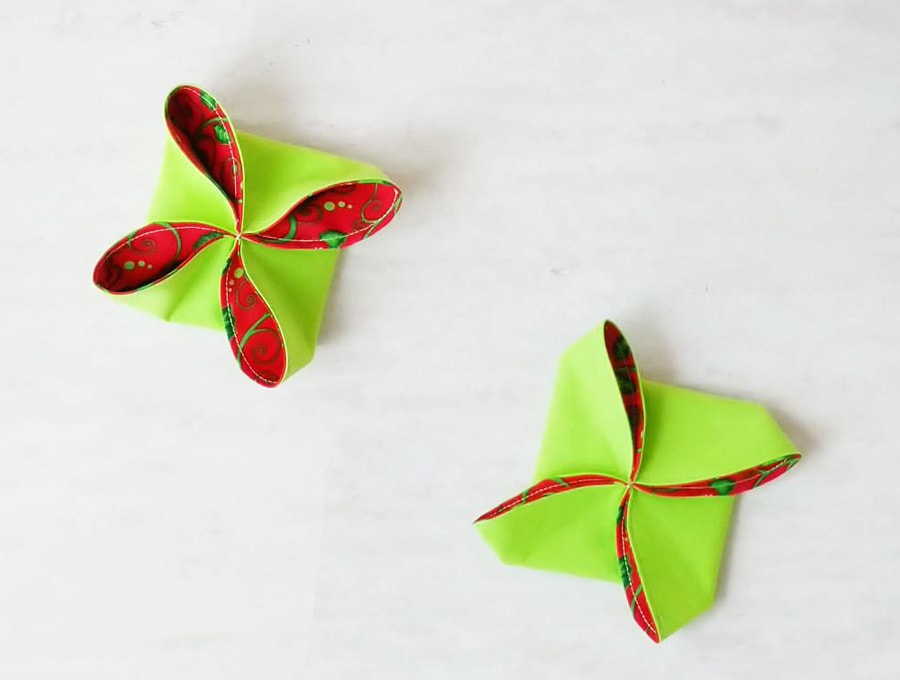
When you finish, you should get something that looks like a filled dumpling from a Chinese restaurant, with four petal-like upright corners.
Tie up a thread around the threads in the center where the petals touch.
STEP 6: Finish the Christmas decoration
Press the center of the ornament with your palm so that it touches the back layer of the fabric. It will look like a pinwheel
Now you need to flip all four corners inside-out so that your desired fabric takes over as dominant.
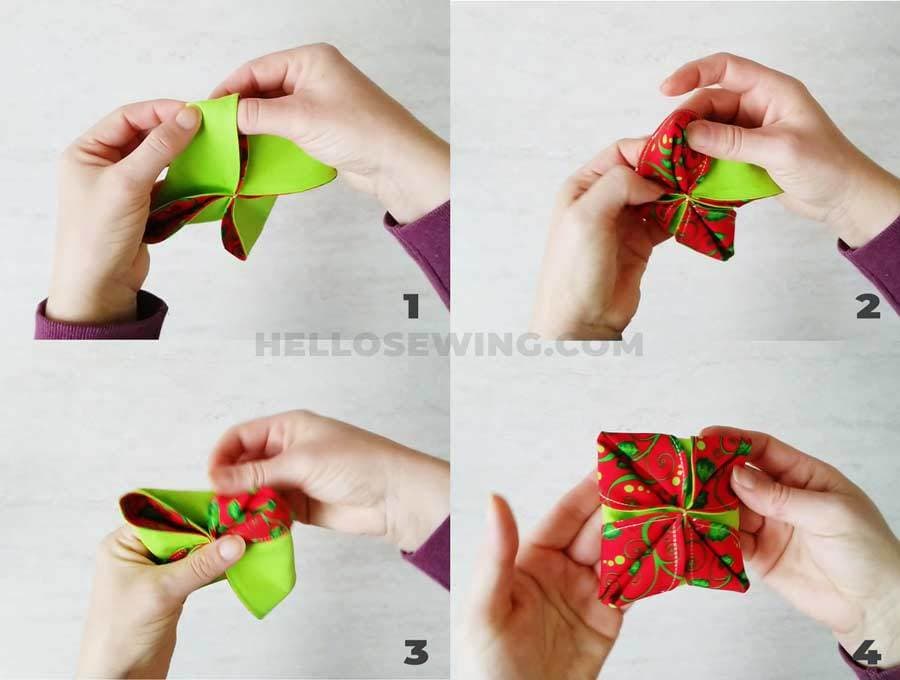
Make sure to align everything and make it flat and straight. You can press the whole thing with your iron.
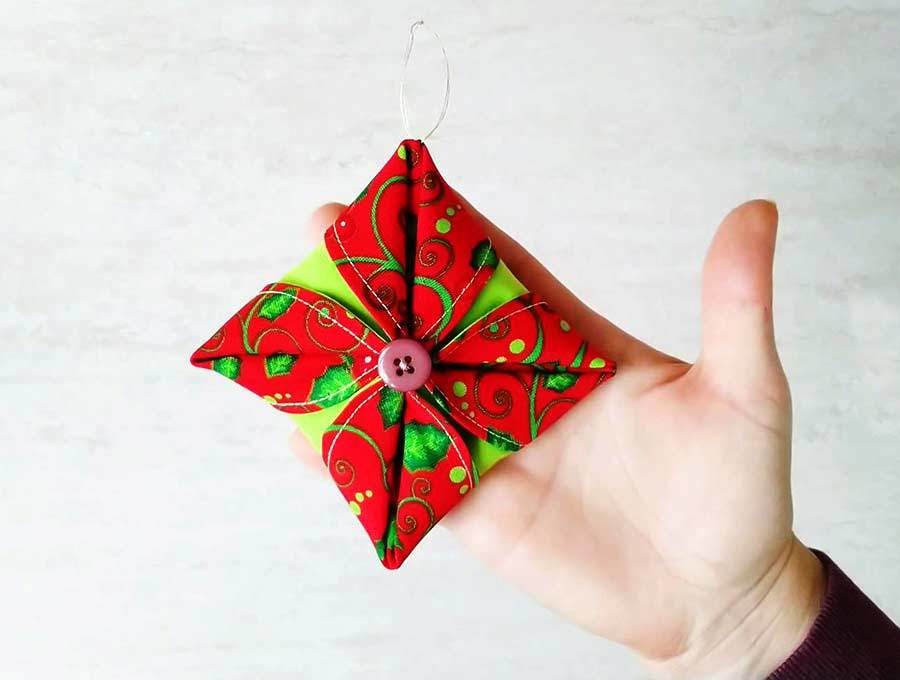
STEP 7: Add the finishing touches
To finalize the ornament, you’ll be sewing on a button and adding a hanging loop.
If you have some kind of button-like decoration, sew that onto the center of the ornament. Any pretty button will do though, so use whatever you wish. You can also leave the ornament as it is, without the button.
The last thing to do is to add a loop so that you can hang the ornament. You can use a decorative string and a tapestry needle and run them through one corner of the ornament. Then just tie up the string.
You can also make a fabric loop by folding a thin fabric piece lengthwise twice and stitching its ends to the corner of the ornament.
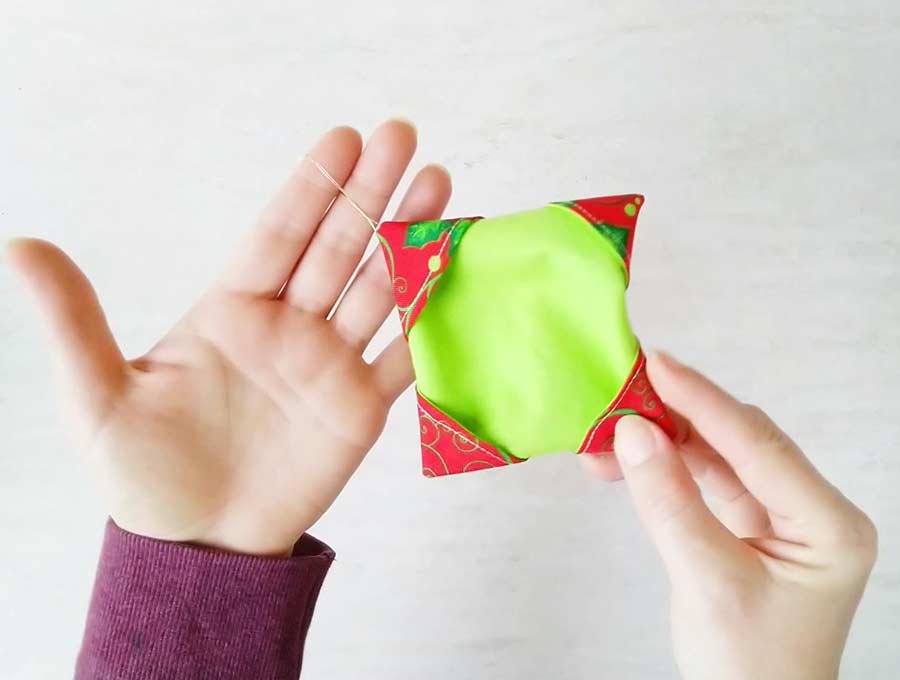
Your new handmade Christmas fabric ornament is complete! Here’s the back looks. So pretty!
I hope you liked this tutorial! Try making a few of these unique diy fabric ornaments for your loved ones and tell us what they thought! If you have some suggestions you’d like to share with us, write them out in the comment section below. We appreciate the feedback! Have a wonderful Christmas!
Do you like this? Pin for later:
Wanna be friends? Click HERE and follow me on Pinterest
OTHER STUNNING CHRISTMAS SEWING PROJECTS:
Christmas tree napkins tutorial
2in1 Christmas stocking and wine dispenser
Easy DIY Bunting to decorate your mantel
Easy quilted ornament patterns – Kaleidoscope star