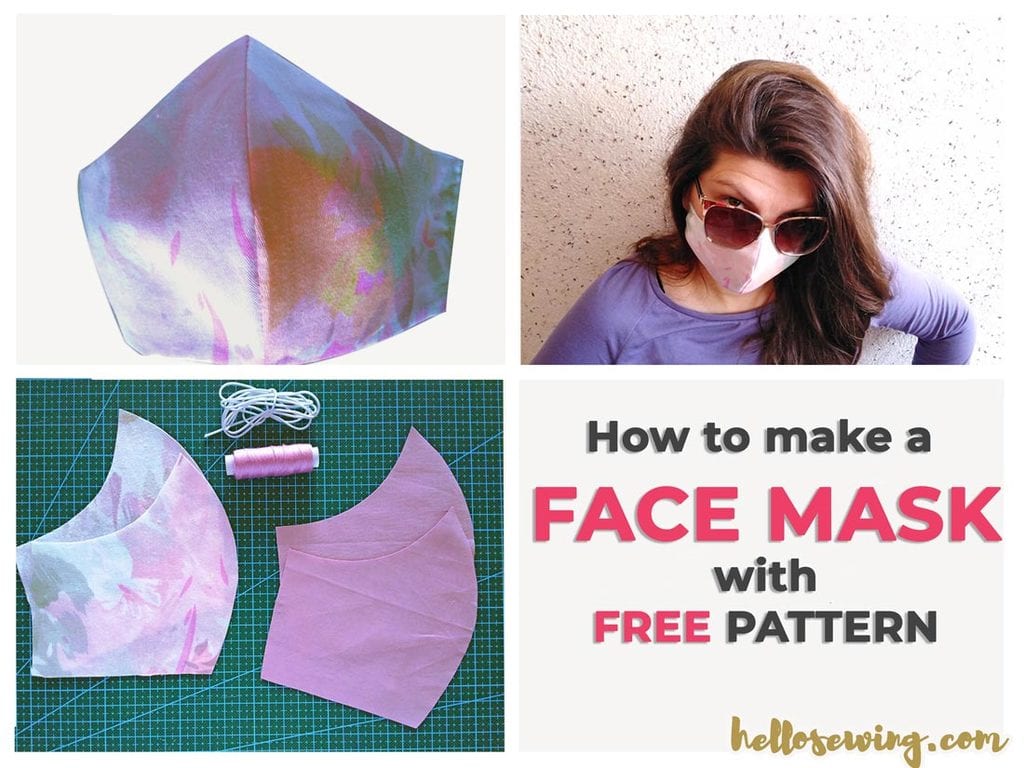
Face Mask Pattern (FREE) – How to Make DIY Mouth Mask
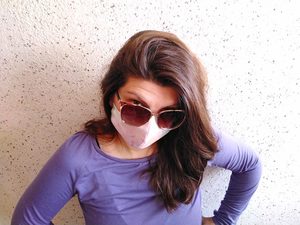 As the coronavirus or COVID-19 gains momentum and slowly finds its way into more and more countries each day, face masks are starting to become a kind of necessity. People are becoming more aware of the danger and everyone is trying their best to avoid infection. That is why it’s becoming incredibly difficult to find N95 respirators or surgical face masks for purchase.
While certainly N95 filter masks are designed to protect against airborne viruses, waiting for them to become available without having any kind of an alternative in the meantime is not something I’m comfortable doing.
Mind you, use this simple DIY face mask as a last resort, as a homemade face masks don’t offer the level of protection the N95 respirator masks do, and their capacity to protect from viruses according to CDC is unknown.
Due to popular demand we added a VIDEO tutorial below, added a printable pdf of the instructions, found the most suitable nose wire materials, and designed 12 more free face masks patterns.
NEW VIDEO tutorial: How to add an eye shield to your face mask
We occasionally link to goods offered by vendors to help the reader find relevant products. Some of the links may be affiliate meaning we earn a small commission if an item is purchased.
Table of Contents
- 1 How to make a DIY face mask with a Pocket For Filter Insert
- 1.1 Supplies and tools
- 1.2 INSTRUCTIONS:
- 1.3 1. Download the pattern and cut the fabric
- 1.4 2. Sew the curve line of the face mask
- 1.5 3.Add the elastic band and finalize your mask
- 1.6 4. Insert flexible nose wire (Optional)
- 1.7 5. Insert filter (optional) and use the mask
- 1.8 6. NEW OPTION: Add an Eye Shield to Your Face Mask
- 1.9 VIDEO INSTRUCTIONS:
- 2 Face Mask FAQ
How to make a DIY face mask with a Pocket For Filter Insert
Supplies and tools
This is a relatively simple project so it doesn’t require a lot of materials and tools to be completed. You need:
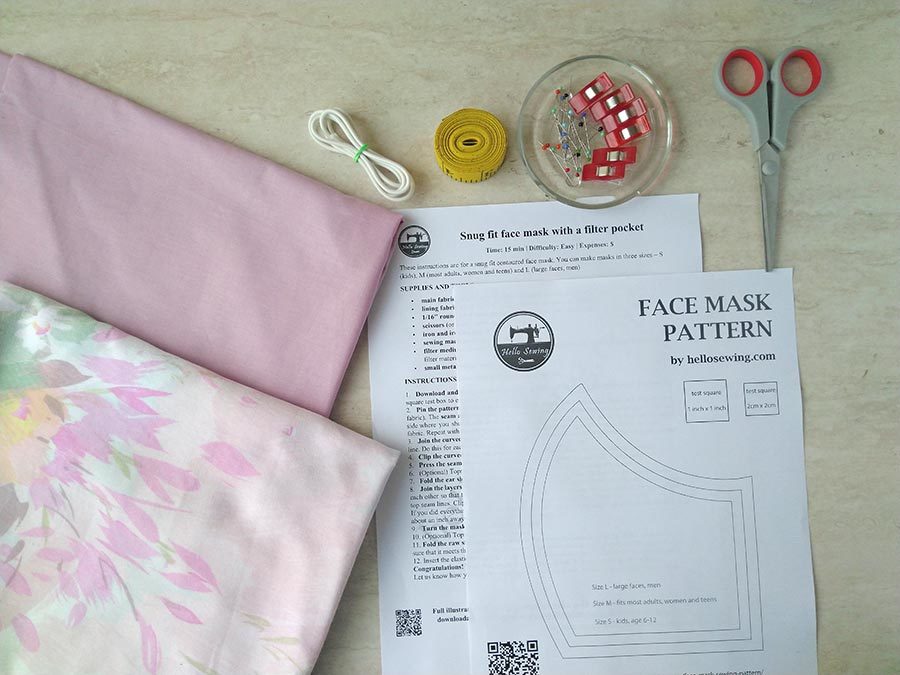
- main fabric – about 13″x 7″, cotton – all white or medical themed (tightly woven cotton, such as quilting cotton or cotton used in quality bed sheets)
- lining fabric about 13″ x 6″, cotton (tightly woven)
- filter (optional)
- 1/16″ round elastic (preferable, currently available option , 1/8″ or 1/4″ flat elastic
- scissors (or better yet rotary cutter and a cutting mat)
- iron and ironing board
- sewing clips or pins
- a sewing machine (I recommend this one this one for beginners as it gets the work done and is reasonably priced. If not sure how to choose – check out our beginner sewing machines buying guide
- OR needle and thread if you are handsewing
Downloads:
If you’re having trouble accessing the FREE pattern, make sure your pop-up blocker is turned off.
- Printable pattern: face mask pattern (PDF file)==IMPORTANT NOTE== Don’t print the PDF pattern from the browser as the size might not be correct. Download the file on your computer, open it with Adobe Acrobat or Adobe Reader and print from there.
- (Optional) Instructions how to sew the face mask (PDF file). Due to a lot of requests and interest from our readers, we’ve added a printable pdf of the instructions.
Once you have gathered all of these essentials, you can proceed to sewing the diy face mask.
INSTRUCTIONS:
1. Download the pattern and cut the fabric
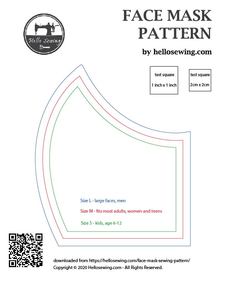
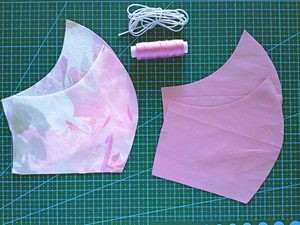 The pattern you will be downloading does not have to be scaled down in any way. Its original dimensions are 8.5 x 11 inches, which is about the size of a letter, small enough for easy printing. If you are not sure whether the dimensions are right, there is a small test square – 1 inch x 1 inch (US) and 2cm x2cm (for those outside US) on it so go ahead and measure it.
Download the pattern, print it out, and cut it accordingly. Before you put it onto your main fabric to cut it, fold the fabric in half so that the pretty sides are facing each other. Pin the pattern onto this folded fabric and cut the fabric.
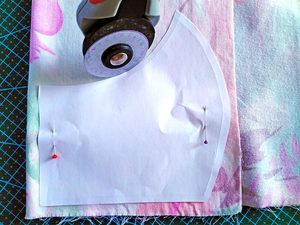
The seam allowance is 1/2 inch and is already included on all sides except for the ear side where you should add additional one inch seam allowance.
Repeat this step with the lining fabric as well. This time, however, do not add a seam allowance for the ear section.
TIPS: Several seamstresses asked us for fabric recommendations. Basically any thickly-woven cotton is fine and it is even better if you can add a filter medium.
Here’s a relevant study that tested the efficacy of homemade masks
I saw someone wearing a stethoscope fabric mask and though that this is a great way to show appreciation to our front-liners. So, I found some suitable fabrics that can be purchased online. If you spot a great design, share it in the comments below
2. Sew the curve line of the face mask
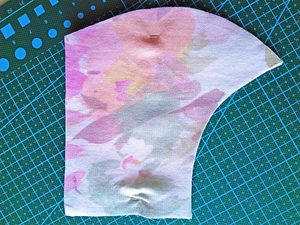 Make sure the right (pretty) of sides are on each other.
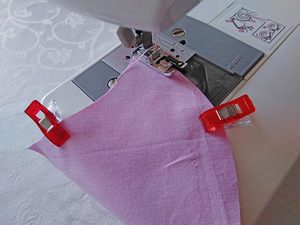
Sew along the curved line on both pieces.
Then draw a line quarter-inch away from the original side line, on the inner layer. Do this for both side seams of the inner layer.
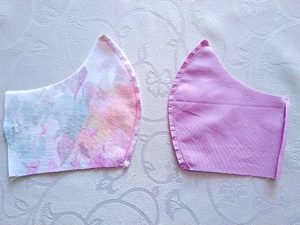 Next, you will need to clip the seam allowance on the curve part of the mask half an inch apart, both on the outer and the inner layer. Doing this allows the edge to stretch nicely instead of bulking up when you flip it inside out.
Now turn both pieces inside out and use the iron to press the seam allowances to different sides. If you want your mask to have a more professional look, topstitch near the seam line so that the seam allowances stay flat. Fold the side at the line you drew earlier and put the raw edge inside to hide it before topstitching it in place. Do this on each of the ear sides of the inner layer.
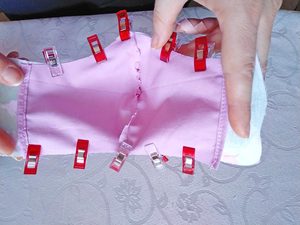 It’s time to join the two layers together now. Put the inner layer on top of the outer, right sides facing each other so that the upper and lower edges align. Make a stitch at the bottom and top seam lines. If you did everything right up to this point, you will find that the edge of the outer layer is a about an inch away from the side seam line on the inner layer. If this isn’t the case, retrace your steps and see where you made a mistake so that you can fix it.
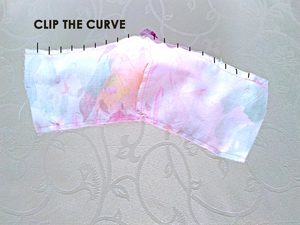 Clip that curve on the seam allowance where the two layers meet and leave about half of an inch from the ends untouched. Flip the mask inside out again. Press the seams flat.
Fold the top and bottom raw edges of the outer layer twice and topstitch along the edge. Do this on the bottom seam line as well.
3.Add the elastic band and finalize your mask
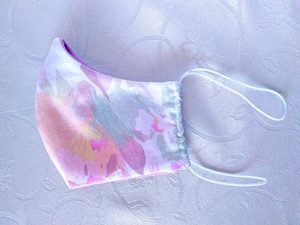
Now you will be making a channel for the elastic band. Fold the raw edge of the outer layer about a quarter of an inch away from the edge. Fold once again until that edge meets the edge of the inner layer.
Topstitch a vertical line across the part you just folded and you will be left with a vertical tube through which you can pull the elastic band.
– For 2 separate ear loops – you’ll need 2 x 6″-8″ of elastic for the adult sizes or 2 x 5 – 5 1/2″ (kids)
– For one continuous piece that goes around the head – use 1 x 15-17″ of elastic (again, depending on the size of the face)
TIP: Many makers report shortage of thin round elastic. You can use hair ties , ribbons or even make ties out of fabric.
4. Insert flexible nose wire (Optional)
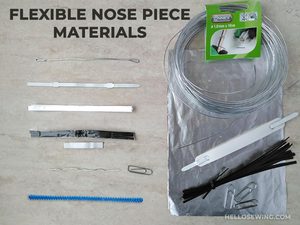
The mask will fit your face more closely if you add a flexible nose piece and mold it over your nose. I suggest using a 7″ long craft wire, couple of twist ties, or pipe cleaners but as those are not always available, we got creative.
We’ve compiled our ideas and feedback from our readers and got to work. We tested which are the most suitable materials and what is the best length for the nose piece. Here’s what we found – the most suitable materials for nose wire.
I recently saw that some aluminum nose bridge strips such as these pop over on amazon and they look like a good option.
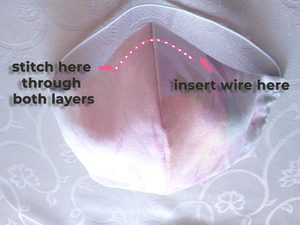
To make a channel for a removable nose wire stitch through both layers, the length of stitching should match the length of the wire.
5. Insert filter (optional) and use the mask
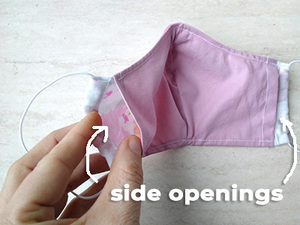 You will also notice an opening between the outer and inner layers. This is where you can put the filter in. Change it regularly and keep your mask clean by washing it in the washing machine after each use.
What to use as a FILTER? Note that these filters are not medically rated and their ability to protect is unknown:
As far as the filter goes you may use a piece of vacuum cleaner bag or HEPA filter without fiberglass, non woven fabric, or even an air-dried anti-bacterial wet wipe as filter. While those won’t be able to stop the virus, they will be able to filter out more particles than fabrics alone. It probably all boils down to finding a balance between breath-ability and filtering. You’ll have to make your own call here, and it would be smart to research whether and what filter to use.
[adinserter name=”Block 4″]
Many readers asked why use vacuum dustbags as filter? According to this 2013 Cambridge university study which evaluated the capacity of several household materials to block bacterial and viral aerosols, vacuum cleaner bags were considered the most formidable household material with a rate of nearly 86 percent protection against the smallest particles they tested.
When placing the filter inside, make sure that it isn’t crumbled up and that it reaches all the way to the upper edge. Once you put the mask on, make sure that it covers your nose well and that there are no gaps between your face and the mask.
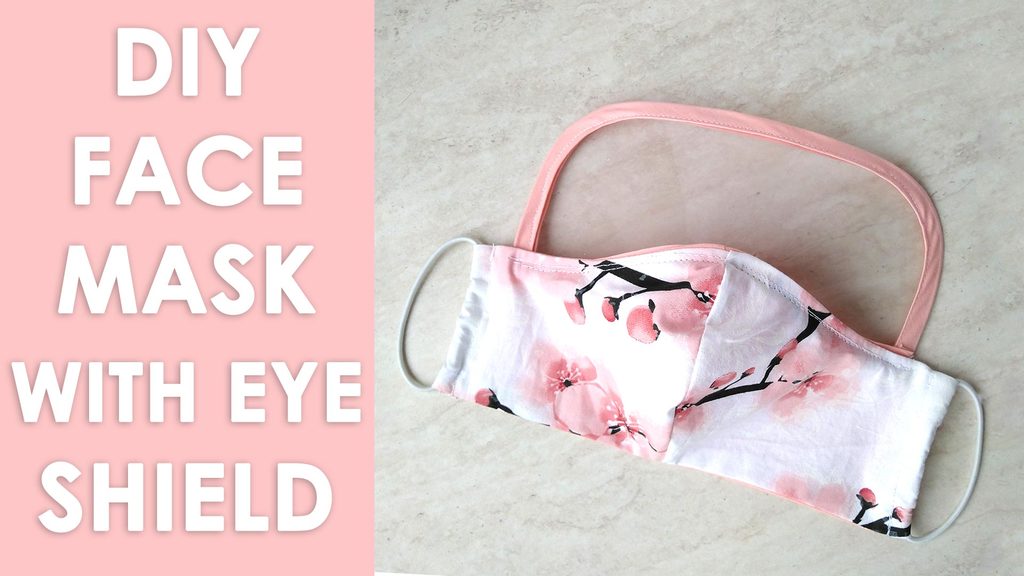
6. NEW OPTION: Add an Eye Shield to Your Face Mask
Level up your protection and add an eye shield to your mask with our easy step by step VIDEO tutorial. Here’s a sneak a peek of the design:
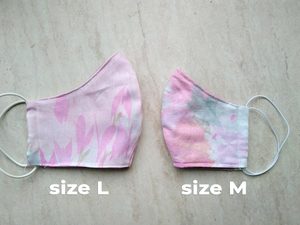
Here’s a quick visual of sizing – size L vs size M:
VIDEO INSTRUCTIONS:
Please enjoy and don’t forget to Like and SUBSCRIBE over on YouTube to be kept up to date with our new videos as they come out.
Still not sure you can sew this?
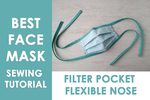
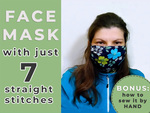
Then make our surgical style masks below. They are the easiest to sew face masks – as easy as it can get. If you can sew a straight stitch, you can make them!
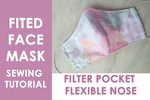
Our FREE face mask patterns and tutorials:
Face Mask FAQ
- How can YOU help fight the current face mask shortage?
1.Put your sewing skills to use – help our frontline medical staff during this COVID-19 crisis by sewing up face masks!
In light of the life-threatening, national PPE shortage, some hospitals have put out public calls for face mask donations and/or are looking for face shields.
Join one of the amazing initiatives and #SewMasks for#MillionMaskChallenges #MillionMaskMayday. Some healthcare workers face critical shortage and are in desperate need – just see how #PPEshortage #GivemePPE and #PPEwanted are really trending on Twitter.
However, before you sew up a bunch of mask make sure they are 1) actually wanted and 2) up to the intended recipient specifications. Don’t randomly pop up and drop masks at a random clinic/hospital.
2.If you have new surgical masks or N95 masks lying around consider donating them. Anything helps, even if it’s just a box of 5 masks.
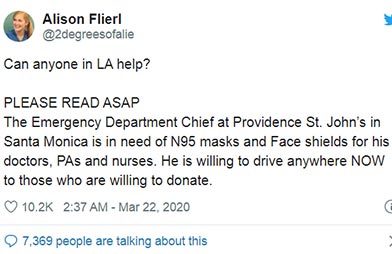

3.If you work for either an industrial company or a medical provider (like dentistry) who won’t need them now consider donating your N95 masks or face shields to local hospitals and first responders
==>If you represent a hospital in need of PPE you may add your institution to the spreadsheet here
==> Potential donors please refer to this spreadsheet which has information regarding how to make donations to hospitals in dire need throughout the country.
- What’s the difference between a surgical mask and n95 respirator?
There’s a considerable difference between the two, in terms of protection against infections, as well as overall design and construction. Let’s cover the most important differences.
– A surgical mask is meant to help block large particle droplets and splashes from reaching your mouth and nose, as well as reduce exposure from your respiratory secretions to the people around you, if you wear it properly. This mask does not fit tightly and it doesn’t protect you from airborne pathogens.
– The N95 respirator, on the other hand, is designed to achieve a very close facial fit d seal protects from inhaling fine airborne particles that could carry the infection. This mask has a seal check that helps you make sure that you put it on well. However, according to the FDA, even a properly fitted N95 respirator does not completely eliminate the risk of illness or death.”
Both masks are only meant to be used once and then have to be thrown away after contact with an infected individual, or once they get moist from your respiration.
For additional differences between surgical masks and N95 respirators, please check FDA’s N95 Respirators and Surgical Masks article and see CDC’s infographic.
- Can a surgical mask or a fabric mask protect you from coronavirus?
The fabric masks’ ability to protect is unknown. For the surgical masks, see above.
However, if you start showing symptoms but have to go out in the public, a mask on your face will lower the chances of people around you getting infected by you.
Refer to the CDC website for accurate and up-to-date information regarding COVID-19.
- How to protect yourself from coronavirus or any other respiratory virus?
The most important thing you have to do is to wash your hands thoroughly with an antibacterial soap for 20 seconds.
Use hand sanitizer (at least 60% alcohol) when there is no sink nearby —especially after touching a handrail or door handle, on public transit for example. You can also use an UV lamp to sanitize your home or your phone. Some people started using LED lamps to fight sunlight deficiency to help maintain good vitamin D levels. Others switched to touchless soap dispencers to reduce germ spread.
Don’t touch your face, mouth or eyes when you’re in public. If you cough or sneeze, do it in a tissue and throw it away as soon as possible. Stay home if you aren’t feeling well and rest.
Sleep and eat well to provide your organism with enough strength to resist the infection. If you are fatigued and lack vitamins, your immune system drops significantly and you become prone to respiratory infections. If you can, use disinfection products to clean the things you touch the most, like doorknobs, your phone, the TV remote and so. Wiping them off with a plain wet wipe or a cleaning spray will do the trick quite well if you don’t have a special disinfecting solution.
Also, you may want to have No products found., desinfectant wipes and hand sanitizer on hand. In the time of severe hand sanitizer shortage a DIY solution is to mix 2/3 pure isopropyl alcohol and 1/3 cup of aloe vera gel.
So Who Does Need a Mask?
Face masks aren’t really an effective way to prevent the most healthy people from getting infected with coronavirus, according to the Centers for Disease Control and Prevention and the World Health Organization. One of the reasons is that the ordinary people don’t wear them properly. Also, people tend to be less strict with hand washing and keeping safe distance from others when wearing a mask and according to Isaac Bogoch, M.D.”Impeccable hand hygiene is key”. So who SHOULD wear them:
- Medical professionals and other people who are caring for a sick person or person suspected of carrying COVID-19, you should wear a face mask according to CDC. Just as make sure you use it properly and throw it away when it becomes unusable.
- People with symptoms similar to COVID-19—such as fever, cough, and shortness of breath—should wear a mask when they are around others.
Pin for later:
Wanna be friends? Click HERE and follow me on Pinterest
Did you make this contoured face mask? Do you have an idea for improvement? Did you spot a great fabric design to show appreciation to our frontliners? Drop a comment below
Sharing is caring! If you find the pattern and tutorial useful please share with your friends on social media
RELATED:

