
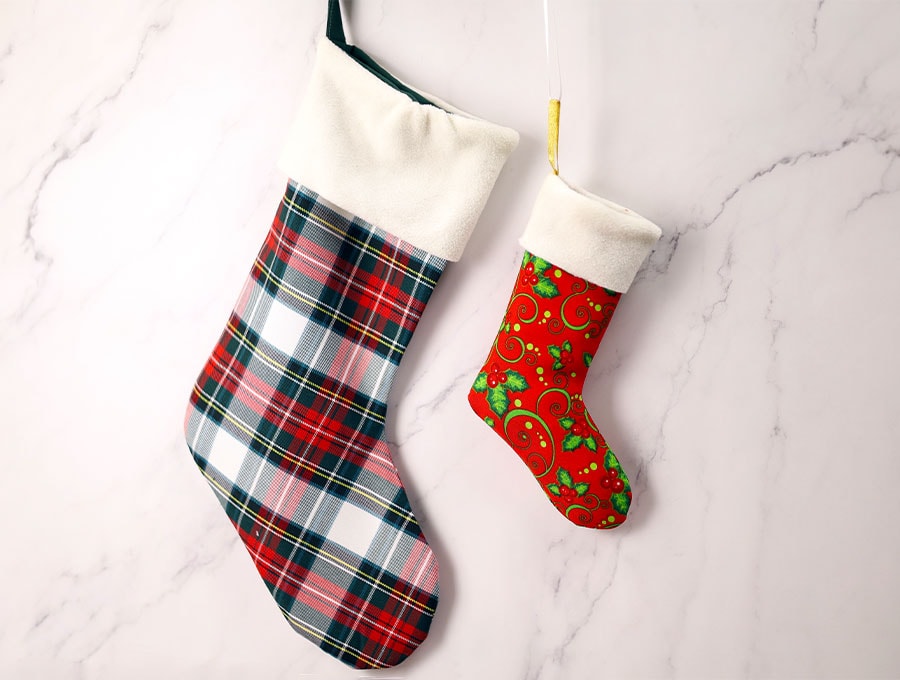
How to Sew a Christmas Stocking [VIDEO] + FREE Pattern in 2 Sizes
The stores are filled with lights and decorations, and the chill in the air heightens the build-up to the festive season. The costs add up for all the little extras you need to make the season genuinely festive. Once you have learned how to make a Christmas stocking, however, you’ll be able to save using our free printable pattern that comes in two sizes, standard and small. Dig into your fabric stash for suitable prints and checks, and have fun making these using our step-by-step guide that will show you how to sew a DIY Christmas stocking. They make great pre-festive season gifts for those who don’t sew and will make your mantel display look amazing.

When making these DIY Christmas stockings, pre-wash your fabric first – just in case the lining and outer fabric shrink at different rates. Making the Christmas stocking with lining and cuff, is super easy and provides a luxurious look to the inside of the stocking, as well as making the top turnover a quick one.
Below you will find my step by step written tutorial how to sew a Christmas Stocking with VIDEO instructions for all the visual learners.
We occasionally link to goods offered by vendors to help the reader find relevant products. Some of the links may be affiliate meaning we earn a small commission if an item is purchased.
Table of Contents
- 1 How to make a Christmas Stocking
- 2 DIY Christmas Stockings Supplies and tools
- 3 How to Sew a Christmas Stocking
- 3.1 Christmas Stocking VIDEO TUTORIAL
- 3.2 Christmas Stocking INSTRUCTIONS:
- 3.3 STEP 1: Prepare the Christmas Stocking pattern
- 3.4 STEP 2: Cut out the fabrics
- 3.5 STEP 3: Sew around
- 3.6 Step 4: Snip the curves
- 3.7 Step 5: Turn around
- 3.8 Step 6: Insert lining
- 3.9 Step 7: Prepare the cuff
- 3.10 Step 8: Sew
- 3.11 Step 9: Turn around
- 3.12 Step 10: Prepare the hanging loop
- 3.13 Step 11: Topstitch
- 3.14 Step 12: Attach the hanging loop to the stocking
- 3.15 Step 13: Attach cuff
- 3.16 Step 14: Sew
- 3.17 Step 15 (optional): Finish the raw edges
- 3.18 Step 16: Neaten the cuff
- 4 DIY Christmas stocking FAQs and tips:
How to make a Christmas Stocking

DIY Christmas Stockings Supplies and tools
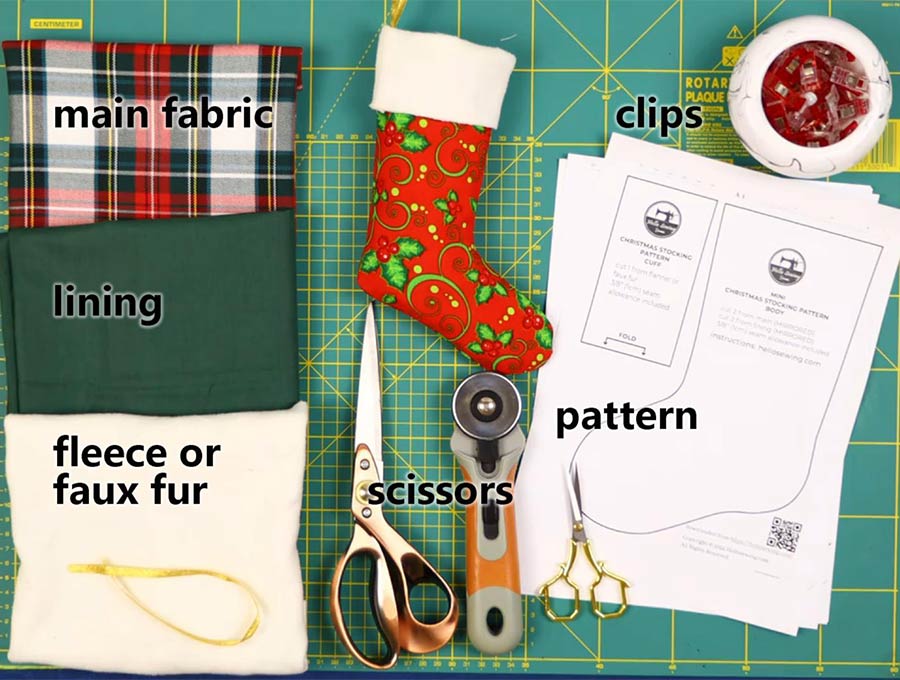
- outer fabric – cotton, flannel, wool, velvet in Christmas print
- lining fabric – woven cotton
- cuff fabric – faux fur, flannel or fleece
- hanging loop: grosgrain ribbon or a piece of lining fabric
- matching thread
- scissors (or rotary cutter and a cutting mat)
- ruler or measuring tape
- iron and ironing board
- sewing clips or pins
DOWNLOAD: DIY Christmas Stocking Pattern (standard size) [Free pdf file]
MINI Christmas Stocking Pattern (mini size) [Free pdf file]
Follow us for free patterns & tutorials! [easy-profiles]
How to Sew a Christmas Stocking
Watch the diy Christmas Stocking video first and then follow the written step by step instructions below.
Please enjoy and don’t forget to Like and SUBSCRIBE over on YouTube to be kept up to date with new videos as they come out.
Christmas Stocking VIDEO TUTORIAL
Christmas Stocking INSTRUCTIONS:
Finished size of the stockings are:
Standard size:
Mini size:
Fabrics you will need:
Standard sized Christmas stocking
- outer fabric – 18 ” x 26″ (46 x 66cm) cotton, flannel, wool, velvet in Christmas print
- lining fabric – 18 ” x 26″ (46 x 66cm) woven cotton
- cuff fabric – 16″ x 5″ (40 x 13cm) faux fur, flannel or fleece
- hanging loop: grosgrain ribbon or 2.5″ x 6″ (6.5 x 15cm) piece of lining fabric
Mini Christmas stocking fabrics:
- outer fabric – 18 ” x 26″ (46 x 66cm) cotton, flannel, wool, velvet in Christmas print
- lining fabric – 18 ” x 26″ (46 x 66cm) woven cotton
- cuff fabric – 16″ x 5″ (40 x 13cm) faux fur, flannel or fleece
- hanging loop: grosgrain ribbon or 2.5″ x 6″ (6.5 x 15cm) piece of lining fabric
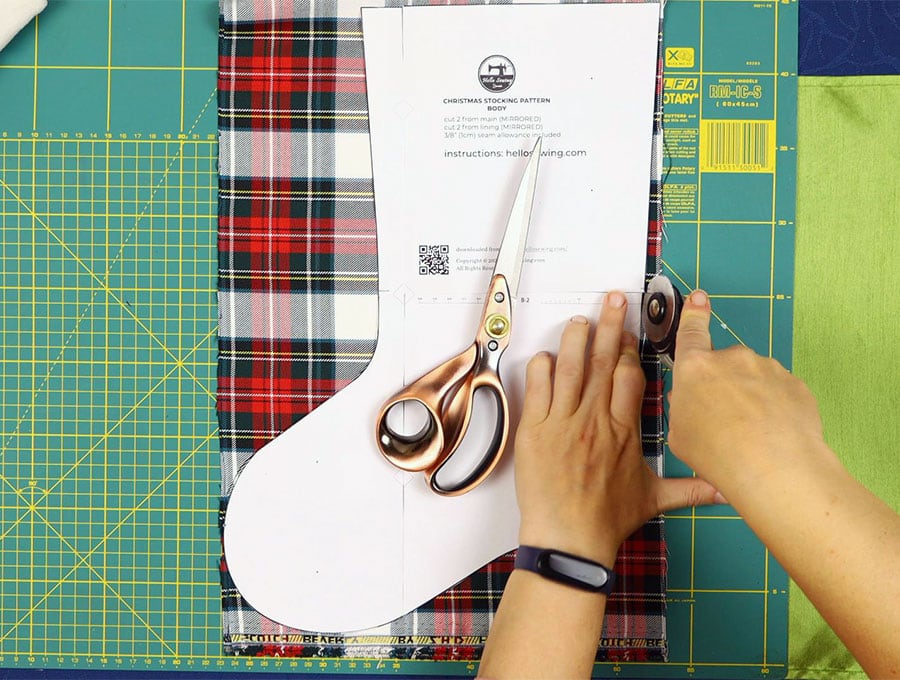
STEP 1: Prepare the Christmas Stocking pattern
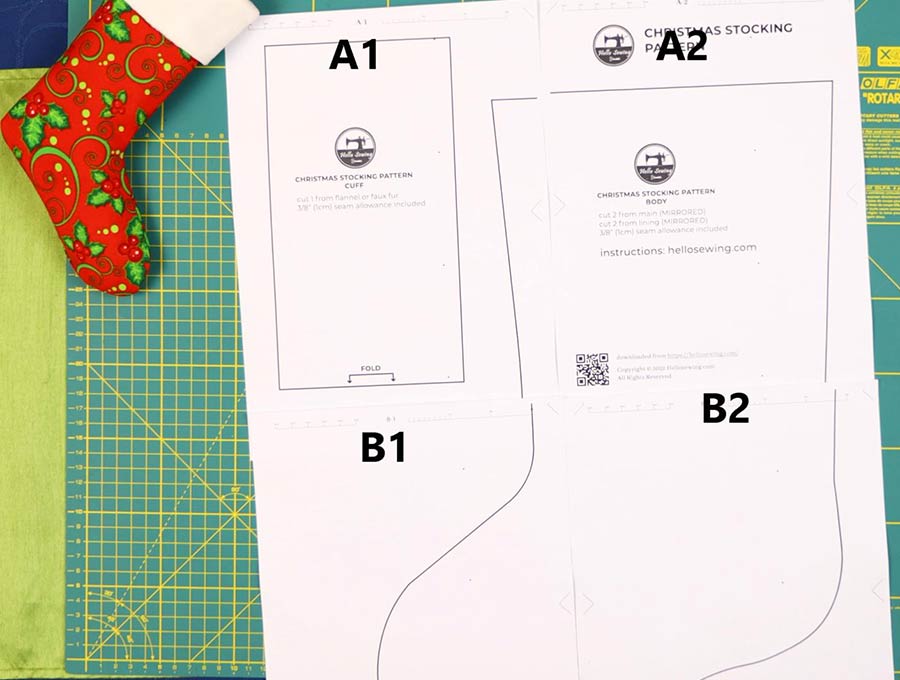
Assemble Christmassy-looking fabrics from your stash and put them into the washer. While you wait for them to wash and dry, you can print out the Christmas stocking template in the size you want, arrange the pieces as shown above, tape them together and then cut it out. Make to print at 100% (no scaling) and then measure the test line.
STEP 2: Cut out the fabrics
Lay out your outer fabric on your tabletop, fold with the right sides inside and cut out the stocking piece on the folded fabric so you have two parts to form the front and back of the stocking. No need to cut extra around the stocking, as the 3/8″ (1cm) seam allowance is already included in the pattern.
Fold the lining fabric, right sides facing inwards. Using the same pattern piece, cut out a Christmas stocking from the folded fabric.
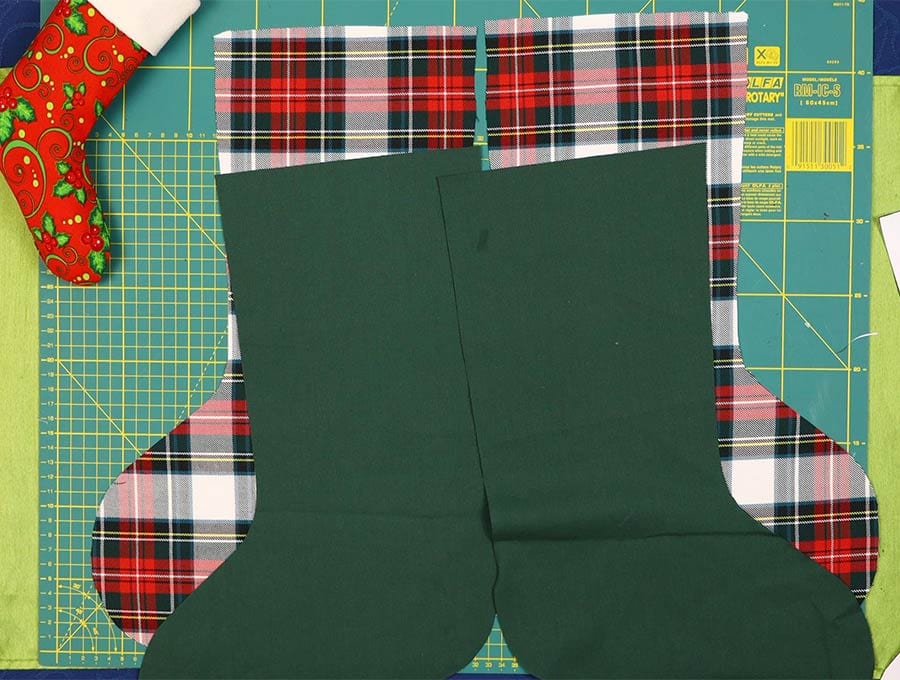
Cut out the cuff and the hanging loop piece.
STEP 3: Sew around
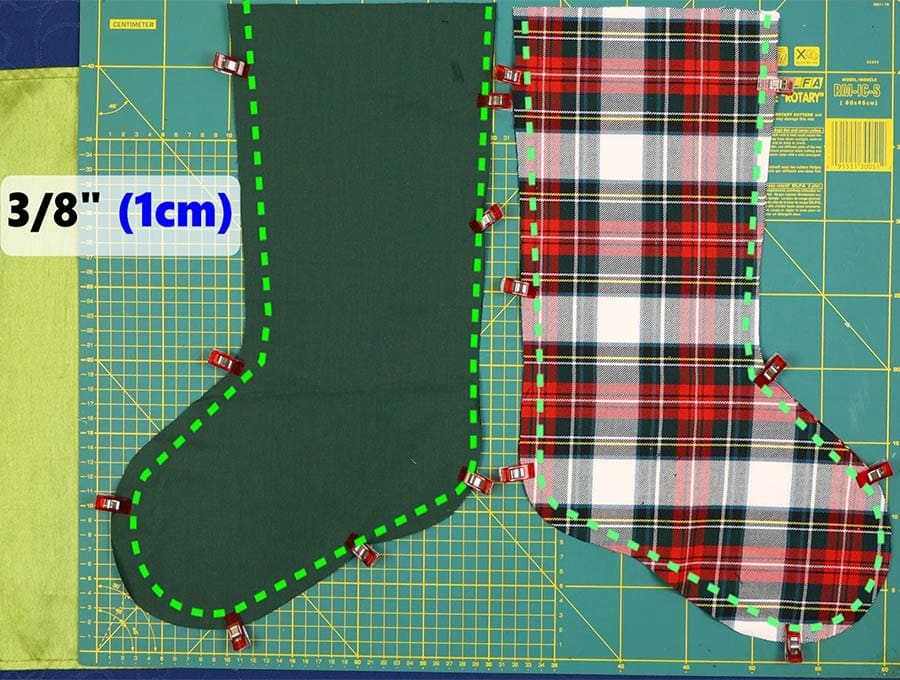
Pin the two pieces of the outer fabric together with the right sides facing inwards, then stitch around the edge of the stocking 3/8 inch (1 cm) from the edge, leaving the top open.
Repeat for the lining.
Step 4: Snip the curves
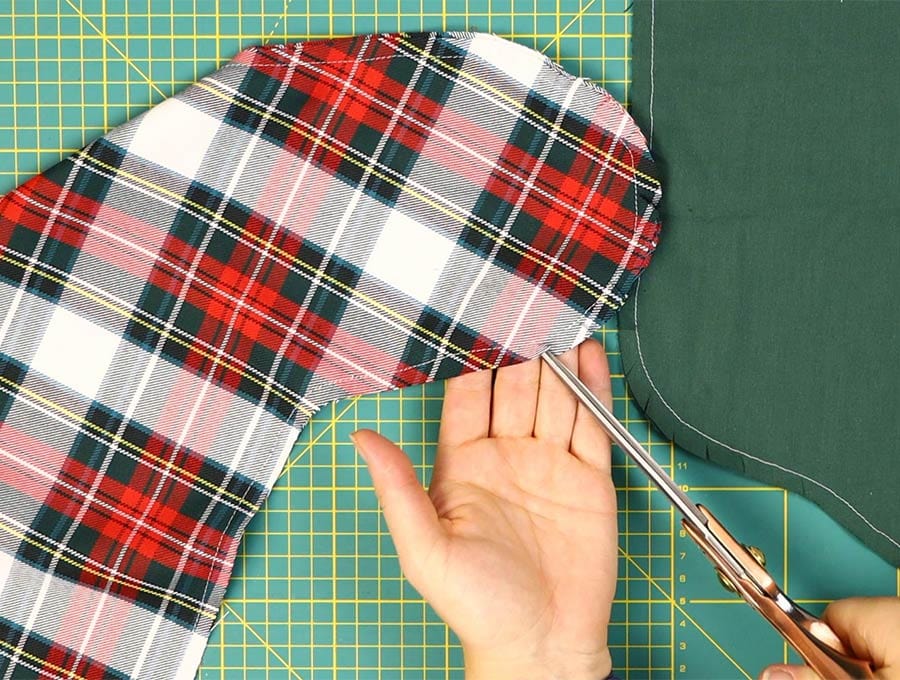
Make small snips around the curved edges of the stocking to enable it to lie flat when turned on both lining and outer sets. Take care not to cut too close to the stitching; otherwise, it will fray out.
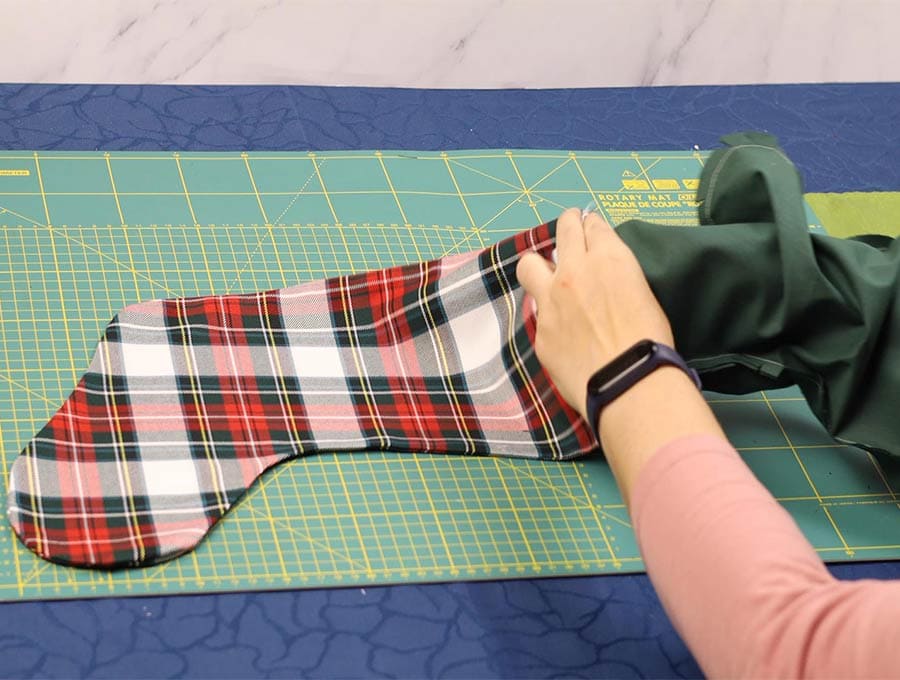
Step 5: Turn around
Turn the stocking the right way out, pressing out the corners, and if you like, you can press with an iron for a really neat finish. Do not turn the lining piece the right way out, as it will be slipped inside the outer cover.
Step 6: Insert lining
Place the lining inside the outer stocking, lining up the edges and pin around the top seam to keep the exterior and lining in place, then set aside.
Step 7: Prepare the cuff
To make the DIY Christmas stocking cuff, fold over the rectangular cuff piece from short side to short side with the right side inside. Pin in place.
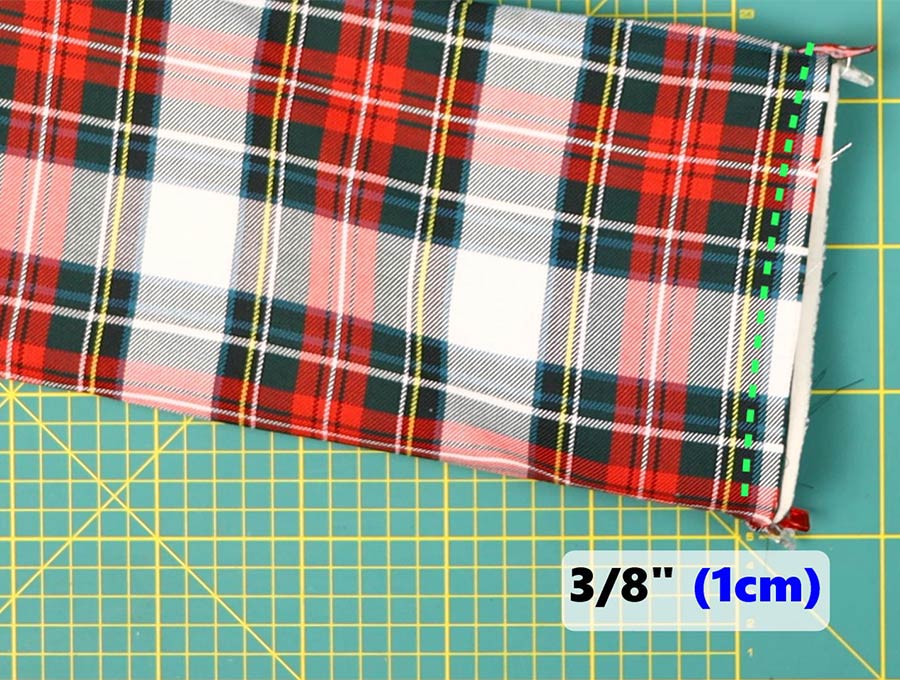
Step 8: Sew
Stitch down the two short sides of the rectangle from the fold downwards, backtacking at the start and finish.
Step 9: Turn around
Turn the stocking cuff the right way out so the seams are inside, then set it aside.
Step 10: Prepare the hanging loop
You can skip steps 10 and 11 if you are using a ribbon.
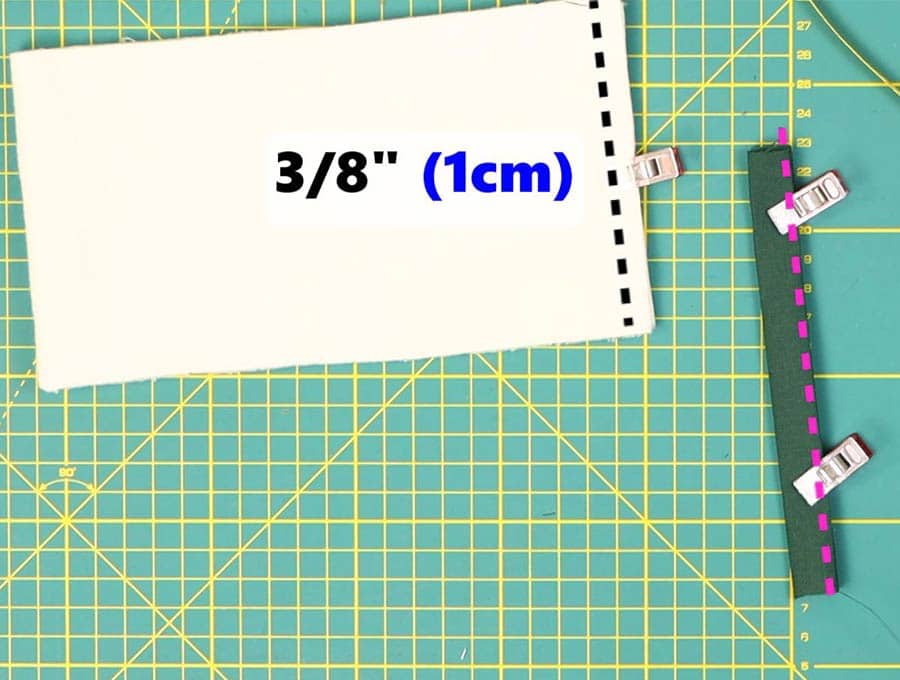
Take the small rectangle that will form the loop to hang up the stocking and fold the long sides to each other, right side outwards, so you have a skinny strip. Press in the center seam.
Unfold the strip and fold one of the long edges towards the center, press in place, then fold the other long edge in towards the center and press. Fold over the one pressed edge to meet the other, so you have 4 layers of fabric and clip or pin in place.
Step 11: Topstitch
Run a straight stitch 1/8 of an inch (3 mm) from the edge, back tacking at the start and finish.
Step 12: Attach the hanging loop to the stocking
Fold the strip over to form a loop and insert it at the top of the side seam on the side where the heel is, facing inwards to the fabric, raw edges to raw edges of the top of the stocking. Pin in place.
Step 13: Attach cuff
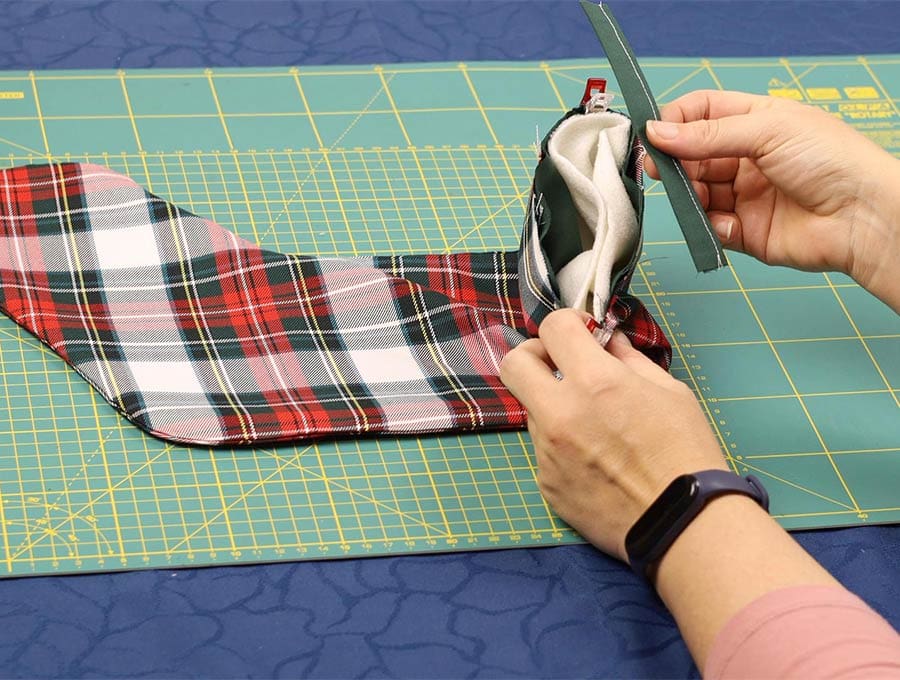
Now take the rectangular cuff you stitched and insert it neatly into the top of the stocking, raw edges to raw edges and with the cuff top inside the stocking and pin in place.
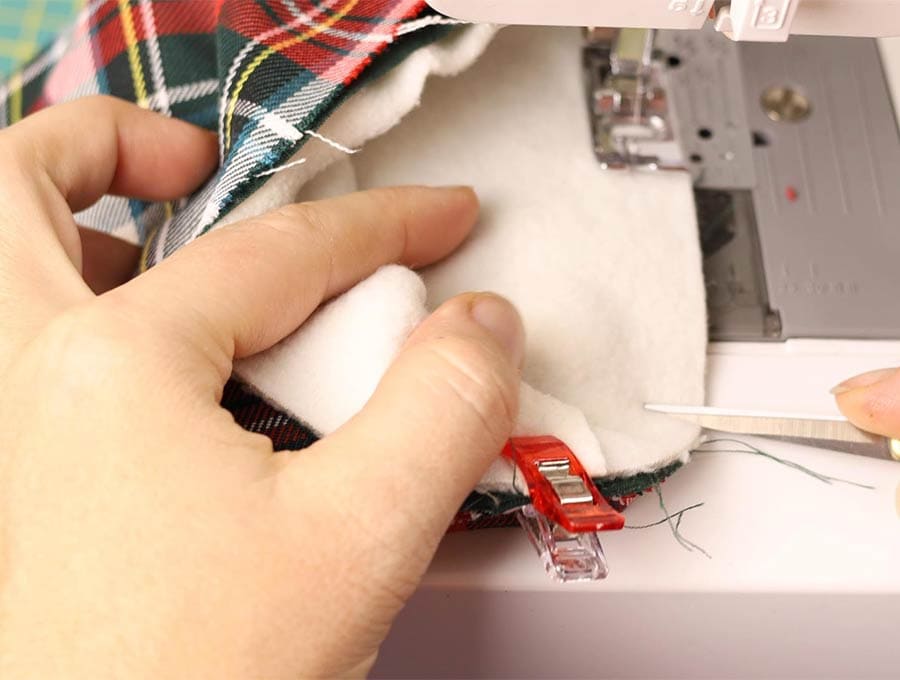
Step 14: Sew
Stitch carefully around the top edge of the stocking using a 3/8″ (1cm) seam allowance, being very careful where the needle passes over the loop, as you will have several layers to get through. It is wise to switch to a heavy-duty needle for this step.
Step 15 (optional): Finish the raw edges
If you have a serger (overlocker), you can use it to finish off the seam neatly or use pinking shears. It won’t really matter as the top will be turned down over the outside of the stocking, covering the stitching, the loop will be exposed, and the stocking will be ready to hang up.
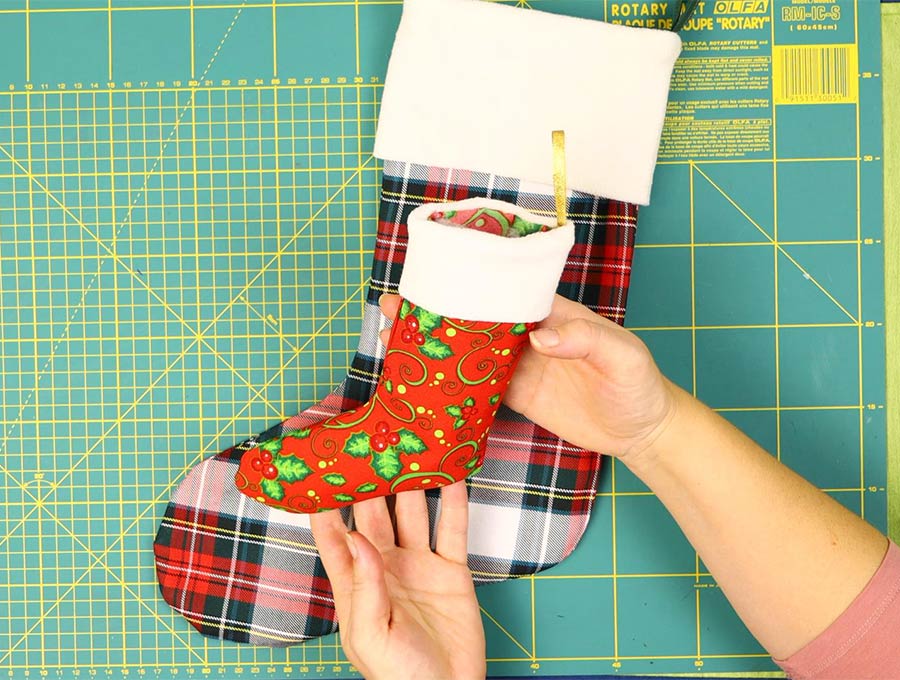
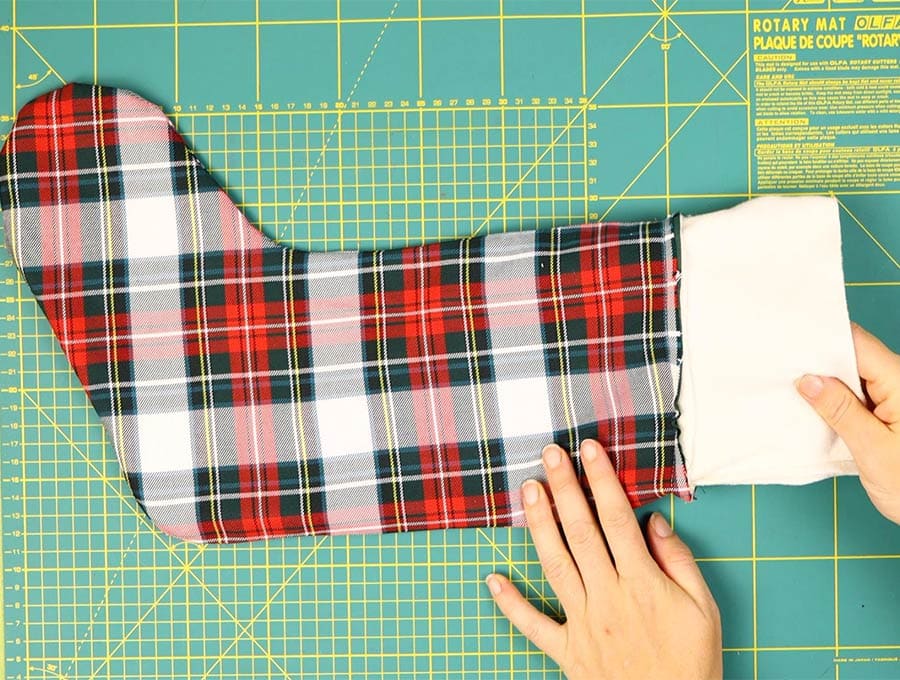
Step 16: Neaten the cuff
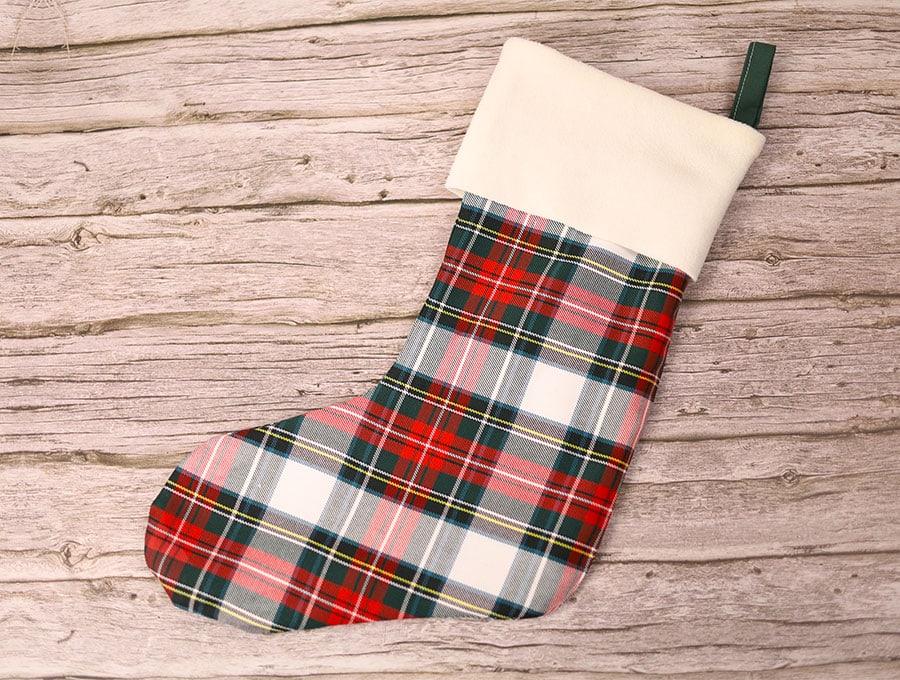
Pull out and turn down the cuff. Voila the first DIY Christmas stocking with lining and cuff is finished!
Now that you have finished the DIY Christmas stocking with a cuff and lining, you’ll probably want to make more. You can personalize them by writing the recipient’s name with a fabric glitter pen. If you enjoyed this festive tutorial for sewing a Christmas stocking, then please follow and share the tutorial with friends and family. Subscribe to have more tutorials delivered straight to your inbox.
DIY Christmas stocking FAQs and tips:
Q: What is the best material to make a Christmas stocking?
A: Choose a reasonably firm material, so it doesn’t fold in on itself – the stocking should hang flat before placing the gifts in it.
Q: Can I use interfacing instead of a lining for the Christmas stocking?
A: Using interfacing will keep a lighter fabric, like a quilting fabric, firm and is perfect for a Christmas stocking. Fuse the interlining to the fabric, cut out your pattern and proceed as from Step 2 in the instructions.
Q: How do you make a no-sew Christmas stocking?
A: Use felt or a non-fraying fabric and use fabric glue to stick the edges together.
Q: How big should a Christmas stocking be?
Christmas stockings range in size and are typically measured by their length.
Establish what size your family requires before committing to a size. Standard-size stockings range from 18 (45.7 cm) to 28 (71 cm) inches in length. Children’s gifts tend to be larger, while adult gifts are often smaller – like perfumes, watches and jewelry, so you could make 12-inch stockings too. You can even make a giant stocking as an outdoor decoration for your house if you have enough fabric!
Q: Can I add fringing or braid to the edge of the cuff?
A: It is easy to add fringing or braiding to the edge of the cuff. Do it before attaching it to the top of the stocking, folding over the final end to cover the raw edge where the braid starts. Ensure when you pin the cuff to the stocking that the braiding will be the right way out when the cuff is turned down over the stocking.
Q: What should I fill the Christmas stocking with?
A: The secret is to give something enjoyable and useful, not a novelty that will be discarded and added to landfill within a couple of days.
Handmade Christmas Stocking stuffer ideas:
Each one is a link to the tutorial and/or pattern, so click through to see it.
- Scrunchies
- Headbands
- Coin purse
- Sliding Pencil case
- Folding shopping bag
- Winter infinity scarf
- Fleece hat
- Warm fleece mittens in 3 sizes
- Cute felt animals – great for kids
- Decorated Christmas cookies, shortbread or tiny mini Christmas cakes.
- Handmade chocolates or sweets, like fudge or coconut ice
- Healthy snacks like protein balls with dates, nuts and cranberries
- Trail mix you personally combine using the person’s favorite ingredients
Here are some purchased ideas:
- Puzzle books
- Art materials – paintbrushes, metallic pens, graphic markers, watercolor sets.
- Rubik’s Cube
- Spice rubs
- Mini flashlight
- Headlamp
- Multi-tool
- Seed packets for avid gardeners
- Compact manicure kit
- Cocktail umbrellas and other drinks decorations or swizzle sticks for those who love cocktails
- Freeze-dried fruit
- Gold chocolate coins
- Essential oils
- Tealight holders
- Pretty cupcake holders for a baker
- Sprinkles or other cake-decorating items
- Set of Allen keys
- Set of mini screwdrivers
- Bath bombs
- Nail polish
- Chopstick
- Beautiful soap bar – we need to eliminate single-use plastic containers with liquid soap.
Do you like this? Pin for later:

Wanna be friends? Click HERE and follow me on Pinterest
RELATED:
Christmas tree napkins – make a set of these for a dear friend or level up your Christmas table with this cool idea
35+ Thoughtful but Easy Gifts to Sew for Just About Anyone on Your list